Whatever display device you use in your home theater, be it a plasma panel, an LCD panel or a projector, it is necessary to calibrate it to obtain the highest effect, only then will you get the maximum picture quality of the movie being played on the screen. To achieve this goal, there is a special calibration program Display Basic Adjustment Test, which can be downloaded from this link . The downloaded file is an image that must be burned to disk or mounted into a virtual drive, for example, using the free version of Daemon Tools . When playing it, five test images will be displayed sequentially on the screen, which will help calibrate the TV with an aspect ratio of 16:9 and a resolution of up to 1366x768 pixels inclusive. If you are going to calibrate a device that supports 1920x1080 pixel resolution, use the AVEC.iso . It must be recorded on a Blu-ray disk and then played back using a Blu-ray player, or on a PC, mounting it into a virtual BD drive using Daemon Tools. For subsequent playback, you can use the Cyberlink PowerDVD 11 software player.
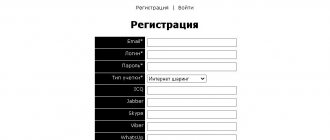
How to adjust TV pictures
The image quality on the TV depends on the set basic parameters of the following indicators:
- format;
- brightness;
- contrast;
- color/saturation;
- sharpness.
The primary parameters of the TV are established using test pictures, on which all indicators are checked and control is carried out. At the end of the work, the quality of the image on the screen is compared with the real photograph.
The next step is to check the pixels and color. Pixels are checked using solid colors and grids. The latter looks for combinations in which the performance of pixels depends on the position of neighboring pixels.
Color quality is controlled by color bars.
Changes made are not always saved. There are several reasons for this.
- Settings are saved in HOME or Home View mode. If your TV is in DEMO or SHOP mode, you need to make changes.
- The operating rules of the receiver have been violated or the software has been installed incorrectly. Use the instructions and set the initial (factory settings).
- Incorrect operation of the TV memory. In this case, the device does not remember not only the picture settings, but also the channels.
Important! In the first two cases, the instructions will help, in the third - a professional technician who will replace the necessary parts.
Setting depending on TV model
The settings in different TV models do not differ from each other. The menu consists of the five above indicators with the same way of setting the desired parameters. The user needs to enter the menu and set their preferred values. Devices from different manufacturers will have different interfaces. Regardless of the manufacturer, black and white stripes are responsible for brightness, gray and white for contrast.
The situation is different with test pictures. They differ in appearance, but are the same in type: plain ones check the pixels on the screen, colored ones check the operation of the color bars.
Attention! The TV's picture format depends on the model. The two most common types are Full HD and Ultra HD 4K.
Calibration of TV, projector
Play the test DVD in your player. You will see a specific sequence of five different images. If you skip any of the setup steps, you will not be able to obtain optimal picture quality. When adjusting brightness and contrast, first reduce their value to a minimum and gradually increase it until the test conditions are met. When adjusting color, set the parameters to the middle position. Factory settings typically have a very high color temperature, resulting in predominantly blue tones in the image. allows you to adjust the color temperature, set its value to <6500K> , <Warm> or <Neutral> . On the contrary, the image sharpness of most TVs is initially adjusted quite well. The final image check is performed in the fifth step. You need to make sure once again that all previously selected settings are correct. This step also allows you to check the operation of the sound system.
For those who want to take TV calibration seriously, the best option would be a special calibrator - Datacolor Spyder 4 TV HD 2 costing ≈4000 rubles. Thanks to it, you can significantly improve the quality of the TV image by making the necessary adjustments.
Instructions for calibrating the monitor and a review of calibrators with calibration programs are located in the following articles:
- Monitor calibration | Step-by-step instruction
- Monitor calibrators | Calibration programs
What parameters to set when setting up
Correctly set TV settings will help avoid mistakes when setting up the picture. A high-quality picture is obtained subject to the following conditions:
- The format (size) of the image is adjusted by two triangles. Cut off triangle vertices indicate an error. Before carrying out work, you should disable the scaling function.
- Brightness. Adjustable by dark colored cells. If configured correctly, the tone of each subsequent cell will be different from the previous one. If this is not the case, work on setting the brightness should continue.
- Contrast. Adjustable with gray scale. Clear boundaries between cells of different shades of gray indicate proper operation.
- Color or saturation. For installation there is a picture depicting women with different skin colors. After working with regulators, women's skin should look natural. Red skin color indicates incorrect color and color temperature settings.
- Sharpness. The parameter is set after working out the first point. Looking at the screen, we should see all the lines exactly.
Recommended picture parameters on modern TVs
TV manufacturers often calibrate their products poorly in the factory. Even the venerable trio - Samsung, LG and Sony - have been caught in this more than once, judging by numerous customer complaints. Store salespeople turn up all the parameters to the maximum in order to attract customers with bright and oversaturated images.
Experts in this field have outlined certain recommendations for TV settings that allow you to get an optimal output image that will allow you to fully enjoy video content.
Common parameters:
- brightness around 120 cd/m2;
- linear gamma for a light room – 2.22, for a dark one – 2.4;
- color temperature D65/6500K;
- sRGB/REC709 coverage.
Setting up the TV picture: step-by-step instructions
The image adjustment must be done at home, in the place where the TV will be located. There are two ways to carry out the procedure.
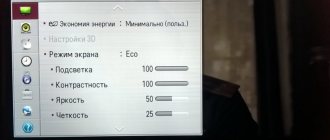
Using standard features
To do this, find the desired button on the remote control. It can be called differently - Settings, Options, Menu. A menu with a list of settings will appear on the TV. Next, moving the sliders, we achieve a high-quality image.
Optimal preset mode
The above parameters can significantly improve image quality, but if you don’t want to tinker with the settings, you can select a ready-made script from the local firmware. Afterwards, you can adjust the preset mode manually, simply taking it as a base.
There are only three main presets - “Standard”, “Dynamic” and “Cinema”. There are several more variations, but only these three modes radically change the image. As mentioned above, the standard settings of all manufacturers are far from the most adequate, so we will not touch them.
Important! It is better not to use dynamic mode to watch video content. The picture here is far from the original due to the non-linear gamma.
In addition, the brightness and contrast at these settings are clearly too high, and after an hour or two your eyes may begin to hurt. This effect is especially noticeable when watching TV in a dark room. Dynamic mode is good for game consoles and connecting to a PC, but not for watching videos.
Almost perfect color adjustment on the TV in “Cinema” (sometimes “Cinema”) mode. There is absolutely no need for any additional adjustment here. The only exception is for those who are used to watching TV in intense lighting: in this case, you can turn up the brightness a little.
Myth 2. After calibration, colors will become bright and saturated
No. They should be like this only in one case: when the TV is displayed on the supermarket counter in order to attract the buyer with the picture. In other cases, the truth should be on the screen. Oversaturated colors are the same evil as faded colors. To admire in publications “how this projector shows the deep green color” is to emphasize that the device is unable to display it accurately without special actions.
Watching an embellished film or an original one is a matter of taste. At vernissages, amateur artists often sell reproductions of famous paintings - colorful, so to speak, “to enhance the sensations.” Such “paintings” are in some sense attractive: if you look at the Tretyakov Gallery, the original will seem more modest. Then why do collectors at Sotheby's pay crazy amounts of money for real paintings? These are the weirdos...
Image Processing Capabilities
TV features such as frame rate interpolation (soap opera effect) and black frame insertion implement additional frames generated by the TV's processor to improve motion clarity.
However, unless you watch sports or play fast-paced games, these features will have a negative impact on picture quality. Some people prefer to turn it off even while gaming/watching sports, while others like to use this feature to watch almost anything.
Different TV brands will call these features differently, for example, LG TruMotion, Sony MotionFlow, etc.
Other features that affect image quality are Dynamic Contrast Ratio, Color Temperature, and Local Dimming, which you should also turn off. Then, when you're done calibrating, you can enable these features and see how they affect image quality.
Naturally, if you're using your TV as a monitor or for console gaming, you should leave "Game Mode"/"PC Mode" enabled. Additionally, the Noise Removal/Reduction feature should only be used with low quality content and disabled otherwise.
Myth 1. After calibration, the picture looks like the view from an open window
Unfortunately no. If only because the projector or panel does not have enough colors to display all the shades that the eye sees. Even devices with a huge color gamut of the new ITU-R BT.2020 standard. If we look at the CIE 1931 chromaticity plot, we see that the colors available to a three-component RGB device are located within a triangle inscribed within the curvilinear region of all visible colors—there is a vast area beyond it.
Theoretically, a “multidimensional” device with an infinite number of emitters of pure spectral colors (lasers) can give us pleasure of full color. But this is not three RGB subpixels per full pixel, but at least tens. Or dozens of matrices in a projector - this is already a topic for engineering fiction.
The view from the window is the entire spectrum received by the eyes at the color locus. As you can see, even the most advanced Rec.2020 does not fill it completely
In addition, a projector or panel (even HDR) is not yet capable of realizing the dynamic range of our vision. For example, reproduce the following scene: a moonless night, a fire on the river bank, a forest nearby and complete darkness, a car appears in the frame and blinds us with its headlights.
What should the calibrated picture look like on your screen? The way the director saw it on the display of the reference studio monitor before “signing” the film for distribution.