Store blog
If you have lost the instructions for your Sega console, this is not a problem. We are publishing for you a printout of the user manual that comes with each Sega console. The instructions describe in detail how to connect the set-top box to the TV, how to turn it on and play it, as well as solving possible problems.
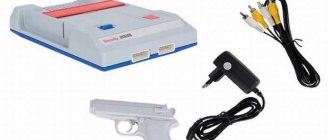
Components of the Sega console design
Installation and connection
The power supply comes from an alternating current network 220V 50Hz with the connection of a standard network adapter. The adapter is connected to the power input located on the rear panel of the set-top box. The power switch (“POWER” button) is located on the top panel of the set-top box.
Connecting Sega to the power supply
Connecting to a TV via AV input (in this case, color rendition and graphic image will be the best)
- Insert the AV cable's combi-plug into the AV output of the set-top box located on the rear panel.
- Insert the yellow plug of the AV cable into the video input, and the white plug into the audio input of the TV.
- Switch your TV to AV mode.
Connecting Sega to TV via AV cable
Connecting to a TV via antenna input
- Insert the combi plug of the modulator into the AV output of the set-top box.
- Connect the modulator and the antenna input of the TV with an antenna cable.
- Set up your TV.
Connecting Sega to a TV via an antenna cable
* Store note: it is possible to connect to a TV via a SCART connector using a special adapter.
Operating procedure
- Make sure the set-top box is turned off.
- Make sure all connections to the TV are correct.
- Connect the joystick to the left (main) connector on the front panel, for two-player play, the second joystick is connected to the right (additional) connector.
- Insert the cartridge with the picture facing you into the connector on the top panel to ensure complete mating of the docking contacts; the cartridge is inserted with slight pressure.
- Turn on the power of the set-top box. When connected correctly, the “SEGA” logo will appear on the screen, followed by the game name and game clip.
- Press the “START” button on the joystick. The game has begun. To start the game again or move on to the next game, press the “RESET” button on the top panel of the console.
How to connect via antenna cable?
If for some reason there is no AV wire, then you can go the other way and synchronize via the antenna cable. This is the simplest connection method. It is very similar to the one used in kinescope-type devices.
Follow a few simple steps:
- Find the AV output on the game console case.
- Insert into it the combined modulator plug (a device that changes signal parameters), from which the coaxial cable comes. The latter is necessary for the transmission of radio frequency electrical signals.
- Extend the antenna wire to the device. Mount into the desired hole.
- Activate the set-top box, that is, simply turn it on and insert the cartridge into it.
- On TV, start auto-search for TV programs.
The method of connecting the set-top box via an antenna cable can be seen in the video:
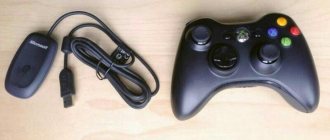
Joystick functions
- START button starts the game and also turns on/off pause during the game.
- arrow buttons on the left control movement in the game
- Buttons A, B, C control the main actions of the game: shooting, jumping, etc.
- Buttons X, Y, Z serve, as a rule, for additional actions of the hero in complex games.
The specific purpose of the A, B, C, X, Y, Z buttons depends on the game.
- Sega emulator + games
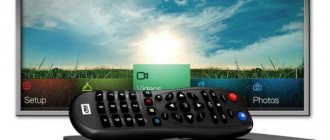
Watching digital channels without a set-top box
It is possible to do without a prefix:
- if the TV has a built-in DVB-T2 digital tuner, then the channels are located through the TV menu;
- when the TV is Smart TV. You can connect your TV to the Internet via a LAN cable or wirelessly. There are paid and free options. Paid ones may include online television services with a monthly subscription fee. You can access a large number of channels in the highest quality. You can set up IPTV Internet television for free. A special application is installed and a playlist with channels is loaded. To watch IPTV you need fast internet. The required speed for display without freezing is from 50 Mbit/s.
Precautionary measures
To power the set-top box, use the installed network adapter. Do not use homemade or uninstalled adapters. When making connections to the processor unit, carefully check all connections to avoid breaks or internal damage.
There are openings on the unit body that provide cooling of system components during operation; factors that interfere with ventilation and the entry of dust and foreign objects into the system should be avoided. The normal operating temperature for the set-top box is room temperature, so it should not be located near heat sources or in direct sunlight.
When changing the game cartridge or switching cords, be sure to turn off the console. You should take a certain break between turning it on and off, and at the end of the work, the set-top box must be disconnected from the network.
When installing a cartridge, switching cords or connecting additional accessories, in order to avoid damage to the docking contacts, do not use excessive force. During operation and storage, avoid getting moisture and dust into the system.
You should not place foreign objects on the console, and it is recommended to pack it again after finishing work.
During the game you should be at least one meter away from the TV screen. The room must be sufficiently lit. After every hour of play, you should take breaks of 10-15 minutes to protect your eyes from fatigue. Persons predisposed to epilepsy are not recommended to use the game console without consulting a doctor.
Necessary equipment
If theater begins with a hanger, then digital broadcasting begins with the purchase of equipment. What will the user need?
What is already there: standard set-top box equipment
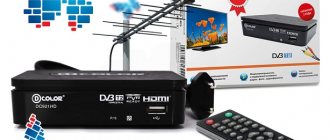
The set-top box for DVB-T2 (the broadcasting standard used in European countries and Russia) usually includes the following:
- The console itself. A digital tuner (receiver) that receives and converts a signal to transmit it to the ports of a TV receiver. Modern set-top boxes often have additional functions (recording to a flash card, delayed viewing, Wi-Fi support, etc.).
- Remote control. Almost all modern set-top boxes, starting from the middle price class, are equipped with IR remote controls.
- Power unit. It can be either internal, built into its body, or external. In the latter case, the kit includes an adapter that connects to an outlet and a connecting cable, from which power is supplied to the receiver.
What else is needed: additional equipment
In addition to the set-top box itself, to connect you will need:
Possible malfunctions and methods for correcting them
If a malfunction occurs in the operation of the set-top box, it is usually caused by a minor reason. Before claiming under warranty, perform the following checks:
| Problem | Check |
| No image on screen |
|
| The image is flickering or not in color |
|
| No sound |
|
| Streaks appear on the screen while playing | Fine-tune your TV |
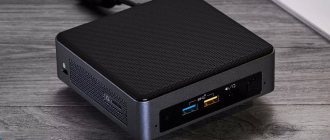
Connecting Sega to a computer monitor
If for some reason it was not possible to synchronize the console with the plasma panel, then you can connect the Sega to a computer monitor. Additionally, you will need to purchase a video adapter or TV tuner. A device integrated into a PC is suitable for the process.
It is better to use a portable device that transmits the signal through the HDMI port.
The algorithm of actions is as follows:
- Install the driver program on your computer and configure your PC. To make it more convenient to use the set-top box, it is recommended to install a specialized program. It's called AverTV.
- Configure the project.
- Connect the console to the tuner or adapter using the same system as when synchronizing using an AV cable.
- Start playing.
Precautionary measures
When using a SEGA console to play games that broadcast images to a modern digital TV, you should take certain precautions:
- Avoid switching cords or replacing cartridges without disconnecting the power supply. Before any manipulations with it, the game console must be de-energized.
- After finishing the game, do not leave the cartridge in the slot. Carelessness in this matter can lead to failure of structural elements of the equipment.
- Handle cables and wires with care. This is the weakest point of Sega game consoles. Finding an authentic joystick or power supply, especially for old consoles from 30 years ago, can be very difficult.
- Eliminate negative thermal and mechanical effects. The attachment should be installed so that it is not located next to a heating radiator or in direct sunlight, and should be protected from water.
If a 16-bit game console has not been used for a long time, gathering dust on a shelf, in order to avoid a short circuit, it is recommended to thoroughly clean it from dust inside the case. If the wires and cables of the accessories are damaged, they must be replaced. It is optimal if, to run games, not rare equipment from the early 90s of the 20th century is used, but its more modern versions.
One of the above methods of connecting Sega to a modern TV is discussed in more detail in the following video.
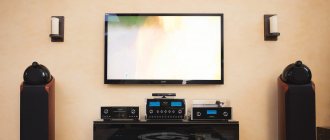
Smart TV and Android TV Box are amazing devices that provide almost unlimited possibilities. This time, I will show you how to make a game console (Sega, Sega Dreamcast, Dandy, NES, Sony PlayStation, etc.) from any Smart TV/TV Box without additional equipment.
In order to get a game console on regular hardware from a TV, we don’t need to change the firmware, dance with a tambourine... In fact, everything is much simpler! These instructions are suitable for all devices and no matter what model of TV or set-top box you have.
Features of synchronizing the Sega console with modern TVs
Connecting a Sega game console to a modern TV with a built-in Smart TV function or even to a cheap device model will not be possible without a trick. Support for such a console is simply not provided.
TV uses a digital signal, while Sega requires an analog signal.
Among the key points of synchronizing a plasma panel with Sega, the following can be noted:
- Minimum illustration resolution.
A picture with a resolution of 320 × 224, provided by Sega, will be transmitted in the same quality. Very noticeable on TV with UHD, Full HD. The only way to make the situation a little easier is to determine the lowest screen resolution on the device. - Connection via component input.
The illustration will be in black and white format. It is possible to solve the problem. It is worth reconnecting the device to an analog signal. - Samsung did not provide AV connectivity through the usual color ports.
The catch is that you will need an adapter to SCART, and the synchronization itself is done through the yellow-green connectors. - LG TV also has difficulties with AV synchronization.
You can use the video enhancement function. To do this, you will need to install it via the HDMI port. - The light gun will not function.
The LCD screen cannot provide sharp changes between dark and light spots. The sensitivity of the photocell in the pistol becomes low. In addition, modern TV models have signal delay.
Installing emulators
I hasten to please you, installing the emulator is as easy and quick as installing Kodi itself, in addition, you don’t even need to download anything, everything is already built-in. Let's move on:
- Open settings.
- Click Add-ons and go to Install from Repository.
- Select "Game Addons"
then the “Emulators” section:
- Select the emulator you need and install it. Let's look at Sega as an example. You can install any other one.
.
.
By and large, we have everything ready. All that remains is to download games for the emulator, of which there are plenty on the Internet. To simplify everything as much as possible, I have collected an archive containing 100,500 games for Sega and Dandy. You can download it from this link from Google:
https://drive.google.com/file/d/1G0KCBwqHqjs1v_J3AcJrGWk5M6koaTNr/view
Setting up channels
Setting up channels through the set-top box is done according to the step-by-step instructions for this device.
Its order is as follows:
- The set-top box and TV turn on.
- In the receiver menu, select the “Settings” item.
- Select the country and signal type. For Russia it will be DVB-T2.
- The item “Automatic signal search” or similar is turned on.
- The receiver goes through the frequencies available to it and detects the channels available on them.
- If programs are detected, you need to select “Save” from the menu. After this, the found channels can be viewed.
- If channels are not found, you can try to find them using manual tuning. To do this, you need to enter the frequency on which broadcasting occurs in this area. After channels are detected, they are also stored in the set-top box’s memory.
Checking the signal quality
Sometimes it happens that some channels are not received. A common reason for this is low signal strength.
To find out, you need to use the check function. Usually it is launched by pressing the “INFO” key on the remote control of the set-top box. After this, the receiver will display a quality rating on the screen:
- 50% and above is a normal indicator, you can use it.
- Below is unstable reception. You may have to move the antenna, aim it more accurately, or get a signal amplifier.
Installing games
After we have configured and prepared everything, unpack the archive with games and upload it to your Smart TV or TV Box using a flash drive. Now open the main Kodi screen and select the “Games” section by clicking on it:
We need to select our games folder, so click “Add a game...”. In the window that opens, click browse, then find your games folder. When you open the folder, it will be empty, and that's okay. Click “OK”, then “OK” again. Done, upon completion you will be transferred back to the menu, which will contain your games folder.
Purpose of connectors: what is needed for what
To connect the set-top box to the TV, you need to connect the antenna, receiver and TV itself with cables. To connect cables, you need appropriate connectors, and now more than one standard is used. Where and what plugs should I plug in?
Standard connectors
Each set-top box, regardless of its type, must have two connectors:
In addition to the mandatory ones, there are a number of connectors that you will almost always encounter:
- Antenna output. May be called "RF-OUT", "RF-LOOP", LOOP-OUT". Designed for serial connection of another set-top box. On models that have a built-in RF modulator, the signal from this port can be sent to the antenna input of the TV and catch local analog TV.
- RCA output. From it, video and audio signals enter through the corresponding plugs (marked red, white and yellow) on the TV. Used for most older television receivers, but no longer provides high image quality.
- HDMI. High definition digital output. If the TV has a corresponding input, then we recommend using this particular connector, and leaving RCA only for outputting sound to external speakers.
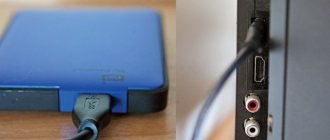
- USB. A connector familiar from computers. Used to connect external storage devices (from flash drive to HDD). As a result, it becomes possible to record programs or view video and audio files of a supported format. In addition, if the set-top box has such a function, you can connect a Wi-Fi module through this connector.
Rare connectors
In addition to the common ones, digital set-top boxes may also have rare types of connectors. These include:
- VGA. This is an old connector, developed back in 1987 to connect computer monitors to a video card. Later it was sometimes used to connect DVD players. It is commonly used for plasma and LCD TVs. HDMI is now outdated and is being actively replaced. Additionally requires audio connection via a separate cable.
- SCART. This is a standard connector for equipment used in Europe. Therefore, it is often found not only in televisions, but also in set-top boxes aimed at the European market.
- S-Video. An old connector, actively used for video players and game consoles. Now it usually requires purchasing an adapter. Provides high quality TV signal, but only for standard definition: it does not transmit HD images.
Let's start the game
To launch the installed game, you just need to click on it, after which the application will ask you which emulator to open it with. Select the one you installed:
Also, Kodi will offer you another emulator that can also open this file. If your file does not open correctly, install another one that the system offers.
Done, let's play and enjoy!
Everything has its time
Remember that Dandy is over 20 years old, so your favorite game may look very unattractive on a high-resolution screen. Therefore, it is better to buy and connect a PS3 to your TV, and run Dendy games on your computer by downloading an emulator.
Connecting a game console to a TV can be done in several ways. The ease of use of the device, as well as the image quality, depend on which one is chosen.
Instructions
If your TV is equipped only with a high-frequency input, then choose a set-top box that has a corresponding output. Unlike VCRs, which are most often equipped with UHF modulators, set-top boxes are usually equipped with VHF modulators. Therefore, it is necessary to connect a set-top box to a TV that has separate inputs for these ranges instead of an MV antenna. Remember that you must connect and disconnect a collective or other grounded antenna when the device is turned off. The same applies to the set-top box if its power supply is switching. After connecting the set-top box, turn on its power, and then tune the TV to the channel on which its modulator operates. The method for performing this operation varies depending on the TV. The criterion for fine tuning is a compromise between image clarity and the invisibility of crackling from frame sync pulses. Frequent switching of cables from the antenna and set-top box leads to rapid wear of the TV socket. Some set-top boxes include special antenna switches. In this case, with the equipment de-energized (the switch body is metal!), connect an antenna and a set-top box to the switch inputs, and connect the switch output to the TV. A number of set-top boxes do not contain a built-in modulator, but have a special socket for connecting it. In addition to image and sound signals, the supply voltage is output to this socket. Connect the modulator to the socket, and connect its output to the TV using one of the methods indicated above. The best image quality and date are achieved when connecting the set-top box via a low-frequency channel. To do this, first make sure that your TV is equipped with the appropriate inputs. Then purchase or assemble a cable to connect the set-top box to the DIN-6, RCA or SCART connectors available on the TV, depending on the type of device. Once connected, select the AV input on your TV. If your TV has several such inputs, try them all until an image appears. There is no need to configure the device. If the set-top box does not have a modulator, and the TV does not have a low-frequency input, use a VCR as a modulator. But remember that you will have to look for the output signal in the UHF range. Almost all VCRs contain switching power supplies and require de-energization when connected.
No problem. We are publishing for you a printout of the Dendy console user manual, which comes with each console. The instructions describe in detail how to connect the set-top box to the TV, how to turn it on and play it, as well as solving possible problems.
* Store note: for the last few years, instead of an antenna switch, the set-top box has been supplied with a “tulip” cable. The manufacturer did not have time to change the instructions.
Attention
Products that have mechanical damage (breaks, cracks), that have lost their presentation (stickers, heavy soiling, scratches), or that show signs of self-repair or servicing by third-party repair organizations (with a broken case seal) are not subject to warranty service. Free warranty repairs do not apply to joysticks and network adapters.
The development of computer technology has affected not only the technical parameters of the hardware; the software has undergone significant changes. If we compare it with what was on the SEGA and Dandy game consoles at the end of the last and beginning of this century, now completely different pictures have appeared on the screens. The evolution of software has radically changed the external and internal world of computer games - graphics have improved, functionality has increased, and productivity has increased. But real gamers know where it all began, and those clumsy toys that, at first glance, at first glance for a modern user, evoke more emotions than the most advanced gaming software.
Basic Operations
The main operations in the system represent many categories. So, the user will be able to configure the following items:
- Program Manager.
- A picture.
- Search for broadcasts.
- Set the current time.
- Configure system parameters.
- Update the list of TV channels.
Program Manager
The program manager, in turn, is divided into several categories. Let's consider each point separately.
The channel editor includes a set of parameters that allow you to:
- Add a specific broadcast to your favorites list. To do this, mark the channel with a red mark by selecting the channel and clicking “OK”.
- To remove from this category, click “FAV”.
- If you want to remove a channel from the list so that it is not broadcast at all, select it and press the blue button on the remote control.
- To skip the broadcast, use the green key.
- If you want to move the channel to another position, then click on the red key, and when you select a place, click “OK”.
- You can block a channel by pressing the yellow button.
Please note that this section may require you to enter a password when editing the list of broadcasts. Usually a standard simple code is set - 0000. This way you can assign a specific number to the broadcast, delete a specific channel, add it to your favorites or remove it from there.
The next function in the program manager is TV Guide. This option allows you to view upcoming TV broadcast schedules. You should also read the description of a specific channel. In other words, this is the TV program guide.
The third category is sorting. Allows you to sort broadcasts by name or identification number. This way you can arrange them alphabetically, use your own numbering, or set them to automatic.
How to connect an iPhone to a Samsung Smart TV: via Wi-Fi, USB, HDMI, programs
Image Settings
When considering how to set up the Selenga set-top box, it is worth noting one of the important parameters - the image. Open the menu and go to the second section. The user will then be able to:
- Change image format. Set the ratio to 4:3, full screen, 16:9, wide or panoramic. It is advisable to leave the choice to the system and set it to “Auto”.
- Adjust the volume level for a specific broadcast or for all at once.
- Set the required resolution. For example, for NTSC you should set 480i/480p, for PAL - 576i/576p. The maximum resolution is also available – 720p/1080i/1080p.
- Set menu transparency.
- Change the brightness, activate the visible broadcast number, set the time on the screen.
Search channels
The next item is searching for channels. This option is carried out at the very beginning after connecting the tuner. But, the user can also perform a repeated search. Available on the menu:
- Automatic search.
- Manual search. Used when the auto search did not give the desired results (usually due to a bad signal or error).
- Change country.
- Activate antenna power. Enable this option when using an antenna with an amplifier.
Setting the time
It makes no sense to explain what setting the time is. This paragraph contains standard parameters, including:
- Setting the time.
- Change region.
- Setting the time zone.
- Turn on the timer to turn off the TV.
Setting options
The parameters do not require additional manipulations. The only thing available to the user is to change the menu language.
System Settings
In the system parameters section, the following options are available to the user:
- Parental control function. Allows you to restrict access to viewing certain TV channels. When using this option, the system will prompt you to enter a password. Enter 000000. You can also set a code to use specific applications on the TV, for example, YouTube.
- Reset settings. This function is used only in extreme cases. Let's say a system failure occurs and many options on the TV no longer work, and steps to solve the problem did not bring results, then reset the settings to factory settings.
- Software update. Remember that every software needs regular updates. If you do not do this, various errors may appear over time. Usually, the update occurs automatically by the system itself, but sometimes an unexpected failure occurs, which is why you have to install the update manually.
Problem with the network “Error code 400” on Youtube: reasons, what to do?
Internet package “Gaming”
“Game” is one of two Rostelecom Internet tariff plans with a speed that is twice the standard maximum for connecting a home Internet.
When connecting in regions, the bandwidth with the “Game” package is 200 Mbit/s. For users from Moscow and some other cities, the speed can reach 500 Mbit/sec (the service is provided by the subsidiary provider OnLime). This makes Rostelecom one of the most attractive companies for connecting home Internet if you are a gamer and plan to play a lot and stream playthroughs.
The "Game" includes:
- One of three game options - bonuses for Wargaming, 4Game or Warface games to choose from.
- Router (10 rubles/month) – with special technology that supports speeds of 200 Mbit/sec and higher.
- Kaspersky Anti-Virus – free for the first month.
- 101 TV channel from Wink.
- The Internet connection itself is from 200 Mbit/sec.
Additionally, you can enable “Parental Control” - free for the first month, and then for a subscription fee of 99 rubles. 1 TB of Yandex.Disk+ space is also available for a monthly subscription fee of 200 rubles.
All additional options can be disabled and enabled in your personal account.