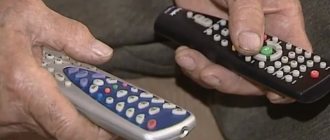
When the TV remote control buttons do not work or are difficult to press, at the very least, it is annoying. At most, it makes it impossible to switch channels or adjust the volume. Modern TVs, LG or Sony, may not have control buttons on the body at all. If the remote control is not working properly, you can fix it at home. It only requires precision and some simple supplies.
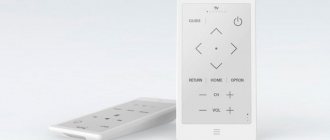
Remote control device
All remote controls have a similar design. Main components:
- Frame. Consists of two halves, glued or twisted.
- Printed circuit board. The board contains a small microcircuit, a few more radio elements, an infrared LED, battery compartment contacts and a contact pad in the form of conductive tracks.
— Rubberized pad with buttons.
- Batteries.
This is interesting: Why the dishwasher does not wash dishes well: causes and repair of the malfunction
Obvious problems
The vast majority of complaints about the remote not working well are due to its power supply being drained . Most often these are ordinary salt batteries. They need to be replaced before looking for more serious problems. This is done as follows:
- The remote control is turned over for inspection;
- in its lower part or in the center there is a battery compartment cover (it can be attached with a latch or fixed with a screw);
- The cover is removed by unscrewing the screw or pressing the latch area and moving the part in the direction indicated by the arrow.
After the batteries are removed, the contact pads should be inspected. On one side of the compartment there is a plate with protrusions, on the other there are two springs. There should be no oxides on these parts; if any are detected, cleaning is carried out. It is convenient to use a thin metal screwdriver and alcohol.
Important! If the contact pads are excessively worn or oxidized, the remote control can only be revived by replacing them. Service workshops will definitely have the necessary spare parts.
If everything is in order with the metal parts, you need to insert the batteries into the compartment and check the operation of the remote control. The TV may not respond. In this case, continue to press the buttons. If the batteries heat up during the test, it means that there are short circuits or other malfunctions in the TV remote control in the electronic circuit of the remote control. The easiest way out is to take the device to a service center. You can try to restore its operation yourself using one of the methods described below.
The second common cause of breakdowns is falls and impacts. If the remote control stops working after this, there may be serious damage to the electronics. It is better to replace a device with a split casing, since repairs at the service center will cost more than a new remote control. As well as efforts to resuscitate the remote control unit on our own.
What you need to do
During the analysis process, you need to have a few simple tools on hand:
- Small diameter Phillips screwdriver;
- Flat blade screwdriver;
- Knife;
- Plastic card or mediator.
The device body can be secured with glue. Subsequently, glue will be needed again to carry out assembly after successfully completing cleaning or repairing the remote control.
IMPORTANT! Do not use a bank card for this operation. Take, for example, a discount card for a store.
Leave a request and receive a 15% discount on your first repair!
Submit your application
Disassembling the remote control
At the very beginning, we take out the batteries, then look in the battery recess for the presence of mounting screws. They may be under stickers. Run a screwdriver over the sticker; if it presses through somewhere, it means there is a screw underneath it. Inspect the entire case for screws. If there is, unscrew everything and divide the body into two halves. In addition to the screws, the housing can be secured with latches. If there are no screws, then the entire case is assembled only with latches. It happens that it is additionally glued, but don’t panic, everything can be sorted out.
We take any knife and carefully insert the tip into the slot in the middle of the body and try to push the halves apart until a click appears. A click indicates that one of the latches has opened. Here it is important to find and release the first latch; the rest will be easier. Try to do everything carefully so as not to break the latches, and even if you break one or two, it doesn’t matter, it won’t make the remote control close any worse; in extreme cases, it can easily be glued with a drop of any superglue. You can also separate it with two thin screwdrivers, or combine a knife and a screwdriver.
If you are disassembling the remote control for the first time, it is preferable to use a knife and a screwdriver. First, insert the tip of the screwdriver into the gap between the halves of the case and, slowly moving the screwdriver along the case, look for the first latch. As soon as you find it, you snap it off, but leave the screwdriver stuck near the latch, and then continue to work with the tip of the knife. When you reach the next latch with your knife, you can insert a second screwdriver and continue moving with the tip of the knife, or continue moving with the first screwdriver. In general, do what is most convenient for you.
Next, take out the board and the rubber pad with buttons. The battery compartment has slots into which the spring contacts of the batteries are inserted. Before removing the printed circuit board, remember how they fit in the grooves so that there are no questions during assembly. In most cases, these contact springs are soldered onto the board and cannot be inserted any other way.
That's it, the remote control is disassembled.
Next, there are several ways to restore the conductive coating of non-working remote control buttons.
General remarks.
Before restoring the conductive layer of the buttons, it is recommended to simply clean them first. Sometimes contamination is visible to the naked eye.
Quite often, the entire space where the rubber base with buttons is located is filled with a transparent sticky and viscous liquid that looks like epoxy resin, only without a hardener. This liquid is spread in a neat thin layer, with small droplets in places. This sticky liquid is everywhere. On the top and bottom side of the rubber base of the buttons, on the top of the case with slots for buttons. The upper part of the printed circuit board with contact pads is also coated with this glue...
The origin of this glue is a matter of debate and even debate in repair circles. Some say it's grease from the fingers, others say it's fumes from batteries. But why then is the lower part of the board, where there are no parts, not covered with these fumes?
The most likely version seems to be that these sticky connections actually come from the rubber base itself. The rubber seems to sweat, releasing plasticizers, which indicates a violation of the production technology of rubber products. But the question arises: why are there so many such substandard products? This is observed in almost every remote control when a similar malfunction occurs.
It is necessary to clean with soap or other detergent, but not with alcohol, acetone, etc., which can lead to complete failure of the remote control. A good result can be obtained by washing the board and rubber with buttons with not very hot water, preferably using dishwashing detergent or laundry soap.
You should wash it gently with a soft cloth, using blotting movements, so as not to erase the graphite coating. It’s very good if, before washing off the snotty deposit, the parts of the disassembled remote control lie for some time, 20…30 minutes, in a detergent solution. After washing, do not wipe, but wait until the parts dry and only then assemble the remote control. You can use a hair dryer to speed up drying.
Do not assemble the remote control completely, attach the buttons, insert batteries and check operation. If everything works, collect and use. If the fault remains, we proceed to the second stage of recovery. In some cases, you can skip flushing and go straight to restoration. Intuition will help you.
For those interested, there are detailed instructions for repairing car alarm key fobs of various types.
Method 1. Superglue and foil squares
Using glue, carefully stick pieces of foil onto the contact pads of the “mat”. You can take foil from sweets (clean), chocolates, or better yet, from a pack of cigarettes. Aluminum foil with a paper base from cigarette packs is glued quite reliably and simply with any “Moment” type glue or superglue from small tubes. Piglets can be made either square or round. You can use a hole punch of a suitable diameter. The result should look something like this.
Method 2. Double-sided tape and foil
A strip of 5-7 cm long double-sided tape needs to be glued to the foil, cut off the edges of the foil where there is no tape. Then we “pass” the foil with tape through the hole punch as many times as there are buttons we need to repair, or we use scissors. You can also use a broken telescopic antenna. A link of suitable diameter is taken and circles are cut out on the glass. When the circles are ready, glue them onto the non-working areas of the remote control buttons. You don’t have to bother with circles and cut out squares.
Additionally, you can carefully use a sharp blade to cut off the layer of conductive rubber from the buttons in front of the sticker. Typically this is a layer of approximately 0.5-1.0 mm.
Method 3. Copper wire
You will need copper wire with a diameter of 0.2-0.4. Using a hammer, we flatten it on any anvil at intervals of approximately 1 cm. Schematic designation (“——” This is a wire, “O” is the place of flattening) (—-O—-O—-O—-) cut off the element (—–O )
we stick the left end of the element into the button, possibly next to the button, bend the flattened part of the element (—–O) over the conductive rubber
If secured well, this option is quite durable.
A simpler option is a metal stapler staple. Bend and shorten it to the size of the contact pad and press it into the rubber in such a position that when the button is pressed, the bracket closes the contacts on the board.
Method 4. Conductive adhesives or varnishes
Another option for repairing the remote control is to coat the buttons with conductive adhesives and varnishes, such as Kontaktol or Ellast. There are also many different opinions regarding this method, which is better is not yet clear. Apparently, everything is simple: whoever did well praises and vice versa.
Method 5. Repair kit
Ready-made repair kits are sold specifically for repairing remote controls. They are cheap - the main thing is to find them. The bag contains a tube of glue and round rubber spots with a graphite coating. Just spread it and stick it where you need it. There are even instructions on how to glue it.
A more modern version of the repair kit is self-adhesive patches. Everything is quite simple here. In such cases, wiping the rubber buttons with alcohol or another solvent will not hurt.
All options are workable and tested in practice. Choose whichever one you like best. Good luck.
How can I solve the problem?
After diagnosing the equipment, you need to choose a solution to the problem that corresponds to the specific problem:
- change batteries if they are dead;
- check the operation of the LED in case of signal failure;
- Check the internal components for damage due to the remote control being dropped.
To understand which repair method to choose in a particular situation, it is best to carefully study each of them.
Most problems that arise with the remote control can be solved yourself!
Change batteries
To change the batteries on the remote control, follow these steps:
- Open the protective cover of the power system elements, which is most often located at the bottom of the rear side of the case.
- Remove old batteries.
- Insert new batteries. Pay attention to the power poles. The minus must be combined with the minuses, and the plus with the plus.
- Carefully close the protective cover.
After completing all steps, you can continue to use the device.
Batteries run out extremely suddenly for users, so it’s a good idea to keep a few, or even a pack, at home in case the ones in the device run out.
Check LED
The LED is the most important part of any remote control. It is this small light bulb that transmits the infrared signal with the desired command to the TV. Without it, the bullet is simply useless.
The LED should first be inspected for physical damage. The light bulb should not have scratches or dents, and even more so, it should not be broken.
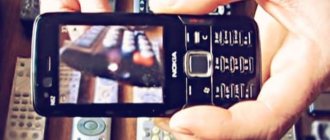
The user must then check the LED's functionality. This can be done using any smartphone camera. By pointing the device at the device and switching channels, you can notice how the light is on - this means that the LED is working correctly.
If problems are found in one of the two checks, then the device must be noticed. To do this, you need to buy an LED in a specialized electronics store and carefully solder the light bulb into the remote control chip.
Open and check for internal damage
In case of mechanical damage to the case, the internal parts of the device are most often also damaged. This kind of damage is the easiest to notice. There will be dents or chipped plastic in the outer shell of the remote control.
However, there are often cases when, after a fall or strong impact, the body of the remote control has no visible mechanical damage, but despite this, the internal system of the remote control is damaged and because of this the device ceases to function fully.
Closed damage is also indicated by the sound of knocking on plastic walls, as if something was loose inside.
To check for physical damage, you need to open the case. Some remote controls are equipped with screws, so to open their “shell” you just need to unscrew the fasteners with a small Phillips screwdriver.
Other models are fastened with latches; such devices are opened using a knife with a thin blade. It must be carefully inserted into the gap between the halves of the case and slowly disconnected from each other.
When opening the case with a knife, you must be extremely careful not to damage the microcircuits.
Video instruction that demonstrates how to open the remote control yourself and check it for internal damage
If individual buttons do not work
There are many reasons why the remote control buttons do not work:
- Wear of the graphite layer.
- Liquid has entered the device.
- Mechanical damage to the device.
It is important to understand that malfunction of the buttons is a consequence of the breakdown, and not its cause. Therefore, in order to begin any repair actions, you should find out why this or that key fails.
Video instructions with different ways to solve problems with erased buttons
If there is an oily liquid inside
Often, when you press the buttons on the remote control, you can see a dark oily liquid. The first thing that comes to every user’s mind is that some kind of liquid was spilled on the device. However, this fluid is collected from fat that is secreted by the pores of the fingers.
It is extremely easy to clean the remote control from this oily liquid. To do this, you need to disassemble the case and thoroughly wipe the entire internal system.
How to restore lost contacts
Broken contacts of microcircuits can only be restored using a soldering iron. You should use this device with extreme caution so as not to further damage the remote control.
How to restore the graphite layer on the board
The graphite layer is located at the lower level of the buttons and is in contact with the microcircuits. Over time, this layer wears off and the buttons stop functioning. However, this problem is easy to solve on your own. To do this, you need to buy a special kit with glue and additional graphite heels at a radio electronics store and repair the remote control yourself.
Many repairmen replace the store-bought graphite layer with ordinary food foil.
Sequencing
Simple instructions for opening almost any modern remote control:
- Inspect the remote control for placement of fasteners. Some manufacturers put some of the screws in the battery compartment. Remove the batteries;
- Take a screwdriver of the appropriate size and remove all fasteners;
It may be difficult to ask the question - how to disassemble the remote control for an LG that does not have screws? Pay attention to the joints on the sides of the device. You need to create gaps in the joints, then widen the cracks and pry to remove the plastic shell. Step-by-step instructions, with a description of the nuances:
- Check the seams on the body. If they are connected with glue for security, use a knife or flat-head screwdriver. Use them to pry up the edges of the case until the edges separate;
- Sony Bravia TV remote control , like many other devices of this type, you need to use a knife to remove the latches located inside the case. Do not pull the body halves in different directions at once, run the blade along the edges and feel for hidden fasteners. Gently squeeze them out;
- Use a plastic card to slide it along the joints between the cases to finally loosen the plastic and open the remote control;
- Take out the keyboard;
- Carefully unscrew the chip without removing the sensor from it;
- Carry out the necessary procedures to clean or repair the product.
How to open the remote control if the plastic is sitting on mounting screws and there is no Phillips-head screwdriver nearby? The fasteners can be rolled using the tip of a knife. It will be convenient to take a knife with a curved blade at the end for this purpose.
IMPORTANT! Try not to cut your hands - if you have problems with fine motor skills, first put on a thick work glove. Regardless of your confidence in your dexterity with tools, choose a dull knife.
The Philips remote control can be easily snapped off using even simple tweezers. In Philips, the fastening of the top cover may be slightly recessed into the plastic of the rear surface. How to properly disassemble the remote control in this case? Carefully pry the lid at the joints, preferably not with a blade. A knife may scratch the lid and ruin its appearance. There is also a danger of accidentally running a sharp edge over the buttons. If you damage something, it’s okay - remote controls for Samsung TVs and other common manufacturers are inexpensive, and in some cases are interchangeable.
Model rmctpj1ap2 – original Samsung TV remote control.
The parsing process is not fundamentally different from the scheme already described. If you still can’t open the TV remote control, try pressing on the narrow edges to force the plastic to slide out of the grooves.
Why doesn't the TV remote work?
The main reasons why the TV remote control does not work:
- dead batteries;
- moisture getting inside the device;
- damage to the device due to a fall or strong impact;
- broken or worn contacts;
- interference interfering with the remote control signal;
- Incorrect operation of the TV itself.
It is quite simple to understand what situation happened with a specific remote control, but to do this, you should analyze each of the listed cases separately.
The batteries are low
No matter how trivial this reason for the TV remote control stopping working may seem, in most cases the problems associated with this device are due to dead batteries.
Ways to check if the batteries are dead:
- The simplest is to try to use the batteries in another device.
- Check the charge using a special device.
It is important to understand that rearranging the batteries in the remote control socket does not give them an additional charge, no matter how much a budget-conscious user might want it.
Separately, I would like to highlight those users who use batteries several times, charging them using a specialized device - an AA battery. This use is extremely ambiguous.
Pros and cons of reusing batteries
Saving
Caring for the environment - fewer batteries are thrown away
These batteries drain faster
The insides of the battery can “float” right in the device
Having dealt with the simplest reason, you can move on to more complex ones.
Moisture has entered
The Achilles heel of not only TV remotes, but also of almost all electronic devices is water. Even a small amount of moisture entering the internal system of the device can
The fact is that the remote control, like most equipment, consists of electronic microcircuits that, upon contact with any liquid, stop functioning, and sometimes simply short-circuit and burn out.
Therefore, if moisture gets into the remote control before the user’s eyes, measures must be taken. It is best to remove the device from the case and dry it thoroughly with paper towels or a hairdryer, and then thoroughly wipe all hard-to-reach places with cotton swabs.
If the user was not present at the incident, then it is extremely easy to understand that water got into the TV control device - some buttons do not respond to pressing the first time or stop functioning altogether.
Just like moisture, dirt affects the remote control. Therefore, you should not let it get into the inside of the device.
Doesn't work after being dropped or hit
Probably, each of us has seen how some user, trying to fix a broken TV remote control, hits the device on some surface. However, doing this is strictly prohibited!
Due to the fact that the microcircuits are connected to each other using thin cables, the device reacts sharply to any physical damage. If the cable is disconnected, then a whole group of TV remote control buttons will not function.
It is not so difficult to connect a broken cable; it is much more difficult to repair a device if the microcircuit itself is cracked. It is almost impossible to fix such a problem.
To find out for sure whether problems in the operation of the device are due to mechanical damage, you need to open the case of the remote control and carefully examine the internal structure for scratches, cracks and other physical defects.
Contact wear
Contact wear is a factor in the malfunction of the TV remote control, which most often occurs in older models.
Under each button of the device there is a special sensor, when pressed, the electronic microcircuit of the device understands what signal to send to the TV. The longer the remote control is used, the more these sensors wear out. Therefore, on older models, certain buttons sometimes do not work.
Worn device contacts do not belong to restoration!
Despite the fact that it is impossible to give a second life to an erased contact, the user can still fix this problem. To do this you need:
- Buy a special set of new contacts.
- Open the device case.
- Carefully solder new sensors in place of those worn out during use.
- Close the remote control housing.
After completing these steps, the device will be fully functional again. However, the question arises: is such labor, containing many nuances, equivalent to buying a new remote control?
TV malfunction
In addition to a malfunction of the TV remote control itself, there are often cases when problems arise with the TV.
To check whether the problems really lie in the TV, you don’t have to understand electronics. You just need to use one of two simple ways to figure out the problem:
- Change the remote control. If, after changing the device, the TV still does not receive a signal from the device, then most likely the cause of the problem lies in the TV.
- Try using the remote control on another TV. If, when changing the TV, all devices continue to function, then this is a clear sign that the problem is hidden in the TV.
It is not recommended to repair TV breakdowns on your own, since this electrical device has an extremely complex internal system, which is sometimes difficult for even specialists to handle.
Also, do not confuse TV problems with signal problems or interference, which will be discussed later.
Extraneous interference
This type of reason for the incorrect operation of the remote control is often confused with problems with the TV, despite this extraneous interference is in no way related to the internal processes of the TV.
The fact is that remote controls send a signal to TVs in two main ways:
- using infrared radiation;
- via LED signal.
Both of these methods can be drowned out by extraneous noise.
Extraneous interference is an extremely rare phenomenon, but you can still encounter it. Most often, the user may encounter this problem if the TV is installed in the kitchen. There, microwave ovens or flickering LED lamps interfere with the signal.
It is also worth making sure that nothing interferes with the LED signal. There should be no physical obstacles in the path between the remote control and the TV that would prevent the devices from communicating.
This is interesting: The multicooker does not turn on: reasons and what to do?
How to disassemble the remote control: types of faults, diagnostics, repairs
A person is so accustomed to the remote control (RC) that its malfunction or incorrect operation causes serious discomfort. The operating principle of the device is based on transmitting a specific command using an infrared signal to a photocell transceiver installed in a TV, air conditioner, smart set-top box or other equipment.
A malfunction of one of the structural elements of the remote control can be accompanied by various inconveniences, and the operation of the equipment becomes difficult. In this article, we will look in detail at how to disassemble the remote control, why it may not work, and how to restore it yourself without turning to specialists. Most causes can be eliminated with your own hands.
TV does not respond to remote control commands
If neither cleaning nor replacing batteries helps, the remote control is visually intact, but the TV does not respond to its commands, you should check the condition of the electronic part. To do this, the remote control is disassembled. When troubleshooting, you need to act carefully and carefully.
Lost contacts
When remotes are dropped or simply over time, a variety of devastating consequences can occur. After disassembling the remote control, inspect:
- area of the LED, the state of its legs;
- wires from the battery compartment, their condition, strength of soldering to the main board;
- condition of other parts with legs.
If breaks or broken conductors are found, repairs with a soldering iron or complete replacement of parts with damaged contacts are necessary.
Advice! It would not be superfluous to inspect the back surface of the electronic board. In places where the ends of the component legs have sunk deep, it is worth adding tin and working with a soldering iron.
Troubleshooting
During the initial visual inspection, most simple problems are detected and eliminated. If this does not help restore the operation of the remote control, it is worth checking the condition of some electronic components of the board. They start with an LED. Batteries are inserted into the power compartment. You will need a smartphone to check. The camera starts on it. The remote is pointed at her lens. If the LED is working properly, when you press the buttons, the smartphone, whose camera also captures waves invisible to the eye, will clearly display flashes. If the element is broken, the user will not see anything.
The second difficult problem is the failure of the quartz resonator necessary to generate a signal for the TV. Some manufacturers place this element in different parts of the electronic board. Therefore, you will have to determine the breakdown by ear. The board is gently shaken near the ear: if a rustling sound is heard, as if from rolling grains of sand, it means that the resonator is damaged and requires replacement . You can do this yourself or take the remote control to a workshop.
Cleaning elements
This is the most important point of self-repair; other than this, no other actions are possible . After the device is disassembled and the microcircuit is removed, the time comes to clean all these parts using a cotton pad and alcohol. Upon external inspection, it will become clear what the cause of the malfunction is; if it is clear that the microcircuit is damaged, further actions should be aimed at replacing the remote control. If not, then just clean everything with a cotton pad and place it in its original place. It is important to know how to properly clean the TV remote control.
We carry out repairs
Mechanical damage to the housing cannot be effectively repaired during remote control repairs. Large cracks look bad even when glued together. In addition, the vulnerability of the entire device increases sharply - most likely, from now on the housing will break regularly. If you step on the remote control, there is a high probability of damaging not only the case, but also rendering the entire board unusable. Any crack on the board cannot be repaired. There's nothing you can do about it - you'll have to buy a new device.
IMPORTANT! Before you begin repairing the remote control, make sure the batteries are in working condition. In the vast majority of cases, the problem will be resolved at this stage.
Samsung service remote does not work normally , try calibrating the product.
- Replace the batteries.
- "GUIDE" button for a few seconds . Count to 5.
- If the sensor still does not work, reconnect the entire remote control to the TV.
Remote settings
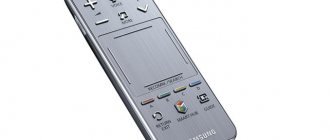
Samsung Smart Control remotes are touch devices that allow you to control TVs from a distance. They are included with Samsung TVs that have the Smart TV function and were produced after 2012. It is capable of controlling not only the TV, but also the set-top box that is connected to it. It can also be used as a control device for a Blue-Ray player. It has a voice control function, with which you can increase or decrease the volume and perform other actions without touching the remote control.
Types of breakdown
Statistics on remote control repairs in service centers claim that the most common breakdowns or failures of devices look like this:
- damage to important controls and housing due to falls from various heights or other mechanical impacts;
- sometimes some of the remote control buttons do not work, but the rest perform their functions properly;
- Frequently used buttons do not function or only work when pressed very hard;
- The TV remote control only works from a very close distance.
Identifying the cause is not difficult, but you need to know the procedure for the upcoming repair, which directly depends on the breakdown that occurred; sometimes it is cheaper to buy a new remote control than to revive the old one.
Important! When the remote control buttons for your TV do not work, before starting repairs, try inserting new batteries - in 80% of cases the remote control will work as before. Such simple steps will help to revive even the Smart TV remote control.
How to choose a remote control for a Samsung Smart TV
At one time, Samsung Smart TV technology became revolutionary in the field of televisions. This is a very creative and interesting solution by the company. It contains a large number of functions that are now indispensable. For this function to function correctly, a good Internet connection is required, so the company installs good equipment in Smart TVs to ensure high Internet speeds. For more comfortable control of this technology, you can use special remote control-pointers, which are distinguished by great functionality.
Smart TVs are essentially multimedia platforms. For their production, the most modern technologies are used, which allow achieving maximum image and sound quality. This contributes to the fact that the cost of these devices is quite high. You need to choose a device based on your requirements and for a specific TV model. There are push-button and touch-type devices. If you have problems setting up or operating the smart remote control, look for a solution on the Internet or contact your equipment supplier.
- Push-button device type. The main advantage is that there is no need for configuration. It can be used immediately after installing the batteries in the special compartment. It can connect to multiple devices at the same time. Thanks to this, the push-button remote control is universal. It is also often chosen for its ease of management, as well as its low acquisition cost.
- The touch type has a more complex connection process. First of all, insert the batteries and press the power button. After this, hold down the “RETURN” and “GUIDE” keys for several seconds until the “bluetooth” icon appears. The appearance of this notification indicates that the device is paired with the TV. The remote controls that come with your TV only work with this device.
Important! Before purchasing a universal remote control, make sure that it exactly fits your TV model.
Sticky buttons
If steam or liquid gets inside the device, a kind of oil condensation occurs. Dirt accumulated over years of service reacts with wet steam or drops. Roughly speaking, the insides of the remote control “stick together” due to dirt and grease deposits, so it becomes impossible to press the buttons properly.
IMPORTANT! There is an old method for preventing breakdowns caused by dirt. To prevent fat, skin particles and dust from settling inside the remote control, you can wrap the device in polyethylene or wrap it in simple cellophane. If you do this carefully and tape it in the right places to fit the shape of the remote control, you can even preserve the aesthetic appearance of the device.
In this case, repair of the remote control is carried out by simply cleaning the device:
- Disassemble the remote control.
- Soak a cotton swab in alcohol.
- Gently wipe the board with a cotton swab, removing any dirt.
- Clean the contacts on the buttons.
- Tidy up the spring contacts for the batteries. You can get rid of oxidation by cleaning the contacts with sandpaper.
- Wait for the device to dry.
- Put it back together.
At the end of the process, you should check the remote control for functionality.
IMPORTANT! Chinese models of remote controls may permanently fail after cleaning with alcohol! To treat them, use a regular soap solution with water. Wipe the remote control parts with a stick soaked in soapy water. Then rinse the rubber gently with lukewarm water. Don't soak the entire board! Just remove any remaining soap from it. Wipe the device with paper towels. Take some time with assembly - first wait until the remote control is completely dry. After assembly, check if the remote control works.
Useful tips
- To clean the remote control, you need to prepare the following equipment: alcohol-containing liquid and paper napkins. Hard-to-reach places can be cleaned with a toothpick, on which you need to wrap a napkin previously soaked in alcohol.
- For a convenient reassembly process, it is necessary to lay out all the parts in alternate sequence. The presence of foreign objects on the table is also undesirable.
- Keep the remote control away from food products and various liquids. Determine a permanent storage location so you don’t have to look for it throughout the apartment.
- Wrap it in cellophane film - this will prevent food particles and dust from getting into the internal cavity of the remote control.
- Clean the remote control periodically as dust entering the interior will cause clogging and cause premature wear of parts.
Attention! Before you begin the process, you need to watch video instructions on the Internet on the topic “how to disassemble the remote control for a Samsung smart TV.”
Malfunctions of the TV remote control are not that rare. Sometimes the damage is minor, for example, a button gets stuck. But this is not a reason to change the remote control. All you have to do is open it and fix the problem. So, how to disassemble the Samsung TV remote control?
Resuscitation of buttons
Graphite conducts electricity well. If the graphite coating on the rubber button plate has worn off, you can replace it with a ready-made Chinese part. However, the cost of the part can be compared to the price of the whole remote control. In order not to waste money, you can repair the remote control at home.
Take:
- Foil from a pack of cigarettes, or any other foil on a paper backing.
- Good silicone based glue. You can use "Moment". There is no point in buying special glue for a one-time repair of the remote control.
- Scissors. Using scissors, you will cut out small geometric shapes from foil that match the shape of the remote control buttons.
If possible, you can buy a repair kit at a specialized store. The set includes ready-made buttons with conductive graphite coating and glue for attaching them.
How to repair the remote control:
- Disassemble the remote control;
- Take out the rubber button element;
- Place pieces of foil on the bottom of the non-functioning buttons. Place the paper side of the foil on the glue.
Repairing remote controls for Samsung smart TVs follows the same principles as work on devices from other brands. As you can see, repairing remote controls yourself is not a difficult task. It is enough to understand the general structure of the product. If you have an idea of how the remote works, you can effectively fix it yourself.
Repairing television remotes yourself is not always worth the associated hassle. Sometimes it is better to entrust remote control repairs to specialists.
A horizontal black stripe appeared on the TV screen
Disassembling the Samsung TV remote control
Setting up a huayu universal remote control for your TV
Features of disassembling the touch panel
The touch control panel is disassembled according to a similar scheme. Many companies equip their devices with modern remote controls with touch sensors. Despite the significant difference in the control principle between conventional remote controls and sensors, the touch sensor in a Samsung TV does not interfere with disassembly.
IMPORTANT! Try not to damage the cables that connect the touch sensor to the board. Remove these parts from the plastic shell, handling the sensor as carefully as possible.
Samsung TV and its competitors are equipped with approximately the same additional devices. Parsing the remote control from Samsung or any other brand will not be difficult if you understand the general design principle of these devices.
The batteries are low
80% of all calls to service workshops regarding a broken TV remote control are caused by batteries. The first thing to do when diagnosing failures of the remote control is to replace the batteries with new ones.
Even if you only installed new batteries a few days ago, you should try updating them. Batteries may be defective or expired; often, even in original packaging, these elements may be “dead.”
If you have a voltmeter in your house, you can check their voltage with this device. The minimum charge value should be 1.3 V. If the battery potential is lower, it must be replaced.
Check the operation of the remote control with new batteries; further repairs may not be required. If they are not the reason, move on to the next stage.
Malfunctions and their elimination
If you purchased a device and it is not working, the first steps to take are:
- Read the operating instructions carefully;
- Make sure that the device is compatible with this TV model;
- Disconnect the batteries and install them back;
- Remove the power plug from the outlet, wait a couple of minutes, plug it back in and turn on the TV.
The disadvantage of Samsung Smart Touch remote control devices is that repairs are not carried out in official service centers. The cost of the original remote control sometimes reaches a third of the cost of the entire TV. Therefore, most users try to repair the remote control themselves. A common problem is the gradual increase in the rate at which the batteries drain, and eventually the remote control does not work at all, even with new batteries. This is facilitated by a malfunction of the capacitors at the positive input. To solve the problem, you can simply remove them, but this does not guarantee safety of use, but without them the remote control will begin to function normally.
Cleaning from moisture and dirt
Anything that has oily dirt can be wiped with a damp cloth or cotton wool soaked in alcohol. However, if the remote control is old, the dirt may be unexpectedly heavy. It would seem where this dirt would come from, but, as practice shows, all remote controls collect dirt.
Take a small basin and pour warm, clean water into it. Add a few drops of dish detergent and lather the solution. Place all the elements of the remote control in it, including the circuit board. Don't worry, without power there will be no short circuit. After some time, all the dirt will become wet and it will be easy to remove, for example, with a regular toothbrush.
Clean the board with radio components especially carefully: they must not be damaged. The contacts on the microcircuit and the buttons themselves on the reverse side of the rubber element must be black! After all dirt has been removed, rinse the parts with running water, pat them dry with a dry towel and place them in a warm, dry place for 30-40 minutes to dry completely.
If the button contact has a graphite coating, then the reason for poor operation may be that it is worn out and erased. Regular chocolate or cigarette packaging will help solve the problem. You just need to cut paper-based foil into squares or circles of the appropriate size and glue the pieces with the paper side to the contacts.
It is best to glue the foil to the contacts using “Moment” or silicone-based glue. There is also a special product for this type of need, but buying it specifically for 1-2 buttons is impractical. Also on the market are special repair kits for remote controls, which contain buttons with conductive coating and a small tube of adhesive.