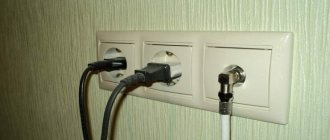
Today, with a few exceptions, all motherboards on the market with a built-in sound card have a digital S/PDIF output. You will be able to see that when the equipment is turned on and that socket is not in use, even though most of them have a small flip cover, a red light will come on and this is because your equipment is ready to use it at the same time. at the hardware level. like software
How is TOSLINK different from S/PDIF?
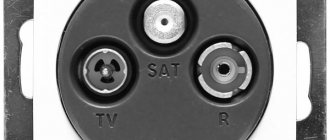
S/PDIF is a communication standard that stands for Sony/Philips Digital Interface Format. It uses two cables/connectors: a fiber optic cable with TOSLINK connectors or a coaxial cable with RCA connectors. As far as the actual signal is concerned, they are identical, however TOSLINK on coax has higher signal instability (jitter).
The most modern and frequently used is fiber optic cable, therefore, basically, the term “S/PDIF” refers to fiber optic cable.
History of the system
Until recently, fiber optic cable was not perceived as a tool for high-quality sound transmission. It is known that fast data transmission is possible only with light. Optical technology was first used in the photophone developed by Alexander Bell.
Optical telephone communication proved the possibility of transmitting a signal through the air, but the inventor’s idea itself did not take root. The physicist's achievements began to be used for communication between ships, but nothing more.
The widespread use of fiber optic technologies began only in the mid-20th century, and a major breakthrough that brought digital audio out to the masses occurred in 1980 with the invention of fiberglass wire, which was capable of transmitting a light signal.
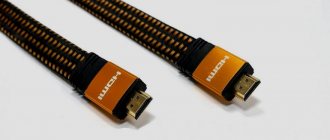
Despite the fact that the optical input celebrated its 40th anniversary, it is still considered the best in terms of analog sound transmission quality, which cannot be matched by the “tulip” HDMI cable, which appeared much later.
Is it worth buying an optical audio cable?
Probably, many people think that there is no point in buying an optical cable, for example, for a TV, since HDMI can transmit both sound and image. And although the HDMI connection is indeed of high quality, in many cases we cannot use it. In a situation where we want to connect an audio source, such as a Blu-ray player or console, to a separate amplifier or DAC, connecting using an optical TOSLINK or Mini-TOSLINK cable can be a salvation.
The history of optical transmission dates back to the early 1980s and began with the debut of CD-Audio players. Although fiber optic connections were already known, the technology entered the consumer market with the introduction of the first all-digital audio format. The connection standard was developed by the Japanese company Toshiba, to which we also owe the name of the plug standard for these cables - TOSLINK (TOS (hiba) LINK).
Comparison with HDMI
How to connect a TV cable
Fiber optic communication systems of the early 2000s have a serious competitor. These are devices for transmitting digital information, including an audio signal via an HDMI cable.
HDMI cable
HDMI (High Definition Multimedia Interface) is an interface for high-definition multimedia systems.
The big advantage of an HDMI connection is the ability to simultaneously transmit digital signals, both video and audio, in high quality. Moreover, sound can be sent over eight channels with 24-bit resolution and a frequency of 192 kHz. At the same time, surround sound is easily realized in the speaker system. The HDMI interface is superior to fiber optic systems in terms of the amount of transmitted audio information. For home use, HDMI cables have a length of 1.5-3 meters, but can reach 15 m.
The only disadvantage of an HDMI conductor is the signal transmission through metal conductors. Although they are well shielded, there is still potential for interference from local electromagnetic fields.
Will HDMI replace fiber optics? Not likely in the near future. Many acoustic systems and music centers using optical audio channels have been produced, and their production continues. The consumer will have to choose.
What's so special about optical cable?
First of all, it is capable of transmitting compressed 5.1/7.1 surround sound or transmitting lossless stereo audio in PCM (pulse code modulation) format up to 192 kHz/24 bit. And most importantly, it is practically immune to external influences.
The optical cable transmits audio in digital format (S/PDIF standard) using red light with a wavelength of 660 nm. If you look closely at such a cable, you will see that it consists of tightly woven optical fiber. The quality of an optical cable is indicated by the number of fibers from which the entire cable bundle is made. Since we are not dealing with electrical impulses, optical cables are not sensitive to electromagnetic and radio interference, so they almost always output the same sound as received from the transmitter at the output of the audio source. This means that optical cables have a significant advantage in this regard compared to cables that conduct the signal electrically (galvanically), such as 75 ohm coaxial cables. Additionally, using an optical cable prevents two devices connected together from grounding, which can cause annoying constant hissing or squeaking in headphones and speakers.
Basic operating principle
An optical cable connected to digital audio out consists of a shell and a core.
Accepted standards for TV input, the same for Samsung, LG, and other manufacturers, consist of several stages of information transportation:
- generation of a light signal from an electrical one;
- its retransmission from output to input without loss of power or distortion;
- reception of a signal by an incoming device;
- reverse transformation of the signal into an electrical one.
An optical cable connected to digital audio out consists of a sheath and a core. During production, attention is paid to the complexity of connecting connectors, with which you can connect two devices to each other.
Violation of technology significantly spoils the quality of transmitted sound, making the use of optical connections useless. That is why music lovers purchase industrial-cut cables of a certain length.
What to look for when buying an optical audio cable?
Of course, the main issue is the cable length, which according to the official specification should not exceed 5 meters unless an appropriate signal amplifier is used. Opinions on the maximum signal transmission length are divided, but the most common opinion is that a lossless signal is guaranteed with a cable length not exceeding 50 meters. This means we don't have to worry about whether we buy a 5 meter or a 30 meter TOSLINK. However, remember that the signal quality in this case will also depend on the class of the transmitting and receiving device and the class of the signal amplifier used.
It is also worth paying attention to what kind of tape the cable we buy supports. The optimal range is 9 MHz to 11 MHz (higher range indicates better cable material). The material from which our TOSLINK is made is also important here. The lowest place is occupied by plastic, and the highest by borosilicate glass. The latter material can be found almost exclusively in high-quality audio cables. However, the price of 1 m of such cable can exceed the ceiling of 15,000 rubles.
Balanced output
In the field of professional audio equipment, one of the reference connection options is balanced . Externally, it is not much different from a wide-profile TRS, but its operating algorithm allows you to achieve noticeably better sound quality.
With an unbalanced connection (the usual jack/minijack used in smartphones and inexpensive players), the signal arrives through two conductors: ground and the information channel (left/right). This solution can significantly reduce the final cost of an audio device, but has one drawback - a high level of interference.
With a balanced connection (symmetrical), the signal passes through three conductors: two information channels (direct and reverse) and ground. Thus, the electrical impedance between the conductors is balanced because it is supplied in antiphase. The result: a significant increase in the power of the useful signal and minimization of interference.
How to listen: Shielding the cable against antiphase... The winner will definitely be the balanced connection version. Forget about interference, noise and distortion, but it's still physics.
How to install such a cable yourself?
Unfortunately, optical audio cables are not ordinary metal wires that you can throw on the floor with impunity. Under no circumstances should TOSLINK cables be bent, twisted or stretched as this may cause the optical fiber to break and become permanently damaged. Of course, a broken optical cable cannot be repaired with electrical tape and a soldering iron, so after such damage the only thing left to do is throw it in the trash. So, if we are already laying TOSLINK cable somewhere, do it carefully and not forcefully.
The process of connecting the cable to the device is quite simple. All you need to do is remove the special plastic cover from the tip and connect the end of the cable to the appropriate connector. But be careful—the plastic cover isn't just there to protect the forks from physical damage. A very important factor affecting the usability of this type of connection is cleanliness. Even the tiniest speck of dust, if it gets onto a TOSLINK plug, can disrupt or completely prevent signal transmission. That's why optical inputs and outputs on all types of audio and video devices have a plastic flap that only opens when the cable needs to be connected. This leads to another conclusion - often the cause of a non-working optical input is slight dirt, and not a cable defect. Most often, it is enough to carefully blow off the unnecessary pollen for everything to return to normal.
If we connect with our cable, for example, a DVD player or a set-top box with a set of speakers, there is nothing left to do but enjoy completely clear sound. Unfortunately, we must remember that if we have a low-quality set of speakers or a bad amplifier, even the best optical cable will not produce clear sound. In this case, you should not buy TOSLINK and it is better to purchase a regular copper cable.
Remember that good optical cables will reveal their full potential when paired with a good player, amplifier and set of speakers. At the end of the day, your system will only perform as well as its weakest link.
TRS jack connector
The TRS standard is one of the oldest and time-tested, since it was first used at the dawn of the design of telephone switches in the 19th century. Initially, the TRS connector had a simplified TS design (there was no additional ring channel). The essence of the abbreviation itself is as follows:
- T = tip – translated from English as “tip”;
- R = ring – translated from English as “ring”;
- S = sleeve – translated from English as “sleeve”;
The design of the TRS plug fully justifies its components: a pointed sleeve with plastic insulating partitions separating the channels. The generally accepted standard for a TRS plug and, accordingly, a port is a traditional stereo jack, which has three contacts: left and right channels + ground.
With the advent of smartphones, TRS has undergone minor changes, having received an additional ring responsible for a microphone headset ( TRRS ). Sony went the furthest, presenting a series of Xperia Z smartphones, the headset of which has a five-pin jack ( TRRRS ) on the two rings of which two microphones are powered: one for speech recording, the other for noise reduction.
There are three sizes of TRS audio connectors:
- 6.3 mm jack (1/4 inch). Used in professional musical equipment: from mixers and sound cards, to microphones and musical power instruments.
- 3.5 mm jack. A universal audio output that is used in consumer electronics and portable equipment of any level.
- 2.5 mm jack. A standard that is gradually becoming a thing of the past. Scope of application: portable equipment, tuners, headphone cup connection ports with detachable cords.
How to listen: Connecting via TRS is the simplest: it’s easy to choose the appropriate adapter for any size of port and plug, but the main enemy of cheapness remains physics. Don’t expect “super sound” and the laurels of “reference vinyl” from TRS.
Location
If the TV is on a cabinet, counter, rack, table or chest of drawers, then the soundbar can simply be placed directly in front of it. However, you need to measure the distance from the surface of the stand to the screen and check whether the soundbar will fit in this gap and whether it will block the image. But this arrangement is ideal - the sound will come almost “from the picture”.
If you want to install the soundbar inside a rack, then it should be pushed forward as much as possible so that the sound does not interfere with the side walls of the rack. It is also necessary to take into account that sound bars that support Dolby Atmos and DTS:X should not be placed inside racks - since they work with sound reflected from the ceiling to create vertical audio effects.
It is better not to cover the front and side panels of the soundbar with anything and not interfere with the propagation of sound. Although the photo shows it differently
If the TV is hanging on the wall, then the soundbar can be screwed underneath it - many models are equipped with wall mounts. You can place it either under the TV or above it, but from below it is still better, since the height of the sound source is approximately the same as the listeners, and this option, in our opinion, looks prettier. Soundbars often come with mounts and/or paper templates that make it easy to mark the wall for holes for screws.
The Bluesound Pulse Soundbar can even be mounted on a TV stand
If the soundbar does not come with mounts, you should consult the user manual and see if it can, in principle, be hung on the wall, and what the manufacturer recommends purchasing for this.
Video setup
Before you start adjusting the image, turn off the default automatic settings - manual optimization will allow you to achieve the optimal image. The picture for testing can be uploaded to a flash drive, and it must be connected to the TV via a USB connector. To set up your video yourself, you only need to adjust 5 basic parameters:
- boundaries;
- brightness;
- contrast;
- color correction;
- definition.
By adjusting these settings, you can watch TV through your home theater with an ideal picture.
Borders
In the right and left corners of the image there are arrows that should touch the edge of the display, but with only sharp ends. If the size is chosen incorrectly, the clarity will noticeably decrease, as a result of which the picture will be cropped. To change the boundaries, go to the menu. You are interested in the following sections: Overscan, PtP, Full Pixel, Original.
If you set the scaling incorrectly, the image clarity will noticeably drop. An illustrative example:
Brightness
By correctly adjusting this parameter, all shades with clear contours will be visible in the lower part of the image, for a total of 32 of them. Low brightness is a catalyst for increasing the gray color, due to which the picture merges in dark areas.
Excessively increased brightness will cause gradations to merge in the light areas of the picture.
Contrast
Setting this parameter follows the same principle as optimizing grayscale. Correct adjustment requires visibility of all elements of the scale. If the setting is incorrect, some areas of the skin will change to negative.
After completing the settings, go back and look at the brightness indicators - it is possible that they will change. Then check the contrast further. Example of low contrast:
Which optical fiber is better to choose?
I encountered some difficulty in choosing. As it turned out, the choice in length is not as large as it seems. My system is located almost close to the TV, so I simply don’t need too long a wire. That is why you need to clarify in advance how many meters of cable are needed in a given situation.
It should not be a little longer and with a margin, since it cannot be rolled up and tucked behind a TV or audio system. An optical cable with a glass core transmits data with a beam of light and the light inside is reflected from the outer surface. The problem is that if you bend the cable too much, the information may stop being transmitted because the angle of light is too wide.
That is why most often such wires are thick enough to mechanically prevent the optical connection from bending too much. Now you understand that buying with a reserve is a very bad idea and the cable should be freely connected without strong bends. Therefore, when choosing a wire in a store by meter, you must measure in advance the distance from the audio system or speakers to the TV.
Next, buy any suitable cable - they are all almost identical in characteristics. For some reason, many articles write nonsense about the footage, that it is supposedly better to take exactly 5 meters - but this is just nonsense. Since the optics have a long range and do not affect the footage within the apartment in any way. If desired, the cable can even be taken out onto the street or into a neighboring house.