Advantages of LED backlighting
Both gas discharge lamps and LED backlight solve the same problem. They form a background light for the TV display matrix, which has cells with controlled transparency of the pixels and their color. However, the modern technical solution based on semiconductor crystals has many advantages. Moreover, these are advantages for both manufacturers and users, increasing the reliability of the TV, its safety, durability and other characteristics.
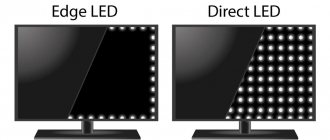
- TVs have become thinner. The conductor on which the diodes with lenses are mounted, as well as the scattering filter, occupy a very small height. Compared to the previous generation of lamp-backlit TVs, the gain in thickness is up to 10 cm.
- LEDs are durable and reliable, indifferent to falls. They will withstand shock if the TV is dropped or vibrates during transport.
- The user gets a much brighter screen for the same operating cost. The level of energy consumption of semiconductor crystals is many times less than that of gas-discharge lamps.
- The level of heat generation from diodes is negligible. Using TV becomes safer.
- For semiconductor crystals, the service life is measured in hundreds of thousands of hours of continuous glow without a drop in flux intensity. The TV will show for years the same bright picture as on the first day after it was first turned on.
The benefits to public health are also clear. LEDs are easier to recycle. They do not contain mercury vapor; service workshops do not need to keep strict records, responsible storage and delivery of failed parts to special collection points. As a result, the user receives low repair costs and high speed.
In addition, there is no danger of injury from mercury vapor inside the apartment. If a child suddenly accidentally breaks an LED TV, no particular problem will arise. The safety of LED backlighting lies in the fact that each of its elements operates at low voltage; in case of breakdowns, arc discharges, flames and other situations that can lead to significant negative consequences do not occur.
Due to the large amount of data and for ease of searching, tables for different brands had to be distributed on different pages, since one page of the site is not able to accommodate such a volume of data, below are links to tables by brand.
| Table: Backlight for PHILIPS and LEDs for PHILIPS | Table: Backlight for BBK and LEDs for BBK |
| Table: Backlight for SONY and LEDs for SONY | Table: Backlight for DEXP and LEDs for DEXP |
| Table: Backlight for Rolsen and LEDs for Rolsen | Table: Backlight for SUPRA and LEDs for SUPRA |
| Table: Backlight for MYSTERY and LEDs for MYSTERY | Table: Backlight for HAIER and LEDs for HAIER |
| Table: Backlight for Panasonic and LEDs for Panasonic | Table: Backlight for Orion and LEDs for Orion |
| Table: Backlight for THOMSON and LEDs for THOMSON | Table: Backlight for TELEFUNKEN and LEDs for TELEFUNKEN |
| Table: Backlight for SHIVAKI and LEDs for SHIVAKI | Table: Backlight for SHARP and LEDs for SHARP |
| Table: Backlight for AKAI and LEDs for AKAI | Table: Backlight for HISENSE and LEDs for HISENSE |
| Table: Backlight for Xiaomi MI and LEDs for Xiaomi MI | Table: Backlight for TCL and LEDs for TCL |
| Table: Backlight for DAEWOO and LEDs for DAEWOO | Table: Backlight for ERISSON and LEDs for ERISSON |
| Table: Backlight for Prestigio and LEDs for Prestigio | Table: Backlight for IRBIS and LEDs for IRBIS |
| Table: Backlight for POLARLINE and LEDs for POLARLINE | Table: Backlight for GOLDSTAR and LEDs for GOLDSTAR |
| Table: Backlight for DNS and LEDs for DNS |
Below is an outdated, incomplete table:
| Brand | Model | Planks | Installed LED | Can be replaced with: |
| Samsung | UE43N5500AU UE43N5510AU UE43N7100U UE43N7120U UE43NU7100U UE43NU7120U UE43NU7140U UE43NU7170U | AOT_43_NU7100F_2X28_3030C_d6t-2d1_28S1P REV.2 (2 strips of 28 LEDs each) | 3030 6V 1.6W | |
| Samsung | UE49K5100AU UA49K5300 UN49K5300 | V6LF_490SFA_LED31 V6LF_490SFB_LED31 (Two strips with a reflector of 31 LEDs each) | 1313 3V 3W LED035 | |
| LG | 47LA620V-ZA | 6916l-1259a, 6916l-1261a 6916l-1260a, 6916l-1262a | 3V 2835 1W | |
| LG | 42LB671V | 6916l-1682a, 6916l-1683a 6916l-1684a, 6916l-1685a | 3V 2835 1W | |
| LG | 43UJ655V-ZA | 43″ V17 ART3 2867 Rev0.3 1 (6916L-2867A) 2 strips of 10 LEDs | 1313 3V 3W LED035 | |
| LG | 42LA643V | 6916L1471A REV1.0 2 6920L-0001C | 6B 7030 1W | |
| LG | 55LA620V-ZA | LG Innotek POLA 2.0 55 | 3V 2835 1W | |
| BBK | 32LEM-3081/T2C | SUJ320AG2_REV2_6LED (three strips of 6 LEDs each) | 3B 2835 1W art. LED010 | 3B 2835 1W art. LED009 |
| PHILIPS | 32PHT4201/60 | LB-PF3030-GJD2P53153X7AHV2-D (3 strips of 7 LEDs each) | 3V 3030 1.5W art.LED036 | art. LED007 |
| LG | 32LJ500V | |||
| LG | 32LJ510U | HL-99320A30-0501S-01 A2 2×5 (two strips of 5 LEDs each) | 3V 3030 1.5W art.LED036 | art. LED007 |
| Samsung | UE32F4510AK UE32F5300AK | 2013SVS32H 9 REV1.8 5 strips of 9 LEDs | 3V 3535 1W LED003 | |
| BBK | 40LEM-3080/FT2C | CHA 39 3228 05 REV1.1 or REV1.2 (8 strips of 5 LEDs each) | 3V 3228 1.5W LED025 | 3V 3228 1.5W LED014 |
| LG | 32LF560U | 6916L-2224A 6916L-2223A | 6V 3535 1.2W | |
| LG | 42LF560V | 6V 2W 3535 | 6V 2W 3535 | |
| LG | 32LM340T | 32 ROW Rev 0.6 A-Type (6916L-1030A) 32 ROW Rev 0.6 B-Type (6916L-1031A) (4 strips of 9 LEDs) | 3B 2835 1W art. LED009 | 3B 2835 1W art. LED010 |
| LG | 42LB675V | 3V 2835 1W | ||
| DEXP | F32D7000C | cc02320d510v06 32e20 2×6 6s1p | 6V 3030 1-2W | 3030 6V 1.8W |
| DEXP | H32D7000E | SJ.CX.D3200601-3030ES-M (2 strips of 6 LEDs each) | 6V 3030 1-2W art. LED008 | 6V 3030 1.8W art. LED024 |
| Rolsen | RL-39D1309F | 2013CH390 13Y LVED 3228 04 REV1.0 | 3228 3V 1.5W | 3V 2835 1W |
| Rolsen | RL-28D1309T2C | SVJ280A01_REV3_5LED_130402 (3 strips of 5 LEDs each) | 3V 2835 1W | 3V 2835 1W |
| SUPRA | STV-LC32552WL | LED32F3200NE REV-01 | 6V 3030 1-2W | 6V 3535 1.2W |
| LG | 32LB552U 32LB580U | UOT DRT 3.0 32″ Rev0.9 A type (UOT_B) UOT DRT 3.0 32″ Rev0.9 B type (UOT_A) | 6V 3535 1.2W | |
| LG | 32LF561U | LG innotek DRT 3.0 32″_A type Rev0.0 LG innotek DRT 3.0 32″_B type Rev0.0 (Compatible with Rev0.2) 3 strips of 6 LEDs | 6V 2W 3535 | 6V 2W 3535 |
| LG | 32LB552B 32LB552V 32LF562V 32LB563V 32LB565V 32LB580V 32LF620U 32LF630V | LG innotek DRT 3.0 32″_A type Rev0.2 LG innotek DRT 3.0 32″_B type Rev0.2 (3 strips of 6 LEDs) | 6V 2W 3535 | 6V 2W 3535 |
| LG | 42LS570T-ZB | LG innotek 42lnch 7030PKG 60EA Rev0.2 | 6W 1W 7030 | |
| LG | 32LN570V | 6916L-1106A 6916L-1105A | 3V 2835 1W | |
| SUPRA | XKYS315D07-ZC14F-01 | 3V 2835 1W | ||
| SUPRA | STV-LC55ST2000U | K550WDC1 | 6V 3030 1.8W art. LED024 | 6V 3030 1-2W art. LED008 |
| LG | 42LF562V 42LF564V 42LB563V 42LB572V 42LB582V 42LB585V 42LB5510 42LB5610 42LB5800 42LB552V 42LY320C 42LY345C | LG innotek DRT 3.0 42″_A type Rev0.1 LG innotek DRT 3.0 42″_B type Rev0.1 (6916L-1957E 6916L-1956E) (6916L-1709A 6916L-1710A) (8 strips with 4 LEDs each) | 6V 2W 3535 | 6V 2W 3535 |
| LG | 42LB620V | 42″ DRT3.0 REV7 2 A-type 42″ DRT3.0 REV7 2 B-type Suitable strips DRT 3.0 42″_ Rev0.1 (8 strips with 4 LEDs each) | 6V 2W 3535 art. LED027 | 6V 1-2W 3535 art. LED017 |
| MYSTERY | MTV-3031LT2 | LED29D9-10(A) | 3V 2835 1W | |
| Samsung | UE32H5020AK | D4GE-320DC1-R1 (4 strips of 7 LEDs each) | 3V 3535 2.4W | |
| Samsung | UE40H5000AK UE40H5270AK UE40H5030AK UA40H6300 UA40H6340 UA40H6400 | D4GE-400DCA-R2 D4GE-400DCB-R2 5 strips of 6 LEDs + 5 strips of 3 LEDs Compatible strips (reduce current) | 3V 3535 2.4W | |
| Samsung | UA40J5100 UA40J5120 UA40J5020 | SAMSUNG_2014SVS40_3228_L06,R03 REV1.6 Compatible strips (reduce current) | ||
| PHILIPS | 40PFL5527T/60 | SLED 2012SGS40 7030L 56 REV1.0 | 6B 7030 1W | |
| Samsung | UE32D5000 | 2011SVS32_456K_H1_1CH_PV_LEFT44 2011SVS32_456K_H1_1CH_PV_RIGHT44 (two strips of 44 LEDs each) | 3V 0.5W 5630 | |
| PHILIPS | 47PFL7008S/60 | 47″ V13 ART TV REV 0.2 1 R-Type 6920L-0001C 47″ V13 ART TV REV 0.2 1 L-Type 6920L-0001C | 3V 7020 0.5W | |
| PHILIPS | 40PFT4509 | GJ-DLEDII P5-400-D409_V4 | 3B 3535 1W | 3B 2835 1W |
| SUPRA | STV-LC32T410WL | KL32GT618 *35017727 REV-01 2 strips of 10 LEDs each | 6V 3030 1-2W | 6V 3535 1.2W |
| LG | 32LB530U | 6916L-1204A (A1 2 pcs.) 6916L-1426A (B1 1 pc.) (32″ROW2.1 Rev 0.9 1 A1-Type & B1-Type) three strips of 7 LEDs | 3B 2835 1W art. LED009 | 3B 2835 1W art. LED010 |
| LG | 32LN540V 32LN542V | 32″V13 Rev 0.01 B1-Type (1 pc.) 32″V13 Rev 0.01 B2-Type (2 pcs.) (aka 6916L-1438A, 6916L-1437A) three strips of 7 LEDs | 3B 2835 1W art. LED009 | 3B 2835 1W art. LED010 |
| LG | 42LS570S | 42″ V12 Edge REV1.1 6920L-0001C | 6W 1W 7030 | |
| LG | 32LN536U | LG innotek POLA2.0 32″_A tupe Rev0.0 LG innotek POLA2.0 32″_B tupe Rev0.0 | 3B 1W 2835 | |
| THOMSON | T32D15DH-01B | 32HR331M09A5 | 3V 1.5V 3030 | 3V 2835 1W |
| THOMSON | T22D16DF-02B | 4C-LB220T-XR1 (two strips of 4 LEDs each) | 6V 1.8W 3030 art. LED024 | |
| SUPRA | STV-LC32T820WL | WD315-5620TML-0607 (L) Rev_B WD315-5620TML-0607 (R) Rev_B | 5620 0.5W 3V | |
| TELEFUNKEN | TF-LED28S9T2 | d2851235-06bs (H92K34 D140313) | 3V 2835 1W | |
| SUPRA | STV-LC32T650WL | 5800-W32001-3P00 Ver00.00 (three strips of 7 LEDs each) | 3V 3030 1.5W art.LED036 | 3B 3030 1.5W art. LED030 |
| LG | 49LB552V | 6916L-1789A 6916L-1788A (LG innotek DRT 3.0 49″_A type Rev0.2 LG innotek DRT 3.0 49″_B type Rev0.2) | 6V 2W 3535 | 6V 2W 3535 |
| LG | 32LF564V | 6916L-2223A (32″ DRT3.0 Rev0.9 A-Type) 6916L-2224A (32″ DRT3.0 Rev0.9 B-Type) | 6V 2W 3535 | 6V 2W 3535 |
| LG | 42LA620V 42LA621V 42LN613V | 6916l-1415a (R2-Type) 6916l-1412a (L1-Type) 6916l-1414a (L2-Type) 6916l-1413a (R1-Type) Total 10 strips of 5 LEDs | 3V 2835 1W | 3V 2835 1W |
| LG | 42LN542V 42LN5400 | 6916L-1386A (R1- Type) 6916L-1385A (L1- Type) 6916L-1388A (R2- Type) 6916L-1387A (L2- Type) (42″ ROW2.1 Rev 0.01) Total 10 strips of 5 LEDs | 3V 2835 1W | 3V 2835 1W |
| PHILIPS | 47PFT6569/60 | LBM470P1001-M-2(L) LBM470P0301-N-2(R) | 3B 3030 1.5W | |
| SHIVAKI | STV-32LED16 | MS-L1343 V1 (8D32-DNWR-A3206B) two strips of 6 LEDs each | 6V 3030 1.8W | 6V 3030 1-2W 6V 3535 1.2W |
| SHARP | LC-32LD135V | SVS320AA6_7LED_Rev.5 SVS320AA6_6LED_Rev.5 (three strips, 20 LEDs in total) | 3V 2835 1W | 3V 2835 1W |
| LG | 39LB650V | LG innotek DRT 3.0 39″_A tupe Rev0.1 LG innotek DRT 3.0 39″_B tupe Rev0.1 | 6V 2W 3535 | 6V 2W 3535 |
| LG | 42LS561T | LG innotek 42lnch 7030PKG 64EA Rev0.2 | 6W 1W 7030 | |
| LG | 24MT45V-WZ 24LB450U | LG innotek 23.6inch Rev0.1 (18 LEDs) | 4014 3V 0.2V | |
| LG | 24LB457U | V236B1-LE2-TREM11 (18 LEDs) | 4020 3V 0.5W | 4014 3v 0.5W art. LED022 |
| SUPRA | STV-LC32510WL | 32D7-LIGHT-BAR-PCB (390mm 3 LEDs each, 5 strips total) | 3030 3V 3W (LXML-PWD9N-0000) | |
| LG | 49LF640V 49LF620V | 6916L-1944A (5 pcs.) (LG innotek DRT 3.0 49″_A type Rev03.1) 6916L-1945A (5 pcs.) (LG innotek DRT 3.0 49″_B type Rev03.1) (10 strips - 45 LEDs in total) | 6V 2W 3535 | 6V 2W 3535 |
| AKAI | LES-32V01M | echom-32cb-4632j2003-a1 (3 strips 603mm, 8 LEDs each) | 3B 2835 1W | |
| AKAI | LEA-32M19P | IC-A-HWW32D044 (A6/70-721m/3.9-4.0v) 3 strips of 10 LEDs each | 3V 2835 1W LED011 | |
| MYSTERY | MTV3223LT2 | LED315D10-ZC14-01(D) LED315D10-ZC14-02(D) LED315D10-ZC14-03(D) three strips of 10 LEDs | 3V 2835 1W | |
| MYSTERY | MTV-2430LTA2 | LED236D7-01(B) two strips of 7 LEDs each | 3V 2835 1W | |
| MYSTERY | MTV-4129LTA2 | LED40D11-ZC14-01(A) (4 pcs.) LED40D11-ZC14-02(A) (4 pcs.) 8 strips, 44 LEDs in total | 3V 2835 1W | |
| PHILIPS | 50PUT6400/60 | LB50045 V0 V1 6 lines of 6 LEDs and 6 lines of 5 LEDs | 3B 3030 1-1.5W art. LED036 | 3V 3030 1.5W 3V 2828 1.5W 3V 3030 1.5W |
| PHILIPS | 55PFL5507T/12 | Side strip 80 LEDs SLED 2012GS55 7030 80 REV1.0 | 6V 7030 1W | |
| BBK | 32LEM-1018/ T2C | LB-C320X14-E11-H-G1-SE 3 strips of 6 LEDs each | 3V 2835 1W | 3V 2835 1W |
| BBK | DS55M78-DS02-V01 (10 strips with 5 LEDs each) | 3V 3030 1.5 W | ||
| HISENSE | 40K321UW | SAMSUNG_2014CHI396_3228_10_REV1.0 4 strips of 10 LEDs | 3228 3V 1.5W | |
| Xiaomi MI | L55M5-AD | MI55T32_5X10_MCPCB 12mm_V1 (KA7H-33F1-2-B -G78-32-47055) (5 strips of 10 LEDs each) | 3B 3030 1-1.5W art. LED036 | 3V 3030 1.5W 3V 2828 1.5W 3V 3030 1.5W |
| TCL | L32S6FS | 32HR330M12A0 V6 (only one strip of 12 LEDs) | 3030 6V 2W | |
| Panasonic | TX-32ER250ZZ | K320WDC1 (2 strips of 6 LEDs each) | 3030 6V 1.8W | 3030 6V 1-2W |
| Panasonic | TX-LR32EM5A | LG innotek 32INCH 7030PKG 48EA_74580 Rev 0.2 (total 48 LEDs, 1 strip 4 channels) | 7030 6V 1W art. LED018 | |
| Panasonic | TX-55FXR600 | TNP4G623-1 22 strips of 3 LEDs | 1313 3V 3W LED035 | |
| Orion | OLT-32002 | CCO2320D570V12 320L 32E9 7S1P 2X7 1210 (2 strips of 7 LEDs) | 6V 3030 1-2W art. LED008 | 6V 3030 1.8 W art. LED024 |
| HAIER | LE42B8000TF | LED42D15-01(C) (4 strips of 15 LEDs each) | 3V 2835 1W | |
| HAIER | LE32M600 | LED315D10-07 (B) (3 strips of 10 LEDs each) | 3V 2835 1W LED011 | |
| DAEWOO | L32V680VKE | K320WDX A2 Type A K320WDX A2 Type B (Two strips of 6 LEDs each) | 6V 3030 1.8W LED024 | 6V 3030 1-2W LED008 |
| PHILIPS | 32PHS4012/12 | |||
| ERISSON | 32FLEA96T2SMW 32HLE20T2SM | MS-L1343 V2 2017-01-04 (CY 2*6_3030_300mA_36V) (Two strips of 6 LEDs each) | 6V 3030 1.8W LED024 | 6V 3030 1-2W LED008 |
| Prestigio | PTV32SN02Z_BK_CLS | |||
| IRBIS | 32S30HA105B | SQY32LB_2X9_MCPCB_V1 (2 strips of 9 LEDs each) | 3V 2835 1W LED011 |
Why might the LED backlight break?
It is immediately worth noting an important design feature of LED backlighting. Although each of its elements operates at low voltage, all diodes are connected in series to stabilize the power supply to them from a single source. The result is a huge disadvantage: if one semiconductor crystal fails, the entire backlight goes out.
A twofold situation arises. On the one hand, the user receives a solution with increased reliability. The circuit for supplying voltage to the diodes is simple, it has great fault tolerance. Modern semiconductor elements are reliable and stable. However, no one is immune from manufacturing defects and other unpredictable things. As a result, if one light element fails, the backlight turns off.
This is unpleasant, to say the least. After all, without background light, you can’t see anything on the screen. The matrix is completely dark. You can only see the picture with a flashlight by shining it on the display. But there is no need to be upset. With some skills and a little special equipment, you can even fix your TV yourself.
Operating principle of LED/OLED matrices
It is important to know the operating principle of modern TV matrices for one reason - failure of the backlight is not such a serious problem.
The TV screen itself is made of millions of low-brightness color LEDs. In order to see the picture on the TV screen, the matrix is equipped with a bright white LED backlight. It is its light, subsequently colored by the LED/OLED LEDs of the matrix, that we see on the TV. The design of the LED screen module of modern television receivers looks something like this: From the diagram it can be seen that the backlight is an auxiliary component of the TV screen module. The failure of this device does not in any way affect the operation of the screen itself. This is easy to verify. Turn on the TV (preferably with no light in the room) and direct the light from the flashlight onto the screen. In the place where the light from the flashlight falls, the picture currently displayed on the screen will be visible.
How to check the backlight
The simplest and most effective method is already indicated above. If you can see an image on the screen when you shine a flashlight through it, you don’t even have to look for other problems. Decoders, power supply system, signal loops, graphic processors and other key components are working normally. The problem has occurred in the backlight or its control unit.
To check the backlight, you need to remove almost everything from the TV. But all this can be done carefully and quickly. Checking the backlight consists of two stages.
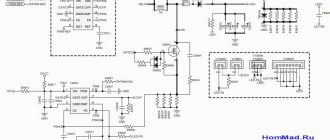
- You need to make sure that voltage is applied to the diode structure. This problem is solved by the LED driver, a separate circuit of the TV power supply. If there is no voltage at its output, the backlight will not work.
- If there is voltage on the driver, and during inspection no areas of local overheating, fallen off conductors or damage to current-carrying paths are found, proceed to checking each of the crystals.
Although the work will require special equipment, its operation requires only minimal knowledge and skills. The list of equipment includes a multimeter, a soldering iron (air soldering station) and sharp probes. But the scope of knowledge is somewhat broader. The repairman will need to be able to check the parameters of sections of the circuit. It would be useful to know about the basic voltage values with which semiconductor crystals operate. You will also need accuracy, dexterity and confident soldering skills with an air dryer. Therefore, if all this is not available, it is not recommended to start self-repair. It is better to contact the service for qualified help.
- Advantages and disadvantages of LED backlight for TV + DIY repairs
More possible problems and ways to solve them
Usually, expensive equipment is repaired at a service center, but sometimes the problem may turn out to be minor, and you can solve it yourself. Let's look at a few common problems and how to fix them yourself.
TV won't turn on
This problem is the most common, and almost every third LG TV owner encounters it. You shouldn’t immediately assume that TV receivers are of poor quality, everything is much more banal. The batteries on the remote control may be dead or the electrical cable may be damaged. Check that the plug fits tightly into the socket and that the socket itself is in good condition. If basic measures did not help or correct the situation, then you need to look deeper, namely in the hardware.
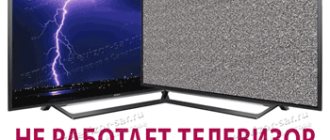
No image on screen
If the sound works, but the image is not displayed, then most likely the problem is the backlight. How to check the LED backlight on a TV is described above in this article. There may be several reasons:
- no current is supplied to the light bulbs if gas-discharge lamps are used;
- the diodes have burned out if strips with LEDs are used;
- scanning electrodes are faulty.
There is no image, but the bar is lit
The type of stripe can be different: located vertically and horizontally. This indicates that there is a problem with the sweep electrode. To confirm this, you need to connect another TV device with a working matrix. This situation can only be corrected by completely replacing the damaged part. If a spot appears on the display rather than a stripe, then the reason is most likely the same.
If backlight repair is required
Backlight repairs should be carried out in the following order:
- Turn the TV device over and unscrew the fasteners on the back of the case.
- Disconnect the cable from the chip boards.
- Remove the latches on the matrix and unscrew the connecting elements.
- Remove the top of the screen to access the diodes.
- Use a tester to check the performance of each strip.
- Identify the faulty strip.
- Using hot air from a hair dryer, heat the tape under the strips and remove the faulty diodes.
- Replace broken diodes.
- Test the connection to the current and the flow of electricity.
- If there are no problems, then tighten everything in the reverse order.
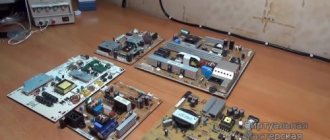
Disassembling the product
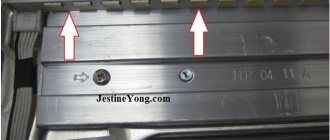
The TV has three main boards - main, T-con and power supply, all of which are clearly visible in the photo.
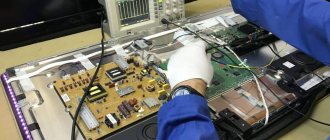
Removing and disassembling the matrix with your own hands is a very painstaking job, one careless move and you can buy a new TV, so it’s better not to undertake repairs without experience. Experts highlight the following main points when disassembling the matrix:
- it is necessary to prepare a work area and two tables on which to lay matrices and scattering films;
- Before starting this work, you should thoroughly wash your hands so as not to accidentally leave traces of dirty fingers on the filters and the matrix itself - this can harm the image quality later;
- special attention must be paid to decoders - one inaccurate movement can lead to a break in the cable.
Subsequent dismantling is carried out in several stages.
- The T-con board is easily removed after disconnecting the cables and unscrewing the bolt located between them.
- It is necessary to remove the metal protection from the decoders - to do this, unscrew the fastening bolts on the sides, after which they are held only by rubber fasteners.
- It's time to remove the front frame of the TV - unscrew the fastening bolts along the entire contour, place the product on the back cover and remove the frame.
- We remove the frame, turn the screen over, but at the same time carefully hold the matrix, because it is not secured by anything. The product lies on the matrix, the decoders are on top and you can remove them from the rubber mounts, but with extreme caution.
- The matrix remained on the table so that it does not interfere with further work - transfer it to the previously prepared place.
Troubleshooting
Now the actual repair of the LED backlight of the TV begins: to do this, you need to carefully unclip all the latches along the contour, remove the plastic frame and remove the diffusing films to expose the LEDs.
Different models of LG TVs will have their own set of LED backlights: for the LG 32LN541U there are three rows of 7 LEDs, and for the LG 32LB582V there are three rows of 6 LEDs.
As noted above, in all TVs that use such backlighting, the LEDs are connected in series, so if one of them burns out, the entire system stops working. If the LED driver is faulty, then no voltage is supplied to the entire system, and when one of the LEDs burns out, then the voltage flows, but all the efforts of the device to illuminate the system are in vain: even if you supply 200 volts, the circuit is open.
As we can see from the photograph, the backlight consists of 18 LEDs; during measurements, the voltage without load was 140 V, that is, each one accounted for 7.8 V. When we take into account the voltage drop on each strip and the total load, the conclusion will be as follows: this model uses 6V LEDs.
Finding a burnt-out LED is not easy: if there is no burnout at the mounting location, then you need to check each element separately.
Can I replace the backlight myself?
The backlight is a fairly simple electronic component. It consists of several tens or hundreds of white LEDs. Typically, these LEDs are combined into strips arranged horizontally or vertically with the same distance between each other. For example, the photo below shows the backlight module for LG TVs of the 42LA6230 model range:
Each of the 5 LED strips has 10 LEDs in its design, i.e. there are 50 of them in total. The strips can be unsoldered from the backlight module and then just as easily replaced with new ones.
A special case of backlight failure—the burnout of one or more LEDs—is shown in the image below:
From here you can see that the LED strips are located behind the TV screen module. Those. they can be repaired or replaced at any time. But it is not recommended to do this without experience in repairing delicate electrical equipment.
Where to get spare parts
Today, finding spare parts for your TV is not difficult. The easiest way is to order them from the model manufacturer. In this case, you can buy ready-made rulers assembled, with conductors, diodes and lenses glued to them. They just need to be installed in their regular places and connected. But there is a problem of long delivery and quite high prices.
The second option is to order LEDs in online stores or on the Aliexpress site. In this case, the price of the kit will be acceptable, but you will have to wait quite a long time. Finally, there is the option of going to service workshops in order to select and purchase light elements that have already been used.
- LED TV backlight repair at home
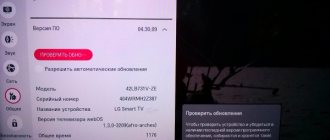
What should I do if the IN-START button in the AnyMote app does not work?
If the IN-START doesn't work, then from the AnyMote home screen, tap the gear icon in the top right corner to enter the app settings. In the settings, find the “Advanced settings” .
Here you will find an option called Msgstr "Use alternate Ir commands". Activate this option because it is possible that your smartphone is not sending commands correctly or is not compatible with the TV without it. Enabling this option should enable compatibility mode, making it more likely that the virtual remote control will work correctly.
After activating this option, try LG Remote Control > Remote Service and press the "IN-START" button again. This time the command should be sent correctly and the screen will ask you to enter your PIN into the service menu.
How to change diodes
If you are lucky enough to buy ready-made rulers from the manufacturer, the problem is solved simply: they are installed entirely in place of the old ones. Even without checking individual diodes. There is a more difficult way. Having found the burnt diodes, they are cut out along with the section of the substrate with conductors. The same part obtained from the new line is placed in this place. All that remains is to restore the tracks, that is, solder a couple of short conductors into the gap.
But if you only have a set of used diodes or a set from Aliexpress in your hands, you will have to tinker.
How to remove a lens
The main thing is not to damage the legs of the lens. This will make it easier to install it in place. The operation is carried out very carefully. The temperature is set on the hairdryer to 100-120 degrees, the exhaust is directed to the substrate tape from below. The distance is selected empirically, usually about 10 cm. A thin strip of plastic is placed under the lens and a light attempt is made, like a lever, to lift it. As soon as the hair dryer straightens the glue, the part will separate from the backing. As you work, it is recommended to write down where everything is removed from, so that you can then reinstall it correctly.
How to remove a diode
The diodes are also heated with a hairdryer. The air temperature is set at 320-350 degrees. You can tell that the diode has separated by the melting of the solder along its edges. The part is removed with tweezers.
How to prepare a landing site
After removing the old diode, a place is prepared for the new one. That is, they remove excess tin on the conductive areas, get rid of leaked flux, and clean everything. Then the contact points are tinned.
How to install a new diode
The new diode is very carefully placed on the prepared area with tweezers. Without displacing the part or moving the backing tape, the latter is heated from below with a hairdryer. As soon as the molten tin is visible, the heat supply is stopped. After the metal on the contact pads has cooled, the diode is ready for operation.
Putting the lenses back in place
There is one operation left before the installation is completed. It needs to be done quickly. The lenses are returned to their places according to the recorded dismantling card. Superglue is applied to the legs of the part. It is advisable to use gel, as it hardens more slowly. The legs are placed at the same points, while ensuring that the optical axis of the lens passes through the center of the semiconductor crystal.
Important! If you place all the lenses quickly, the glue will not have time to harden. This makes it possible to check and, if necessary, make adjustments.
To do this, the backlight is connected to the driver and a light-scattering filter plate is placed on top. If it is evenly lit, you don't need to do anything. But if defects are detected, the lens at the location where they are found can be slightly moved to the correct position.
And this is a repaired view of the backlight panel assembled and ready for further use:
- LEDs for LED backlighting of TVs. Where to buy and reasons for failure.
Final works
When the repair of the LED system of LG TVs has been completed, before making final assembly, we connect the voltage to the strips and check the glow of all LEDs. If everything is fine, then we assemble the TV, performing all operations sequentially and with caution, as during dismantling.
After finishing, it is better not to turn the backlight brightness to maximum, but to limit it to 75% - in this mode, the LEDs operate in normal mode and, according to experts, will last much longer.
We install the TV in its original place, turn it on and enjoy the quality: if there are no extraneous spots of light or dark color anywhere on the screen, it means that the repair was carried out correctly, in compliance with all recommendations. And you can get the most out of your TV by learning how to properly set up digital channels on your LG TV.
Light-emitting diode
An LED is a semiconductor device capable of emitting light in the visible spectrum when voltage is applied. This is caused by design features in the manufacture of pn junctions using special material. The backlighting of LG TVs uses various types of LEDs, differing in geometric dimensions and supplied voltage.
LED backlight
The most reliable LG TVs of 2020
TV LG 32LM570BTV LG 50UM7300TV OLED LG OLED65C9PTV OLED LG OLED55B9PTV LG 55UM7450
Continuing the topic: Subscribe, and your VK feed will contain all the most interesting things about technology: Calculation of consumption
electricity equipmentCalculateShow more —> x28.08.2020What you need to do immediately after buying a new smartphone on AndroidSmartphone27.07.2020Top programs for smartwatches on Android WearSmart watch27.07.2020How to choose a smart TVTV
Sorry. No data yet.
Your opinion Loading...Equipment reviews Calculator
electricity calculationCalculate04/6/2020iLife V7s Plus: affordable robot vacuum cleaner for large apartmentsReviews03/24/2020iPlus X700 robot vacuum cleaner: powerful, efficient, affordableReviews03/10/2020Cleverpanda i7 robot vacuum cleaner review: quiet cleaning of any surfacesReviewsContents