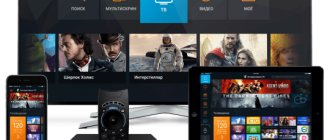
The MAG-245/250 set-top box is one of the most successful in the line of the Ukrainian company Infomir and one of the best, if not the best, in its price segment. Therefore, it has gained well-deserved popularity among Russian consumers.
There are a huge number of different instructions on the Internet for setting up this set-top box, but often they are all limited by the settings of a particular provider. As a result, the instructions will be far from complete and will not reveal the wide capabilities of the device at all.
Today we will discuss various and complete ways to use this set-top box with any IPTV traffic content provider.
Modernization of MAG TV set-top box
We will describe a simple way to make a budget multimedia center from a regular MAG-250 (Aura_HD) TV set-top box and their compatible copies and models.
The problem with standard solutions like Smart-TV and all other standard tools is that, for a number of reasons, they do not allow us to create a truly real multimedia service, fully using the capabilities of the device we purchased. And the capabilities of this hardware are much more extensive than what a manufacturer can offer us, constrained by copyright agreements and contracts with large holders of multimedia content.
Software
All MAG 250 firmware is based on Linux 2.6.23, which serves as the basis for the rest of the set-top box software. Any user with the necessary knowledge can create the necessary programs and interface. There are detailed instructions on the manufacturer's official website. Thanks to this feature, IPTV providers can create entire services and their own platforms. Ordinary users who bought the MAG 250 console can do the same.
You can download the official software for the set-top box from the manufacturer’s website. The MAG 250 firmware can also be updated via the Internet. The developer quite often releases new versions of the software with changes and additions.
Both official and unofficial software can be installed in several ways - via BIOS or from a USB drive, via Multicast or the Internet. The update can be performed either automatically or manually by the user.
The main feature of the MAG 250 set-top boxes is the variety of functionality: all options depend not on the IPTV set-top box itself or its software, but on the selected provider and the content offered by it.
Using the built-in set-top portal
The built-in portal is empty by default: it does not contain any channels. You need to add the channel list there manually. The list of channels should be located either at any address available for downloading on the Internet or on a local network. The channel list URL must point to a file in m3u or m3u8 format. The file must contain links to a list of streams (channels). You can easily download such a ready-made file on the Internet or create it yourself by editing it in Notepad or any other text editor.
You can read about editing the channel list in a separate article. After downloading the list of channels, you can edit it directly in the set-top box using the remote control: move channels, create groups, edit their URL and delete them. When you exit the channel menu with the Exit button, the Set-top box will offer to save the changes.
- Hacking a Rostelecom TV set-top box
The convenience of this approach is that you can add any channels to the list of channels, both from your provider and any others - paid and free - found on the Internet. The downside is that the functionality of the set-top box does not support viewing channels from the archive of TV programs - you cannot rewind the broadcast to the desired date and time.
At the same time, I have a subscription to the paid IPTV service edem.tv, which provides access to hundreds of channels, including HD in good quality for only $1 per month. This service also provides its own playlist for access to all channels at once. The playlist can either be downloaded or opened in any video player that supports playback of streaming content, for example, the most popular VLC. I download this file too, open both in the Notepad++ editor, edit it line by line, merging the lists and leaving only the channels I need. For each channel, this file contains 3 lines: the group to which the channel belongs (optional line), URL link to the stream and the name of the channel.
The inside of an M3u sheet looks something like this:
#EXTINF:1,Match! TVhttps://persik.by/stream/3903/293564/276.m3u8#EXTINF:1,Match! Arenahttps://persik.by/stream/3903/293564/261.m3u8 #EXTINF:1,Match! Planethttps://persik.by/stream/3903/293564/10269.m3u8#EXTINF:1,Match! Game https://persik.by/stream/3903/293564/10270.m3u8#EXTINF:1, Match! Our sport https://persik.by/stream/3903/293564/10271.m3u8
There is also an option to simply indicate a direct http link to posting the playlist on the edem.tv servers - in case you only have one playlist and you do not plan to edit it. If you want to use the edem.tv playlist, but edit it online (for example, change the order of channels and their grouping), then you can place it on the free Ottplayer service. This service allows you to place third-party playlists on it and view channels through this service with the ability to access the TV program guide and program archive.
To add a new m3u playlist:
- In the main menu, select IPTV channels, enter the list of portal channels
- Press the Menu button, a menu will appear on the right
- Select “Add IPTV list”
- Using the remote control and on-screen keyboard (language translation - F4), enter the list URL, press OK
- A list of channels will be added to the left. If you already had some channels in the list, then new ones will be added to the end of the list.
- If you want to organize channels into groups, then select the necessary channels with the F2 button, press Menu, select the “Add to group” option.
- Click Exit, save the channel list when exiting.
Firmware for TV set-top box mag 250
Possible problems
Setting up a set-top box does not always happen immediately and without any problems. More often than not, users experience difficulties loading the playlist, complaining that the device “does not see” the list. Although it is saved on a flash drive according to all the rules. Or when you press the blue button on the remote, nothing happens.
First, you should make sure that the file system of the drive is FAT32. Experienced film experts claim that without fulfilling this condition, nothing will work. Then the playlist format is checked. It should be of the form playlist.m3u (where the first part before the extension is the name). And, if the list is created with any other extension (not m3u), it will also not be played.
Often the solution is to update the set-top box software, downloading the latest, most recent firmware version. Many questions are related to unstable playback of the playlist file. To avoid having broken links, it is important to download collections from trusted sources. Use self-updating sheets.
MAG set-top boxes support (can analyze the contents of) external playlists in the M3U format - text files with the .m3u extension. Further descriptions and examples are provided for m3u playlists.
Starting with the 4xx series, STB MAG supports additional playlist formats - see Technical Specifications.
Users are also given the opportunity to manually add channels and perform other Operations with the list of IPTV channels (deleting, editing a channel, etc.).
Set-top box capabilities for providers
Based on MAG 250 devices, providers can create fairly large user IP television networks.
Since the set-top box supports modern Middleware systems, each user can deploy their own portal with support for both Smart TV and IPTV set-top boxes.
When ordering a large batch of devices, the manufacturer customizes the software and appearance of the consoles. For example, the provider’s logo can be applied to the case and a unique key can be installed that will not allow the set-top box to be used in the networks of other providers.
The open source of internal software makes it possible to create your own system firmware, adding various services and functions.
Operator software mostly affects the functionality of any IPTV set-top box. Therefore, changing client hardware will not require large investments from the provider.
Subscribers can be provided with various services - TimeShift, IPTV, delayed viewing, karaoke, Internet radio, their own online cinema and many others.
A provider using the Stalker media portal can offer subscribers the following services:
What to do if the remote control for the Beeline set-top box does not work
- watching television channels in FullHD resolution;
- ability to record broadcasts;
- access to TV program;
- watching any films, series, programs, TV shows;
- listening to Internet radio;
- a video catalog with the ability to play any of them;
- free access to materials on YouTube video hosting;
- access to images located on Google’s resource;
- latest exchange rates, weather forecast;
- various entertainments - games, karaoke and jokes.
In general, the MAG 250 IPTV set-top box leaves a positive impression during use. A wide selection of providers significantly increases the functionality of such devices and allows you to select exactly those functions and options that are most suitable for the user.
Basic Settings
After connecting all the necessary cables and installing the set-top box in the optimal location, you can turn on the device. The first start-up is usually quite long and can take up to 10-15 minutes. This is due to a software firmware update. Rostelecom quite often releases system updates after it has been finalized. Installing these updates when you first start your device will take time. Updates improve the quality of the console and its functionality.
The set-top box will become available for use as soon as the automatic flashing from Rostelecom is completed. One of the list of Rostelecom channels will immediately begin playing on the TV screen. Switching channels is carried out, as usual, using the remote control. In addition to the cable connection, the device has a built-in Wi-Fi module for wireless Internet connection and IPTV. Wi-Fi setup is done through the settings menu. To connect, select your access point and enter the password.
Despite the fact that the main function of the set-top box is to play digital TV, the device also has other useful features. There are functions for recording broadcasts and delaying viewing of programs (up to 48 hours of waiting). In addition, thanks to the firmware from Rostelecom, the system offers a large selection of official films that can be purchased directly or rented
An important function is access to information services, such as weather forecasts, exchange rates, Yandex maps. Another interesting feature is access to social networks, which allows you to view photos, like, and share movies directly on the big TV screen
The set-top box has two USB connectors, which makes it possible to connect portable media to play movies or other multimedia files. In conclusion, to summarize: the MAG 245/250 device will be a useful acquisition with a wide range of functions, which will give you the opportunity to enjoy using your TV as a multimedia device.
If you still have questions, we recommend watching the following video.
Specification
Processor: STi7105
RAM: 256 MB
Flash memory: 256 MB
Operating system: linux 2.6.23
External interfaces: Optical audio output S/PDIF, HDMI 1.3a (on the rear panel), USB 2.0 (1 on the front panel and 1 on the rear panel), composite + stereo A/V output (mini jack on the rear panel) , Ethernet port 100Mbps (on the rear panel), connector for connecting a 5V power supply (on the rear panel), LED indicator (on the front panel)
Media content sources: USB devices (external hard drive, USB flash drive, USB card reader, etc.), PC and NAS on the local network (SMB, NFS, UPnP, HTTP), other Internet and local TV broadcast networks (HTTP, UDP / RTP unicast/multicast), video streaming services are fully supported
Web engine: WebKit
DRM option: Verimatrix, Secure Media
Video modes: 1080i, 1080p, 720p, 576p, 480p, PAL, NTSC
Video codecs: MPEG1/2 [email protected] , H.264 [email protected] 4.1, MPEG4 part 2 (ASP), WMV-9 (optional), VC1 video, XviD; support for high-bitrate video (up to 40 Mbit/s and higher)
Video formats: MKV,MPEG-TS,MPEG-PS, M2TS, VOB, AVI, MOV, MP4, ASF, QT, WMV (optional)
Audio codecs: MPEG-1 layer I/II, MPEG-2 layer II, MPEG-2 layer III (mp3), MPEG-2 AAC (optional), MPEG-4 AAC LC 2-ch/5.1ch (optional), MPEG -4 AAC+SBR 2-h/5.1ch(optional), Dolby Digital
Audio formats: MP3, MPA, M4A, WMA (optional), Ogg, WAV,AC3,AAC
Image formats: JPEG, PNG, BMP, GIF, RAW
Subtitles: DVB,SRT (support coming soon), built-in text
Playlist formats: M3U
Ethernet: 10/100 Mbps
Stream media protocols: RTSP, RTP, UDP, IGMP, HTTP
Software: Fully compatible with MAG-100, MAG-200, MAG-250(P) (API JS, API C) built-in media portal with IPTV functionality HTTP 1.1, HTML 4.01 XHTML 1.0/1.1 DOM 1, 2, 3, CSS 1 , 2, 3 XML 1.0, XSLT 1.0, XPath 1.0 SOAP 1.1 JavaScript ECMA-262, revision 5 Media JavaScript API C layer SDK
Dimensions (w/d/h), mm: 125/86/28
Set-top box weight, g: 156 (with packaging: 620)
Contents: MAG-250 Micro set-top box, user manual, mini jack to RCA (A/V) cable; power adapter 5V 1.5A, remote control, AA batteries - 2 pcs, packaging.
Warranty: 2 years
Selecting NAND/NAND2/DHCP boot mode
The STB software download process is activated after the STB or STB is powered on. The main software (firmware) is loaded into the STB random access memory (RAM). The source of the main software (image file) can be internal NAND flash memory (normal boot mode) or external network storage, the data about which the set-top box requests from the DHCP server.
To change the boot mode you need to:
- ;
- Select “Upgrade Tools” or “Upgrade Menu” (if you are using a second copy of the bootloader);
- Select “Boot Mode” and press the remote control to the right to set the boot mode:
- DHCP - loading according to a script that STB requests from the DHCP server. An example of setting up a DHCP server is given in the section DHCP server - configuration, downloading and updating software.
NAND or NAND2 are banks of internal reprogrammable STB memory. Used to store the main STB software. The bootloader will use the copy of the main software specified in this setting.
If the software is successfully loaded, the user interface of the built-in or external portal (depending on the STB software settings) should be displayed on the TV screen.
1. The use of two banks of internal reprogrammable memory STB (NAND and NAND2) increases the reliability of the software update process: if the update operation fails, an alternative memory bank can be used to load the STB.2. After each successful update, the number of the NAND bank from which to boot is automatically reversed.
Playing content
To call up positioning forms when viewing or listening to a file, press the navigation buttons on the remote control. The form contains:
- exact position time;
- step value in seconds;
- duration of content playback;
- current position indicator.
Each press of the ← and → buttons changes the current position by 1 step, the value of which can be changed using the ↑ and ↓ buttons from 5 to 900 s. The default step is 60 s. The first press of the navigation buttons stops content playback to allow the user to change the positioning step. Playback continues from the set time after 1 s.
Network connection
The next stage of preparation for operation of the MAG-250 is setting up an Internet connection. There are two options:
- direct connection to the network;
- via router.
When connecting the MAG-250 via a router, the procedure is as follows.
- Connect the Ethernet network cable to the corresponding connector of the set-top box and router.
- Connect the HDMI cable to the MAG-250 and TV connector. If there is no HDMI input, use an AV cable and the TV's composite input.
- Connect the power supply.
- Configure the router.
- Turn on the TV and use the remote control to select the signal source (SOURCE, HDMI or INPUT).
If the MAG-250 set-top box is connected via an HDMI cable, then after pressing the INPUT or SOURCE button you should select the HDMI signal source. If through composite, then you need to press AV on the remote control.
What do you need to know before installing the firmware?
First, you will need to determine the version of the installed software, since this will determine which firmware file you download in the future. Therefore, your procedure is as follows:
- Open the settings of the set-top box and find the “Firmware” item.
- Now look at the version. Now we will compare it with the data that is presented and conditionally divided below. This is done for convenience, which you will appreciate later.
So, our three conditional divisions by firmware:
- Your version is 2248.
- Your version is lower than 2248.
- And the last option is 2281.
If with version 2281 everything is extremely clear and understandable (you have the latest version of the operating system installed, and you do not need to reflash anything), then in the other two cases we will tell you in detail what you need to do.
Setting up the MAG-245/250 set-top box to work with any IPTV provider
The MAG-245/250 set-top box is one of the most successful in the line of the Ukrainian company Infomir and one of the best, if not the best, in its price segment. Therefore, it has gained well-deserved popularity among Russian consumers.
There are a huge number of different instructions on the Internet for setting up this set-top box, but often they are all limited by the settings of a particular provider. As a result, the instructions will be far from complete and will not reveal the wide capabilities of the device at all.
Today we will discuss various and complete ways to use this set-top box with any IPTV traffic content provider.
Entering the bootloader menu
- Turn off the power to the STB or apply a soft reset to the STB (command in system settings);
- Press and hold the “menu” button on the remote control;
“Menu” button on the SRC-4513 (slim) remote control
- Turn on the STB power while continuing to hold the “menu” button (in case of a soft reset, skip this step);
- Release the “menu” button after entering the bootloader menu.
In some cases, there may be no picture on the screen if the analog TV receiver does not receive a signal in PAL mode. If there is no picture:
- turn off the power to the STB;
- press and hold the “menu” button on the remote control (point the remote control at the STB);
- Apply power to the STB while continuing to hold the “menu” button;
- hold down the “menu” button for about 5-10 seconds;
- Switch the PAL - NTSC mode by pressing the red “F1” button on the remote control once.
Creating profiles and categories
Press MENU and go to the “Favorites” menu, which contains the following functions:
- “Manage favorites” to create channel categories and change their lists.
- “Manage Profiles” to create profiles and configure them for each user, assigning available channel categories to profiles.
- “Change profile” to change the active profile.
If more than one set-top box is used, then it is enough to manage profiles and favorites on only one.
Using external portals for the MAG-245 set-top box
Our set-top box allows you to specify in the settings the downloading of content from external portals. There are quite a lot of such portals; for each supported model of set-top box they provide their own access link.
In particular, the Smotreshka portal (smotreshka.tv) provides access to IPTV under various tariff plans for both Internet providers and private clients. Smotreshka supports many different viewing platforms, in particular the Infomir set-top box.
Adding new portals occurs as follows:
- from the main menu select Settings
- Click System Settings > Servers > Portals
- Using the remote control and on-screen keyboard (language translation - F4), enter the portal URL and a custom name.
To configure the loading of such a portal in the MAG-245 set-top box, you need to specify the URL in the portal address settings, and then enter it by selecting it from the list. Address for MAG set-top box: https://mag.somteshka.tv
Of course, you will need Internet access to download the portal. When loading the Smotreshka portal for the first time, it requires you to provide your account information to log in. You can enter them using the on-screen keyboard and the console remote control. After logging in, you will see a list of channels available to you according to your tariff plan.
There are also free portals for MAG-245/250. Such a portal is provided by the same Ottplayer service discussed above. Let me remind you that Ottplayer itself is not an IPTV service provider; it provides a platform for posting your playlists and playing them through their player or set-top boxes with a web portal.
To add Ottplayer to the MAG set-top box, enter the address widget.ottplayer.es.
The Ottplayer portal is convenient because it supports as many playlists as you have added on the service website. You can easily switch between them at the bottom of the portal. As you understand, playlists are in no way tied to providers - within the portal you can play any content, as long as the Internet works. It also supports a program archive, scrolling back and forth, and a TV program guide (provided that you have included a link to it in the m3u file).
Uploading a playlist in m3u format to STB via URL
Adding an IPTV list - downloading a preset list of channels from the server:
Open the IPTV channels window ⇒ Operations.
In the menu that opens, select Add IPTV list.
In the Add IPTV list window that opens:
in the File encoding field, select the required encoding (m3u playlists usually use utf-8 encoding, otherwise select the required encoding);
in the URL field, enter the address where the list of channels is located;
Click Save (OK).
Example of filling in the URL field
If the channel list does not load:
the file address (URL) is entered incorrectly;
there is no connection with the server;
a file with the same name was not found on the server;
the file is not in the correct format.
Torrent client
The “Transmission” torrent client and the “shared files” server are already installed on the set-top box. However, these extensions are not activated yet. You can enable them in the Set-top box Settings in the Extensions menu.
If you want to access files or use the media center as also a file storage, then both extensions must be enabled.
Now, you need to insert a USB flash drive or removable hard drive into the rear connector.
The set-top box supports popular file systems such as NTFS, FAT32/64, EXTx, and also supports large disks, so you can easily use modern external hard drives with a capacity of more than 1TB as a storage device. This already adds to your set-top box the role of a NAS drive with multimedia functionality.
Our example involves a ready-made solution - this is an external hard drive from the manufacturer Western Digital, My Passport Ultra Metal Edition line, with a capacity of 2 TB.
The choice of device is due to the fact that the disks of this manufacturer are durable, subject to operation in 24/365 mode. It has an aluminum body, which means it is less susceptible to overheating when used around the clock, and is also equipped with a built-in energy saving mechanism. Therefore, at a time when you are not using it and there are no active file sharing tasks, your drive stops spindle rotation, which significantly saves hard drive resource.
Now you need to get to the set-top box through a regular Internet browser, having found out its IP address on your network using this path: https://set-top box ip-address:9091/
Also, there is an even more convenient way to add files to the download list using programs for Android devices that allow you to manage Transmission.
- Remote Transmission GUI
- Remote Transmission
- Torrnado
- Transdrone
The example shows the interface of the Torrnado program. It seemed to us the most convenient to use, but they are practically no different from each other either fundamentally or functionally.
Just open the link in your browser using this program and the download will be added automatically.
All the files that you add for downloading to this program will automatically appear on your set-top box and all you have to do is start viewing them.
Viewing multimedia files is carried out through the internal portal in the Home Media section
That's all! With relatively simple manipulations, it turns out that you can get a budget version of a multimedia center at home, which can also be equipped with a NAS function, where you can not only store your library of photos, videos, documents, etc., but view it all from the same device.
source
Example playlist (m3u file)
Not allowed:
empty line breaks
titles created by VLC player
Channel playback parameters are set and edited using the URL parameter (present in the Add and Edit windows, called through the Operations menu).
The URL field format is as follows:
Solution - serves to display the channel access specification to the media resource. The access specification allows the player to select the required format and decoder for playing an audio and video file or stream. The list of values for the Solution parameter is given in the table below.
auto
rtp
Playing a stream in MPEG2TS format. If the URL starts with rtp:, then the RTP stream will be played, if with udp:, then the UDP stream. If there is additional information about the stream, the necessary codecs are installed, for example, H.264, AC-3, etc.
rtsp
ifm
Play an Internet radio audio stream.
fm
Play audio from MPEG-TS stream (udp:, rtp:).
Plays HLS, as well as various audio-video data formats: avi, mkv, mpg, mp4, mov, wmv, AC-3. Generally used for non-streaming broadcasts other than HLS.
ffrt
Playing an MPEG-TS stream from an HTTP server.
frt2
frt3
frt4
Same as ffrt2, but this specification is used to quickly launch streams over the rtmp protocol (rtmp://.).
For streaming
The specification should be as follows:
To access a stream from an RTSP server, the specification must be as follows:
rtsp space URL
More detailed information can be found in the document JavaScript API Specification for MAG100,MAG200 (Rev 1.20).pdf (In section stb.SetupRTSP page 37).
For http stream
It is also possible to use “Solution” fm, ffrt, ffrt2, ffrt3, depending on the type of stream being played.
For HLS stream
Broadcasting via the HLS protocol (HTTP Live Streaming) supports real-time (live stream) and video on demand (VoD) modes. To transmit audio and video data via the HLS protocol, the MPEG2-TS transport stream is used. The HLS protocol uses segmentation of audio and video data - it breaks the transport stream into fragments (files), which are stored on the web server along with an index file that contains information about the order in which the files in the series are played. The index file has the extension *.m3u8.
There is nothing complicated about setting up IPTV, even for a beginner. See for yourself.
The main reason is freedom of choice. Here, no one will limit us to the number of channels in the digital cable TV package or on-air broadcasting of state channels. With this technology we can watch what we want and when we want it. No crazy speech shows, shouting experts, massive propaganda, etc.
The second reason for its popularity is the ease of setting up and using IPTV.
The third reason is that using IPTV can save your monthly budget.
You will only need two things, more on that later. Well, of course, the presence of a connected and stable Internet connection. By the way, the requirements for Internet speed when watching IPTV are quite publicly available. About 5 Mb/s is enough. That is, you can launch IPTV even if you do not have cable Internet. Mobile Internet will be quite enough to watch TV channels, including in HD quality.
This, by the way, is another advantage of IPTV - with this technology you can watch many channels in high quality. At the same time, without spending money on digital packages from cable TV operators. It’s no secret that cable companies tend to charge extra for watching the most interesting channels. The cost of such packages from 200 rubles per month each can significantly increase your monthly payment. In turn, using IPTV can save your money.
So, a program for broadcasting IPTV. More precisely, there are many such programs. And once you understand how to use one, you will understand how other similar programs work. Therefore, I took the widely used and easy-to-use IPTV Pro program as an example. Don't be intimidated by the Pro console. In this case, its operation will not require any additional knowledge and skills from you. Moreover, you can install this program for yourself without this extension. Then it will be called simply - IPTV. It weighs only a little more than 20 MB, so it won’t burden your device’s memory at all.
After you install and open the program, you will be greeted by such a window, quite minimalist. No hassles.
Click on the cross in the middle of the screen: + Add playlist. A window will open in the upper right corner:
Add URL
Select a file
By clicking on Add URL, you will be taken to a window where you can add this same URL manually.
Two words about what a playlist in IPTV is. This is a file with the extension m3U. Do not confuse them with MP3, the player will not play such files.
Playlists can be downloaded on the Internet, where you can easily find URL links to these playlists.
So, in the window in which you are required to enter a URL (link to the playlist), you simply manually type the previously found link. The only thing that is required of you is to be attentive when typing. Repeat exactly all the letters and signs from this link. For example, this link may look like this: https://iptvm3u.ru/iptvhd.m3u. Or simply copy and paste a similar link using your mouse.
We can also call this playlist. I named him NEW. Click OK. That's all. Your IPTV is ready to watch. It took me less than three minutes.
To use the second command: Select file. You will need to first download the file with the m3U extension from the Internet and simply install it. The result will be the same as in the first case.
Smart TVs and personal computers have their own nuances for installing and using IPTV.
Use these instructions to set up Internet access and watch IPTV channels. If you have additional questions, please contact technical support.
How to connect a digital TV set-top box MAG 250(245)
03.10.2014
Digital television
Very often, when we need to set something up, instead of calling a specialist, we try to do it ourselves. Of course, this doesn’t always end successfully, but that’s a different story. In the case of interactive digital television, you can connect your set-top box yourself. The connection procedure consists of two stages:
1 — Connecting the TV set-top box to the provider’s network 2 — Connecting the TV set-top box to the remote control.
Diagrams for connecting the Mag 245/250 micro STB set-top box to the provider’s TV network.
1. Switch (network switch)
If the switch is unmanaged, then there is simply no configuration. Some providers may provide subscribers with a managed switch with VLAN support for use. In this case, you need to configure a port for STB on it. Otherwise she won't show anything. Next, you just need to connect the network cable to the switch port.
2. Router (Router)
In this option, you must first configure your router so that it separates one of its LAN ports into a separate group. After setting up the router, you need to turn on the mag 250 TV set-top box exactly in the router port that you have allocated for it.
There are two options for connecting the mag-250 to the router:
1. Using a regular Ethernet patch cord. This is a classic option.
2. Using a Wi-Fi adapter.
To the delight of many IPTV STB users, the infomir mag 245 and mag 250 set-top boxes can also work via a Wi-Fi wireless network. But unfortunately, only with a few adapter models based on the Ralink 3070 chipset:
Setting up the STB connection via Wi-Fi is as follows:
1. We connect the adapter to the USB port of the set-top box and wait until it “sees” it. 2. Press the Setup button on the remote control and go to settings - “Network” >>> “Wireless Wi-Fi”. 3. Select the “Auto (DHCP)” item. 4. Scan the airwaves in search of your Wi-Fi network and select it from the list of those found. 5. Enter the WiFi password using the on-screen keyboard (KV button on the remote control in the form of a keyboard). 6. Check the network status.
3. Direct connection to the provider's network.
In this case, the cable from the provider that comes to your apartment must be laid all the way to the TV set-top box. Next, we simply plug it into the LAN connector, reboot the set-top box and wait until it receives an IP address.
Connecting a mag-245 or mag 250 TV set-top box to a TV.
There is nothing complicated here at all. First, decide which cable you will use to connect the STB IPTV set-top box to your TV. If this is an old TV with a picture tube, then there will be no question - we connect it via an RCA cable (the “tulips” familiar to everyone). But if you are using an LCD TV or plasma panel, it is better to use an HDMI connector. We connect the cable to the appropriate connector on the TV. Then, on the TV remote control, press the video source selection button and select the output to which you connected the mag 250. If you did everything correctly, you should see the main menu.
A very good example of connecting Infomir MAG 250 set-top boxes can be seen in this video:
mag 250 connection, how to connect a set-top box, connecting a TV set-top box
Firmware version lower than 2248
In fact, there is nothing wrong with this, except that you will have to follow the above instructions twice: the first time you will update the device to 2248, and the second time to a more current one. You just need to download additional files from firmware 2248. These will be Bootstrap_250_2248 from the link (https://www.lanta-net.ru/files/Bootstrap_250_2248 and imageupdate_250_2248) from the link (https://www.lanta-net.ru/files/ imageupdate_250_2248). And the process itself is the same, we repeat it again as described above. Therefore, friends, we carefully study the material to avoid trouble.
Automatic software update
Automatic software update consists of two stages:
- Analysis of data on the release of new software versions. The set-top box periodically reads this data (file update_list.txt) from the server with software updates. The standard software version (manufacturer's software version) contains the following address ( - ):
https://update.infomir.com/mag//update_list.txt
- When a new version is detected, the STB software is automatically updated.
Setting up auto update
The auto-update mode is configured in the “Settings / Software Update” section of the built-in portal:
- Login to Settings;
- Select Software Update;
- In the Software Update window, in the Auto Update field, select the required mode: Disabled—auto update is disabled (default value);
- Enabled—automatic update is performed when a new software version is detected;
- With confirmation - auto-update in confirmation mode: when a new software version is detected, a warning will be displayed on the screen; the user's consent (confirmation) is expected to continue the update.
- ON - use beta version (test version);
- The stability of the beta version is not guaranteed.
- If the auto-update function is disabled, messages about the availability of a new software version will not be displayed; you can only update the set-top box software manually.
- A description for developers is given in the Automatic update module section.
1) Software versions signed with a public key (ID_KEY=STB_PUBLIC)
2) Software versions installed in the set-top box at the manufacturer, as well as software versions provided by the manufacturer for updating/automatic updating from the manufacturer’s servers
On this page:
Related articles:
- Bootloader
- Built-in portal
- Building a software image (using the example of MAG254)
- SSH - Change password, port, disable/enable
- Automatic update module
Loading a playlist from a USB drive or via an SMB/NFS network
The playlist is a *.m3u file, the recommended encoding is UTF-8. Playlist example.
Loading a playlist
The playlist can be downloaded from a USB drive or from an available network resource (SMB/NFS).
Open the Home Media section.
Enter the folder containing the playlist located on the required USB drive or accessible network resource.
Open the playlist with the OK button on the remote control.
In the Open playlist window that appears, select the required option:
View content (F1 on remote)
Start playing all recordings (F2 on the remote)
Add all content to IPTV channels (F3 on remote)
View playlist contents
The View contents option (F1 on the remote control) opens a list of channels for viewing. In channel viewing mode (without playback), the following operations with channels are provided:
Navigation through the channel list (Down and Up buttons on the remote control - go to play the next and previous channel, respectively; Left and Right buttons on the remote control - go to the beginning and end of the list, respectively).
Copying the necessary channels to add them to the list of IPTV channels of the Built-in portal:
select the necessary channels from the list (use the F2 button on the remote control or the Select command from the Operations menu - called by the Menu button on the remote control);
if you need to select all channels in the list, you must use the Select all command from the Operations menu;
copy selected channels (use the Menu button on the remote control to call up the Operations menu, activate the Copy command).
go to the IPTV channels section (TV button on the remote control);
in the IPTV channels window, paste the copied channels into the main list or into the required folder (go to the folder, use the Menu button on the remote control to open the Operations menu, activate the Paste command).
Play all recordings
Option Start playing all recordings - switch to playing the playlist, starting from the first channel. The following operations are available when playing a channel:
OK or Exit button on the remote control - switches to the channel list viewing mode in combination with an info block (a smaller window with the channel being played). You can move through the list of channels (Down and Up buttons on the remote control - go to play the next and previous channel, respectively; Left and Right buttons on the remote control - go to the beginning and end of the list, respectively). Return to full-screen playback mode with the OK button.
Down and Up buttons on the remote control - go to playback of the next (or previous) channel.
Adding playlist content to the list of IPTV channels
The Add all content to IPTV channels option (F3 on the remote control) saves (adds) all the contents of the current playlist to the main list of IPTV channels.
Characteristics
| Manufacturer: | STB MAG |
| Device type: | media player |
| WiFi: | optional |
| HD support: | 1080p |
| MKV support: | |
| Ethernet interface: | |
| Recorder: | ✘ |
| Analog TV tuner: | ✘ |
| Digital TV tuner (DVB-T): | ✘ |
| DVB-T2 support: | ✘ |
| TimeShift function: | ✘ |
| BD3D image support: | ✘ |
| AVI support: | |
| WMV support: | |
| ISO support: | ✘ |
| IFO support: | ✘ |
| VOB support: | |
| MOV support: | |
| ASF support: | |
| TP support: | ✘ |
| TS support: | |
| TRP support: | ✘ |
| M2T support: | ✘ |
| M2TS support: | |
| MP4 support: | |
| MPG support: | ✘ |
| DAT support: | ✘ |
| FLV support: | ✘ |
| MPEG1 support: | |
| MPEG2 support: | |
| MPEG4 support: | |
| XviD support: | |
| DivX support: | |
| H.264 support: | |
| WMV9 support: | |
| VC-1 support: | |
| WMA support: | ✘ |
| AVCHD support: | ✘ |
| AAC support: | |
| PCM support: | ✘ |
| M4A support: | |
| OGG support: | |
| AC3 support: | |
| WAV support: | |
| FLAC support: | ✘ |
| APE support: | ✘ |
| DTS support: | ✘ |
| RM support: | ✘ |
| RMVB support: | ✘ |
| JPEG support: | |
| GIF support: | |
| BMP support: | |
| TIFF support: | ✘ |
| PNG support: | |
| Stereo audio input: | ✘ |
| Audio input coaxial: | ✘ |
| Audio optical input: | ✘ |
| AES/EBU input: | ✘ |
| I2S input: | ✘ |
| Composite video input: | ✘ |
| S-Video input: | ✘ |
| Stereo audio output: | |
| Stereo balanced audio output: | ✘ |
| PreAmp Output: | ✘ |
| 5.1CH Audio Output: | ✘ |
| 7.1CH Audio Output: | ✘ |
| DTS decoder: | ✘ |
| Dolby Digital decoder: | ✘ |
| Audio output coaxial: | ✘ |
| Audio optical output: | |
| Headphone output: | ✘ |
| Composite video output: | |
| Component video output: | ✘ |
| S-Video output: | ✘ |
| SCART output: | ✘ |
| VGA Output: | ✘ |
| HDMI Output: | |
| HDMI Version: | 1.3a |
| DVI output: | ✘ |
| USB 2.0 Type A interface: | |
| Number of USB 2.0 Type A interfaces: | 2 |
| USB 2.0 Type B interface: | ✘ |
| USB 3.0 Type B interface: | ✘ |
| Number of Ethernet interfaces: | 1 |
| Ethernet speed: | 10/100 |
| DLNA support: | ✘ |
| UPnP support: | |
| eSATA Host Interface: | ✘ |
| eSATA Slave Interface: | ✘ |
| AirPlay: | ✘ |
| Bluetooth: | ✘ |
| SD support: | ✘ |
| SDHC support: | ✘ |
| microSD support: | ✘ |
| microSDHC support: | ✘ |
| CompactFlash support: | ✘ |
| Memory Stick support: | ✘ |
| xD-Picture support: | ✘ |
| Memory Stick Duo support: | ✘ |
| Memory Stick Pro support: | ✘ |
| MultiMedia Card support: | ✘ |
| RAM size: | 256 |
| Internet services: | |
| Internet radio: | ✘ |
| IPTV support: | |
| BitTorrent download manager: | ✘ |
| HTTP download manager: | |
| FTP download manager: | ✘ |
| Print server: | ✘ |
| NAS server: | ✘ |
| FTP server: | ✘ |
| EXT2 file system support: | |
| EXT3 file system support: | |
| FAT16 file system support: | |
| FAT32 file system support: | |
| NTFS file system support: | only reading |
| UDF file system support: | ✘ |
| HFS+ file system support: | ✘ |
| Operation in preamp mode: | ✘ |
| Tube output: | ✘ |
| iPhone support: | ✘ |
| Display: | |
| Remote control: | |
| Power unit: | external |
| Cooling: | passive |
| Width: | 125 mm |
| Height: | 28 mm |
| Depth: | 86 mm |
| Weight: | 0.156 kg |
| Yandex.Inside: | ✘ |
Setting up the MAG-250 set-top box for connecting via Wi-Fi
1. While the set-top box is loading, the following will appear on the TV screen in turn: Loading, Loading the portal..., when the message Loading the portal... appears, press and hold the SETUP button on the set-top box remote control, release it when the message Loading the internal portal... appears, we get into the internal portal:
2. Go to the Network Configuration menu:
3. Select Wireless (Wi-Fi):
4. Select Auto (DHCP):
5. Click the Scan button:
6. In the list of found networks, select your wireless network and click OK on the set-top box remote control:
7. In the Password field, enter the key for your wireless network and click OK. To enter characters, we use the on-screen keyboard, which can be displayed by pressing the KV button on the set-top box remote control:
8. Select the Reboot menu:
This completes the Wi-Fi network setup
Export channels (record playlist to USB drive)
Export channels - saving a list of IPTV channels to a file on a USB drive in the name.m3u format (name - user selectable):
While in the list of IPTV channels, open the Operations window (press Menu on the remote control).
Select the Export channels command.
In the Export Channels window that opens:
in the File location field, select the required USB drive;
in the File field, enter the name of the playlist file;
in the Save from groups field select:
ON—write channels from the general list and from channel groups to a file;
OFF—write to a file only channels from the general list.
Click Save (OK on the remote control).
Standard applications
You can view content from popular social networks such as Youtube and Vkontakte. You can also access television services and content from popular entertainment resources.
To get additional functions using standard tools, you can simply download additional applications to the set-top box. To do this, go to the “internal portal” of the set-top box through the “Settings” menu, and then to the “Applications” section.
But if this is not enough, you can turn the set-top box into a full-fledged multimedia center with a torrent client and the function of automatically downloading files to the set-top box for later viewing.
IPTV for MAG250 set-top boxes
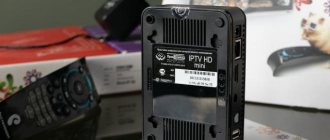
250 today is considered one of the most popular set-top boxes, with which, among other things, you can use a service such as sharing. It is quite easy to distinguish it from others: a bright, beautiful box with color printing, on different sides of which there is an image of the console itself, as well as logos of supporting standards and services.
The originality of the product is indicated by a factory sticker with a barcode, MAC address of the Ethernet interface and serial number.
The package includes:
- the device itself 250;
- power unit;
- remote control with batteries for it;
- A/V cable;
- manual.
The only thing missing is an HDMI cable, which is basically necessary to use the set-top box with modern TVs, especially if sharing is used. True, it is inexpensive, so purchasing it is easy. The 250 is quite compact in size, with a classic rectangular shape, weighing no more than 156 g. On the front panel of the 250 there is a USB connector, as well as an LED indicator and an IR receiver for the remote control, covered with translucent plastic.
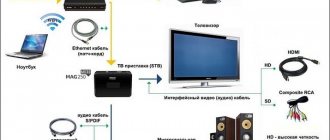
On the matte background of the upper side of the case you can see the glossy inscription mag250, and on the label on the lower part the MAC address of the device, serial number and model are indicated. On the rear panel there is another USB port, a connector for an external IR receiver, an RJ-45 Ethernet port, an HDMI connector, optical S/PDIF, A/V output (Jack) and a power connector. Thanks to its miniature size, the mag250 can be placed very conveniently behind your TV.
Software Features
In this case, it is based on the Linux kernel 2.6.23. By the way, an improved analogue of the iptv set-top box mag 245 micro works on its basis. Updates for the set-top box can be downloaded via the Internet. New updated versions are released quite often. Setting up the software involves a fairly wide variety of methods:
- via a USB disk (flash drive) using the appropriate menu;
- via BIOS;
- via Multicast;
- over the network, etc.
Updates are downloaded automatically or manually. The main feature of this type of equipment can be considered the fact that its functionality largely depends not so much on the set-top box or firmware, but on the content provider. The more different “chips” it has, the more options for using the console will expand accordingly. By the way, the capabilities of the mag250 allow you to successfully work with different operators (including magtisat). The network can be configured by connecting a wired or wireless interface. However, in the second case you will need an additional USB Wi-Fi adapter.
Cons and pros
The popularity of this device has certain reasons, namely:
- Many modern digital television amenities are available, including sharing.
- A large number of functions, which can also be expanded by the operator.
- Ability to independently create portals and internal software
- Wide range of network protocols and compatibility with a wide range of systems
- Attractive design, simple setup and control system, easy to use remote control
Among the minor drawbacks is the not very powerful hardware (preferably more memory and a more “capacious” Internet port). However, in general, this equipment receives only positive reviews.
Description of IP set-top box
The MAG-250 case is small and stylish. The front panel contains a USB connector, an infrared remote control receiver and a standby indicator. The rear panel contains an additional USB connector, HDMI, Ethernet, composite video and audio output, digital audio output and a power connector. The side panels have slits for ventilation of the device.
In addition to MAG-250, the kit includes:
- RCA audio and video cable;
- remote control;
- two AAA batteries;
- external power supply.