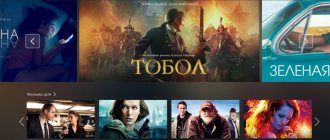
You might be surprised, but television is still alive. Yes, the audience has thinned out and “aged”, and technologies have multiplied and become younger (IPTV, SmartTV, various set-top boxes), but still, there is life not only in YouTube and TikTok. Moreover, now you can create your own TV channel with a fairly small investment of time and finances. In 2017, my brother (Ruler-ufa) asked me for help with the technical implementation of a new music TV channel in the Bashkir and Tatar languages. What we did will be discussed in this article. I’ll immediately make a reservation that the nuances of selecting content, designing the broadcast and similar topics will not be here, because I dealt exclusively with the technical part. In addition, the task was to make everything as simple and cheap as possible, because... the budget was limited, so some things could have been done differently - more correctly, but much more expensive.
DISCLAIMER! All mentioned solutions, companies, partners and operators are only a reflection of our personal experience, and not advertising.
Where can I get money?
The barrier to entry into the television broadcasting market is quite high. If your own funds are not enough, you can contact the bank for a targeted loan. Financial institutions are willing to enter into loan agreements with start-up commercial TV channels. Prefer not to deal with loans? Try to attract the attention of investors. Depending on the broadcast format, these could be financiers, entrepreneurs, show business representatives, or even government organizations.
Often, venerable studios who are interested in expanding and attracting new audiences come to the aid of young TV channels. If you manage to “infect” them with your ideas, there will be no shortage of funds.
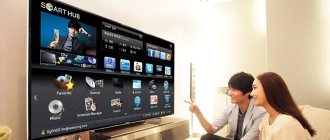
"Livestream" - create your own TV channel on the Internet
Livestream makes it possible to create your own broadcast channel by streaming video from a computer, mobile device or video camera over the Internet.
Modern media play a huge role in the creation and development of civil society, restoration of social justice, and information about charitable and civic events. Sometimes only media intervention helps to stop an abusive official, help the offended and needy, or draw attention to a civil initiative.
However, it is not at all necessary to wait for the intervention of journalists from a central or local television channel in order to solve this or that problem. Today's computer technologies allow anyone to create their own TV channel and feel like a reporter. The Livestream online service allows you to freely stream video from a computer, mobile device or video camera via the Internet directly to the monitors of your viewers.
Why can this be useful for participants of NPOs, public organizations and charitable foundations?
- creation of information and advertising materials about its activities;
- reports from conferences, meetings, seminars;
- reports on important events and incidents;
- direct input from hot spots and disaster zones;
- video blogging.
Of course, the list of possible applications of video streaming is not limited to this list and you can find other applications of this technology.
Livestream has been around since 2007, but has recently been completely redesigned, making it the simplest and most powerful web app in its category. With its help, any user can start their broadcast no more difficult than publishing news on Facebook or Twitter.
The first step on the path to becoming a future reporter is to register an account. Then you will be asked to watch or subscribe to channels that match your interests, of which there are hundreds, maybe thousands, on the service. But we are primarily interested in creating our own video broadcast, so we find the Post button in the top toolbar and in the pop-up window that appears, give a name to our event.
Then we must go through a few simple steps, during which we specify the broadcast time, upload an image that will serve as the channel cover, and make a number of other simple settings. After this, you are taken to your broadcast page, which is called Event here, and you can add the necessary content. Using a special panel on the right, you have the option of embedding a text message, images, video file or streaming video.
If you click the add live video stream button, links to special applications for capturing and broadcasting using your computer or mobile device running Android or iPhone will become available. Thus, you can conduct your report even directly from the scene simply using your smartphone - the main thing is that you have a high-speed Internet connection.
Now that your show is ready, it's time to go on air. You can publish a link to your broadcast on social networks, on your organization’s page, on friendly sites and blogs. Any interested visitor can follow the link and start watching your video stream. The free account has some restrictions and shows your channel only to registered users, and their number is limited to 50 people. Therefore, if you seriously want to engage in online broadcasting, then you should get acquainted with paid tariffs.
Livestream will work on any device, and the video will even play on mobile phones in real time. Your channel page stores all the programs you have made, and viewers can subsequently review past episodes. Of course, there is a subscription, thanks to which your fans can be notified in advance about a new show on your channel.
Using the Livestream , you can create your own TV channel, which will broadcast via the Internet about events, incidents and promotions that are important for your project.
For this you only need a computer (laptop), a webcam or video camera and, of course, Internet access (including Wi-Fi / 3G / Wi-MAX). Livestream will do the rest for you.
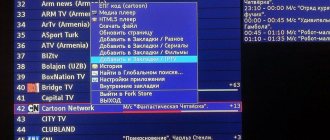
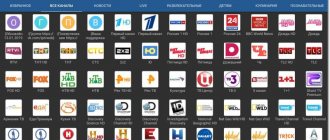
What is an IPTV playlist?
IPTV m3u playlist is a collection of links to streams. The playlist allows the IPTV viewing program or IPTV set-top box to navigate the information flows of the Internet.
IPTV m3u playlist is a directory that allows the program to show what is interesting to you.
Any m3u file includes the content address and its properties. Links can directly access a file if it is saved in one folder, this can be a path to a storage location on a hard drive or an Internet address. The latter is used for IPTV playlists.
How to divide channels into groups in an IPTV playlist?
To create categories and lists in a playlist, do the following:
- Create a blank line between the channel name and address.
- Please indicate the category on this line. To do this, write: “#EXTGRP: subgroup name.”
- Repeat for all channels. You can copy the category line and paste it in the right places. It will be faster this way.
To create an m3u IPTV playlist, carefully following the instructions, you need no more than 15 minutes. See current playlists and take the necessary channels to your place. And thanks to the created categories and groups, browsing will become more convenient.
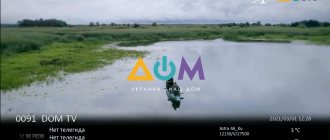
Connecting and setting up cable digital television
In addition to the TV itself, you will need:
- Antenna with amplifier . Of course, you can take it without an amplifier if the signal quality is good. However, if you plan to connect two or more TVs in the future, then it is better to take it with an amplifier. If the distance from the transmitting station is no more than 50 km, then take an inexpensive antenna with an amplifier Locus Meridian 07AF Turbo.
- Tuner (set-top box) . The tuner or receiver improves the quality of the image displayed on the screen. Most modern TVs have a built-in tuner, but older CRT models may not work with digital TV. On average, a normal tuner (set-top box) can be purchased for 1000-1500 rubles.
- Cable . You will need a coaxial cable from the antenna to the tuner and a cable with an HDMI connector to connect the tuner to the TV.
Step 1: Connecting Antenna and Tuner:
- We point the antenna at the television tower . There is a map of digital television in Russia online, where you can find out the nearest location of the TV tower.
- Connecting the antenna to the tuner. Simply insert the plug into the appropriate connector, as shown in the picture.
- We connect the tuner to the TV . Connect the cable to the HDMI connector on the TV.
If you need to connect two or more TVs to one antenna at once, then find out how to do this in the previous article.
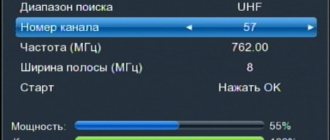
Step 2: Automatic Channel Tuning:
- After turning on the TV, the message “channels not tuned” will appear on the screen. To configure, press the “Menu” button on the remote control.
- In the “technical configuration” section, go to the “channel setup” item.
- In the “channel setup” section, select “auto tuning”.
Automatic channel tuning will last 2-3 minutes. However, there is a high probability of duplicate channels appearing, and even with poor quality of picture transmission. Such channels must be manually deleted immediately.
Manual tuning allows you to find channels with a good signal, but it takes much longer. If you still decide to configure it manually, then step 3 is for you.
Step 3: Manual setup:
- In the same “technical configuration” section, select the “channel setup” item.
- In the “channel setup” item, select “manual tuning” or “manual search” (depending on the TV model).
- Start the search using the volume keys; each channel found will have to be saved separately.
Stages of making a homemade antenna
Before you start making an antenna, you should carefully study the step-by-step instructions on how to make an antenna yourself.
- How to fix a laptop that won't charge
Insulated dielectric screwdrivers up to 1000V - tips on how to choose the best manufacturer
Dielectric insulated tool for work - which one is better to choose? Review of manufacturers, photos + video
First, it is necessary to assemble the fabric of the antenna itself from copper, and then assemble a reflector or reflector to increase noise immunity. After completing the installation work, a cable leading to the TV is soldered to the antenna.
Material for a homemade antenna
The main question that one almost always faces when making this kind of device is the material or what one can make the antenna out of with one’s own hands.
Typically, the best material for this type of work is copper, as it is highly conductive and easy to solder to.
Aluminum can also be used for these purposes, but its conductivity is worse compared to copper and connections must be made using screws and nuts.
Antenna Tool
If copper is used in the manufacture of the antenna, then you need to stock up on a sufficiently powerful soldering iron.
So you can use a soldering iron with a power of 100 watts. In addition, to process copper you will need standard metalworking tools and a drill.