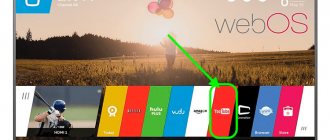
Today, every third owner of a TV or set-top box is faced with an error in which YouTube does not work on Smart TV. It can be expressed differently on different models of Samsung, LG, Philips, Sony, Xiaomi. For example, the YouTube application stopped working or completely disappeared from the Android system menu. Or it simply doesn’t load or show videos from the Internet anymore, and even the channels don’t open. How to deal with this problem and restore YouTube functionality on a Smart TV?
YouTube doesn't work on old TV
Since I don’t know what year your TV is, I can assume that it does not have an Android system on board at all, and therefore does not support the YouTube application. Also recently, owners of old Smart TV operating systems of their own design, which were installed on Samsung, LG, Philips, Sony and many other “experienced” brands, were faced with a situation where Google, which owns YouTube, stopped supporting outdated TV systems. TVs produced before 2012 became incompatible with Google branded services. As a result, indeed, the YouTube application simply disappeared from their screens, and it became impossible to install it from the company store, although everything worked fine before.
In this case, I can recommend the following solutions to the situation:
- Play YouTube videos through the Internet browser built into the TV. Of course, this is not so convenient, but it’s still better than not watching channels at all
- Purchase and connect a TV set-top box on Android, on which you are guaranteed to be able to download and install the application for watching YouTube
- Use a Miracast adapter and stream YouTube to TV from your computer, laptop or smartphone
Universal solutions
If YouTube suddenly stops working on your Smart TV, you don’t need to immediately take emergency measures to reinstall the application or reset the device to its original settings. You can try simple universal actions.
- Update your TV software. Each Smart TV device runs on a specific operating system. The system is periodically updated, new versions from developers are released. This means that malfunctions may occur. This affects the operation of the TV as a whole and individual functions. Therefore, if Youtube does not turn on or does not show after downloading, try updating to the latest software version. Open the settings section of your TV receiver and look for the item that is responsible for updates. Search for updates and then download and install them. Then turn off the TV, wait a few minutes, turn it on and check the application. On LG Smart TVs, updates are checked through the settings item “General” - “TV Information”. On Samsung Smart TV of new release series, updates are performed in the “Support” - “Software Update” menu.
- Turn off the device completely. You need to turn it off not only with the remote control, but also unplug the network cable from the outlet. Wait 20 minutes, turn on the TV and check that Youtube is working. Before turning off, it is sometimes advised to hold down the “EXIT” button on the remote control for a few seconds. During the time that the TV is turned off from electricity, the internal memory will be completely cleared. This action helps not only to restore YouTube, but also to solve many problems that arise on Smart TV equipment. Relevant for all manufacturers of television equipment.
- If the screen says “No network connection” after opening the application, then the reason lies in the Internet not working. Even if the cable or Wi-Fi network is connected, this does not mean that the Internet is working. You can verify this through your browser. Open the built-in web browser on your TV and go to any website. If it says there is no connection, then there is a problem with the Internet. Then try rebooting the router, unplugging the LAN cable and reinserting it. If the Internet loads sites, then the problem is different.
- Make sure that the correct date, time, and time zone settings are set in the general settings.
If the recommendations do not give a positive result, follow the instructions below.
Each section of the material describes the process of restoring Youtube on a specific brand of TV.
YouTube stopped working on a TV or Smart TV set-top box on Android
If you own a more modern TV with Smart TV or Android OS, then most likely the YouTube application used to work for you, but at some point it stopped. On cheap Chinese models such as Yasin, Skyworth, Akai, Gazer, Mystery, Hisense, Ergo, TCL, Mystery, Gazer and even Xiaomi, other problems may also appear when the application does not show the video or loads every time.
This is most often due to a crooked license for using Android on such TVs. The Chinese have never been particularly friendly with international laws. As a result, this affects consumers, that is, you and me, since Google is constantly looking for such violations and blocks the operation of its applications, including YouTube.
Other problems with YouTube
Smart TV set-top boxes, such as Android TV, allow you to expand the capabilities of your TV. By installing the box on your device, you get 4K video support, a convenient keyboard for searching, support for different languages, and an improved picture on the monitor. But there are problems with this device:
- modern videos on hosting have advanced encoding, so older boxes may have problems with the codes;
- problems with choosing a region. On boxes this setting is by default. To change it, you need to read the instructions for the device or contact technical support.
The YouTube application has disappeared from the TV system
It happens that the application for watching YouTube videos disappears from the TV menu after updating the system. Check if the remaining programs are there, as there is a high probability that some other programs may have disappeared somewhere. In such a situation, just go to the Google Store application store again and install it on your Smart TV
Causes
First, let's highlight the reasons why YouTube does not work on the Lumax console. There could be several explanations for this:
- Lack of Internet.
- Problems on YouTube itself.
- Glitch of the console.
- Software problems.
- Outdated (weak) receiver hardware.
- Old key.
These are the main explanations why Lumax does not always work with YouTube. At the same time, you need to know how to correct the situation to restore functions. We will dwell on this issue below.
YouTube does not load videos from the Internet to Smart TV
If YouTube previously worked on the TV, but at some point stopped showing video, then it makes sense to clear the data and program cache. To do this you need to go to application settings
Find YouTube here
And clear all saved information from memory
On the previous M3821 processor there was and is the ability to view YouTube and IPTV , but only on two over-the-air cable set-top boxes - World Vision Premium and its cropped clone StarTrack SRT 999 T2/C - both have 128 MB of memory and 8 MB of flash memory. Unfortunately, other conventional M3821 set-top boxes do not have such resources - everything is standard: 64 MB of memory and 4 MB of flash.
Not long ago, set-top boxes began to appear on the new M3821 P with integrated 64 MB, I previously described one of them: Review of the DVB-T2 receiver Reflect 310 Mini on the ALi M3821P processor.
At the same time, I quickly looked at other emerging models based on the M3821 P , and, in particular, Selenga T30, Selenga T71(D) and Selenga HD930(D), but also looked: do they have firmware? And it turned out that these ordinary set-top boxes have very unusual firmware for the latest serial numbers:
- ... processor ALI M3821P, tuner MXL 608. Download
- ... ALI M3821P processor, MXL 608 tuner with Wi-Fi support (YouTube, IPTV), an additional USB WiFi adapter (7601 chip) is required. Download
I’ll immediately make a reservation that Selenga T71 (D) and Selenga HD930 (D) were also produced on the previous M3821, and in this article we will only talk about their latest modifications on the M3821 P. But if someone has a programmer, then if they wish, they can try to update the old 71 and 930 with the new firmware from M3821 P.
Well, Selenga T30 initially came only with M3821 P.
Moreover, these possibilities are not mentioned anywhere else on the Selenga website, and there is nothing at all about this in the Instructions, i.e. Only by accidentally going to these consoles in the FIRMWARE , you can find out about this. So this article will essentially be the first Setup Instructions for the T30/T71/HD930 themselves.
Because The Selenga website has quite difficult navigation, I will provide direct links to the firmware data:
Let me remind you that the firmware for ALi processors is also a complete dump for flash memory.
I note that while looking through the insides of these WiFi firmwares, I noticed that both the bootloader and the maincode have a completely different and completely unknown M3503 . Although in the Information it’s still M3821P :
Software Version: T30_NET_V1.2_2017-9-9 Hardware Version: M3821P_V1.0
As you can see, neither the bootloader nor the maincode and other well-known firmware blocks are even mentioned here, but the main word is present here - NET - Network.
Moreover, all 5 firmwares have the same version and date - September 9, 2021 , i.e. literally a month ago.
So, there are two main conditions for flashing the firmware of your set-top box:
- M3821P processor
- tuner MaxLinear MxL608
Moreover, it is better to check the tuner model in your set-top box yourself by opening the tuner block, without relying on the description of the official website. For example, the Reflect 310 Mini that I converted has a “Rafael Micro R836” tuner listed on its website, but in reality it has a MaxLinear MxL608 tuner. And everything worked great.
Or, for example, what happened with World Vision T59: on the website and on their forum, an unknown processor “Montage A21” was indicated to anyone, and only a few months later users noticed and pointed out that it was actually labeled and labeled Montage inside, and “A21” "does not exist in nature at all.
These are our “manufacturers”, but in reality they are just Customers: even if they indicated this with the processor, then with the tuner it is even better to check it personally by opening the cover of the tuner unit:
But even if, without opening it, you flash the set-top box with a real Rafael Micro R836, you will simply stop receiving DVB-T2 channels and then you will need to return to the native firmware.
Well, I will certainly remind you:
EVERYTHING YOU DO WITH YOUR CONSTRUCTION IS AT YOUR OWN RISK!
By the way, now, if in set-top boxes with M3821 P the tuner burns out after a thunderstorm (and it doesn’t matter which one), then you won’t have to throw away such a set-top box, but continue to use it to watch IPTV .
So, I’ll start in order using the Reflect 310 Mini as an example: to convert a regular set-top box into any of the listed Selenga models, you first need to get a remote control - you’ll need any Huayu DVB-T2 .
For example, in Buzuluk, Yekaterinburg, Izhevsk, Krasnodar, Moscow, Novosibirsk, Orenburg, Samara, Saratov, Simferopol, Tolyatti, Ulyanovsk, Ufa, Cheboksary, Yaroslavl, similar remote controls can be purchased for a minimal price:
• universal Huayu DVB-T2+2 (code 0) - p. • universal Huayu DVB-T2+3 (code 002) - p. • universal Huayu DVB-T2+2 version 2017 (code 002) - p. • universal Huayu DVB-T2+2 version 2021 (code 002) - p. • +trained Huayu DVB-T2+TV (code 0) - p. • +trainable Huayu DVB-T2+TV version 2021 (code 002) - p.
Moreover, if it is not available in your branch, they will send it from another for free.
You can also order the trained Huayu RM-D1155+5 (code 002) on AliExpress - from r.
As you can see, the oldest codes are used, so even the very first universal Huayu DVB-T2 and Huayu DVB-T2+1 will do.
As usual, with the original remote control we go to Upgrade By USB (for Selenga this is “Update via USB”):
We specify any of the 5 firmware files listed above, for example, usb_T30_ali3821p_wifi.abs :
And click Start . We are warned not to remove the flash drive until the end - Alert: Do not remove U Disk during upgrading (“Attention: do not remove the device until the update is completed.”):
And before the actual firmware update, as usual, they will warn you again - Attention: after the software update the receiver will reset to factory default. Favorite lists and other personal settings will be deleted and should be saved before. If you want to continue select -OK- (“Attention. After the update, all user settings will be deleted. If you agree, click “OK””):
We agree and go Burn Flash - Do not turn it off (“Burn flash. Do not turn off the power.”):
The console will reboot itself at the end.
We received Selenga T30 and, accordingly, the original Reflect 310 Mini remote control no longer works, the digital indicator also went out and now the green LED is constantly on - this is the price for being able to watch IPTV. I’ll say right away that you can also return the native firmware of the Reflect 310 Mini back.
The screen has a standard start screen, but of course with the Selenga logo in the background:
We are not interested in setting up channels yet (but of course everything works and shows), so we immediately press the MENU and go to a new item that was not Tools Network :
And here we will see 3 points, but Network Settings are not yet available to us - it returns us back here:
Because first you need to connect
a WiFi adapter :
As with other modern receivers, a chipset is required.
You can, of course, buy it in the nearest well-known stores: only available at DNS Technopoint for 490 rubles, but all of these are ineffective USB plugs without antennas, so it’s better and 2 times cheaper to order an adapter on AliExpress, paying attention in the Specifications so that the chip is indicated 7601 , and with a normal antenna.
For example, an adapter with a blue indicator and a 5 dBi antenna:
or without an indicator and exactly the same for 180 rubles:
There are also models with a short 2 dBi antenna, costing the same 200 rubles:
So, we plug the adapter into the set-top box and several messages appear on the screen in succession:
[WiFi]: Device Plug IN
WiFi Opening…, Please Don't Plug Out!
WiFi Connecting...
And if there were no messages, it means that the adapter has a different chipset altogether.
If you pull it back, it will also respond with the message - [WiFi]: Device Plug Out
Now we can go to Network settings , find and select your WiFi router from the list:
At the bottom, two scales simultaneously show the signal level of the selected access point.
Enter the password in the Key :
Switch to small letters with the yellow button, delete the last character with the red button, and after completing entering the password, click on the blue button and then click on the Connected .
The connection procedure will occur - Connecting....
[WiFi]: AP Connected!
Moreover, in the Network Management , only one of your routers will remain visible.
Finally, the set-top box will receive an IP address from the router, for example:
If necessary, you can disconnect from the access point again:
There is no need to repeat all this in the future; everything will happen automatically when you turn on the set-top box:
- [WiFi]: Device Plug IN
- WiFi Opening…, Please Don't Plug Out!
- WiFi Connecting...
- [WiFi]: AP Connected!
- [WiFi]: IP Addr 192.168.xxx.xxx
Go to the YouTube .
First, the list of YouTube Categories is loaded - Loading YouTube Category List, and if everything is fine, it will write Fetch Category Success!
To search on YouTube, you need to go to the top category -
Search :
Unfortunately, only Latin letters are available here; you can see that this window repeats the WiFi password entry window:
For example, MASHA BEAR results:
All 9 videos are not cartoons, but toys related to “Masha and the Bear”.
Sometimes when searching, it is better to select not The Latest , but Most Popular .
But even with Latin letters, Search works somehow strangely; for some words it writes the error Search Video Failed!
so it's unlikely to be really useful.
By clicking the yellow button in the main window, we will see Settings - by default, Region - Russia :
those. Videos from the Russian segment will be offered.
Having selected the desired Category, the video will preload Loading Videos, Please Wait... and if successful, it will display the message Open Category Success!
for example Film & Animation:
or Music:
Return to the list of Categories using the MENU .
Outdated Categories, starting with Movies, are not available, so there will be a network error - Network Error!
By selecting a specific video, its downloading will begin - Loading Video...
Of course, the choice is not limited to just these 9 videos, if you go below, the following page with 9 videos will load:
As an example I chose:
In the upper right corner it always shows the current download speed:
By default, the broadcast is in SD , if you press the yellow button, you can downgrade to Small :
When changing the quality, the attachment returns exactly to the position when the button was pressed:
Other control functions, not counting the Pause button | | , not here.
By the end of viewing, the download speed will drop to 0B/s, because... the rest of the video is already in the buffer:
YouTube
application is more for entertainment - watching the top videos from various categories. Finding any specific video you need will be very difficult.
IPTV
Strictly speaking, this is an internal television service from Internet providers, which is provided, as a rule, only through a network managed by the operator itself with guaranteed QoS (“quality of service”).
And external television is (Web TV). But it is often also called IPTV, without going into details.
I would like to note right away that this IPTV can work simultaneously with both internal and external sources collected in one common playlist.
The advantages of internal IPTV are signal sources guaranteed by your provider and guaranteed bandwidth in its internal city network.
The advantages of external Internet television - independence from the set of channels provided by your provider and indeed in general - does not depend on the availability of IPTV service from your provider.
Well, and, accordingly, hence the disadvantages of external Internet television:
- you need a good, stable Internet access speed (starting from at least 5 Mbit/s, but preferably 10 or even more). Moreover, we must remember that if you simultaneously download something from the Internet (for example, from a torrent), then you clog your access channel.
- lack of guarantee of broadcast sources: for example, in the evening some channels may be downloaded by the same viewers, or at some point the channel may stop broadcasting altogether. Therefore, choosing stable broadcast sources is important.
Internal IPTV is usually broadcast via UDP multicast - in the provider’s playlist, stream addresses begin at udp://
External Internet television uses regular HTTP or other protocols, so addresses begin with https:// or, for example, rtmp://
As with any other receivers on ALi processors, the IPTV application cannot work directly with UDP broadcast streams, so to view internal IPTV you will need a UDP Proxy to convert UDP to regular HTTP. This will be discussed at the end.
And, naturally, here we are considering the possibility of viewing only open IPTV - and closed paid IPTV from Rostelecom, Beeline and other similar operators requires connecting to their IPTV service with a monthly subscription fee and their branded closed set-top boxes.
So, go to the IPTV no iptv channel will appear first
“No IPTV channels!” - and this is understandable, because so far there really is nothing:
Using the green button you can Add a channel list, and using the yellow button you can Delete .
Standard for ALi after inserting a flash drive and it is detected:
You still need to wait about 20 seconds to autotest the recording speed. And if you try to click Add before the test is completed, it will write that the flash drive is not ready - USB NOT READY!!!!!!!
Then, if you click Add , it will say - iptv.m3u does not exist or unable to open the iptv file!
those. the playlist file should be called iptv.m3u
And if you substitute it with this name, it will load a list of channels, for example, in my case it wrote - Added 146 new iptv channels :
“146 new IPTV channels have been added.” But I don’t recommend making a list of more than 120 channels, because... the end of the list is spoiled, apparently due to lack of space in flash memory:
The IPTV application somehow strangely works with UTF-8 national characters - some of the letters in the channel names have disappeared (although the channels themselves, of course, work):
Naturally, everything is fine with
Latin letters.
Therefore, it is advisable to first rewrite the channel names in Latin letters. For the test, I prepared a playlist from an external source (unpack the archive, the iptv.m3u to a clean flash drive) with 20 federal channels 1 and 2 of the multiplex:
By loading it into the set-top box, anyone can immediately check the operation of IPTV.
By the way, resetting the set-top box to Factory Settings will not lead to deleting the playlist from the IPTV application.
Only if you click Delete Deleted IPTV from flash will appear :
and the list will be empty again.
Playlists with external sources can be found, for example, on the website - and there on the main page it is immediately explained what a playlist in .m3u
And for the IPTV application, this is better - the most minimal design, without any links to TV guides, channel logos, additional parameters and other garbage that it still won’t understand. And as I already noted, the channel name is better in Latin letters, for example:
#EXTINF:-1, NAZVANIE KANALA https://adres.servera.istochnika/kanala
I note that for testing purpose I left the set-top box turned on on one channel (and from an external source), and it worked continuously for more than 2.5 days, and then I just got tired of it and turned it off. Those. If there is a stable source, the broadcast can go on for as long as desired - the set-top box works in full, without freezing.
The most stable sources, and official ones at that, are the servers of the TV channels themselves, for example:
#EXTINF:-1,Nebiset https://hls.nebiset.tv/nebiset.m3u8 #EXTINF:-1,One.by https://rtmp.one.by:1200 #EXTINF:-1,One.by HD https://rtmp.one.by:1300
As you can see, the prefix also works with -streams.
When receiving HD channels, you need to take special care of a stable Internet access speed of at least 10 Mbit/s.
Naturally, the set-top box should not be located 3 rooms away from the WiFi router, but at least no further than the next one.
In general, this applies to any TV set-top boxes connected via WiFi. ZyXEL has a good article:
and a separate article: .
Therefore, it is better to take an adapter that has a 5 dBi antenna than a regular WiFi “whistle” or even a “plug”, although, of course, you can also try with them, but with a USB extension cable, choosing the best location for receiving the signal. But in difficult conditions, even with a normal antenna, a USB extension cable will also be useful.
When the channel starts, the message IPTV Stream please wait... and in the upper right corner shows the current download speed (the indicator disappears after 3 s):
The duration of display of the infobar and the transparency of the menu are set in the general settings of the set-top box - item
On-Screen Menu .
And if for some reason the broadcast source is unavailable, it will answer - Server not Online!!!!!
SD channels are downloaded at a speed of about 300-400 KB/s:
There are few control functions in the application, well, of course, there is a pause - with the button ||
If you press the blue button, the message No Ext-Subtitle, Setting Invalid!
Press the yellow button - There is only one chapter!
On the green one it will write - No External Subtitle!
On the SUB-T - No Embedded Subtitle!
The red button indicates the presence of a video track - Programs VideoProg 1/1 :
and if you try to open the radio broadcast and press red, it will write - There is only one Video Program!
Pressing the USB while watching a TV channel will show the presence of an audio track - Audio Track 1/1 :
and again, if you try to open a radio stream and press this button, the answer will be No Audio Track!
and no additional parameters to #EXTINF:-1 help:
audio-track="ru" type="audio"
most likely because the IPTV application simply does not process them in any way. After all, this is an ordinary set-top box with only 64 MB of memory and 4 MB of flash memory - you shouldn’t expect any rich functionality here.
You can switch between channels only through the MENU or the ■ (stop) button, going to the general list and selecting another channel to watch there.
UDP-to-HTTP Proxy (udpxy)
As noted above, Internet providers for IPTV usually use multicast; this can be determined, for example, by the addresses of the streams in your provider’s playlist, if they start at udp://
#EXTINF:-1, Cinema House udp://@232.0.1.51:1234 #EXTINF:-1, My Planet udp://@232.0.2.36:1234 #EXTINF:-1, Hunter and Fisherman udp://@ 232.0.2.53:1234
Receivers on ALi processors do not directly allow such streams (they are closed to multicast); a preliminary UDP > HTTP .
This function is available in routers ZyXEL , ASUS and the latest D-Link . For other common routers - only installing alternative firmware (, etc.) or installing it on a computer (and one more).
Instructions for ZyXEL: and the principle is explained there:
For example, we know that the provider’s channels have the following addressing:
udp://224.0.0.41:1111 udp://224.0.0.42:1111 udp://224.0.0.43:1111 and so on.
On the router with the address 192.168.1.1 we have the udpxy on port 4022, in this case, to receive video content you need to send the following http request:
https://192.168.1.1:4022/udp/224.0.0.41:1111 https://192.168.1.1:4022/udp/224.0.0.42:1111 https://192.168.1.1:4022/udp/224.0.0.43: 1111 and so on.
:
Configure UDP Proxy (Udpxy) - This function converts UDP multicast to HTTP unicast. Specify the port (for example, 4022) that you want to designate the IPTV application, then use this format to enter the address into the playlist to watch IPTV:
https://:/[protocol]/:
For example:
https://192.168.1.1:4022/udp/239.255.1.1:5000
to enable UDP Proxy (Udpxy) instead of 0 you need to enter 4022:
or here is another section for reference.
And on the latest D-Link :
So, the proxy works and, accordingly, through the usual Replacement in a simple text editor, remake the playlist as described above.
For example, in the provider’s playlist there was:
#EXTINF:-1, Cinema House udp://@232.0.1.51:1234 #EXTINF:-1, My Planet udp://@232.0.2.36:1234 #EXTINF:-1, Hunter and Fisherman udp://@ 232.0.2.53:1234
and to make it work as it should:
#EXTINF:-1, House of Cinema https://192.168.1.1:4022/udp/232.0.1.51:1234 #EXTINF:-1, My Planet https://192.168.1.1:4022/udp/232.0.2.36:1234 #EXTINF:-1, Hunter and Fisher https://192.168.1.1:4022/udp/232.0.2.53:1234
you need all the initial udp://@
Replaced by:
https://192.168.1.1:4022/udp/
where 192.168.1.1 is the address of your router, and 4022 is the udpxy port number.
Save the file in UTF-8 encoding and with the name iptv.m3u
In general, all this has been repeatedly described on the forums of satellite receivers with ALi , for example, on and and on other forums, for example, various media players.
Well, if you don’t yet have a set-top box for ALi M3821 P , then you can immediately buy the latest versions of Selenga T30/T71/HD930, for example, in the nearest Yulmart:
Selenga T30 - r. Selenga T71 - r.
And watch not only terrestrial DVB-T2, but also IPTV from various sources.
4.5/5 — (13 votes)
Also read:
- IPTV on the MStar MSD7T01 processor using the example of Divisat Hobbit Unit II ver. 2.0
- IPTV on the new D-Color DC1301HD and DC1002HD mini on Sunplus 1509A
- IPTV on Lumax and other set-top boxes on the MStar MSD7T01 processor
You can ask questions about digital television on the DVBpro forum
Author: Alexander Vorobyov, 13 Oct 2021 | Permanent link to the page:
Reviews about Lumax set-top box
Currently, the company's products are popular among users. Firstly, everyone appreciates the ease of installation of these devices and their overall reliability. On average, one such set-top box can work for more than 5 years, while some devices from other companies burn out after six months of use.
In addition, when purchasing, you have the option of an additional cinema hall, which contains only the most popular films. There are also about 100 Soviet cartoons, which your children will appreciate with a bang.
If we talk about the average rating on the Internet, then the company’s products can be safely given 4.5 on a 5-point scale.
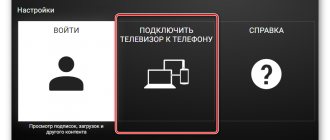
The question arises: how to connect and configure the Lumax set-top box to the TV? Every user has encountered the problem of connecting a digital tuner to a TV. The Lumex company is a well-known representative of set-top boxes for digital television. Thanks to modern technologies, the device supports Wi-FI. This allows you to freely access the Internet and watch any movie or TV series on the big screen. The receiver plays a lot of popular channels. It connects to any TV model. In addition, it has powerful functionality. The price of the set-top box is affordable for everyone. Having problems with your tuner settings? Use the tips below.
Connecting a digital set-top box Lumax
The procedure and nature of connecting the set-top box depends on the TV itself. Depending on the conditions, up to 3 connection methods can be selected. We will tell you about them.
Front panel of the Lumax set-top box with display
For example, let's take the 2 most popular models of Lumax digital set-top boxes - DV1108HD and DV2105HD . If you have a different tuner model, don't worry. The connection procedure is the same for everyone.
First, let's look at the back panel of the presented console.
The back panel of the Lumax console
- Instructions for connecting and setting up DVB set-top boxes Lumax
There are several options here:
- Ant IN. Output for connecting an antenna to the receiver.
- Loop Out. Needed to connect two receivers and receive a digital signal from one antenna.
- HDTV. One of the HDMI output connectors, through which you can additionally connect not only a TV, but also a computer monitor.
- CVBS, R and L. Corresponding RSA outputs. Yellow is responsible for displaying the picture (Video), and the other two are for the right (R) and left (L) speakers of the TV.
Important! In the absence of grounding on external antennas, Lumax does not guarantee the safety of using the set-top box during a thunderstorm. Therefore, upon the onset of such weather conditions, it is better to unplug the antenna cable
HDMI connection
The most beneficial, in terms of quality characteristics, will be to connect the TV to a digital set-top box via an HDMI connector. Its presence must be checked first. The corresponding cable is usually not included with the device. Its cost is around 500 rubles.
Examples of inputs on a TV
It's better not to skimp when buying. In various stores you can find prices starting from 100 rubles, but the better quality the cable, the longer it will last you
When connecting, HDMI is first installed, then you can insert the antenna and turn on the set-top box to the network.
Connection using RSA or SCART-RSA
Often RSA cables are included in digital set-top boxes. They are also usually called “Tulips”. They are made in different colors and are connected via appropriate connectors.
- Setting up the World Vision digital set-top box
On some older TVs you can still find a SCART input. In this case, the only option to connect the set-top box is to use a special adapter that converts the signal from RSA to SCART. You can find one of these in any hardware store. It's inexpensive.
Search by frequency in manual mode
If the automatic search finds too few broadcast TV channels or their quality of display does not suit you, you can try to independently select the required reception frequency from the TV tower and find the corresponding channels on it.
- World vision t62d
To control menu items, you need to use Vol +/- on the remote control of the set-top box and the OK button to select the parameter
The sequence of searching channels in manual mode is as follows:
- First you need to find out the frequency of digital signal transmission from your nearest television tower. This can be done using the CETV interactive map.
- Then you need to press “Menu” on the remote control. In it, select the channel search section.
- We proceed to a manual search and set the channel number that was taken earlier for your area, according to the previously specified map. We wait a few seconds and look at the signal level, it should change. Click OK.
The device will search for the reception frequency you set and find all available programs on it. This must be done for DVB-T and DVB-T2 parameters.
What kind of error? API key quota exceeded - Translation
What does the literal translation of the phrase “youtube api key quota exceeded” mean?
This translates as “YouTube API key quota has been exceeded.” If your lumax set-top box writes such a message, you will no longer be able to watch videos from your TV.
API keys give you access to the YouTube application and all its functions (search, playlists) without unnecessary difficulties. Due to a change in the platform policy, YouTube began to limit the issuance of Api keys in 2019. At the moment, manufacturers have learned to deal with this through updates.
First things first...⇓
First, let's try updating the YouTube application:
- On the set-top box we go to YouTube.
- Select the command “Update”, “Update from server”.
Click on settings (on Lumax it’s the red button on the remote control).
Everything should work, if it doesn’t, there may be a problem with the firmware of the device itself.
For example, the error “youtube api key quota exceeded” on the lumax dv4205hd (and some other models) is usually removed by updating directly from the service menu. What do we have to do:
- Open the System menu on your device.
- Go to "Software Update".
- Run “Update via network” - “Start” - “Click OK”.
Before doing this, do not forget to make sure that the Internet is connected and working.
Everything does not always load normally over the network; the system may display the message “the current firmware is the latest.” However, if nothing works, it means it’s not the newest one, you’ll have to check it manually.