Activation code and firmware for the GS B210 receiver
We think the user will be interested in how to activate new functions, so we will provide you with a special code. Go to Menu – Settings – Add-ons – Activation code. Enter 2222 1111 1111 1111. After this, a notification will appear on the screen indicating access to functions that were previously hidden.
In order to update the firmware of the GS B210 receiver, download the software from the manufacturer’s website: https://gs.ru/support/soft/
Before updating, you should save the previous firmware in case problems arise after the update. We connect the drive to the receiver and go to Menu - System - Save to USB. Enter the file name and click “Ok”.
We save EMU keys, since after the update they are erased. It's best to save them to a storage device. Select Venu - Conditional access - CA settings - Edit keys, press the green button on the remote control to save the keys to the flash drive.
After the above steps, you can begin the firmware update procedure itself. We unpack the downloaded software files onto a USB drive and connect it to the satellite receiver. Select the following Menu - System - Update via USB. In the first line, select the firmware file, in the second line set the update mode (if the firmware is being installed for the first time, it is recommended to select “Software (main codes)”). Press “Start” in the menu and the “Ok” key on the remote control. The update process will begin, and after it is completed, the receiver will automatically reboot.
Instructions on how to set up the GS B210 receiver
Use the remote control when making settings. To search for channels, you should use the Tricolor TV Search application.
To set up the GS B210 satellite receiver you need to follow several steps.
Step 1
Turn on the tuner, after which the “Setup Wizard” application will launch. Select the interface language, video resolution and click “Ok”. To save the parameters in the menu that appears, click “Accept” and confirm the selection by pressing the “Ok” button, otherwise after 15 seconds the selected values will be canceled and the main menu will close. Set the HDMI setting in the same way.
Step 2
Select Set Scope. Press the “Ok” button on the remote control. Set the required area sizes and click “Exit” to save the result. To move on, press “Forward” and “Ok” on the remote control.
Step 3
To automatically set the time and date, find the “Automatic” switch and set it to the “ON” position.
To set them manually, you need to move the switch to the “OFF” position and select “Change”, “Ok”. In the window that opens, use the 0-9 buttons and the cursor buttons to set the time and date. Click "Ok" to save. You can also set your time zone automatically or manually.
Step 4
Select one of the suggested broadcast operator options, depending on your region. After this, a strength scale and a signal quality scale will be displayed at the bottom. To find channels from the Tricolor TV operator, it is not recommended to change the settings for the satellite dish. To proceed to further settings, click “Continue” and “Ok”. Select the region, but if you selected “Main”, channels will be found that are broadcast throughout the operator’s coverage area.
Step 5
At the last stage, an automatic channel search occurs. When finished, a message and results will be displayed. To save the found channels, click the “Save” and “Ok” button.
You can also set a PIN code on the receiver to view and listen to blocked channels. To activate the PIN code, you need to set the switch to the “ON” position and click “Ok”. In the menu that appears, use the number buttons to enter a 4-digit code. Repeat it on the appropriate line. To deactivate, set the “Activate PIN code” switch to the “OFF” position.
Attention! If you suddenly forget your PIN code, you will have to contact the service center.
Receivers from GS
Receivers under the GS brand have long been in demand in our market. They are distinguished by excellent technical characteristics and have wide possibilities for use. In our country, you can purchase a Tricolor TV receiver gs u210; it is this operator that sells this equipment.
There are a huge number of models on sale under this brand - 7300, c591, e212 and many others. But the gs u210 receiver deserves special attention; it can be an excellent choice for a possible purchase.
This model is a completely new development, which went on sale in the first half of 2014. The Tricolor gs u210 receiver immediately received positive feedback from users, because it combines all the advanced technological solutions.
Unlike the kit, which includes a gs e501 receiver and an additional gs c591 receiver, the presented device is much easier to install and use. Of course, the gs e501 receiver allows you to connect more than one TV using a smart card. But some users do not require such a function at all, because for the gs c591 model receiver you will have to pay extra when purchasing.
But still, c591 also has its own advantages. The c591 set-top box is easy to connect and provides high quality duplicated signals. Let's compare the individual advantages of the models to choose the appropriate option.
| u210 | e501+c591 |
| Low price. | Duplicating the signal to a second TV. |
| Easy to set up. | Connecting an additional set-top box via a standard Internet cable. |
| Ability to watch channels in high definition. | Preserving signal quality. |
| Delayed viewing function. |
If the ability to broadcast a signal to two devices is important to you, then you should choose the second set. Otherwise, a standard u210 set-top box will be sufficient; it is quite capable of providing full viewing.
Software update via satellite
To update software via satellite, the receiver must be connected to a configured satellite dish.
Updating the receiver software consists of 2 stages and takes about 20 minutes.
After each update step is completed, the receiver will automatically reboot. Upon completion of all update stages, the Setup Wizard will launch. Do not turn off or restart the receiving equipment yourself until all 2 stages of the update process are completed!
PROCEDURE:
1.Search for Tricolor TV channels. To do this, enter the menu, select “Tricolor TV” and press OK on the remote control. Next, select the “Yes” option and press the “OK” button on the remote control. At the end of the search procedure, save the found channels.
2. Unplug the receiver's power cord from the outlet, and then plug the receiver back in.
3. Switch the receiver to information channel 333.
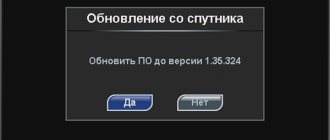
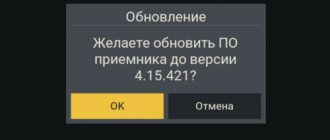
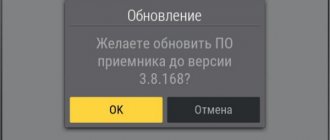
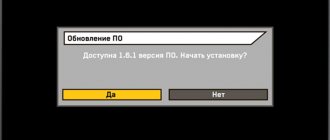
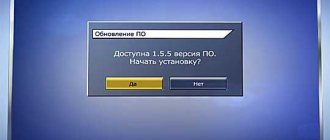
4. After a few seconds, the following message will appear on the screen indicating the need for a software update:
When this message appears, confirm the start of the update by selecting “Yes”.
5. After agreeing to the update, the receiver will switch to bootloader mode, and service messages of the first stage of the software update will appear on the screen. The type of messages is shown below:
6. Upon completion of the first stage of the update, the receiver will reboot, after which the second stage of the software update will be launched.
7. Upon completion of all stages of the update, the receiver will reboot and turn on in Setup Wizard mode. As you go through the steps of the wizard, you will be asked to select the menu language and set the displayed time. Select an operator and region, and also search for channels.
8. After going through all the steps of the Setup Wizard, go to “Menu”, select “Status” and make sure that the receiver software version has changed to 1.9.160.
9. At this point, the software update of the receiver and module is completed, and the receiver is ready for further operation.
The message “No signal” appears on the screen, what should I do?
We will try to explain why the message “No Signal” may appear on the TV screen and tell you how to solve this problem.
First, make sure there is no break in the broadcast at this moment. Information on preventive maintenance can be found on the Tricolor TV website. It is also worth checking whether the cable from the antenna is connected to the receiver and whether it is damaged. But, if the “No Signal” message still does not disappear, at least visually check the condition of the antenna and evaluate its position. It is also worth considering that the lack of a signal may be caused by weather conditions, for example, heavy rain or snow. Check your antenna settings and make sure there are no buildings or trees in the signal path. If the “No Signal” notification appears only on some channels, reset the settings to factory settings and configure the receiver.
If all of the above does not help and the “No signal” message remains, contact a specialist at the Service Center.