Satellite television continent TV
Most models of modern TVs support the HD format, but not all satellite operators can provide a list of channels in such quality. Or there are special rates for payment. But satellite television on the continent has slightly different standards. First of all, we are talking about the fact that for their users they provided a list of high quality channels in the basic subscriber package. Tariffs are minimal.
Other benefits of this provider include:
- Even after the subscription expires, subscribers can watch 18 Russian television channels for free. This is a kind of cardsharing.
- It is possible to connect only one receiver and watch different TV shows if there are two or more TVs in the house. You will only need to pay 99 rubles per month for this.
- Each user is guaranteed a high-quality image. If difficulties arise, technical support operators will help.
- It is possible to connect to the Continent TV package (purchase a receiver and other equipment) in any locality in Russia. The equipment package includes a standard SD receiver, to which you can additionally connect HD functions (at the request of the customer). The signal is received from an American satellite, the service life of which is dated 2027 (this is if sharing is required). All Continent TV channels broadcast in the MPEG-4/DVB-S2 standard. The encoding for the television signal is Irdeto.
- Payment can be made using any convenient methods (terminals, bank cards, non-cash payments, electronic wallets). In any case, this can be more profitable than cardsharing, because for a very reasonable price you get a large selection of programs in high-quality images.
HD receiver test for Continent TV - CHD-02/IR
1. Testing receivers. Second meeting. Receiver Continent HD002 IR.1.1 Introduction. 1.2 Appearance. 1.3 Look under the cover. 1.4 Studying the menu. 1.5 Remote control. 1.6 Tuner operation. 1.7 Map binding. 1.8 What's wrong with the picture? 1.9 We write, read, erase. 1.10 Results.
1.1 Introduction
More than six months have passed since the first child from the family of receivers for Continent TV came into my hands for testing. The project itself has already started and is in full swing. Thousands of subscribers have already connected to it. And now the satellite operator Orion Express is in close cooperation with engineers from Coship Electronic Co. We have prepared the next more advanced receiver model for the Continent TV project. It would seem, why bother with many models of receivers - do it, as, for example, for Tricolor Siberia, one single model DRS4500 and have no problems.
However, in my understanding, this is a dead-end path of development, unless, of course, the company is going to force the entire fleet of receivers to change subscribers every three or four years. This is exactly the way that Tricolor is developing, where the cost of equipment includes two to three years of viewing, and then it is necessary to replenish the broadcaster’s budget either through super-expensive post-warranty maintenance or through replacement of equipment. What am I talking about? The development model chosen by the operator Orion Express is somewhat similar to Tricolor’s strategy, but has some quite serious differences (Tricolor is already trying to start implementing some of them at home). First of all, this concerns additional services and promising HD broadcasting. Yes, today Continent TV does not yet have the capacity for a full HD TV. But the company, working towards expanding capacities, has prepared a promising receiver with which this HD quality television can be watched. And now I have it in my hands. Many thanks to the operator for the opportunity to evaluate the performance of this model of satellite receiver before the start of sales. I hope that my subjective opinion will help the attentive reader understand what this product is.
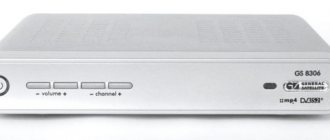
1.2 Appearance
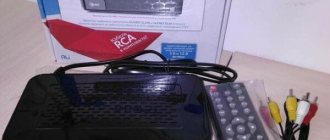
This receiver came to me in a colorful box, the design of which is similar to the packaging from the first CSD-01/IR receiver. It is clear that the same artist worked on the packaging. To be honest, I would diversify the design of the box a little. It's like candy. A beautiful box buys much better than a simpler one. Although the latter may turn out to be tastier than the former. But that's not what we're talking about here. Here the subscriber must understand why he is paying big (emphasis on the first syllable) money. I immediately see objections that the recognized world leaders in the production of high-quality equipment such as SONY, Pioneer and others do not bother themselves with frills in packaging. But still they often meet by their clothes. On the one hand, unification in terms of design is good. But on the other hand, I would look at it this way: for what is more expensive, the subscriber wants to see more.
Let's open the box. Inside is the receiver itself, an instruction manual, a remote control, batteries for it and an Asia3-Asia3 cable. The equipment is very ordinary, nothing remarkable. Although some manufacturers have recently included a cable for connecting to a TV via the HDMI bus. And this is correct, since HD quality television cannot be “touched” by ordinary tulips!
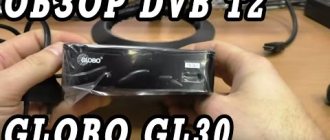
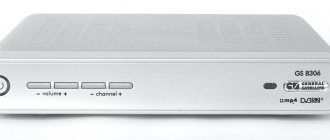
As in the old story about crayfish “yesterday there were small ones of three, and today there were large ones, but of five” - this fully applies to receivers for Continent TV. Absolutely the same design! The first one (the one from yesterday) was a little smaller in size, had a little less functions and capabilities, and, accordingly, should cost less. But the new one (the one today) is somewhat taller, judging by the slightly more sophisticated rear connectors, it should write to a flash drive, its remote control has a lot more buttons - well, in general, all five. In terms of size, the fact that the receiver has grown is absolutely correct. Well, the receiver shouldn’t be as small as a spool. Since it is intended for HD, the load on the processor will be greater. This means heat removal is needed. And in a small case, normal cooling cannot be achieved. However, he only grew in length and width. The height remains the same. Therefore, the legs of the receiver look somewhat disproportionate. But this hides a rather serious advantage - better air exchange through the lower panel of the receiver.
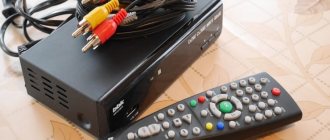
The USB output is hidden under a rubber plug on the front panel. This connector is clearly not for changing software. This means he must write programs to the flash drive. It will be very interesting to see how he will do this. Will it not work out the same way as with the receiver for Tricolor TV (model GS8300) when long before that device went on sale in an article in the respected Telesputnik magazine, it could no longer write in commercial quantities. We'll be sure to take a look at this below.
There are not many connectors on the rear panel: a tuner input and loop output, connectors for component connections, composite video output connectors, digital audio output - SPDIF and an HDMI connector. I think SCART would come in handy here. But the presence of a power switch is good. It is worth noting that recently manufacturers are abandoning 0/12V connectors. I wonder if this device supports the DiSEqC 1.1 protocol? But what about owners of a large number of converters?
1.3 Looking under the lid
Before connecting the receiver to the network, let's look under its cover. To do this, use a Phillips screwdriver to unscrew the four screws on the rear wall of the receiver and remove the cover. First let's look at the power supply. At first it seemed to me that it was identical to the power supply from the CSD-01/IR. In any case, the circuitry is the same. A quick-change fuse, a varistor that protects the power supply from overvoltage in the primary, and an insulating sticker on a large capacitor are used in a completely similar way. However, when you look closer, you begin to notice differences. The shimka in the primary is used in another housing and installed on a radiator; in the secondary, some diodes are used with high current. This was not done by accident. After all, increased requirements for the processor imply greater power consumption, which requires more power output from the power supply. The capacitors are from CapXon. In general, I liked the power supplies from Coship. We have been selling CSD-01/IR receivers for four months now and to date we have not received a single complaint regarding a failed power supply. And in general, the defect statistics for receivers is still negligible - 0.25%. Although, of course, little time has passed for full statistics.
To enlarge the image, click on the picture.
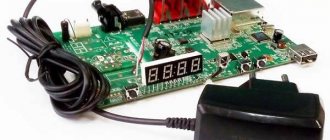
Let's look at the motherboard. If you put two receivers side by side, the features of the same pedigree immediately catch your eye. Firstly, everything is done equally well. It may be without any zest, but it is immediately clear that there are no frills or pretentiousness. A slightly crooked heatsink on the processor is already becoming the calling card of the assemblers at the Coship factory. In any case, it made me smile. To be honest, I will be somewhat upset if in subsequent models of receivers from this manufacturer the radiator is positioned evenly. The third distinctive feature is the presence of many unsoldered elements on the board. It is immediately clear that the manufacturer initially offered the operator a more functional model. However, the operator already created his own specification for specific tasks from this model. Although there is a place for installing Scart on the board, it is not there. But there is a COM port on the board, but there is no COM port on the rear panel. The board also has a JTAG connector. So, for repairs and diagnostics, service centers have the necessary connectors. The card reader is made according to the standard design on TDA8024. Similar ones are used in other receiver models. This part of the receiver is clearly purchased and made at another factory.
To enlarge the image, click on the picture.
The tuner in the receiver is again from Sharp. Exactly the same one is installed in CSD-01/IR. Their sensitivity will be better than that of other models.
1.4 Studying the menu
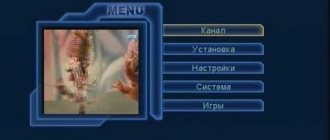
It's time to plug the receiver into the network, see what's in its menu and configure the channels. When turned on, a loading indicator image and the inscription “Loading” appear, which in Russian means “Loading in progress.” Then the colorful Continent TV logo appears on a dark blue background in the form of diamond triangles.
You are then prompted to start searching for channels. It's nice that Russian is selected by default.
But further loading can proceed according to two scenarios. If you have an antenna converter connected, directly tuned to Continent TV or via the DiSEqC 1.0 port, then the receiver itself finds the desired port and scans Continent TV channels.
If the system has tricky settings using a multiswitch, then this trick does not work and you have to go to the receiver menu. The menu image is displayed in 16:9 format. Whether this is right or wrong is up to everyone to decide. Moreover, you can certainly configure this yourself. But the presence of “TV Guide” as the first item in the menu confused me a little. It would be more logical to travel through the sections in order. And the first place should be “Installation”. Then “Settings” should follow... But the clarity of the menu image cannot but rejoice. There is no moire or flicker. Good resolution.
Go to the “Installation” section and configure the satellite parameters for your system. There is no DiSEqC 1.1 protocol here. It's sad... We also note that there are still only three names on the list of satellites. Is it really difficult to add at least nearby satellites to the list?
When I try to minimize the screen to 4:3 format, the same image looks like the photo below. The text from afar is somewhat difficult to read even for my 100% vision. Maybe you should choose a different font?
If in the item “Item number” you select DiSEqC 1.2 and press the OK button, you can get to the settings section for a motorized suspension operating using this protocol. I didn't see any USALS settings. If we have engine settings, then for all options.
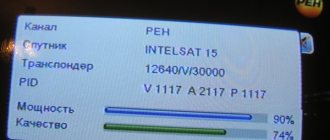
If you click the yellow button in the “Installation” section, you will be able to get to the menu for editing and adding transponders. Here you can also see the power levels and signal quality of the transponders. Visually, they are almost the same as those observed with the CSD-01/IR receiver.
Pressing the blue button allows you to go to the satellite name editing mode. Everything here is quite simple and clear.
Before scanning channels, you need to press the OK button on the selected satellite. Then an asterisk with a hand symbol will appear opposite the channel name, confirming your choice.
Then press the red button on the remote control. The receiver enters channel scanning mode. The process itself is quite fast and takes no more than 5 seconds for two Continent TV transponders. When scanning, a list of found channels will be displayed in the left window. After clicking the OK button, the receiver goes to the first channel in the list - this is the Continent TV Info Channel.
If you press the OK button, a list of available channels is displayed on the screen. You can scroll through it only with the up/down buttons. An obvious flaw. If there are several hundred channels, then you definitely need to have page-by-page scrolling using the right/left buttons.
Let's go to the menu again. Now the object of our study will be the “Settings” section. I would move the top section to the end of the list. Default settings should not be in the most visible place for the user! Although, to get there, you need to know the password (default 0000). Here the password itself is changed and the Parental Control parameters are set - modes: Unblock all, Closed, 7 years, 9 years, 15 years, 18 years.
Below is the “Channel Editor”. Here you can place channels in the list of “Favorite” channels, delete unnecessary channels, block them for viewing and move them within the list (for example, arranging channels by topic). You can only create one list of favorite channels - this is clearly not enough. To enter this section you need to enter a password.
It's not immediately obvious, but there is one flaw in this section. There is no usual dollar sign next to encrypted channels. To edit the list and delete channels that, in principle, cannot be viewed on this receiver, such an icon would not be superfluous. It is noteworthy that, unlike the CSD-01/IR, some functions for editing the channel list are present here right away. But why can’t you rename the channel? Is it really easy for him to write channels with Russian names? In general, I liked the procedure for editing the channel list on this receiver. You go through the list of channels from top to bottom, use colored buttons to place labels, save when you exit, and that’s it. Place a cross next to the Phoenix channel, which is no longer broadcast, and click OK.
A warning will appear on the screen indicating that the action is irreversible. After confirming by clicking OK, the changes will be saved.
Next are the general settings. Here you can change the menu language (there are only two: Russian and English), adjust the transparency of the menu (default 100%), turn on/off summer time and set the current time zone.
The fourth section is Audio/Video settings. Here you can select various setting options: TV mode (PAL, NTSC, Auto), aspect ratio (LetterBox, Pan&Scan, Default), TV screen format (4:3, 16:9, Auto), turn on/off subtitle display, change image resolution (576p, 720p, 720p/60Hz,1080i, 1080i/60Hz), set audio modes (stereo, left, right) and select audio decoding mode (AC3 and DCM). Many of the settings in this section are called up in full screen mode by pressing special buttons on the remote control. However, more on this below. The only thing I would like to draw the attention of software writers is that the abbreviation hz, which denotes frequency, should be written with a capital letter: Hz. The whole world writes like this. It’s a shame for the German scientist Hertz...
Well, the last, most loaded (I would say overloaded section) is Information.
Here you can read information about the smart card...
...and view Softcell Service Status information. In my opinion, this is purely official information. The average user has no use for it.
Below is a section where we look at the bootloader status. Here you can find information about the software version of the receiver, as well as the CSSN number and serial number of the receiver required to bind the card.
The “Components” section could also be hidden from the eyes of the average user. After all, if necessary, this information could be obtained by pressing a combination of buttons on the remote control. The less the subscriber sees numbers he doesn’t understand, the fewer questions he will ask.
“Mail messages” is the place where letters from the operator will be stored. News, subscription end reminders, announcements and you never know what else.
Let's return to the first section of the TV Guide menu. Now there is a lot of information here too. By the way, you can directly access this section of the menu by pressing the EPG button on the remote control.
Press the red button and go to the program guide. And this is where hidden functions begin to appear.
Press the blue button and go to the “All tasks” section. The list is still empty.
By pressing the Exit button we return to the previous menu, and press OK on the selected program. A pop-up menu appears for selecting and setting a task. The schedule type is programmed to Record and Playback (I would replace this word with Inclusion). The schedule mode can be selected from three options: once, daily and weekly.
Select one-time activation for the selected channel and click OK. An alarm icon appears next to the channel name. Now at the appointed time the receiver will turn on on the selected channel. Moreover, even if you are watching another channel, at the right time you will no longer miss the selected program. It is worth drawing the attention of the interested reader that if the letter R is present in the alarm clock icon, then the recording mode is selected. If the letter P is present, then playback (turn on) the channel.
This task is now displayed in the “All tasks” section.
1.5 Remote control
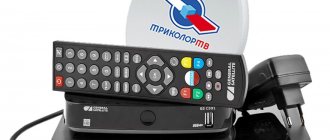
It is better to study the operation of the remote control from the receiver in the user manual. I’ll try to explain why. The remote control itself is not much larger than the one that comes with the CSD-01/IR. In terms of weight, it’s even lighter. But there are almost twice as many buttons on it. Even though it fits comfortably in my hand, I couldn’t remember some of the very necessary buttons. I constantly had to look at the inscriptions on the “lazy guy”. There was no intuitive connection. Maybe this is because I was constantly poking around in the receiver’s menu, rather than stupidly clicking through channels and going through programs.
To enlarge the image, click on the picture.
Until I read the user manual, I still didn’t understand why the remote control has a function to turn the TV’s power on/off. It turns out that the receiver's remote control has four learnable buttons. And with some simple manipulations you can teach him the minimal functions of controlling your TV. How this is done is described in detail in the user manual. I would like to note that, for example, Pioneer TVs do not have an input switch button on the remote control. There is a separate button for each input. Therefore, such a number of programmable buttons is not enough for me. Out of habit, I was fooled several times by turning on the receiver. The eyes found, and the fingers pressed the red button. And to turn on the receiver you had to press the blue button.
It is necessary to mention the “range” of the remote control. The maximum distance from the receiver to the control place was approximately 5.5 meters. This does not mean, of course, that this is the limit for him. I tried to control the receiver by walking close to it and pointing it at the opposite wall. Thus, with reflection, the signal from the remote control traveled about 10 meters. All switches were saved. I also moved the remote control away from the receiver to different angles. Control failure occurred at an angle of 30-40 degrees from the straight line. In principle, not bad.
It’s worth talking a little about some of the remote control buttons that call up various settings (buttons related to the operation of the functions of recording and playing programs on a USB drive will be discussed below in the corresponding section). Some of the buttons, such as Mute (mute), Last (switching between the last two channels watched) are quite easy to use. But there are others that are directly connected to sections of the receiver’s menu and allow you to enter the corresponding menu with one click. So, for example, the Audio button calls up a menu subsection that allows you to select the desired audio track (if there are several of them), as well as change the sound format (stereo, mono right, mono left).
Info button - when pressed for the first time, displays information about the selected channel. Moreover, not only the name of the current program is displayed, but also the name of the next one...
...with the second, more detailed information about the current transmission. Moreover, after three seconds the bottom line of information disappears and the top line does not disappear until the Exit button is pressed. This was apparently done so that the remote control buttons P+/P- could be used to view the TV program.
The Aspect button is also associated with a menu subsection where you can change the screen settings: aspect ratio and screen format.
Fav button - displays a list of favorite channels. I'll repeat it again. It’s a pity that in this receiver you can only create one such list. For example, I like it when you can create thematic lists.
1.6 Tuner operation
Since the main story about the internal contents of the receiver’s menu is finished, it’s worth presenting my subjective impressions of the operation of the receiving part of the receiver. Since the quality of signal reception from the satellite depends on the sensitivity of the tuner, I consider this parameter to be very important. During the four weeks that passed from the moment I received the receiver to the final publication of this report, I was able to test the receiver not only on different satellites, but also in different places. If at home I have antennas that provide reception in any conditions (snow, thunderstorm), then, for example, in the office, where, as they say, “a shoemaker without boots” and antennas of somewhat smaller diameters, I can evaluate the quality of reception in comparison with other receivers. For example, in the rain, the interruption of the picture on open channels on the ABS-1 satellite with the tested receiver occurred much less frequently than with the famous Arion with triples (one copy of this receiver is in the office for activating cards for clients). At the same time, we were able to compare the performance of this receiver with the Topfield TF7700 HDCI receiver with the Continent TV CAM module installed. In heavy rain, Topfield's picture began to work in freeze-frame mode, but the Continent CHD-02/IR continued to show. Only when the image on the 7700 was almost completely restored, only then did the “No Signal” message periodically begin to appear on the Continental receiver. It’s a pity there is no second receiver for a fuller experience and more correct statistics.
1.7 Linking a card
I have repeatedly written words of gratitude to the management of Orion Express, which helps with my tests, providing maximum information and opportunities for this. Once again they helped me activate and link my existing installer card to this receiver. The activation itself took place only on the second attempt. The first time I tried to do this was in the office. But as luck would have it, there was a severe thunderstorm in Novosibirsk that day. I had to postpone the process to another day. The receiver was already installed at home. I myself was at work. I asked my son to turn on the receiver at home. The SMS itself sent the activation data to Moscow. And about five minutes later my son called back and said that everything worked. Therefore, many thanks to everyone who participated in this process.
As I already wrote in the first review, all new receivers for Continent TV are made using Secure Silicone technology, that is, the receiver works in pairs only with a card “linked” to it. Whether this is good or bad, let them debate on the forums. It seems to me that the binding should not be so severe. Firstly, installer cards are not used. A function for pre-linking the installer's card to the receiver in your personal account with the possibility of re-linking it to a permanent card after a couple of days would not hurt. This is necessary primarily for installers, who could check the equipment before visiting the client. In our vast expanses, such as in Siberia, this will not be superfluous. I remember a story about one installer who went to two Tricolor Siberia installations 200 kilometers away. I didn’t bother to check the DRS4500 receivers before leaving. As a result, he had to go there a second time. Two out of two were defective. So...Although this is not the case with the current generation of Coship receivers, China is a country of contrasts. God saves man, who save himself.
1.8 What's wrong with the picture?
The TVs I have allow me to evaluate the picture with different connection options. On the Pioneer PDP-506 plasma I can check all the options: composite via regular tulips, component and HDMI. For the hundredth time you are convinced that connecting via HDMI gives a huge gain in image quality. It’s nice that compared to February, there is a noticeable improvement in the picture on Continent TV channels. Artifacts that arise during compression in MPEG4 during rapid image changes (especially on sports programs) have become almost invisible. Colors when connected via HDMI are quite bright and rich. The contrast is clearly higher than when connected via a composite input. And the confusion immediately goes away.
But still, I wonder what standard the HDMI interface of the receiver is designed for? Over the past year, two versions of the HDMI standard have appeared: 1.4 and 1.4a. According to Wikipedia, their main difference from previous versions, besides support for higher resolutions, is support for the 3D format. Considering that the Continent TV package has already begun broadcasting programs in 3D, then this would not be out of place. But the user manual doesn't say anything about the HDMI version.
I would really like to evaluate the picture quality when receiving HD channels. But in Siberia they are currently practically unavailable. We can only hope that their time will come this year. After all, if you rethink the well-known saying, the one who is the first to launch HD channels in Siberia is the winner...
1.9 Write, read, erase
It's time to familiarize yourself with the USB recording function. This feature is certainly not new in the world of satellite equipment. But having experience with many models of receivers, I will say that in most of them it looks so different that you can write a separate article on how to organize the recording of TV channels on external media. Let's try to evaluate the advantages and disadvantages of organizing this process on the proposed device.
The first thing we will pay attention to is compatibility with a variety of flash drives. Of course, I am not able to review all the models available on the market. But from my experience I can say that the problem of compatibility of this equipment (flash drives and receivers) really exists. Not every receiver will fit a certain model. But at the same time, I had to encounter such cases when a flash drive works on one receiver, but fails on another, and vice versa, a flash drive that works on the second does not work on the first. A lot here depends on the type of file system supported by the receiver. I strongly recommend paying attention to this. For example, in the Operating Manual for the CHD-02/IR receiver it is written in black and white that the file system should be FAT32.
Well, it's time to move on to action. For this I will use three different flash drives from different manufacturers. Moreover, among them there is one that flatly refused to work with several receivers at once: Globo 9600, Galaxy Innovations S3489 and S9196. Which one do you think I started with? Right. Exactly with this one. I formatted it on my computer in FAT32, removed the rubber plug on the front panel of the receiver, installed the flash drive in the slot and... Lo and behold!!! She made up her mind immediately. The screen displays the message “USB device found, please wait, checking in progress” for a couple of seconds, which is replaced by the message “USB device is working normally.” Looking ahead, I will say that other flash drives worked perfectly with this receiver. I still can’t get around to getting myself a USB hard drive. It’s a pity that we weren’t able to check the operation of the receiver in combination with these devices.
Out of habit, I press the button with the red circle. Nothing on the screen! I press it a second time - there is nothing on the TV screen or on the receiver display. Strange... I press again. Only after seven seconds (measured later) an icon appears in the upper left corner of the TV screen informing about the start of recording. There is absolutely nothing on the receiver's display - an obvious flaw.
We press the button with the red circle again and only then the recording settings menu is displayed on the TV screen. There are two parameters to set here. The first one is recording time. In the menu read - period.
You can also change the file name here.
When there is very little time left before the end of the recording (I can’t say exactly how much - the time was always displayed differently, apparently due to the fact that the recording time was constantly varying), an information window appears with a proposal to extend the recording time. I think this is a very useful thing. For example, you started recording a movie, but the start time was shifted due to advertising or delayed news. There was an opportunity to make adjustments.
This is what the list of recorded files looks like. The duration time is shown in minutes. In this section, you can delete an entry, group it, rename it, and block viewing. The viewing starts with the OK button.
Almost the same menu is called up from the remote control when you press the “List” button on the remote control. Only here information about the free space on the media is already shown and an unnecessary entry cannot be deleted.
After you start watching a recorded program, a characteristic playback symbol is displayed on the screen.
It is very interesting to see in what format and how recorded programs are written to a flash drive. To do this, we move the media into the computer. The root directory contains two folders and two files.
We are interested in the PVR directory. This is where all program records are added. The name of the directory with the program completely copies the date and time the recording began.
Each directory contains two files: an index file and the actual program entry itself in .trp format. The format for satellite receivers is quite common. The only drawback is that too few players support it. However, .avi transcoders are quite available.
Completely missed the PVR Settings section. Interesting menu. To understand exactly what each item means, carefully read the Operating Manual.
Returning to the previously described operation of the EPG function, let me remind you that there you can program the recording of programs by time. Assigned tasks also appear in the “Schedules” section.
There is also an item in the menu where you can format a USB drive. In my experience, it is better to always have a flash drive for recording, formatted in the receiver. I don’t know whether I have this prejudice or not, but I have encountered that USB flash drives previously formatted on a computer did not always work fully.
It is impossible not to mention one of the buttons on the remote control used for recording - PVR Assist. It’s hard to say about other buttons on the remote control for recording/playback modes. I still don't understand their work. It feels like the algorithm for their operation in the receiver software is written incorrectly. I think that programmers will pay attention to this in the future. It's one thing to work on a menu. It’s quite another to activate functions without calling up the menu.
There are two more functions in the receiver that cannot be kept silent about. This is playback of images in .jpg format and playback of music files in .mp3 format. Let's start with the photos. To do this, we will write several files to a flash drive for testing. In principle, there is nothing unusual on the menu. The only pity is that the viewing mode cannot be directly controlled from the remote control - you must go to the receiver’s menu. For photos taken with a 5 megapixel camera, downloading files takes a somewhat annoyingly long time (about 7 seconds). Disorder. On other receivers it seemed to me that the boot process was faster. And the photographs themselves seem somewhat compressed from the sides.
This is what the Thumbnail View mode looks like. It also loads slowly. It is much more interesting to view it in the “Slideshow” mode. There are no annoying pauses, and the photos change smoothly.
Playing MP3 files is not without its drawbacks. For example, files that have Cyrillic in their names change their names. Russian letters simply evaporate. But the playback of the files themselves is good, without any brakes.
1.10 Results
By and large, testing of the receiver is completed and some results can be summed up. I liked the receiver mainly because of its simplicity. It’s not for nothing that they say that everything ingenious should be simple and understandable. Of course, I embellished about genius. There are definitely more sophisticated models. But we must not forget that this is primarily an operator’s receiver, which was created with the direct participation of the operator’s technical services for their specific tasks and services. The average user does not need any super bells and whistles.
Simple satellite TV subscribers only need to press buttons on the remote control to cycle through channels and adjust the sound. For those who need greater opportunities in life, Orion Express, in close cooperation with the SMIT company, has prepared the Irdeto Secure Silicone CAM module. Buy a DVB-S2 receiver with Common Interface, a CAM module, whatever your heart desires, and watch Continent TV. And if you are satisfied with simplicity and reliability, then CHD-02/IR is possible and your choice. It also seems to me that satellite TV installers will also appreciate this. After all, the main thing for them is that the subscriber does not make complaints about the quality of the equipment.
What could be improved. Well, I’m already tired of writing about the list of satellites. Give NTV and TNT from Yamal! There are clearly few favorite lists. It would be nice to add support for the DiSEqC 1.1 protocol. If there is a large number of channels in the list, it would be correct to scroll through the list page by page. Undoubtedly, you need to pay attention to the operation of the remote control buttons in recording/playback mode, and in some places adjust the display of various menu functions. However, these are all software things. I think the programmers will work and fix a lot. As for the hardware, in almost a month of testing there was not a single freeze, loss of image or sound. Let's hope that the receivers from the production batch will be at least as good as the test copy.
The receiver was evaluated by Alex313 June-July 2010.
Tags:
- continent tv
Connection nuances
What equipment is needed to connect Content TV? First of all, this is a Continent CSD-01/IR or Continent CHD-02/IR receiver with a CONTINENT TV access card, a converter with universal functions, a 60 cm satellite antenna (for the Urals and more distant areas - 80 cm).
Continent TV is constantly expanding the list of channels, of which sharing allows you to watch more than 40 for free, and cardsharing with payment will allow you to connect to a list of no less than 135 channels of various types - world cinema, sports, discoveries (packages about nature), erotic, etc. . These include all federal broadcasting channels, Carousel, Discovery Channel, Our New Cinema, World of TV Series, BST, RTG TV - this list can be continued for a long time.