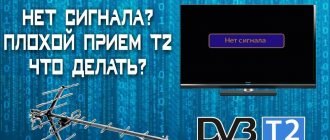
Otau TV: UGC To set up terrestrial television, you do not need to call a specialist. If you have step-by-step instructions you can easily cope with this task yourself. How to set up Otau TV on your TV without wasting time and nerves? Read on.
How to set up Otau TV on your TV yourself
First, let's look at the necessary equipment. To catch the maximum number of national terrestrial television channels in good quality, it is important to use a decimeter antenna in combination with a special receiver.
OTAU TV recommends the Strong SRT-8520 receiver. It is capable of processing the T2 signal and decoding the IRDETO cipher. In addition, for better reception it is better to use an outdoor antenna. The internal device also copes well with this job, but only if the subscriber is not too far from the radio and television station.
How to call from a hidden number on a mobile phone
So, step-by-step instructions for setting up OTAU TV look like this:
Step #1. Receiver connection:
- Turn the receiver back towards you and familiarize yourself with the connectors. We are interested in: ANT input, RSI or HDMI set.
- Connect the antenna cable to the ANT input.
- Connect the RSI cable (“tulip”) to the corresponding sockets by color. The yellow cable is intended for transmitting a video signal (video-in), red and white - for audio: red - audio-in stereo; white - audio-in mono+stereo.
- HDMI is a more advanced analogue of the “tulip”, thanks to it there is no need to understand the matching of colors and connectors.
Note: An HDMI cable must be purchased separately as it is not included in the package.
Step #2. Network connection:
Seven common mistakes when changing tires are named
- Connect the receiver to the electrical outlet by inserting one end of the cord into the device and the other into an outlet.
- Activate the receiver by pointing the remote control at it and pressing the red button on top of it.
Step #3. Setting up Otau TV channels:
- Using the TV remote control, switch it to AV mode. When the receiver is turned on, the inscription “National Digital Terrestrial Television OTAU TV” should appear on the screen.
Note: if there is no inscription, check whether the receiver is plugged into the network, and that the antenna cable and connecting wires are connected correctly.
- Wait for the menu to load. This usually takes no more than forty seconds.
- Go to settings. Select the interface language, quality, image format and region of location. If you use an active antenna to receive the signal, set this function in the Antenna Power parameter.
- Click the “Next” button, after which an automatic channel search will start.
A few tricks to make your train journey more enjoyable
Setting up Otau TV manually
If the automatic method does not produce results, perform manual channel tuning.
It's easy to do:
- Press the exit button on the remote receiver.
- Go to “Antenna Settings” and set the broadcast frequency range depending on your region.
Note: You can find a complete list of broadcast frequencies in the user manual or by calling support.
As you can see, there is nothing complicated in setting up Otau TV. Connect the equipment according to the instructions, search for channels and enjoy the excellent quality of digital terrestrial television. Detailed information about connection conditions can be found on the website otautv.kz.
A unique selection of news from our editor-in-chief
Source
Subscriber's connection to the device:
1).
2) the antenna is connected to the radio;
3) press the corset to the right side of the antenna and then press on it;
4).
5) The cable must be connected to the antenna, and the signal must be removed from the burner.
Subscriber zhiyntyktyn kuramyna enetin zattar:
1).
Signals senіmdi kabyldau ushіn antenna diameter aimak baylanysty, 0.9 bin 1.2 m aralygynd bolady.
2) әmbabap shuyly az kusheytkish block; 3) F-type as stinging;
5).
Please connect the old terminal to the subscriber's antenna, the antenna cable, the cable, the cable, and the cable. Olek anyktalady. Subscriber's connection to the radio station, KazSat-3, the signal has been received from the antennas. kaita kuige keltiru bolyp tabylada. The subscriber lives on ornat talaptars buzylgan zhane antennas KazSat-3garyshevraty na kayta kelter mumkіndіgі bolmagan zhagdayda antennas baska zherge austyru kazhe b ұл subscriber zhiyntykty zhan installationdau zhumys kolemіne sajkes keledi.
Zherseriktik antennas Intelsat 904 (60°E) zherseriginen KazSat-3 (58.5°E) aystyryp kuige kelter ushen aldymen zherseriktik receiver nemese CAM-module qoldanatyn bigsanyz telediards kaita teңshelimdeu kazhet.
Birnshi kadam: Subscriber kondyrgyny kuige kelter
- Bagdarlamalyk zhasaktamanyn (BZ) songy kuskasyna aldyn-ala zhanartylyp koyylgan zherseriktik kabyldagysh koldanatyn bolsanyz, mazir archyly qabyldagyshty zauyt yk tekshelimge tussiriniz, ary karai zherserikt tandau kezinde KazSat-3 korsetіniz, then signaldyn money men sapas turaly aparat korsetіledi (eger zherseriktі to antenna Aldyn-ala kuyge keltirilip koygan bolsa), eger KazSat-3 kolzhetimd zherserikter tiziminde korstelimese, kabyldagishynizdyn BZh nuskasyn tags bir retekseriniz, bel kim sizge BZ zhanartu kerek.
- Eger sіz SAM-moduldi teledidar koldanatyn bolsanyz, kelesі іс-sharalardy atkaru says:
A) telediardyn tenshelimderinde zherserikti tandau kezinde, mumkindiginshe Intelsat 904 (60°E) zherserigin KazSat-3-ke (58.5°E) auystyru kkaet. Usynylgan tіzimde KazSat-3 Bolmasa, zherserikt “Tutynushylyk” retinda kolmen terіp kosynyz;
Ә) Residential LNB-den “9750-ge” auystyrynyz;
B) Transponder parameterlerin tenshelimder/ozgerister mazirinde 1 kosymshaga saikes, KazSat-3 zherserіgіnіn 6 tasponderin kosu kazhet.
Eskertu: OTAU TV zhelіsіnің KazSat-3zhererіgі arkyly khabar taratuynyn algashky kezeninde B4, B6, B8 degen ush transponderdin parametrlerin koldanu zhosparlangan.
B) kosylgan transponderlerdi ret-retіmen tandap, sapasynyn signal kazhetti dengeyde ekenіne koz zhetkizu (äger zherseriktik antenna aldyn-ala kuyge keltirilgen bolsa).
Kosymsha 1. KazSat-3 series of transponderlerin parameters.
P№
Garysh devices
Transponder number
Volumes of radio iron ortalyk zhiіlik, MHz
Tomeng radio polarizations
Yeskertpe
Barlyk multiplexer ushіn kelesі parameterler koldanylady: Modulation 8PSK,FEC 3/4, charts zhyldamdyk 30 000 Sim/s
Source
How to reconfigure equipment for OTAU TV subscribers
OTAU TV transfers broadcasting to a new satellite. In this regard, subscribers must reconfigure their equipment.
For reference. OTAU TV is a satellite operator in Kazakhstan. It offers over 100 television and radio channels, 57 of which are available free of charge, without paying a subscription fee. Operator services are available in any region of Kazakhstan. One of the company's advantages is a convenient menu. Users can select 1 of 3 languages and enjoy additional features such as parental controls, program guide, etc.
To begin, make sure that:
1. There are no types of interference in the form of trees, high-rise buildings, etc. in the antenna’s field of view, and a direct line of sight to the satellite is created.
2. You can securely attach the “plate” to the building.
3. If service work is necessary, you will be able to easily access the antenna.
4. Storm water or ice floes from the roof will not get onto the “plate”.
5. The antenna is located at a minimum distance from the satellite receiver.
The subscription kit consists of the following elements:
1.
Offset “plate” assembled with a reflector, rods, support, positioner, fasteners, and irradiator holder. Depending on the region of installation, the antenna diameter can range from 90 to 120 cm.
2. Low noise amplifier unit.
3. F-type crimp connectors.
5. Subscriber receiver or CAM module. The first option is compatible with all types of TVs. The second - only with those equipped with a CI connector.
MTS TV
MTS TV SATELLITE ANTENNAS IN UST-KAMENOGORSK. SALE OF KITS, MTS TV TUNERS, MTS TV SELF-MODULE, CONNECTION, ANTENNA INSTALLATION, SETUP
The largest cellular operator MTS has launched a new paid satellite television project now in Kazakhstan called “Satellite Television” from MTS.
MTS TV
is a new television format from the largest cellular operator in Russia. MTS TV is broadcast from the ABS 2 satellite (75° east). The MTS Satellite TV package includes about 130 different popular TV channels in excellent quality, including more than 25 HD channels. Some channels include two versions with different time zones, so if you missed your favorite show, you can watch it on the same channel, but in a different time zone, for example +2,+4,+7 hours. Watch the best shows and films from domestic and foreign countries production! Connect a new generation television with satellite TV from MTS.
To watch MTS Satellite TV you need the following equipment
:
One of the following devices: HD set-top box with MTS SIM card. Using this device, it is possible to view channels in HDTV format (“high-definition television”).
HD Wi-Fi set-top box with MTS SIM card. A TV set-top box with the ability to watch channels in HDTV format, which has a built-in Wi-Fi module.
TV module (CAM) is a device for watching Satellite TV without using a set-top box. The TV module also allows you to watch channels in HD quality. To use the CAM module, you need a TV equipped with a DVB-S2 receiver with a built-in CI connector (CI slot).
Compact and easy to use! When using the MTS TV CAM module in a TV with a built-in satellite tuner, no additional external receiving devices are required, and, therefore, additional wires, power supplies, and an additional remote control. To view MTS TV satellite television programs, one remote control is used – Your television remote control.
Antenna
Converter
You can connect MTS TV in Ust-Kamenogrsk or throughout Kazakhstan and enjoy watching your favorite TV programs!
By choosing the services of our company, you receive:
High level of received satellite signal power
Service maintenance
And also: Get any information about antennas;
Select equipment;
What you need to know before reconfiguring your equipment
The scope of work depends on many factors. The location where the satellite dish is located is taken into account. The length of the cable and the location where the subscriber receiver is located are taken into account. If the equipment is placed according to the operator's recommendations, then most of the action will focus on reconfiguring the antenna. If you did not follow the recommendations when installing the antenna, it is possible that you will need to move the “dish” to another location. First, you need to reconfigure your satellite receiver or TV (when using a CAM module).
For reference. KazSat-3 is the national satellite of Kazakhstan. It was manufactured by specialists from JSC Information Satellite Systems named after Academician M.F. Reshetnev". The government of Kazakhstan decided to create it back in 2010. The spacecraft has 28 Ku-band transponders. On March 1, the media received information that testing was completed successfully. And subscribers began the transition to the new satellite.
Receiver reconfiguration guide
If you managed to update the receiver software to the latest version, then you need to reset the settings to factory settings. Enter the menu and select the KazSat-3 satellite. Data about the signal level and quality will appear at the bottom of the TV screen. If you have not updated the software to the latest version, you will have to do so first. Otherwise, you will not find KazSat-3 in the list of available satellites.
Guide to reconfiguring the CAM module
Owners of CAM modules must complete the following steps. Enter the TV settings and change the Intelsat 904 spacecraft (60°E) to the KazSat-3 spacecraft (58.5°E). If you do not find this satellite in the list, you can enter its name manually as “Custom”. After selecting a satellite, we proceed to changing the frequency. Change LNB to “9750”. Next, add 6 transponders, use the settings specified in Appendix 1 below. To do this, go to the menu for setting/changing transponder parameters. We select the added transponders and check whether the signal corresponds to the required level. This can only be done with a pre-tuned antenna.
For reference. A CAM module is an electronic device that is used as an adapter for an encoding system. They provide subscribers with access to media content on digital television. CAM modules are an excellent alternative to satellite receivers, as they do not take up extra space and perform all the necessary functions.
pp/p
Promotion. Connect OTAU TV T2 at a super price from 12,999 tenge and OTAU TV S2 from 27,999 tenge. Hurry, promotions are limited. Inquiries by phone: office, mobile/w hatsApp +7 707 250-55-75
Receiver selection
Some consumers believe that the more a satellite receiver costs, the better it is.
This statement is not entirely true. The price of the device is determined by several factors - the number of installed options, the ability to play HDTV, and, by the way, the “promotion” of the manufacturer’s brand. It often happens that a user purchases an expensive receiver with many functions, but in reality he does not need them at all, he just overpays for them. Therefore, the choice of receiver must be approached individually, based on your capabilities and needs. Also, when purchasing a device, pay attention to the encoding system of the channels (Seca, Irdeto, Viaccess, etc.) that you want to watch. Receiver models are conventionally divided into several groups, depending on the presence of certain functions or connectors, based on which they belong to one or another price category. Note that receivers from well-known brands will always cost an order of magnitude more.
1. Receivers that pick up only FTA channels (free to air), that is, free channels that are freely available. Such channels are present on almost all satellites. If you don’t want to deal with satellite television operators, pay them a subscription fee and FTA channels are enough for you, then this is the choice for you. You can buy a receiver of this group at the lowest price (50 – 100 USD). The manufacturer, image and sound quality, additional options and other technical characteristics distinguish these devices from each other.
2. Satellite receivers working with the popular Viaccess encoding. TV channels of the NTV Plus operator and some channels broadcast from European satellites are encoded in Viaccess. You can purchase such a receiver for 100 – 250 USD.
3. Satellite receivers that work with encodings other than Viaccess. Such devices are less popular, and their price is slightly higher - from 120 USD. Such receivers are needed for those who are going to watch foreign satellite television.
4. Receivers with a CI or CAM port. In addition to the usual slot for an access card, there is a CAM port through which an additional access module is connected, allowing you to open certain encodings. There are universal modules that provide the ability to work with several encodings simultaneously, their cost starts from 40 USD. A receiver with a CAM port can be purchased for 70 USD.
5. Receivers with a built-in module that opens 5 or more encodings (Viaccess, Seca, Irdeto, BetaCrypt, Nagravision, etc.). Manufacturers are creating more and more similar models, as this is a convenient option for those who have purchased a set of satellite equipment with a rotating satellite dish. The price of these receivers is not very high, from 80 USD.
6. Receivers with a built-in decoder (or encoding emulator). Card readers are not installed in such receivers, and encrypted TV channels can be watched after entering the key from the remote control. The advantage here is that there is no need to flash new keys onto the access card. The demand for these devices has recently increased significantly, so manufacturers began to produce them in large quantities, as a result of which the price for them has dropped. You can buy a receiver with a built-in decoder for 50 USD.
7. Receivers with a built-in hard drive. They have a built-in hard drive, the size of which will determine the price of the device. You can record programs or movies onto such a receiver and save them for a while. The larger the hard drive capacity, the more videos you can record. But you need to remember that not all films or programs are allowed to be recorded, as they are protected by copyright. Most manufacturers leave the opportunity for users to independently change the hard drive to a larger one (40 GB, 60 GB, 80 GB, 120 GB, etc.). Satellite receivers are produced without a built-in hard drive, but allowing you to connect it via a USB port. Also, receivers with two tuners are becoming popular. Here you can simultaneously watch one TV channel and record another. There are models that have both a card reader and CI, or only CI. Their cost starts from 300 USD.
8. Digital-analog receivers. In truth, the device is useless, since analogue television has long been giving way to digital satellite TV. All channels that continue to be broadcast in analog format have long been transferred to digital format.
- Digital dual-tuner satellite receiver GS B532M
9. Receivers with built-in subscription. They already have a built-in subscription to a certain package of channels from some satellite television operator, for example NTV Plus. There are devices with an additional card reader or CI slot, and some without them. Such receivers are becoming quite popular. Price – from 100 USD Conditional access modules with this function are also in demand.
10. Satellite receivers with advanced capabilities. This includes two or more format receivers: satellite receiver + cable receiver, satellite receiver + DVD player, combined devices: satellite receiver + multimedia center, etc. Perhaps cable receivers are not yet in demand in Russia, but universal devices will definitely find their buyer. But do not forget that the more complex the device, the higher its price, the more expensive the maintenance and the greater the likelihood of it breaking.
11. Receivers with the ability to receive HDTV. These are the most expensive terminals, but they provide the user with such opportunities that you don’t mind paying for them. The HDTV receiver plays video in DVB-S2 stream and supports MPEG-4 format. To watch satellite TV in high-definition HD format, in addition to the receiver, you will also need a TV that supports HD format.
Let's summarize all of the above.
Before you buy a set of satellite equipment, thoroughly familiarize yourself with the TV channels broadcast by different satellites. It is likely that free FTA channels, of which there are many on each satellite, will be enough for you. This will allow you to save on the purchase of a receiver, which can be purchased for 60 - 100 USD. If you have the financial opportunity, or you want to soon expand the functionality of your satellite system, then it makes sense to purchase a receiver with a module for 5 encodings or with a built-in emulator. To receive a signal from the Hot Bird satellite, you cannot do without such a device. A satellite receiver with a built-in hard drive is expensive. Its price is significantly higher than that of similar devices, but without it. Therefore, if there is no need for a hard drive, then you should not overpay the extra money.
Also, before purchasing a receiver, it would be a good idea to find out what additional features it provides. Many options are very convenient:
1. The presence of a modulator that allows you to distribute the signal from one receiver to several TVs. That is, on different TVs you can only watch the same channel at the same time.
2. Availability of outputs for digital audio/video (S/PDIF), for connecting the receiver to a stereo system or home theater.
3. The presence of an HDMI output, which gives access to watching TV channels in high definition HD format.
4. Ability to update the receiver software via satellite.
5. The presence of a built-in positioner that allows you to remotely rotate a satellite dish with a polar suspension, or support for the DiSEqC protocol version 1.0, 1.2, etc. An external positioner can be connected via DiSEqC.
6. The presence of such useful options as teletext, subtitles, games, EPG (electronic program guide).
7. Availability of a USB port through which you can connect to a computer or connect external media for recording programs. Also, a good feature is the presence of an Ethernet interface for accessing the Internet.
8. The presence of two tuners for receivers with a built-in hard drive.
1,2,3,4,5,6,7,8,9,10,11,12,13,14,15,16,17,18,19,20,21
To set up over-the-air television, you don’t need to call a technician. If you have step-by-step instructions, you can easily cope with this task yourself. How to set up Otau TV on your TV without wasting time and nerves? Read on.
How to reconfigure equipment for OTAU TV subscribers
OTAU TV transfers broadcasting to a new satellite. In this regard, subscribers must reconfigure their equipment.
For reference. OTAU TV is a satellite operator in Kazakhstan. It offers over 100 television and radio channels, 57 of which are available free of charge, without paying a subscription fee. Operator services are available in any region of Kazakhstan. One of the company's advantages is a convenient menu. Users can select 1 of 3 languages and enjoy additional features such as parental controls, program guide, etc.
To begin, make sure that:
1. There are no types of interference in the form of trees, high-rise buildings, etc. in the antenna’s field of view, and a direct line of sight to the satellite is created.
2. You can securely attach the “plate” to the building.
3. If service work is necessary, you will be able to easily access the antenna.
4. Storm water or ice floes from the roof will not get onto the “plate”.
5. The antenna is located at a minimum distance from the satellite receiver.
The subscription kit consists of the following elements:
1.
Offset “plate” assembled with a reflector, rods, support, positioner, fasteners, and irradiator holder. Depending on the region of installation, the antenna diameter can range from 90 to 120 cm.
2. Low noise amplifier unit.
3. F-type crimp connectors.
5. Subscriber receiver or CAM module. The first option is compatible with all types of TVs. The second - only with those equipped with a CI connector.
NTV PLUS
NTV PLUS VOSTOK SATELLITE ANTENNAS IN UST-KAMENOGORSK. SALE OF KITS, NTV PLUS VOSTOK TUNERS, NTV PLUS VOSTOK SAM-MODULE. RENEWAL OF NTV PLUS VOSTOK CARDS. CONNECTION, ANTENNA INSTALLATION, SETUP
NTV Plus is one of the first operators on the Russian satellite TV market. The company has been working in the broadcasting field since 1996. Over many years of activity, it has accumulated experience in the field of television and radio services and today can offer viewers a considerable range of multi-genre programs, films and programs. Today NTV-PLUS offers subscribers more than 240 channels of various content, which are transmitted, including in high definition format. The main difference between the operator and its competitors is, undoubtedly, the quality of the supplied signal, 24-hour customer service, a large assortment of satellite channels, especially SPORTS and films of its own production. Only on NTV Plus you will find the latest sports broadcasts and film premieres. In addition to the usual digital ones, the viewer is provided with about 20 channels in high definition broadcast format - NTV plus HD.
What you need to know before reconfiguring your equipment
The scope of work depends on many factors. The location where the satellite dish is located is taken into account. The length of the cable and the location where the subscriber receiver is located are taken into account. If the equipment is placed according to the operator's recommendations, then most of the action will focus on reconfiguring the antenna. If you did not follow the recommendations when installing the antenna, it is possible that you will need to move the “dish” to another location. First, you need to reconfigure your satellite receiver or TV (when using a CAM module).
For reference. KazSat-3 is the national satellite of Kazakhstan. It was manufactured by specialists from JSC Information Satellite Systems named after Academician M.F. Reshetnev". The government of Kazakhstan decided to create it back in 2010. The spacecraft has 28 Ku-band transponders. On March 1, the media received information that testing was completed successfully. And subscribers began the transition to the new satellite.
Receiver reconfiguration guide
If you managed to update the receiver software to the latest version, then you need to reset the settings to factory settings. Enter the menu and select the KazSat-3 satellite. Data about the signal level and quality will appear at the bottom of the TV screen. If you have not updated the software to the latest version, you will have to do so first. Otherwise, you will not find KazSat-3 in the list of available satellites.
Guide to reconfiguring the CAM module
Owners of CAM modules must complete the following steps. Enter the TV settings and change the Intelsat 904 spacecraft (60°E) to the KazSat-3 spacecraft (58.5°E). If you do not find this satellite in the list, you can enter its name manually as “Custom”. After selecting a satellite, we proceed to changing the frequency. Change LNB to “9750”. Next, add 6 transponders, use the settings specified in Appendix 1 below. To do this, go to the menu for setting/changing transponder parameters. We select the added transponders and check whether the signal corresponds to the required level. This can only be done with a pre-tuned antenna.
For reference. A CAM module is an electronic device that is used as an adapter for an encoding system. They provide subscribers with access to media content on digital television. CAM modules are an excellent alternative to satellite receivers, as they do not take up extra space and perform all the necessary functions.
pp/p
Spacecraft Transponder number Center frequency on downlink radio, MHz Polarization on downlink radio Note 1 KazSat-3beam No. 2B210720H-horizontal For all multiplexes the following parameters are used:
Modulation 8PSK, FEC 3/4, symbol rate 30 000 Sim/s2B410762Н-horizontal3B610804Н-horizontal4B810846Н-horizontal5B1010887Н-horizontal6B1210929Н-horizontal
Note: By angle we mean the angle by which the line of sight on the spacecraft deviates horizontally. By azimuth we mean the angle between the direction that points to the spacecraft and north.
Guide to reconfiguring a satellite dish:
1. Determine the coordinates of the optimal placement of the “plate”. Using a special device (GPS module), determine the appropriate latitude and longitude.
2. Calculate the optimal values of azimuth and elevation. Then determine the “LNB tilt angle” value. Adjust the antenna only after all values are known. The calculation can be made over the Internet, using special programs, or using applications for mobile devices running on Android and MacOS.
NOTE! THERE WILL BE DIFFERENT PARAMETERS IN DIFFERENT REGIONS OF KAZAKHSTAN. THERE IS NO SINGLE STANDARD.
3. Next, we try to rotate the antenna in azimuth, focusing on the parameters of the KazSat-3 satellite (58.5°E). To determine the correct position, we use the Satfinder device or one of its analogues. The antenna can be tuned manually, without the use of special instruments. But it will be a little difficult. In this case, we focus on the level and quality of the signal. It is necessary to ensure that the receiver displays the highest quality picture on the TV screen. To do this, we try to change the elevation angle.
4. Next, you need to adjust the polarization of the LNB.
NOTE! IF YOU HAVE ONLY USED A SINGLE WAY LOAN MUCH PREVIOUSLY, YOU WILL NEED TO REPLACE IT. ITS TECHNICAL PARAMETERS DO NOT ALLOW YOU TO RECEIVE THE SIGNAL OF A NEW CAPACITY.
After setting up the antenna, we proceed to setting up TV channels.
For reference. Satfinder is a special device that is used in setting up satellite dishes. It is presented in the form of a small receiver. It is connected to the satellite convector using a short cable. The scale of the device allows you to determine the accuracy of pointing the antenna at the desired satellite.
How to retune TV channels
Go to MENU and select “Search for channels”. We confirm our choice by clicking the “OK” button. You must wait until the search for a complete list of TV channels is completed.
What to do next
When all the necessary settings have been completed, you should make sure that the kit is working correctly. The subscriber must inform Kazteleradio representatives about the transition to the KazSat-3 satellite. To do this, you need to contact the support service by phone 193,+7(727)2 581 500.
The operator warns that all work must be carried out by specialists who have undergone appropriate training.
Source
How to set up Otau TV on your TV yourself
First, let's look at the necessary equipment. To catch the maximum number of national terrestrial television channels in good quality, it is important to use a decimeter antenna in combination with a special receiver.
OTAU TV recommends the Strong SRT-8520 receiver. It is capable of processing the T2 signal and decoding the IRDETO cipher. In addition, for better reception it is better to use an outdoor antenna. The internal device also copes well with this job, but only if the subscriber is not too far from the radio and television station.
How to call from a hidden number on a mobile phone
So, step-by-step instructions for setting up OTAU TV look like this:
Step #1. Receiver connection:
- Turn the receiver back towards you and familiarize yourself with the connectors. We are interested in: ANT input, RSI or HDMI set.
- Connect the antenna cable to the ANT input.
- Connect the RSI cable (“tulip”) to the corresponding sockets by color. The yellow cable is intended for transmitting a video signal (video-in), red and white - for audio: red - audio-in stereo; white - audio-in mono+stereo.
- HDMI is a more advanced analogue of the “tulip”, thanks to it there is no need to understand the matching of colors and connectors.
Note: An HDMI cable must be purchased separately as it is not included in the package.
Step #2. Network connection:
Seven common mistakes when changing tires are named
- Connect the receiver to the electrical outlet by inserting one end of the cord into the device and the other into an outlet.
- Activate the receiver by pointing the remote control at it and pressing the red button on top of it.
Step #3. Setting up Otau TV channels:
- Using the TV remote control, switch it to AV mode. When the receiver is turned on, the inscription “National Digital Terrestrial Television OTAU TV” should appear on the screen.
Note: if there is no inscription, check whether the receiver is plugged into the network, and that the antenna cable and connecting wires are connected correctly.
- Wait for the menu to load. This usually takes no more than forty seconds.
- Go to settings. Select the interface language, quality, image format and region of location. If you use an active antenna to receive the signal, set this function in the Antenna Power parameter.
- Click the “Next” button, after which an automatic channel search will start.
A few tricks to make your train journey more enjoyable
LIST OF TV CHANNELS
By choosing the services of our company, you receive:
High level of received satellite signal power
Original satellite equipment
Professional installation of equipment
Service maintenance
And:
Get any information about antennas;
Select equipment;
Place an order for the installation of your antenna.
To order you need:
Select the channel package you like
Attic keys (for apartments)
Apply by calling: 21 34 86, 57-90-78, mob. 8 777 5 411 411,
Payment is due after installation.
Ordering the installation of a satellite dish by specialists from our company is a guarantee of quality and your excellent mood from watching your favorite programs. We are waiting for you at st. Kazakhstan 83 (opposite the Pushkin Library), “ANTENNA” store.
INSTRUCTIONS
for connection to digital terrestrial television and radio broadcasting services “OTAU TV”
To receive digital terrestrial television and radio broadcasting services, you need a receiver (receiver) model SRT-8520, which provides signal reception in the DVB-T2 standard and is integrated with the encoding system installed on the broadcast network of Kazteleradio JSC. In order to ensure reliable signal reception, it is recommended to use an outdoor UHF antenna or an active indoor UHF antenna. Receiving a signal via a passive indoor antenna may not provide the required quality and stability of signal reception if the subscriber is located remotely from the nearest signal source.
- The signal is received from the air
- Signal source - the nearest RTS (Radio Television Station)
- Digital terrestrial receiver
- UHF antenna
- The antenna may be covered with snow or debris or blocked by a branch in the direction of the satellite. Turn off the receiver (power supply) from the mains, check the surface of the antenna to see if it is covered with snow or debris or a branch, clean the antenna, cut off the branch, clean the converter cover (“head”) from snow, while doing this, act carefully, try not to move the antenna (not to knock it down). setup, do not hit the antenna), turn on the receiver;
- The cable may not be connected or damaged. Turn off the receiver (power supply) from the network, check the connection of the antenna cable, disconnect the cable from the receiver and connect it back, repeat the same from the converter (“head”), turn on the Otau TV receiver to the network.
- The antenna tuning may have gone wrong. To tune the antenna. The cost of setup for subscribers who were installed by employees is free for a year from the date of installation, over this period - 2999 tenge, for other subscribers 4999 tenge.
- Maybe you changed the receiver settings. Reset the receiver to factory settings as follows.
- Maybe you have a single-sideband LNA converter. Follow steps 10) and 9).
- maybe the receiver itself needs to be repaired, if more than a year has passed since the installation of Otau TV and all the actions described here have not solved the problem, then send the receiver in for repair. The cost of repairs averages 3,000 tenge, depending on the cost of the parts being replaced.
To receive a signal you need:
(internal or external, depending on reception conditions).
Connection diagram
Option No. 1 Option No. 2
Receiving a signal via an external antenna. Receiving a signal to an indoor antenna
Connecting the receiver
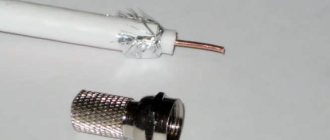
1. On the rear panel of the receiver, connect the cable from the antenna to the “ANT Input” connector.
2. Connect a multi-colored RCI “tulip” cable to the connectors on the rear panel of the receiver, according to their colors: yellow to yellow, red to red, white to white. In the same way, according to the color, connect the second side of the cable to the “Video-in” / “Video-In” and “Audio-in” / “Audio-In” connectors on the TV. If the TV does not have stereo sound - there is only one connector for the "Audio" input - connect the connector to one of the plugs of the cable intended for audio transmission.
* If your TV has an HDMI connector, you can connect the receiver using an HDMI cable, which will improve image quality (the HDMI cable is not included in the package and must be purchased separately in retail chains).
3.Connect the receiver to the power supply
Automatic channel search
What to do if (for card receivers with NDS VideoGuard):
1) when you turn on any channel of the Basic package, the message “to order this channel, contact the contact center” appears on the screen?
Answer:
Apparently your Otau TV receiver was disconnected from the network (was turned off) for a long period of time (more than 1 month). Call the contact center
2) the message “Technical problems. The receiver cannot receive the signal. 1. Check the cable connection...” or the receiver does not load, the message “Please wait, turning on the receiver” appears on the screen for a long time?
Answer:
There may be different reasons for this message to appear:
Calling a technician and diagnosing a fault costs 2999 tenge.
3) a message appeared on the screen: “Your access card is blocked. ... Contact the contact Please insert the access card and do not remove it until...”?
Answer:
Open the cover of the card reader, remove the access card, wipe the contacts with a dry cloth (be careful not to break the contacts) and insert it back (in the direction of the arrow on the card, arrow up). The cover is located on the right side of the front panel, where there is an Otau TV logo. Some receivers have the card inserted from the back.
If this does not help, reset the receiver to factory settings (step 10), unplug the receiver from the socket and plug it back in, after the message about the absence of a card appears, unplug the receiver from the socket and plug it back in.
If this does not help, the receiver may be faulty. .
5) When you press the receiver remote control (Otau TV), nothing changes on the TV screen, the Otau TV logo does not appear, and the message appears on the screen: “No signal” or “Bad signal” or “Search for a channel” or “No signal” (on Chinese TVs), etc.
Answer:
This means that YOU switched the TV to another input that is not connected to the Otau TV receiver, or switched the TV to TV. In this case, switch the TV to the input to which the Otau TV is connected, look on the TV to which connector (AV1 or AV2 or AV3... or HDMI1 or HDMI2 or...) the cable from the Otau TV receiver is connected and on the TV remote control switch the TV to this input. Otau TV has nothing to do with it.
6) Some channels, for example, the Astana channel, show glitches, small squares appear on the screen, the sound disappears, the frame is delayed
Answer:
Follow the steps indicated in point 2).
7)
The message “to order this channel, contact the contact center” appears on the screen
. Answer:
1) If such a message appears on all channels, including Kazakhstani channels (only channel zero is shown), this means that your receiver is blocked due to lack of registration (not to be confused with activation).
2) If such a message does not appear in all channels, only on paid channels, this means that you have run out of funds in your personal account, you need to top up your personal account in Otau TV and paid channels will be shown. It is advisable that at the time of payment the receiver Otau TV was on, i.e. the color should be green.
If you are sure that you have enough funds in your personal account to view the paid package, then unplug the receiver and turn it back on; if this does not help, to resolve this issue you need to call the contact center or customer service department.
 You paid for a paid package, but paid channels are not shown to you:
Answer:
When paying for a paid package, money for the “Premium” package must be credited to your personal account in the amount of at least 2500 (3500) tenge (the tariff for legal entities is indicated in brackets), i.e. payment must be made taking into account the commission of the bank or terminal).
Disconnect the Otau TV receiver from the network (de-energize) and after a few seconds plug it back into the network. If it doesn’t show in this case, call the contact center and give your personal account number and ask to activate the account.
9) The Otau TV receiver rebooted to the initial (factory) settings
Answer:
Follow the on-screen instructions:
Select a language (right or left arrows) and press OK;
Click OK;
Select the type of LNA - universal, the value of the lower frequency should be 09750, the upper one - 10600 (as a rule, these are the types of LNAs, if you have another converter, change the frequencies, as written on the LNA converter itself), then click OK;
On the next screen, select the TR User1 transponder and press the yellow button, in the window that appears, instead of the numbers 11555, dial 10762, press OK, Save - OK and on TR User1 OK and OK again;
scales will appear on the screen; if the antenna is configured correctly, then the right scale should be red, the left one depending on the signal strength at a level from 60% to 90%. The “signal strength” value should not be equal to 0. If 0, then check the antenna setting (the antenna needs to be adjusted). If the antenna is configured correctly (checked with an appropriate device or another receiver) and the signal strength shows 0, then check the cable and signal at the input to the receiver, if in this case the value is 0, it is necessary.
Wait until “OK to next screen” appears in the lower right corner of the screen and click OK. As the picture appears in the reduced window, press “back” “back” until channel zero comes out - the Otau TV information channel.
10. Asks for a PIN code
Answer:
The factory-set PIN code is 0 0 0 0 (four zeros).
11. How to reset to factory settings?
Answer:
a) can be done through the Otau TV receiver menu:
press OK ― Menu. To select one or another menu item, use the buttons shown in the photo in the middle; if you pressed something incorrectly, use the “back” button (pictured on the right) to return to the previous menu.
go to Settings > System
dial PIN code - 0000, enter Settings
Wait until the message “reboot the receiver” appears and turn off the receiver from the network (de-energize) and turn it back on. Follow the instructions in point 9.
b) can be done by pressing a combination of buttons on the receiver itself:
press the “OK/Menu” button on the receiver (indicated 1 in the photo) and while holding it, press the receiver’s turn off button (indicated 2 in the photo). Wait until the message “reboot the receiver” appears and turn off the receiver from the network and turn it back on.
After rebooting, be sure to follow the instructions in step 9).
To set up over-the-air television, you don’t need to call a technician. If you have step-by-step instructions, you can easily cope with this task yourself. How to set up Otau TV on your TV without wasting time and nerves? Read on.