Today, every home has at least one TV, so many people are interested in how to connect digital TV to Smart TV. If we talk about the quality of modern television, then digital greatly outperforms analogue. Technology and digital image display, special encoding algorithms allow you to transmit high quality pictures and played sound. It is because of these advantages that most people choose modern television. In addition, the digital signal is as stable as possible.
A significant advantage of digital television is that the user can independently select the list of necessary channels, eliminating all that is unnecessary. Today HD content has become so popular and accessible that it is unreasonable to refuse it. It offers rich, bright pictures and uninterrupted communication.
Before you connect digital channels to your Smart TV, you need to understand the additional equipment. It's important to understand that there are several different ways to connect. The choice of equipment that will be needed for connection depends on the individual method.
Introduction. Watching digital channels on your Smart TV
So, you have decided to connect and configure digital terrestrial television for your Smart TV device. This, of course, can be done regardless of what manufacturer of your TV you have - Samsung, LG, Philips or some other. The main thing is that your gadget has a built-in receiver. It is important to note that such a receiver is installed in almost every modern Smart TV. But just in case, you can clarify this either in the instructions or in the store where you purchased the TV (or find information on the Internet).
What can the fact that the TV is capable of receiving digital terrestrial television give you? Remember the old TVs, which most often had a screen with a twitching image, on which it was often simply impossible to watch your favorite program - these were analog channels. So, the modern world has overcome this problem with the help of digital TV channels that have high quality image and sound. Agree, in this case it will be much more pleasant to watch movies, TV shows or the same news. In general, only pros and no cons! So let's move on directly to how to connect digital terrestrial television to your TV.
other methods
The set-top box is also not needed if there is any antenna. If your TV previously received an analog signal through it, then you do not need to buy anything additional. The clarity of interactive TV will depend on the following conditions:
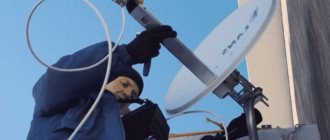
- Distance from the device to the distribution tower. If it is far away, you will need an antenna with an amplifier. An external UHF unit receives digital broadcasting regardless of the presence or absence of an amplifier. But if the signal is bad, it is better to take care of its presence. When a bad signal is detected during installation of the latter, it must be raised to the mast.
- Terrain. In a city with an installed tower, digital TV channels can be shown without an antenna.
- Correct antenna installation. It must be directed strictly towards the tower.
- The antenna must be correctly connected and directed strictly towards the tower.
If your device only supports analog TV (the central channels display the letter “A”), you need to find out whether it can show the DVB-T2 standard. If yes, then the settings must then be made using the remote control:
A TV with DVB-T2 needs to be configured via the remote control:
- Disconnect the TV from the power supply.
- Connect the antenna cable to the antenna input of terrestrial TV.
- Turn on the electricity and the device.
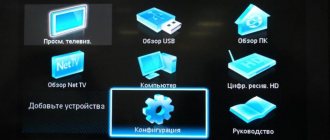
- Select the TV settings menu section.
- Turn on the digital tuner.
- Carry out an automatic search for programs using the instructions in the documents. Or manually find channels.
How to connect a second TV with an analog signal to the already configured signal of a modern device:
- Any old TV has “Tulip” type connectors. It transmits analog TV signal and sound. Therefore, you need to purchase an additional HDMI adapter to connect the old and new devices.
- We connect the HDMI cable, “Tulips” of the old TV and power to the adapter.
- There is a switch on the adapter that needs to be activated.
- After setup, two TVs will show digital channels.
How to set up digital terrestrial television?
Before we begin setting up digital terrestrial television, let's take a look at the preparations. First of all, you will need the antenna itself, which you must first purchase or install (if you have your own). You can also calculate the antenna so that there are no problems with the cable length. And, of course, a TV with support for digital channels. Pay special attention to this, since not all TVs can receive them.
If the answer to these two questions is yes, that is, you have both an antenna and a TV capable of receiving digital channels (it has a special built-in receiver), then you can move on. As for the receiver, carefully read the instructions for using Smart TV. Such information must be indicated therein.
Universal method
The method below is not entirely universal, but rather general. That is, the principle of the sequence of actions will be similar to others, but some menu items or button names will differ. Therefore, you can try your logical and analytical abilities in practice and draw an analogy with your device. If you doubt yourself or don’t want to complicate your life, then simply find the instructions for your TV below (Samsung, LG and Philips are considered). Anyway, let's move on:
- We connect the antenna to the TV using a special connector.
- Now we pick up the TV remote control and click on “Menu”. This button is usually the largest, and it is located in an accessible and visible place.
- Next, we need to find the options or settings where we need automatic mode for them.
- If necessary, you can specify the signal source (this is, of course, cable), and then select digital channels. For each positive choice, click OK or “Next”.
- Specify that you need a full channel search. A field for filling out data may also appear here. In this case, we indicate the following information (note that if there is a network search for channels, then this data does not need to be specified):
- For the frequency, use a value equal to 314 MHz.
- For transmission speed - 6875 KS/s
- Well, modulation - 256
- Click the long-awaited “Start” or “Start” button. All you have to do is wait for the process to complete, after which you can enjoy watching TV channels in higher quality, since your TV will be able to receive digital terrestrial television.
Samsung TVs
- As in the previous instructions, first connect the antenna to your Samsung TV.
- Using the special button on the remote control, enter the device settings.
- In the list that appears, we will need a tab with broadcast (or another name, where the antenna icon is drawn), where there is an “Antenna” item, in it you need to indicate that the connection is made using a cable.
- Then open the “Country” menu item. Here we will select “Other”.
- Now you should see a window asking you to enter a special PIN code. The default is 0000 if you haven't changed anything yourself.
- If the device again asks you to specify the signal source, then without hesitation we select the cable.
- Next, set the following search settings: fast mode, automatic network selection. Don't forget to fill in this information:
- For the frequency, use a value equal to 314 MHz.
- For transmission speed - 6875 KS/s.
- Well, the modulation is 256.
- As they often write on the Internet, “turn on the hatiko mode” - and wait for the process to complete. If completed successfully, you will be able to connect digital channels to your TV.
LG TVs
- It's LG Smart TV's turn. Just in case, let's repeat our first step - connecting the antenna to the TV.
- Next, open the device settings using the button on the remote control.
- We will need to find the country parameters where we should select Finland or Germany.
- The next stage is auto-search for channels. It can also be easily found in the menu tab with the antenna drawn.
- Next, we will need to indicate what type of connection we have. As you know, this is a cable. Therefore, the choice here is obvious and there is no need to think for a long time.
- We find ourselves in special settings, where we indicate data that is already familiar to us (if you have read the previous paragraphs). If not, then look:
- For the frequency, use a value equal to 314 MHz.
- Transfer speed - 6875 KS/s.
- Modulation - 256.
- We are waiting for the end of the search for digital channels. If everything went well, then you can please yourself by watching some program in digital quality.
It’s worth mentioning right away about automatic channel updates on LG TVs. Not all models have this feature. If this is the case, then you don’t have to search again - the TV will do everything for you. This setting is adjustable, so it can be turned off in the options if desired.
Philips TVs
As mentioned above, the method is practically no different from the previous ones, except for the names of menu items and some tabs. Let's get started:
- Connect the antenna to the TV and go to the “Installation” tab of the configuration menu using the remote control.
- A list with parameters will appear in front of you. We need the “Channel Settings” item.
- Next, we enter the automatic installation, where the system will notify you about updating the channel list. We are not afraid, but click the “Start” button.
- Now you must click on reinstall channels, and then select Germany or Finland as the country.
- After these manipulations, you will need to set the connection type to “Cable”.
- It's time to set some parameters using the "Settings" item. Here the speed should be 314.
- And now, after numerous manipulations with the settings and searching for the necessary menu items, we have reached the finish line: click on “Start” and wait for the process to complete. Upon completion, your fruitful work is declared complete.
Is an attachment required?
Since 2021, analogue television has become a thing of the past in Russia. It was replaced by interactive (digital) television. Residents of the regions were recommended to install additional equipment from their providers: set-top boxes Rostelecom, MTS, Megafon, TransTeleCom and others. By connecting the set-top box to the TV, the user can enjoy new channels and continue watching old ones. As a big plus, some operators have supplemented this transition with interesting functions. The new broadcast of TV TTK is equipped with rewinding and recording of the broadcast.
To watch interactive television without a set-top box, you can use the built-in capabilities of your TV: a DVB-T2 tuner. CRT options do not have this format by default. And those who purchased a plasma or LCD TV after 2012 were luckier. Since 2013, the first models with such support began to appear.
Reference! DVB – terrestrial television standards. DVB-T is an outdated format. DVB-T2 – new broadcasting.
To clarify whether this format is present on your TV, there are two ways:
- Through documentation. You can determine this through the “Tuner” section, in which you will see the “Supported digital standards” item and the presence of the “DVB-T2” format.
- Through device settings. Go to the menu and open channel settings. Then you should decide on the type of antenna: cable (DVB-C) or antenna (DVB-T). Next, you will see options for which channels to search for: digital and analogue or digital only. If the option to search for digital is offered, then your TV has this support.
- Through the official website of the manufacturer, where in the characteristics of the device you can find the section and item specified in the first method.
Attention! The presence of Smart TV, 3D and other additional functions in the device does not guarantee the presence of the DVB-T2 standard. Also, you won’t be able to watch digital channels with a separate or built-in DVB-T receiver.
Below we look at other ways to set up terrestrial TV without a set-top box.
How to decode channels?
First of all, please note that if you have set up digital channels according to the method described above, then you should not have any encrypted channels at all. This problem occurs when you have cable television (for example, NTV Plus or Tricolor TV). There you set a special price for watching channels for a certain period of time. When your subscription expires, you are blocked from accessing these digital channels. Then you need to pay for the services and configure the receiver again. If you don’t know how to do this, you can contact the specialists specifically for your receiver by phone number or through their website. You can also try to find instructions on the same official website, which describes in detail the entire procedure for resuming viewing.
Summarizing
Digital terrestrial television has a higher display quality compared to analogue channels. You can connect and configure this function very easily on any TV - you don’t need any special knowledge to do this. Let's summarize our instructions as common for most TVs:
- We connect the antenna.
- In the settings menu we find auto channel search.
- Then we configure the connection type “Cable” and, if necessary, set the parameters in the data area (baud rate, frequency and modulation).
- Also, if necessary, you need to select a country - most often it is Germany or Finland.
- We start searching for channels using the start button in the dialog box.
- We wait for the search to complete and move on to the long-awaited viewing!
We hope everything worked out for you, dear friends! We share our stories about setting up digital terrestrial television in the comments.
general information
What is Smart TV?
Watch a video on the topic with an informal presentation: If we talk about what a TV with WI-FI is, then it is an Internet-enabled device that does not require a wire to connect to the network. It allows you to:
- visit various sites;
- communicate with friends and family via Skype or other programs;
- watch YouTube videos;
- listen to music from the Internet;
- play online games;
- view images and more.
A TV with Wi-Fi is also called a “TV with Smart TV”. This device is popular among both television fans and network fans. The main thing is to choose and configure the receiver correctly.