After purchasing a new TV, there is a need to configure it. Initially, you need to connect the device to power. Helpful recommendations for setting up the initial settings will appear on the screen. In the menu you will need to set the brightness, contrast, color saturation of the screen, you can also adjust the sharpness of the image and sound. After setting up the basic parameters, you should move on to connecting digital television.
How to set up your TV to receive a high-quality signal - we’ll figure it out further.
Broadcast standard
Before you start setting up digital television, you will need to determine which broadcasting standard is appropriate to use: it can be cable, satellite or terrestrial format. Since most modern TVs are already equipped with built-in receivers and decoders, you may not need to buy additional equipment. For a cable connection, you must purchase an access card and modulator from your provider and pay a monthly subscription fee.
Terrestrial digital television DVB-T2 is especially popular now. This is a free high quality broadcast. To connect to this standard, you will need to buy an antenna and cable. The receiver in new TV models is already built-in.
The antenna is placed outdoors towards the broadcast tower. A cable is laid from it, which connects to the TV. For satellite television you will need to purchase a special dish and decoder. All digital broadcasting standards reproduce high quality broadcasts, reaching Full HD and 3D.
Settings
To more conveniently configure channels, you can use the LCN function. This mode means that broadcasts will be ordered exactly according to the logic of the digital TV provider. You just need to find the appropriate item. If you disable this order, you will have to choose:
- alphabetical name;
- use of network identifiers;
- sorting by transmitting stations;
- custom settings.
To set a password, it is again recommended to read the user manual for your specific TV. Usually passwords are set for a specific action:
- viewing certain channels;
- use of storage media;
- Internet connection;
- manipulations with TV settings.
It is also useful to know the action plan of how to set a timer. For this purpose, the reminder function in the TV guide is used. The alarm mode is set in the same way. The reminder may not refer to a specific time, but to a specific broadcast.
This function does not cause any difficulties even for inexperienced users.
IPTV
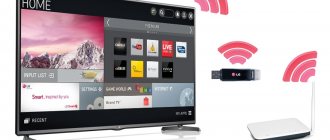
To watch interactive television you will need to install a special player. There are a variety of free IPTV applications on the Internet. By downloading via Wi-Fi and installing it directly on your device, you can watch your favorite TV shows comfortably and with various additional options (not just viewing becomes available - you can stop the program at the moment of interest, and also read information about it). Now developers are presenting players for different operating systems.
Another possibility is to connect several devices to digital television using a LAN cable.
The lineup
There are no and cannot be universal TVs, including those from the Dexp brand. Therefore, you need to carefully familiarize yourself with the entire line in order to choose the most optimal version. But since it is impossible to fully characterize it, it is worthwhile to dwell on a few of the most remarkable models.
The relatively small 20-inch model H20D7100E has good characteristics:
- HD resolution;
- image change frequency - 60 Hz;
- viewing angles - 178 degrees;
- availability of DVB-C, DVB-T, DVB-T2 tuners;
- availability of teletext.
When choosing a 32-inch LED TV, you should pay attention to the H32D7300C. Its matrix already has a resolution of 1366x768 pixels. It's worth noting that HDR mode is not supported. However, this is offset by the 3000 to 1 contrast ratio of the 10-watt speaker. There are 3 HDMI ports, as well as a delayed viewing option.
We should also mention a decent 24-inch version - H24E7000M/W. The screen is backlit using Direct LED technology. Unfortunately, there is no Wi-Fi. The sound volume of 3 W is quite enough for a small room.
When choosing a 55-inch Android TV, you should also consider the U55E9000Q. The design natively supports Smart TV. The matrix resolution reaches 2160p. The brightness of the glow is 330 cd per 1 sq. m. 20-watt sound allows you to organize even an impromptu home theater.
If such a screen is too large, you can choose a simpler 43-inch F43D8000K TV. A picture of 1920x1080 pixels is guaranteed to please even a relatively demanding audience. The system supports playback of files from connected media. A DLNA interface is also provided.
It is worth noting that you will not be able to control the TV from a smartphone.
Digital television
Having purchased a DEXP brand TV, first read the operating instructions for the equipment.
IMPORTANT! Before setting up digital broadcasting on your Smart TV, make sure that it supports this technology. This means that the device itself already has a built-in broadcast tuner.
As a rule, all modern TVs support this broadcast standard and there is no need to buy anything additional. If your device supports this format.
Let's move on to setting up digital terrestrial channels:
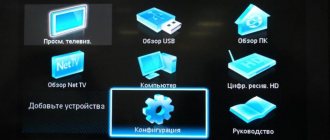
- On your remote control, go to the Smart menu.
- Select "Settings". Click “OK” to confirm your login.
- Click on the "Channel" section.
- In the antenna type selection section, select DVB-C.
- There we select “Auto-tuning”, which will automatically fill in the search data (frequency, modulation, baud rate).
- In the scan types section, select the “Full” view.
- Specify the network identification parameter as “Automatic”.
- To search for channels, click “Search”.
- After a period of time, the auto search will end and 20 on-air digital channels will be available for viewing.
By following the instructions for setting up your Smart TV, you can enjoy comfortable viewing of high-quality channels. This is how cable TV is set up.
Features that are best disabled
Before you start setting anything up, you need to go to the menu and turn on the “Cinema” mode. In this mode, the levels of contrast, color and brightness are transmitted more or less correctly. Of course, accurate calibration will allow you to achieve better results, but it takes a lot of time.
The next step is to turn off all post-processing in the advanced settings menu. Sometimes when you activate the Cinema mode, some functions are disabled automatically, but it is better to check manually. Please note that our tips apply to both regular and HDR TVs.
• Dynamic Contrast/Contrast Enhance . This feature makes dark areas darker and bright areas brighter. Perhaps the picture becomes somewhat more interesting, but there are also disadvantages: detail decreases and saturation becomes uneven. To get maximum detail, it is better to turn off dynamic contrast.
• Increased black level (Black Tone) . Like dynamic contrast, this feature creates a rich effect in dark areas. However, black does not get blacker. Instead, all gray tones are darkened, again resulting in reduced detail. Turn it off.
• Detailed black (Black Detail) . This option is designed to increase detail in the dark areas of the picture, making them brighter. Initially, the function may seem useful, but this is not entirely true: previously invisible artifacts appear in the highlighted areas.
• Edge Enhancement . This option can make the image clearer. It sounds good, but too much sharpness ruins the picture. In addition, duplication and blurring of contours is possible. In most cases, it is better to disable the function.
Effect of applying edge correction
• Live Color/HDR+/Skin Color Correction (Live Color/HDR+/Flesh Tone). These treatments are aimed at improving color. The Live Color option adds saturation. HDR+ technology processes the signal to add an HDR effect to regular content. The skin color correction function should make the skin more natural. However, films made in good studios do not need correction. All such processing should be turned off to obtain a natural picture. Note that there is no need to change the color temperature: as a rule, in the “Cinema” mode, the “warm” color palette is automatically activated. That's how it should be.
• Increasing the resolution of the original image and suppressing noise (Super Resolution/Reality Creation/Smooth Gradation). All this is needed to make content recorded in low quality look better. These functions are designed to add clarity and remove noise and artifacts caused by compression or conversion. Such processing is not necessary when it comes to quality content. For example, when playing Blu-ray discs, such functions need to be deactivated - they can ruin the picture. It is quite appropriate to activate them when watching old DVDs or regular television.
• Frame interpolation (Motion Interpolation). All manufacturers call this technology differently: Sony has “Motionflow”, Samsung has “TruMotion”, LG has “Smooth Motion Effect”. The idea is the same, and it is to create “extra” frames by superimposing two frames on top of each other to achieve increased smoothness. This thing is called the “soap opera effect.” We strongly recommend disabling this feature, unless you are one of those rare users who enjoy these strange effects.
• Automatic mode change (Auto Picture Mode). Some TVs have this feature. It works simply - it independently switches modes depending on what you are watching. It would be a good idea to turn it off, since our setup tips apply to all types of content.
Please note that not all TVs have the above settings. In particular, cheaper models are equipped with them less often. But this list includes almost all the processing settings that are popular on TVs from major manufacturers. In the end, the main thing is that you like everything. However, if you want to get high detail and accurate color reproduction, as the filmmakers intended, we recommend turning off as many “enhancing” options as possible.
DVB-T2 set-top box
If your TV does not have a built-in tuner, you will need to purchase one separately and install it. Having initially configured the receiver's settings, you can proceed to searching for channels on the TV. The search can be performed either automatically or manually. In the second case, you will need to set search parameters manually.
The algorithm of actions is as follows:
- By selecting manual channel search, set the frequency, modulation and baud rate parameters.
- Start the channel detection process using the “OK” button that confirms the action.
- After the first channel found, press the “Next” and “Enter” button on the remote control.
- Each channel found will be assigned a serial number, the search automatically stops at each stage.
- To continue, click the “Next” button.
Thus, you can manually find available terrestrial TV channels. The search procedure itself will take a little longer than the automatic mode.
Setting up the TV picture: step-by-step instructions
The image adjustment must be done at home, in the place where the TV will be located. There are two ways to carry out the procedure.
Using standard features
To do this, find the desired button on the remote control. It can be called differently - Settings, Options, Menu. A menu with a list of settings will appear on the TV. Next, moving the sliders, we achieve a high-quality image.
How to set up a Dexp TV
Dexp TV instructions
Dexp TV instructions for the Dexp 32A3200 model contain information on how to connect the TV.
1. Unpack the TV and place it in a dry and flat place. When installing the TV, make sure that the voltage is turned off;
2. The antenna plug of terrestrial, cable or satellite television must be connected to the RF input port of the TV Dexp.
3. The audio-video output of a DVD player, or other equipment, can be connected to the AV input port of the TV via an AV cable. Make sure all AV cables are connected in the correct order according to the color code on the DXP TV.
4. The component output (YPbPr) of the DVD player can be connected to the component input of the TV via an AV cable. Component input and AV input of Dexp TV cannot be used at the same time.
3. The DVD player's audio-video output can be connected to the TV's AV input port
5. To connect your computer to the Dexp TV, connect one end of the VGA cable to the port on the computer and the other end of the cable to the VGA port on the Dexp TV, and tighten the connector locks clockwise on each end of the cable. When connecting the 15-pin VGA connector, insert it carefully so as not to damage the contacts.
Possible problems
Many complaints about control difficulties are due to the fact that the remote control does not fit. To solve this problem, just purchase a Dexp universal remote control. Connecting a new device requires automatic configuration, because otherwise control will again be unavailable. Manual settings should only be used as a last resort.
At the same time, we must keep in mind that the codes may not work at all, and then all that remains is to turn to professionals.
In many cases, the TV itself malfunctions - and then you need to reset it to factory settings, or, in other words, reboot. The procedure for resetting user settings and information is simple:
- hold down the power button on the remote control for about 5 seconds;
- wait about 1 minute until the TV starts again;
- disconnect the power cable;
- if the problem persists, disconnect the TV from the outlet;
- press the power button;
- wait 2 minutes;
- turn on the TV and use it as usual.
If the receiver freezes, you must:
- de-energize the device for 10-20 seconds;
- check the quality of your Internet connection (when playing files online);
- restart the router;
- reduce picture resolution;
- return to factory settings;
- If you fail at all stages, contact specialists.
It is worth updating your browser every time a new, current version is released. It’s better to monitor this yourself, without relying on automation. You can give such a command using the “update now” or “over the network” item in the “software update” menu. It is important to ensure that the TV is turned on until the process is completed. An uninterruptible power supply will help protect against network failure.
If the TV turns off by itself, the reason may be:
- turned on and forgotten sleep timer;
- software failure;
- mains voltage surge;
- wear of network wires;
- dustiness of the body from the inside;
- Sticky keys on the remote control.
It's not uncommon to discover that an image has disappeared. First you should check the connection of the TV to the network and the presence of voltage in it. Then - connecting the cables. The problem can also be associated with worn cables, loose or burnt ports. Problems with internal cables and boards, processors and screens are even more serious, but diagnostics here should be carried out by professionals.
Review Reviews
It’s worth pointing out right away that there is no consensus among buyers whether it’s really worth buying Dexp TV receivers, or whether it’s wrong. Since such equipment belongs mainly to the budget class, you will have to put up with the uneven quality of components and assembly. Although in general such products are worth the money. According to the majority of consumers and even experts, the products of the Vladivostok brand are diverse in nature and satisfy the demand of many people. You can easily choose quite expensive devices that are distinguished by sophisticated functionality.
Also note:
- decent screens with solid resolution;
- decent frequency of picture changes;
- spectacular sound;
- lack of buttons in a number of models (it’s difficult to control without a remote control);
- Difficulty setting up the menu.
Source