What's the advantage?
- many interesting channels;
- convenient and functional software shell;
- unlimited possibilities for interactive interaction with content;
- individual selection of broadcast programs.
And all this with high image quality and excellent stereo sound. For your convenience, we have placed information on all tariffs for individuals in one table:
| Name | Packages | Cost including VAT (month, BYN ) |
| Interactive | Premiere (basic for 94 channels) | 9.50 (4.50 for additional TV receiver) |
| ZALA: all inclusive (extended 140 channels) | 15.50 (5.50 for additional TV receiver) | |
| ZALA: all-inclusive HD (extended to 146 channels) | 25.50 (13.50 for additional TV receiver) | |
| Essential | TV standard (basic with 27 channels) | 5,90 |
| Terrestrial ZALA: light (basic with 11 channels) | 1,90 | |
| Terrestrial ZALA: light + (basic with 11 channels) | 2,90 | |
| Terrestrial ZALA: all inclusive (extended by 45 channels) | 8,90 | |
| SMART | Kanapa TV (109 channels) | 7,50 |
You can always check prices on the official website https://zala.by/node/4623
“Interactive ZALA” eliminates the need to adapt to the broadcast schedule and allows you to watch your favorite programs exactly when you want, and also pause it if you need to leave. Or even shift the broadcast schedule back to 48 hours.
By the way, you can record the programs you need so that you can watch them later in a comfortable environment. There are also many additional features, all of which you may find useful. For example, “Parental Controls” will protect your children from inappropriate content with age restrictions.
You can connect additional packages and thereby personalize the selection of broadcast channels. A list of them can be found on the official website.
Attention: connection to the basic package is paid, the cost is 4.60 BYN for the main receiver and 1.90 BYN for each additional one.
“Terrestrial ZALA” allows you to watch digital television using wireless transmission of a TV signal from Beltelecom terrestrial transmitting stations. However, without interactive interaction with the content. Broadcasting of programs is carried out according to DVB-T and DVB-T2 standards.
Connection also costs money - 4.95 BYN for each TV receiver. And you can also connect additional packages. There are not as many of them as in the tariffs above, but quite enough to diversify the main grid.
“SMART ZALA” is a current service from Beltelecom that allows you to watch television programs and films on a variety of devices. In other words, directly through the firmware of your smart TV or through a smartphone or tablet.
This is a fundamentally different way of transmitting content and is not supported on all devices. Therefore, it is better to clarify in advance the technical feasibility of connecting it.
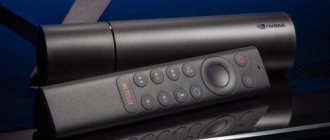
Review of the set-top box for Smart ZALA
Figure 1 - Packaging In the opportunity to use the Smart ZALA TV set-top box.
Read more in the article. Note: this set-top box allows you to watch Smart ZALA on any TV (the old Horizon cube is also suitable). The set-top box replaces the Smart ZALA application, and the channels broadcast through the set-top box fully correspond to the list of channels presented in the Smart ZALA application. The set-top box is issued only to those subscribers who are connected to the “YASNA 50 Smart” or “YASNA Gaming Smart” packages. For each set-top box, an additional monthly subscription fee of 3.5 rubles is charged, in addition to the fee for the tariff plan.
for example, a promotional package is 22.05 rubles/month. + 1 set-top box 3.5 rub./month = 25.55 rub./month. The console is supplied in a cardboard box with the YASNA brand logo. The set includes the set-top box itself, instructions for its use, a remote control, two pinky batteries for it, a 12V power supply, an RJ-45 network cable, an HDMI cable and a 3RCA-Mini Jack cable.
Figure 2 — Equipment
Figure 3 — Equipment
The attachment is small and black. Its important advantage is the presence of a Wi-Fi module, through which it can be connected to a modem (any) via a wireless network.
Figure 4 - Attachment. View from above
Figure 5 - Attachment. Bottom view
On the rear panel there are connectors for connecting a power supply, an AV/HDMI cable, if necessary, a network cable and a USB connector.
Figure 6 - Attachment. Back view
Figure 7 - Connecting the set-top box
After connecting the set-top box to the TV, we switch to HDMI mode and see that we are immediately prompted to select a language. Select it and press “OK” on the remote control.
Figure 8 — Setting up the set-top box
Figure 9 — Setting up the set-top box
Since we want to connect the set-top box wirelessly, we immediately see that the set-top box begins to search for a wireless network.
Figure 10 — Setting up the set-top box
In the list of found wireless networks, select our network, enter the password and click “OK”.
Figure 11 — Setting up the set-top box
Figure 12 — Setting up the set-top box
After connecting to the network, the screen displays the connection speed and quality of the wireless signal.
Figure 13 — Setting up the set-top box
After we connected to the Internet and clicked “Next”, the set-top box started looking for an update and found it.
Figure 14 — Updating the set-top box
Figure 15 — Updating the set-top box
Click the “Reboot” button and wait.
Figure 16 - Turning on the set-top box
After the reboot, the “YASNA” logo appears and Smart ZALA starts loading.
Figure 17 - Turning on the set-top box
After the update and reboot, the set-top box again asks you to complete the initial steps in choosing a language and connecting to a wireless network, as shown in the pictures above. After these manipulations, the device requests a login and password from the contract that the subscriber concludes with the service.
Figure 18 — Authorization
Enter your data and click “Next”. Now you need to create a profile. All you have to do is write any name, select a gender and an avatar, and, if necessary, set age restrictions.
Figure 19 — Creating a profile
Figure 20 — Creating a profile
Figure 21 — Creating a profile
Figure 22 - Creating a profile
After creating a profile, an application menu appears in which we can go to view channels, go to settings or use YouTube.
Figure 24 — Channel list
Figure 25 — Program guide
Figure 26 — Settings menu
Detailed instructions on how to connect and set up a broadcast hall (Zala) from Beltelecom
In this topic we will talk about how to properly connect and set up an on-air hall (digital terrestrial television), a service that Telecom began to provide not so long ago (since May 2014). Let's look at what problems you may encounter when connecting and how to deal with them.
So, the best thing, of course, is to conclude an agreement and wait for the master to arrive, but if you want to do it yourself, and this is very simple, then follow the instructions given below.
What do we need to connect the ethereal zala:
— Television antenna, which preferably hangs higher. If there is none, then we buy it and install it, but you don’t need to secure it tightly, since you may have to turn it in the process. An indoor antenna will not work for these purposes; you don’t even have to try, although the service center may tell you otherwise. A collective antenna is also very unlikely to work, but sometimes it makes sense to try.
— And of course the TV itself, any TV will do except a tube one :)
Connection progress:
1. Take the set-top box out of the package, insert the batteries into the control panel, unpack and insert the wires into the set-top box according to color. The second end goes into your TV, if there are no “Tulip” outputs, then we connect the wires through a scart-tulip adapter, which is also included in the set-top box.
2. We take out the television cable from the TV and insert it into the Zala ; you won’t be able to mix up the connectors even if you really want to. If your antenna is with an amplifier, then plug the power supply into an outlet if it is not connected.
3. The kit includes a card, insert it into the console, with the chip facing forward and down.
4. Turn on the set-top box by pressing the red button at the top right. Naturally, we turn on the TV and select the AV (if you don’t know how to turn on the video mode on the TV, read the instructions). The video mode is usually turned on with the button that says AV on the remote control or the Source or with the depicted rectangle with an arrow inside.
5. If everything is correct, then ZALA is loading on the TV and then a menu with 4 items appears as in the figure below.
6. Select the far right item - “Settings”, a new menu opens (image below). Use the buttons on the remote control to go to Auto Scan, press OK and then Search and wait until it reaches 100%. If everything is in order with the antenna, it will find 26 channels (for the Brest and Grodno regions there is a possibility that there will be about 15 more Polish channels)
That's all, your torment is over - you can continue to enjoy life and watch television :) At first only 8 channels will be shown, the rest will be written in code . In about half an hour they should be “decoded”; if this does not happen, call technical support. support by phone 123
I think there is no need to make instructions on how to switch channels, everything is simple and clear, like on a simple television remote control - forward backward using the up and down arrows or buttons with numbers. Volume with arrows right and left. There are no rewind or recording functions in the on-air Zala. Turn on and turn off the set-top box with the red button at the top right.
Video of setting up the broadcast room from Beltelecom
*Bad scenario : after auto scanning, only 8 channels were found or not found at all.
Your actions:
— Raise the antenna as high as possible, turn in a different direction (for the Brest region towards Rakitnitsa) and repeat the auto scan again. Check the connector on the antenna wire to see if the card is inserted correctly into the set-top box. If everything is unsuccessful, we conclude that your antenna is not suitable for the broadcast hall.
— We take the technical passport of the set-top box (included) and go buy a new antenna, or we take the set-top box and go to Beltelecom to terminate the contract for the provision of the ZALA on-air service.
Related topics:
— Setting up a regular Zala
— Watching Television online
