Sergey Efimov
October 19, 2021
Comments (0)
Many users believe that connecting a PC to a TV receiver is difficult, but in fact the process takes a minimum amount of time if the instructions are followed exactly. Before looking for answers to the question of how to connect a laptop to a TV via Wi-Fi, you need to learn several synchronization techniques. The final option is selected only after familiarization with their distinctive features and a real assessment of one’s own capabilities.
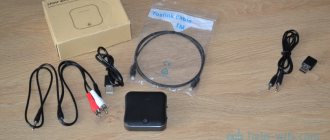
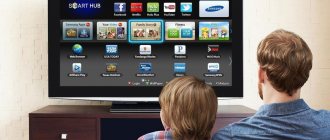
Connecting two devices over the air
Methods for connecting a laptop to a TV via Wi-Fi to transfer images
To connect to your TV via Wi-Fi, you will need to check whether there is a module for receiving the signal. If you bought a TV panel with a Smart function, then, of course, there is one. For the rest, you need to check whether you can connect to WI-FI. You can transfer an image in several ways:
- using DLNA;
- using Intel's WiDi software.
Using DLNA
A home DLNA server provides the ability to access movies, clips and other content from various devices, in our case a TV. To do this, you will need to connect all the devices that you plan to use to your home network, and it doesn’t matter whether it is done wired or wireless. But now we will look at connecting a laptop to a TV via Wi-Fi. Then you need to open access to the folders where the files are located. To do this, follow these steps:
- in the directory properties there is an “Access” tab, go to it;
- click “Advanced settings”;
- o and click “Ok”.
You can also synchronize your laptop and TV panel using Explorer:
- Click on the “Network” menu item.
- A window with the message “Network discovery” will appear, you need to click on it.
- To make the settings correctly, follow the assistant's recommendations.
- On the TV panel you need to check the availability of external connections. To do this, turn on the TV device and select a laptop from the proposed signal sources.
- After you have managed to activate DLNA and synchronize the two devices, right-click on the file and select “Play to” from the menu and then select the TV model.
Remember that modern TV panels do not support the .mkv format, so the broadcast will not start.
Intel's WiDi program
To create synchronization via DLNA between your computer and TV, you will need to allow access to the folders in which the content is stored. But the WiDi function works much simpler - it provides the ability to duplicate the laptop screen onto a TV panel using a local network connection.
However, for synchronization to be successful, the laptop must be equipped with an Intel processor, a discrete graphics card and an adapter for connecting to a Wi-Fi network. It should be noted that most modern laptop models from Samsung connect to TV devices precisely through this function. Before you start setting up, you will need to download and install the driver for wireless broadcasting. You can find them on free resources or on the official Intel website. The only thing that can become an obstacle is that not all modern TV panel models support the WIDI function, so you will have to buy an adapter.
To configure correctly, you must:
- Press the main menu button of the TV device.
- Go to the “Network” section.
- Select the “Miracast/Intel`s WiDi” function from the list.
- On your laptop, go to the Intel Wireless Display program, which is designed to synchronize with TV.
- Select the TV model from the devices that appear on the screen.
- If it requires you to enter a password, then it is mainly the numbers 1111 or 0000.
- To complete the setup, go to the Gharms section on your laptop and select “Devices” and then “Projector”, where you indicate that the broadcast should be carried out to your TV model. If your model is not highlighted in the list, then you need to update the Wi-Fi driver.
Third-party programs for casting laptop screen to TV
Sometimes the answer to the question of how you can transfer an image from a laptop to a TV via Wi-Fi is the use of additional software. Due to this, the television receiver gains access to files and folders that are stored on a personal computer.
Common applications include the following.
Wireless Display
The utility is freely available and distributed free of charge. It can be used for almost all known brands and versions of receivers. The instructions for the software contain the following recommendations:
- The program is downloaded from the developer’s official resource; on the main page, to obtain the software, you need to click on the “download” button;
- the downloaded installation file is launched on the laptop, in the first window that appears, the directory in which the application will be installed is selected;
- the next step is to click on the “execute” button;
- the user can check the box next to the line “create a shortcut to launch the utility”, after which you need to press the “install” button;
- before pairing the equipment, you need to check that both units are connected to the same access point; if this is not the case, then a connection is made (otherwise the software will not be able to detect the receiver);
- after opening Wireless Display, you need to click on “settings” and go to “equipment”;
- in the list that appears, select your own TV, confirm the action with the “ok” key;
- Next comes the transition to the “media resources” subsection, in which folders available for the television receiver are selected;
- After making your selection, press the “ok” button again.
When the desired media files are selected, you need to click on the “launch” folder. The procedure will activate the DLNA server.
Wireless Display
LG Smart Share
The software is suitable for equipment of the same brand. The algorithm is executed sequentially:
- the PC and TV receiver are connected to the virtual line;
- The specified functionality is activated on both devices.
Pairing takes place automatically. User participation consists of subsequent reproduction of materials from the laptop.
Serviio
The application is a free set of tools, it is completely Russified and is intended for generating a DLNA line. The software has a simple, intuitive interface that even a beginner can understand.
The utility requires the computer to have the following technical characteristics:
- operating system - Linux or Windows;
- RAM size - more than 512 MB;
- free disk space - at least 150 MB.
The program should be downloaded only from the official resource of the software developer.
The advantages of the software are presented:
- automatic updating of the media file library;
- support for plugins that allow playback of videos obtained from non-standard sources;
- creating a home local network in several stages.
When using the software, broadcasting is carried out to various devices.
Serviio application
Using various applications
Let's look at how to connect a laptop to a TV without a cable using various applications. Today the most popular applications are the following:
- Share Manager;
- Serviio;
- Miracast.
Share Manager
A proprietary program from Samsung will allow you to view content from your laptop on a large TV screen. The peculiarity is that it is Samsung owners who can use this program. It is downloaded from the official website. Setting up and connecting the laptop is done as follows:
- Download and install the Share Manager program.
- All devices must have an IP address on your home network.
- Open access to the folder where the content is located. To do this, right-click on the main directory and select “Sharing” and even “Set Policy”.
- You need to set the value to “Accepted” and “Ok”.
- If the setup was done correctly, the files will be broadcast to the screen.
Serviio
The convenient Russified Serviio program will allow you to create a DLNA channel to connect a TV to your laptop. A simple and intuitive interface will allow even a beginner to understand it. The utility has the following advantages:
- media libraries are updated automatically;
- broadcasts video to different devices;
- allows you to create a local network with a direct connection to Wi-Fi;
- supports plugins, allowing you to play videos from various gadgets.
Miracast
Miracast technology is an excellent and popular alternative to Intel WiDi, which helps to display video on the TV screen, as well as manage data transfer over Wi-Fi. In other words, you can make a large monitor from a TV panel on which everything that happens on the computer is broadcast.
Intel has stopped supporting WIDI technology, and the latest versions of Windows are shipping with Miracast built-in. The only caveat is that your TV supports the wireless display function.
To connect TV in Windows 10 via Miracast, you need to:
- Press the Win+P buttons simultaneously.
- A window will appear where you can select “Connect to a wireless display.” If the window does not appear, then the laptop does not support this function.
- The search for wireless devices has begun.
- Enable Miracast function on TV panel. To do this, in the signal source selection menu, click “Screen Mirroring” (in Samsung). In Philips, click sequentially “Settings”, “Network settings”, “Wi-Fi Miracast”.
If your TV panel does not support Miracast technology, then buy a Mirascreen adapter. It is connected via an HDMI port.
- The TV appeared in the search.
- Connect your TV device.
The technology allows you to transmit sound along with the image. However, you need to set the sound source depending on where you want it to be output. To do this you need:
- go to the sound settings and select the playback device;
- Right-click on “Speakers” and select “Set as Default”.
Settings on TV
The setting can be done in two ways:
- On an existing router with a functioning network to which both the TV and laptop are connected, create a common access point. To do this, call up the menu by pressing the button ('Menu') on the remote control. In the pop-up window, find and select the “Network” tab and go to the settings section.
Here you will see a list of available Internet networks. Select the one with the name of your router and connect to it by clicking on the icon. - The second method is to connect via Wi-Fi Direct. If you have such a function on your TV, this means that it itself is equipped with a router and does not need additional network equipment. You can see the availability of this function through the menu in the network settings tab. If, having gone to the desired section, you find the “Wi-Fi Direct” item, activate it and write down the security password that you will see on the screen after connecting the function.
After setting up the equipment, find in the menu of your TV the item responsible for displaying files of devices connected to it. Such a section may be called “SmartShare” or something else. Through it you will have access to files from your laptop.
Using Wi-Fi adapters
To connect your laptop to your TV via Wi-Fi, you may need an adapter. This is relevant for those who do not have a smart TV. Modern routers perform various functions: they amplify the signal, are used as an access point, or a wireless bridge. To connect you need:
- buy a router, you can use inexpensive Tonolink or Netis;
- configure as an adapter, i.e. it receives a signal from the main router and transmits it to the TV panel via cable;
- configure the reception of your home network in the TV device menu.
Such an adapter is cheaper to buy than a branded Wi-Fi module, and it can be found in almost any store.
But for those who prefer proven official products, special adapters are provided:
- Google Chromecast;
- Android Mini PC;
- Intel Compute Stick.
Google Chromecast
One of the most popular Google Chromecast adapters, which allows you to broadcast images from a computer to TV. To configure you need to do:
- Connect the device to the TV panel and outlet.
- Install Google Home on your TV with Android software.
- Connect all equipment to one Wi-Fi network.
- Open Google Home and click “Settings”, then register your account, to which Chromecast will then connect.
- Start searching for devices that are nearby.
- Having found the TV, click “Next”.
- Set up a connection to a Wi-Fi network. You may need to enter a password.
- Start the video for transmission.
Now it’s clear how to display video from a computer to a TV.
Android Mini PC
To create a wireless connection from your laptop to your TV, you will need an Android Mini PC adapter, which is an excellent alternative to Google Chromecast. The gadget connects to the TV via an HDMI or USB port. The gadget looks like a small flash drive, but allows you to turn a simple TV receiver into a Smart TV. You can view images from your computer on your TV, play games and applications, listen to music and read books.
Intel Compute Stick
A small but powerful tool for turning your TV panel into a mini computer. It has the Windows 8.1 operating system and a quad-core Atom processor. Contains 2 GB of RAM and 32 GB of internal memory. There is even an antivirus to protect against malware. All you need to do is connect it to your TV panel. For the convenience of Internet surfing, you can additionally connect a mouse and keyboard. Synchronization with TV occurs in a matter of seconds.
What you need when establishing a wireless connection
To transfer images from a computer via a wireless network, the TV must have an appropriate adapter. During the work, it connects to the home router and will receive information from it (you can output video materials, etc.).
Modern models of television receivers are equipped with Wi-Fi Direct technology. In this case, the device creates a wireless line on its own. In this case, a router output is not required to form a connection between two devices.
Transmitting video to television receivers is possible even if they do not have a special function or adapter. To perform the task, the equipment must have an HDMI input. Then you can attach a mini personal computer to it, the size of which does not exceed the volume of a standard flash card.
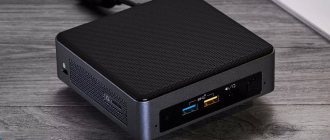
Unit with built-in Wi-Fi
Conclusion
As you can see, there are many different ways to transfer content from a computer to a television receiver. And some of them allow you to turn a TV into a full-fledged mini-computer. It should be noted that manufacturers and developers do not stand still and are constantly releasing new versions, eliminating existing problems and adding new features to their programs and devices.
All of the listed applications and devices allow you to duplicate the PC screen onto a large TV set. This gives a lot of advantages to the user and, above all, the ability to comfortably view photos and other images, communicate on social networks or via Skype. The only thing that can interfere with pleasant viewing is low Wi-Fi speed, so first of all you need to take care of connecting to high-speed Internet.
Cable connection
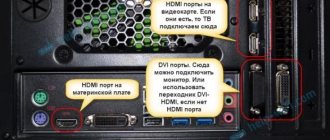
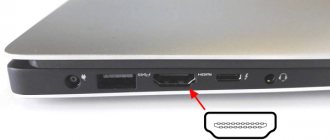
HDMI
The HDMI digital interface, which supports the transmission of FullHD quality images and multi-channel sound, is perhaps the best way to cable connect a laptop to a TV, since most mobile computers are equipped with this interface. Modern TVs also have an HDMI port. To connect devices, a cable of the appropriate type is enough: HDMI-HDMI or micro- (mini-) HDMI-HDMI (if one of the connectors is small).
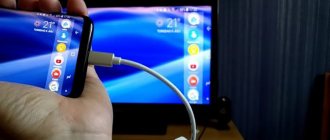
Connecting a cable to the ports is only permissible after turning off the power to the devices (otherwise you can damage them). Switching between displays (laptop and TV) is done by pressing the key combination Fn+F*, where F* is a function key with an icon in the form of two screens, for example, as in the photo below.
The parameters for displaying a picture on an additional display - appearance, resolution, etc., are configured through the Control Panel, the “Screen” applet and the “Setting screen parameters” section.
Audio is configured through the Sound applet. The TV speakers will appear in the Playing Devices list. To make them hosts, open the context menu and o.
VGA
The analog VGA interface is also very common on laptops and TVs. A TV connected to a laptop with a VGA cable will only be able to reproduce the image, and the sound will come from the laptop's speakers.
DisplayPort
DisplayPort connectors are found less frequently on laptops than the first two. This is also a digital interface, like HDMI, capable of transmitting both image and sound.
DVI, S-Video
Ports of these types today can only be found on old laptops, and they are used mainly for connecting to equally old TVs.
Thunderbolt
Thunderbolt is a relatively new interface designed to transfer data of any type at very high speeds. It is most often found on MacBooks and can be used to connect them to an external monitor or TV.
Since there are no TVs with Thunderbolt yet (and if there are, they are unknown to the author), to connect a MacBook you will need additional equipment - a Thunderbolt to HDMI adapter and an HDMI-HDMI cable.
Connecting interfaces of different types using adapters
Remember: the fewer transformations and breaks in the transmission medium, the higher the quality of image and sound on the playback device. A direct cable connection from the laptop port to the TV port always gives better results than using adapters.
If your laptop only has a VGA port and your TV has both VGA and HDMI, it is preferable to use a direct VGA-to-VGA cable rather than an HDMI to VGA adapter and an HDMI-to-HDMI cable. The adapter does not improve the analog signal to the digital level, but simply converts it to another format, often with a loss of quality.