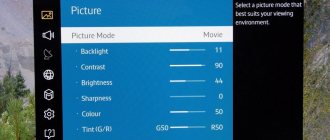
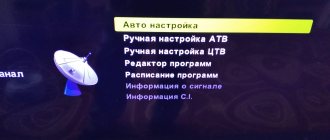
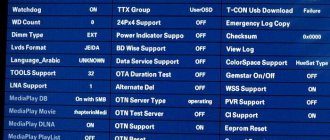
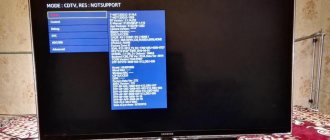
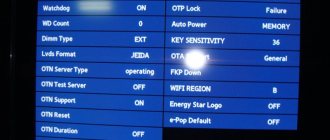
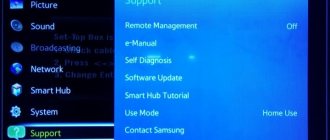
Technological (service) menus of TVs
AIWA TV-C142, TV-A215
Login - press the hidden button on the remote control, located between buttons 8 and SYSTEM (under the false panel). The output is similar to the input.
AIWA 1402, 2002KE, 2102KE.
On the TV board, press the special button S009 simultaneously with the (DISPLAY) button on the remote control. To exit, turn off the TV from the front panel
AKAI CT-2119PD\PDT, U2E\Y2\Y2E
Entering TEST MOD mode - on the TV, press the + and - buttons while holding them to turn on the TV. Exit - press the POWER button.
AKAI CT2899/7171
For the CCU11 processor, press the buttons (• °), (С), (Н) on the remote control. For CCU12, use a screwdriver to press the contact in the hole in the remote control near the keyboard and then immediately press the button (S). To exit, press the (LOAD) button
AKAI CT2161, CT2565, CT2567, CT2865, CT2867
On the remote control, press the (MUTE), (OK), (TV) buttons. Record data - button (OK). Output - (TV)
AKIRA CT-14PF9
On the remote control dial (MENU), (MENU), (V.WIEV), (MUTE). Use the (SLEEP) button to turn pages. Exit - (MENU) button
AKIRA CT-2155
Press the blue button, enter the INSTALLATION menu, press buttons (4), (7), (2), (5). To exit, turn off the TV from the front panel
AKURA, CROWN, MNOKA СХ25/26/34, CR20NT, CR1406FT, MK1498N/N, MK2183/N
Pin 8 of the processor is used to enable the mode. There is a special button S009 on the TV board. Press it simultaneously with the (DISPLAY) button on the remote control. Exit - button (TV/TEXT)
BEKO
Input - on the front panel, press two channel switching buttons simultaneously and turn on the TV with the network toggle switch (you can select the menu language).
BLAUPUNKT I563(72)53 DIGITAL PRO
To turn on the internal memory of the processor, short its pin 1 (contact MP2) to the common wire and turn on the TV. Press buttons (i), (E). To exit, click on them again
BLAUPUNKT MM63-13VT, MM63-14HT
While holding down the (i) button on the remote control, turn on the power switch on the TV. Output - (POWER OFF)
BLAUPUNKT MS70-100 DIGITAL PRO, CS82-100 DIGITAL PRO
Press the button (i) on the remote control. Select the PROGRAMMIER OPTIONEN item and press the (ME), (AUX) buttons. Select the SERVICE MODE item. Press the buttons (ME), (3), (2), (0), (0). Output - (TV)
CIRTIS C-14/21/25/28M1/M2
Close pins 13 and 23 of the microcircuit (SAA3010) in the remote control. Exit - button (P) on the remote control
CONTINENTAL CT1412
While holding down the (P+) and (P-) buttons on the front panel of the TV, turn on the power switch. To exit, turn off the TV from the front panel
DAEWOO KR20V1T
Switch TV to channel 91. Reduce clarity to minimum. On the remote control, press the (red), (green), (menu) buttons. Output - (POWER OFF)
DAEWOO 2594ST, 2896ST, 2898ST
To enter you need a special service remote control R-30SVC. Output - (POWER OFF)
DAEWOO 21U1,21E1,21E5
Select channel number 91 on TV. Set the clarity control (SHARPNESS) to minimum and quickly dial (RED), (GREEN), (MENU) on the remote control. Output -(POWER OFF)
DAYTEK DCT-2062-S
On the remote control dial (DISPLAY), (MUTE), (SLEEP), (FUZZY). The next press of the (DISPLAY) or (SLEEP) button will turn on the service menu. To exit, turn off the TV from the front panel
FERGUSON 51K4/5/751L3/7
While holding the (VOL-) and (PROG-) buttons on the TV panel, turn on the power switch and hold the buttons until a message appears. Output - (POWER OFF)
FUNAI 2100A MK10 HYPER.
To set the TV to service mode, you need to short-circuit the TP test point on the board labeled FAKTORY MODE until a red F appears on the screen. Output - (POWER OFF)
FUNAI MK7, MK8
Connect pins 2 and 14 of the D6600A chip to each other in the remote control. Button (6) in PICTURE SELECT mode switches the symbolic-graphic output of OSD information. To exit, turn off the TV from the front panel
FUNAI 2100AMK11
In the remote control, solder a button between pins 2 and 16 of the RT2461-103 microcircuit. When you press the button once, FACTORY appears on the screen; the second time - B/W ADJUST (adjusting picture tube modes); third time - ADJUST (geometry); fourth time - SETUP (setting options); fifth click - exit the service. Using the buttons (P-), (P+), (V-), (V+) set the required values in the required places
FINLUX 4028D
Immediately after turning on the TV, give the commands (PRG), (EXT) from the remote control. Output - (POWER OFF)
FINLUX SERIA 5000
Immediately after turning on the TV, issue commands from the remote control (TV), (PRG), (EXT). Output - (POWER OFF)
FINLUX 3021
Press the button (N1) on the front panel of the TV and quickly press the button located to the left of the button (N3). To exit, you need to press the button to the left of (N3) again.
GOLDSTAR CF-25/29 C26,C36,C76 (MC-51V chassis).
Login - simultaneously press MENY, -VOL, -PR on the panel. OK - remember the changes. To switch to white balance adjustment: =i - for GG, =? -for RG, =x - for BG. Exit - off on the remote control.
GOLDSTAR CF-25\29C44.
Long press the OK button on the Control board and the yellow button on the remote control.
GRUNDIG M63-105, ST63-160, ST63-781, E63-911
To start the internal memory of the processor, short-circuit its pin 1 (contact MP2) to the common wire and turn on the TV to the network. Press the button (i) on the remote control (TP760). Use the (P+) and (P-) buttons to select SERVICE. Press (OK) and enter the code using buttons (8), (5), (0), (0). Exit - press button (i)
GRUNDIG ST82775, ST95775
Press the button (i), INFO CENTER will appear. Select SPECIAL FUNCTION using the (P+) and (P-) buttons and press (OK). Enter the code using buttons (8), (5), (0), (0). Exit - button (i)
GRUNDIG M55-…, M63-…, ST63-…, ST70-…
Press the (R/C) button on the remote control and turn on the power switch. Output - (POWER OFF)
GRUNDIG ST55-725, ST55-750, ST55-800, ST55-95
While holding down the (i) button on the remote control, turn on the power switch. Exit - button (i)
GRUNDIG P37..., P40..., P42..., P45..., P50..., T51..., T55...
While holding down the button (i) on the remote control (TP720), turn on the power switch. Remember value - (OK). Output - (POWER OFF)
GRUNDIG BOSTON ST270/8/IDTV/LOG
Press the (i) button on the TV panel and the (OK) button on the remote control. Remember value - (OK). To exit, press buttons (i), (POWER OFF)
GRUNDIG GV200VPS
On the remote control, press (CODE), then buttons (4), (9), (3), (4) Then confirm (OK) and press (STAND BY). To exit, turn off the TV from the front panel
GRUNDIG M70-100, M70-580, M82-100, M95-100, M70-681 IDTV
Press the button (i) on the remote control. Use the (P) button to call the SERVICE DEMO mode, press (OK), (AUX). Call SERVICE MODE using buttons (OK), (8), (5), (0), (0). Unlocking - (VIDEOTEXT), (PAGE), (CANSEL), (PAGE), (OK). To remember the adjustments, you need to connect pin 7 of the SDA3526 chip to the common wire. Exit - button (i)
GRUNDIG М70-290/9, М84-211/8
Press the button (i) on the remote control. Use the (P) button to call up the DIALOG CENTER mode, press (OK). Call For authorizes dealer— (OK), (8), (5), (0), (0). Output— (POWER OFF)
GRUNDIG Р37/40/50, Т51/55/65
Close pins 6 and 10 of the MC144105 processor to the remote control. Exit - button (i)
GRUNDIG P37-065/070/730
While holding down the (i) button on the remote control, turn on the power switch. Output - (POWER OFF)
GRUNDIG М82-169/9 IDTV, Greenville 7003 text, Greenville 7003 NIC/TOP, ST63-700 text, ST63-700 NIC/text, ST63-700 NIC/TOP, ST63-780 text, ST63-780 NIC/TOP, ST70 -700 text, ST70-700 NIC/text, ST70-700 NIC/TOP, ST70-780 text, ST70-780 NIC/TOP, ST72-860 TOP, ST72-860 NIC/TOP, Greenville 550 SE 5586 TOP, ST 55 -800 TOP, ST 55-850 TOP, ST 55-710 NIC/TOP, ST 55-725 FT/GB, ST 55-800 NIC/TOP, ST 55-850 NIC/TOP, ST 55-850 FR/ TOP, ST 55-900 FR / TOP, M 70-269/9 Reference, TrentoSE7016/9Ref./PIP, M 82-269/9 Ref., Denver SE 8216/9 Ref./PIP, M 82-269 PAL-plus/ LOG, M 72-410 Ref., M 72-410/9 Ref., M 72-410 Ref./PIP, M 95-410/9 Ref./PIP, MW 70-100/8, Berlin SE 70-100 /8
On the remote control, dial (INFOCENTER), (SPECIAL FUNCTIONE), (SERVICE) and enter the code (8), (5), (0), (0). Output - (POWER OFF)
HITACHI 43FDX, 53FDX
Open the front panel (four screws), remove the central panel (six screws), press the blue button in the left corner of the dial board. To exit, press this button again
HITACHI C25/28P445VT, C21/25/28P745VT, C28P405VT
Dial on the remote control (P), (*), (O/V), (#), (M). Output - (TV)
HITACHI C2575/76/77, C2975/76/77, CL25/29/76, CP25/29/76, C28300TN
While holding down the (VOL+) and (VOL-) buttons on the TV, turn on the power switch. Output - (POWER OFF)
HITACHI CS2840TA
Dial on the remote control in one second (-/—), (MENU), (TV). Output - (POWER OFF)
HITACHI C2578FS, C2589FS, SMT2578
On the front panel of the TV, press the (TV/AV) button and, holding it, turn on the TV. To memorize each parameter, press the (ENTER) button. Output - (POWER OFF)
HITACHI CL2894/TAN/TA, CP2894/TAN/TP/AN
Turn on the TV and immediately dial the combination (MENU), (TV), (I) on the remote control. Output - (POWER OFF)
HITACHI C25/2844TN, C25/2864TN
Hold down the (VOL+) and (VOL-) buttons and turn on the power switch. Under the remote control cover, press the button with the staple symbol twice. Output - (POWER OFF)
HITACHI CP2133TA/AN, CL2133TA/TN
Turn on the TV and immediately dial the combination (G), (M), (PROG) on the remote control. Output - (TV)
JVC AV-29PRO.
Input: 1. Set the volume to 04. 2. On the remote control - DISPLAY and MENY. Exit - off - power.
JVC-21TE, G21T, G250MX
Login - simultaneously press the remote control “display”, “picture mode” 2 times. off timer - remember. The exit is to press MUTE twice.
JVC-C21ZE (21TE, 14TE, 21ME, 14ME, 14W) G21T G21OT G25MX.
Entering the menu: [DYSPLAY]+ SERVICE MENU 1.VSM PRESET 2.SUB VSM 3.IF V/C Menu control: Press 1, 2 or 3 PICTURE ADJUST - SELECT ITEMS IN THE MENU +PICTURE ADJUST - CHANGE ITEM -PICTURE ADJUST - — // — DYSPLAY- CALL MENU TO SCREEN OFF TIMER- SAVE CHANGES SYSTEM CONSTANT MUTE — SAVE CHANGES MUTE – EXIT
LG MC64 and MC84.
Login - Press OK on the remote control and on the TV panel at the same time.
MAGNAVOX.
Login: 1. press the following combination on the remote control: [0], [6], [2], [5], [9], [6]. Channels will change. 2. press MENU Attention! This only works on *SOME* Magnavox TVs. The output is the POWER button on the TV.
MITSUBISHI CT-21M5E\ET\RT, CT-25M5E\EN\ET\ETN\RT\RTN.
Entry - press the service switch S701 (next to the tuner), then button 9 (within 5 seconds). “*” - switching the adjustment display, “2”–“8″—code adjustment, “6”-“4”—data adjustment, “0”—writing to memory, “1”—cancel changes before writing to memory. Exit - stand by.
MITSUBISI CT-29B3EEST.
Input - turn on the power. Press the service switch S701 (next to the tuner), then button 9 (within 5 seconds). Record - button 4. Buttons 2 and 0 change the adjustment code, buttons 5 and 7 change the data value.
NOKIA 6364, 7364 CHASSIS 2B-F (EVROSTEREO 2B-F chassis).
Input - 1. (-/-) 2.(MENY) 3.(TV) - all within 1 second. Recording the result - MEMO. Exit - off from the remote control.
NOKIA, SELECO, SABBA ITT, TELEFUNKEN (STEREO PLUS chassis).
Input — 1.(mute) 2.(OK) 3.(tv), record the result “OK” Output — TV
PANASONIC (MX-3, MX-3S chassis).
Hotel mode: 1. On the remote control - off timer, on the CH panel. UP - enabled. 2. On the remote control - off timer, on the panel - VOL. –off Login - simultaneously press RECALL on the remote control and - VOL. on the panel. The way out is to press NORMAL twice on the remote control.
PANASONIC TC-29V50R CHASSIS MX-2A.
Entering the adjustment mode - press the service switch button S1101 (next to the centering switch). The inscription SNK will appear on the screen. Button S1103 (FUN) - select the required adjustment. Exit - press S1101.
PANASONIC TX-21AD2C, TX-29A3C, TX-25A3C CHASSIS EURO-2, EURO-1.
Set the BASS bass control to maximum, TREBLE treble control to minimum. Press the F button on the TV panel at the same time as the REVEAL button on the remote control.
PHILIPS 25PT8303.
Login - simultaneously press “?” and “sleep” under the lid.
PHILIPS 14PT-1342\43, 14PT-1352\00\01\05\07\11\39, 14PT-1542\01\43, 14PT-1552\00\01\05\11, 20PT-1342\43, 20PT -1542\43, 21PT-1532\58, 21PT-1542\43, 37TA-1232\03, 37TA1432\03, 37TA1462\18, 37TA1473\18, 52TB-2452\19, M-2052\00\01, M2152 \00\07\15, M2182\00, M2192\05 CHASSIS L6, 1AA
Input: 1. Using the service remote control model RC7150 - press the DEFAULT or ALIGN buttons or 2. Short-circuit pins S1 S2 on the processor (pin 14 of IC7600). Exit - STAN-BY button.
PHILIPS14PT-118A\50B\67R\94R, 14PT132A\50B\50R\75R, 14PT133A\162R, 14PT137A\162R, 14PT138A\54R\58T\67R\71R\74R\75R\93S, 20PT188A\50B\ 67R\73R, 20PT120A\78R,20PT132A\75R, 20PT137A\62R, 20PT138A\50D\58R\58H\58R\67R\71R\73R\74R\75R\94R\97R. chassis L7.1A/AA
1. Using special service console (DST) or 2. Short-circuit the service contacts M24, M25 on the printed circuit board (PCB) and turn on the power. Exit - press stand by.
PHILIPS Anubis S\DD.
Input - close pins M31 and M32 (ground) near IC7710. Exit - STAN-BY.
PHILIPS 25PT400/42, 25PT410A/42, 28PT400A/42, 28PT450A/42. CHASSIS GR2.2AA.
Input: 1. Close contacts M33 and M34 (service). 2. Press the INSTALL key on the front panel to turn on the network switch. Exit - STANDBY key.
SAMSUNG CK 5038 ZR\TBWCX (chassis SCT11B) CK6202 CK7202 CHASSIS SCT12B.
Input - 1.(stand by) 2.(p.std) 3.(help-?) 4.(sleep) 5.(power on) Output - STATUS or HILDDEN.
SAMSUNG CS7272 PTR\BWX CHASSIS SCT 51A, CS-721, CS-723.
Input: 1.(picture off) 2.(sleep) 3.(p.std) 4.(mute) 5.(picture on) Output - off - power.
SAMSUNG TVP3350, TVP5050, TVP5350 (monoblock) CHASSIS: SCV11A,B.
Input—Stand-By P.Std Menu Sleep Power On.
TV Samsung, one of the combinations should work:
Option 1: hidden button on the remote control (HIDDEN) Option 2: StandBy - P.STD - Help - Sleep - Power-On Option 3: PICTURE OFF - SLEEP - P.STD - MUTE - PICTURE ON
SCHNEIDER with DTV3, DTV4 chassis
Input: 1. Enable the network button. 2. While holding down the red and blue buttons on the remote control (remote control 204) simultaneously for exactly 5 seconds, without releasing them, press the volume + and CH- buttons on the TV at the same time. Dial the combination clearly, maintaining a strict time interval. The solution is to turn off the power.
SHARP 54AT–15SC.
1.Power off. 2. Vol - simultaneously CH+ on the panel. 3. Power ON on the panel and hold step 2 until it starts.
SHARP VT-1428M, VT-2128M.
Input: 1. Set the TV to standby mode. 2. Press CH UP for 2 seconds or more and press the POWER button at the same time. Exit - MENU button.
SHARP 14D-SC, 14B-SC, 20B-SC, 14D-CM, 21D-CK1, CV-2132CK1 CHASSIS PAL-A.
Set switch S1008 to the service mode position.
SHARP 14R-SC/M8/M10, 14R-W, CV-14RU.
Set switch S1006 to the service mode position.
SHIVAKI CHASSIS 11AK19.
Input: 1. INSTALL key 2. on the remote control in the following sequence 4, 7, 2,5. All adjustments are changed via ADJUST.
SONY KV-2170, 2180, 2540 BE4 chassis.
Input: 1.(?) 2.(5) 3.(+volume) 4.(tv) then MENY Exit - (00)
SONY KV-E2551A\B\E\K, KV-S29 JN1\MN1\SN1, KV-S34 JN1\MN1\SN1, KV-S2941A (AE-2B chassis).
Input: 1. Press any two buttons on the panel at the same time, then MENY on the RM-831 type remote control. 2. OK – remember the data. (adjust according to the table). Exit - off - power.
SONY 25M1K KV-M1440, KV-M2171, KV-M2181, KV-M2101.
Input: 1. TV in STAND BY 2. press DISPLAY on the remote control 3. -/- 5 4. -/- VOL+ 5. -/- POWER Next, press the MENU button on the remote control and you will get to 4 submenus 1. SAA 00 00 all with tips in English language. 2. TDA 8366 1 13 98 geometry, colors, brightness, etc. Recording MUTING values - execution 2 times “0” The data is given for the RM-836 type remote control.
SONY KV-S2941A\B\D\K, KV-S2942U, KV-S2943E SHASSIS AE-2F.
Turn on the TV's power, and then press the ON button on the remote control twice. TT will appear in the upper right corner, then press the MENU button.
SONY KV-S2952 KR CHASSIS AE-3.
Use remote control type RM-831. Turn on the TV's power by simultaneously pressing the - and + buttons on the front of the TV.
SONY KV-G21M1\G21P1\G21S11, KV-T21M1\T21MF1\T21MN1\T21MN11.
Login - press the combination of buttons on the remote control 1(UP) 4(DOWN). Press the MUTE key to display the WRITE (green) screen, press the 0 key to enter into memory. Exit—press the POWER button 2 times.
TOSHIBA 2150 (chassis - S5E).
Input: 1. (mute) 2. (press MUTE again and do not release) 3. (press MENY on TV) “4” – contrast correction. “1”, “2”, “3” - cut-off R, G, B "AV" - selection of test signal. , “— volume +” - adjustment. Exit - off - power.
BRANDT, FERGUSON, NORDMENDE, SABA, TELEFUNKEN, THOMSON (CHASSIS ICC9, TX-90, TX–91).
Input: 1. Stand by - with remote control 2. Turn off with the power button. 3. While holding the teletext button (blue) on the remote control, turn on the network. 4. After turning on the TV, release teletext. 5. If it doesn’t work, then in step 4, release the teletext button and quickly briefly press it again. Attention ! Entering the service mode is possible if there are no signals on the card. Exit - stand-by button.
VCR Panasonic NV-SD205.
The technological mode in the subject is [FF]+[REW]+[EJECT] according to the documentation. The same buttons, held for 5 seconds, reset all errors.
VCR PANASONIC AG-4700BY household 800, 950, 1000.
- simultaneously pressing fast forward, rewind, and eject the cassette.
How to reset all settings on a Philips TV?
Factory reset Philips via Settings
- First, open the Settings
, On Mobile. - Then, under Personal, click Backup & Reset
. ... - Then, under Personal Data, click
Factory
Data Reset . - Then read the information on the screen and tap Reset
Phone.
THIS IS INTERESTING: What drives are best to install on Solaris?
