Subscribers who are accustomed to watching hundreds of satellite television channels at any time are irritated and alarmed by the situation when MTS TV does not work. There is no signal on the TV at all or it is extremely weak, with a crumbling image and faulty sound. Before calling your provider's technical support service, you should make sure that MTS TV is not showing for serious reasons. Perhaps the source of the problems is extremely simple and easy to eliminate on your own.
Simple problems
The first thing to do if there is no MTS TV signal is to start investigating the simplest causes of the problem. They are very banal, but often it is their elimination that helps return the image to your favorite satellite channels.
No payment
A negative or zero personal account balance is the most common reason that there is no signal on all channels . MTS offers its subscribers convenient ways to replenish their accounts. It can be done:
- in your personal account using a bank card;
- at the nearest post office using the details specified in the contract;
- at any ATM or terminal where payment for operator services is offered.
Advice! It is more convenient to check your personal account balance in your personal account. The user agreement specifies the login and password required to log in.
Preventative work
The provider must notify its subscribers about possible preventative maintenance on the equipment. During their implementation, there is no connection to the interactive TV server, and satellite MTS TV does not work.
The user can find out that there is no signal broadcast today on the information channel. It remains available almost always. News about the implementation of certain works, their start and end times are published in the corresponding section on the provider’s official website.
If you cannot access the Internet or have other problems, you can call the MTS support service. Operators will report whether maintenance work is currently ongoing and provide information about the time of its planned completion.
Weather
Satellite communications is the transmission of digital data over a high-frequency radio channel. This broadcast method is greatly influenced by weather conditions. Superimposed on the shortcomings of the cable network in the house and other negative factors, this can cause a sharp drop in signal quality. Negative weather conditions include:
- heavy fog;
- storm;
- rainfall;
- snowfalls;
- blizzard;
- strong solar activity.
If MTS TV does not show or there is a strong signal deterioration, looking outside the window is included in the mandatory check list. Perhaps it's just bad weather today. After its improvement, reception of satellite broadcasts will resume again.
Features of faults
How to connect MTS Internet for a modem: choosing a tariff and conditions
Before moving on to comprehensive diagnostics with deciphering emerging problems and searching for reasons why the MTS modem does not connect to the network, it is advisable to start small - checking your personal account, rebooting the computer and modems with routers (the indicator should light up red, then turn off, and then turn on again). Nothing changed? The problem may be specific to your PC, connector, or even SIM card. You can verify the opposite by checking the modem or router on a third-party device - a laptop, the computer of a friend or acquaintance (there is no better way to find out why the 4G modem stopped working).
Checking the antenna position, switching
If the weather outside is good, there is no preventive maintenance on the provider’s side, but the television does not work, it is worth starting to check the equipment installed in the apartment and house.
Cable network
First of all, all wires and switching points are inspected . The cable network must meet the following requirements:
- wire lines should not be laid under tension and secured when passing in the open air;
- The cable is not allowed to have twists, strong creases, or damage to the insulation that affects the outer screen and internal conductors;
- the surfaces of the contact pads must be free of traces of oxides and corrosion;
- On one cable, more than 1 break is not allowed, made during repair by cutting out a piece and connecting the edges with F-connectors.
All problems found are corrected. The damaged cable is replaced, the connectors, if necessary, are cleaned or replaced with new ones.
Digital interactive TV
For digital interactive TV, the cable checks already listed are performed. Additionally, RG45 connectors at the ends of Ethernet communication lines are inspected. The color of the thin metal contacts on the plastic element should be copper or yellow with a slight tint of green. If dark green, blue with gray, or black colored pads are detected, the RJ45 connector must be replaced. The cable is crimped with a special tool, strictly observing the order of laying the individual twisted pair wires.
Advice! If the user does not have the appropriate skills and equipment, it is recommended to seek help from the nearest computer service center or order a visit from a specialist by calling the MTS technical support service.
Checking the converter
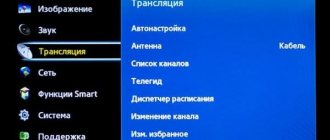
The antenna unit converter may fail as a result of static discharge or interference during lightning strikes. To check the operation of this main element of the satellite TV receiving system, just go to the info channel and display signal level indicators on the screen.
One of the complex indicators measured is called reception strength. The second is signal quality. If the converter breaks down, the indicators will show maximum power, but zero quality . If such a picture is observed, it is recommended to contact the MTS service or buy a new converter of a suitable format for your antenna unit.
Antenna position
If the deflector plate is not firmly secured to the swivel bracket, it can be dislodged by gusts of wind, impacts from random objects, and even birds landing on it. It is necessary to check the position of the antenna. This is convenient to do using the proprietary SatFinder application from MTS.
The program is installed on a smartphone or tablet. The user is required to select an MTS satellite by its name and allow access to geolocation. After this, SatFinder provides all the necessary data, from the horizontal rotation of the dish to the vertical tilt angle for the deflector and converter separately.
Using simple tools, the user can quite accurately align or check the positioning of each element of the antenna unit. After this, it is firmly fixed by tightly tightening the bolts on the bracket fixed to the wall.
Interference
The received signal from the satellite drops significantly if there is interference within the antenna's visibility range. Its level is also affected by the condition of the deflector. You should:
- make sure that there are no tree branches, hanging laundry, or other obstacles in the satellite’s line of sight;
- remove all foreign objects from the surface of the deflector, from fallen leaves to small branches and other objects;
- If a heavy deposit of dust, ice, dirt, or bird droppings is detected on the deflector plate, all contaminants are removed, acting carefully so as not to damage the protective coating.
Advice! If, over time, interference appears in the line of sight of the satellite that cannot be eliminated, the user is advised to find another location to install the antenna. Without moving it, it will not be possible to achieve high-quality reception.
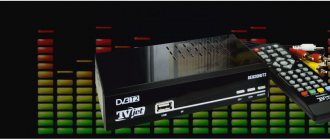
Channels freeze or signal disappears
For stable operation of digital television, it is important that the received signal is of sufficient level. More precisely, a good signal-to-noise ratio is important. When this ratio drops below a certain limit, viewing problems begin. The easiest way to see the signal level is to double-press the INFO button on the problem channel on the remote control of the DVB-T2 set-top box. The “quality” scale should appear on the screen and its value should be as high as 50%. Often, next to the signal scale, a “level” or “strength” scale is displayed - you don’t need to focus on it. If the signal level is low, then the advice is still the same: check the cables and antenna and, if necessary, replace it.
You can leave a comment on this article or ask your question at the bottom of the page.
| You can share this page on social networks. Just click the corresponding picture. If you have a VK account, you can comment on an article or a specialist. |
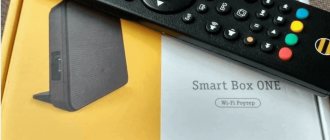
Damaged or incorrectly installed smart card
If the television does not work, the TV receiver loads slowly, or error messages are displayed on the screen, it is worth checking the status and positioning of the smart card. For this:
- the set-top box is turned off, when using the CAM module, the TV is turned off;
- the smart card is pulled out of the slot;
- the contact pads of the carrier are inspected, all deficiencies are eliminated;
- contacts are wiped with alcohol;
- the card dries out.
Important! The smart card must be installed in the slot strictly according to the instructions for the specific set of equipment. You must make sure that the media fits into the slot tightly and all the way. Only after this can you turn on the set-top box or TV with the CAM module.
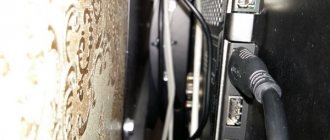
There is no picture on the TV
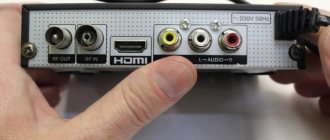
First you need to understand the general connection diagram of a digital receiver, TV and antenna. The receiver is connected to the TV (not with an antenna cable, but with a low-frequency RCA-RCA or HDMI cable), and the antenna is connected to the set-top box. Even if the antenna is faulty or absent, the receiver menu should be displayed on the screen. Those. when you press the console remote control
buttons MENU or OK, at least something should happen on the screen. If this does not happen, it means that the digital receiver is not connected to the TV correctly, or the correct video input has not been selected. It is also possible that you simply did not turn on the set-top box (the green indicator on it should be on).
The first step is to make sure that the set-top box is connected correctly. Most often, it is connected using an RCA cable with characteristic three multi-colored plugs: red, white, yellow. People usually call it “tulips” or “bells”. If you are using just such a cable, you should make sure that it is connected to the TV input and not to the output. The input is usually labeled as INPUT or IN. The output is OUTPUT or OUT, respectively. Old TVs with mono sound do not have a red “tulip”; in this case, it simply is not used. On TVs with a universal input, instead of the yellow “bell” there may be a yellow-green connector. This input is also suitable and can be safely used.
About 15% of TVs of different years of production do not have a “tulip” type input by definition. Instead, the TV should have a SCART connector, which is often called a “comb”. Typically, digital set-top boxes are not equipped with a cable for connecting to such an input, and then you need to purchase an additional SCART-RCA adapter. If the TV is modern, then it is better to immediately buy an HDMI cable instead of an adapter. The image with it will be clearer and the sound clearer.
If the TV and set-top box are connected correctly, and the set-top box menu still does not appear on the screen, you need to make sure that the desired video input is turned on. You must understand that when you connect a digital receiver, the TV will not display an image from the set-top box until you switch the TV to video input mode. This is done by pressing the corresponding button on the TV remote control, which in different models may be called SOURCE, AV, AV/TV, INPUT or the video input icon (arrow pointing inside the circle). As a rule, there are several video inputs on the TV and you need to press the button several times until the set-top box menu appears. Let us remind you once again that the video input is switched by the TV remote control.
Software Update
The MTS provider does everything to offer its customers the highest quality image and sound of satellite broadcasts. For this purpose, program codes and encoding algorithms are constantly being improved, and the most modern compression protocols are being introduced.
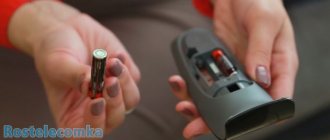
To receive services without interruptions, users need to regularly update the firmware of their set-top boxes. This can be done as follows:
- in the device menu, find information about the installed software version;
- if it does not match what is offered on the provider’s official website, go to the information channel;
- agree to the update offer and follow the instructions.
Exactly where the firmware version is indicated is described in detail in the operating manual for the specific set-top box. Users who do not have sufficient qualifications can immediately enter the information channel. The system will automatically determine the need for firmware. New software is installed only if a more recent version is available.
How to properly connect an MTS modem on Windows
After purchasing network equipment, the procedure for first inclusion and activation is as follows:
- Insert the modem or router into the USB connector.
- Wait until the missing update and driver files are downloaded in the background (in rare cases, a disk with all the information is also available in the kit).
- An MTS-Connect program icon will appear at the bottom of the interface, which will help you figure out the missing settings and network connections.
If all else fails
If nothing helps, and satellite MTS TV is still unavailable after all checks, it is recommended to call the provider’s technical support service. Specialists will require you to provide the user data specified in the contract, after which they will provide instructions for troubleshooting.
Important! Even if the operators' recommendations coincide with the checks already done, it is worth doing them again. Perhaps a mistake was made the first time, and under the guidance of an MTS specialist, the process will go correctly.
If the operator cannot find an acceptable solution, he will accept a request for a visit from a technician to test the equipment and check individual components of the system. MTS specialists arrive at a time convenient for the client, agreed upon in advance. If some of the technician’s work requires payment, the technical support operator notifies the subscriber about this.
Configuring and installing a satellite dish and MTS TV yourself
Mobile TeleSystems have loudly declared themselves in the satellite television market, offering high-quality services and modern technologies for everyday use. Setting up an MTS satellite dish is an important aspect for a potential client to study, since this process must be completed independently. The company's service does not provide home-visit services for a specialist, and calling a specialist will be accompanied by additional financial costs.
By following the established instructions, installing the antenna, mounts, wiring cables and setting up technical equipment will not cause difficulties even for an inexperienced user. In this material we will look at:
- pre-preparation process;
- step by step guide;
- satellite coverage map and direction;
- subsequent equipment setup;
- recommendations, possible difficulties and mistakes.
Diagnostics in the device list
In addition to the “Device Manager” and the “Properties” section in Windows Explorer, problems can also arise in “Network Connections”, where the current settings for interacting with the operator’s servers are listed (the combination Win + R and the command will help to call the section in no time ncpa.cpl).
If the directory is empty, connections are gray or even marked with a cross, then the problem is in the TCP/IPv4 or TCP/IPv6 parameters. You need to do this: right-click on the connection, call “Properties”, and from there check the two values. In both cases, on the “General” page, IP addresses and DNS servers must be selected automatically, that is, the fields for numbers must be left empty, otherwise compatibility problems will arise. If the sections are full, you should clear the data, save the changes, and then try to connect again.
Configuring router settings
If even after selecting automatic search for suitable TCP/IPv4 values nothing has changed, then the last option left is to call support at 8-800-250-08-90 and get the following coordinates from a consultant:
- Required IP addresses for MTS.
- “Subnet Mask” and “Default Gateway” values.
- Preferred DNS servers (including alternative ones).
The values are entered in the same place (Win + R and the ncpa.cpl command) - in the “Properties” of the automatically generated network connection for the TCP/IPv4 and TCP/IPv6 values.
Note!
In some situations, after adding parameters, you will need to restart your computer or laptop.