The red light does not turn on and blinks
One of the common situations is when the Selenga digital set-top box does not turn on and the red light blinks. In addition, the equipment does not respond to the remote control, and the buttons do not work. To resolve the issue, try the following:
- Turn off the equipment (unplug).
- Wait two to three minutes.
- Apply power again.
If this does not help, and the red light on the Selenga console is still blinking, try flashing the device. To do this, you will need a USB flash drive formatted in FAT32 and at least 4 GB in size. Take the following steps:
- Find the new software version for your set-top box.
- Download it to a USB drive.
- Insert the USB flash drive into the tuner connector.
- The download will start automatically. If this does not happen, enable software update in the menu.
- Wait for the program to install and restart the device.
If the Selenga set-top box still does not show, the cause may be a faulty power supply. There are often situations when the capacitors are dry and the device does not have enough voltage for the internal circuit elements. In this case, there are two ways - replace the power supply (if it is remote) or take the tuner to a repair shop.
The image freezes shortly after turning on the console
This defect is quite rare, but if it is detected, repairing the receiver is most often impractical. A clear sign of such a malfunction: the appearance of image distortion and “freezing” of the picture, which appears 5-20 minutes after turning on the digital tuner
, after which the problem does not disappear. Similar symptoms also occur when the signal from the antenna is weak, but in the latter case, image distortion does not have a clear connection with the operating time of the DVB-T2 receiver.
The problem could be the same power supply or overheating of the processor. If the power supply is external, you can try connecting another power supply. If not, then the problem is in the processor itself and repairing the product in this case is impractical.
You can leave a comment on this article or ask your question at the bottom of the page.
| You can share this page on social networks. Just click the corresponding picture |
If you have a VK account, you can comment on an article or a specialist.
Greetings, dear colleagues!
Today I will briefly tell you and show you the main problems with digital television DVB T2 set-top boxes.
As an example, I will present to you the receiver from my previous article entitled. DVB-T2 receiver. Repair + firmware.”
I'll start in order of priority.
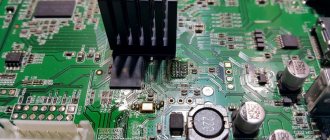
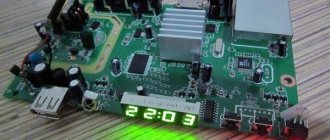
1. Thorough check of the power supply. First of all, we check the fuse; if it is intact, then we check the power at the output of the power supply. Next is a diode bridge, an electrolytic capacitor after it, and a PWM microcircuit. The output diode and capacitor are located after the pulse transformer. An optocoupler, less often a zener diode, a powerful resistor in the power part of the power supply unit, an adjustable zener diode (installed after the pulse transformer).
2. The receiver freezes. The LED blinks and lights up dimly. We are trying to supply 5 volts from an external DC source, with an output current of at least 1.5 amperes, to the output capacitor of the power supply. If it starts, then the problem is in the power supply. The output capacitor of the power supply unit most often requires replacement.
3. There is 5 volts at the power supply output, but the receiver does not start. We check secondary DC-DC voltage converters. On the board they usually look like small pentapod microcircuits installed next to the inductors. We measure on inductances 1V, 1.2V, 1.3V, 1.8V, 3.3V, 15V, etc. If it is missing, we change the corresponding microcircuit.
4. Cyclic reboot, freezes during loading, etc. (the firmware crashed). In the presence of normal voltages on all five-legs, as well as when the inscription “ASH” appears (in some receivers), cyclic reboot, freezing during loading, etc. - flash the flash memory chip.
No signal
Another question that often appears on forums is what to do if there is no signal in the Selenga set-top box. However, the television does not work and you cannot watch channels. In such circumstances, take the following steps:
- Try returning the device to factory settings and scan the tuner again in automatic mode.
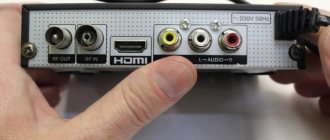
- Make sure all cables are well connected. For example, if the Selenga set-top box does not have a signal via HDMI, check the quality of the connection of the wire to the connectors and the integrity of the cable itself.
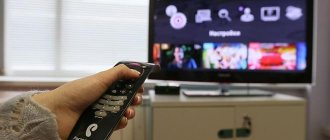
- Check that the correct mode is selected on your TV. Depending on the type of remote control, you need to press the Input, AV, HDMI and other buttons.
- Replace the power supply (if it is remote). There are often situations when the tuner does not work and does not show TV channels due to dry capacitors.
- Check the signal. At a level of 15% and below it will disappear. The cause may be bad weather conditions or incorrect settings. Such a breakdown of the Selenga console can be repaired. In the first case, you just need to wait, and in the second, try to correctly configure the TV antenna by changing its position.
One more situation cannot be ruled out when the TV itself does not work. To check this version, try connecting the TV to other equipment.
Digital set-top box not working? What you can do yourself.
The digital set-top box does not work.
It happens that the DVB-T2 set-top box for receiving digital terrestrial television stops working.
In some cases, you can solve the problem on your own. But if the set-top box is under warranty, then you still need to take it to a service center or where you purchased it. Here we will look at typical problems when a digital set-top box does not work, as well as problems that arise during operation. It is also necessary to understand whether these problems are caused by the failure of the set-top box itself or whether it is still a matter of the antenna, cables or TV.
The set-top box does not turn on.
The most common problem is when the digital set-top box does not turn on at all. There are two possible options for this failure.
- When the red indicator is on, but the receiver does not enter operating mode.
- Or the console shows no signs of life at all.
The weak point in any technology, and digital set-top boxes are no exception, is the power supply. If the power supply completely fails, then in this case the set-top box shows no signs of life at all and no indicators on the front panel light up. But there are cases when the power supply does not fail completely and in this case begins to produce incorrect voltage parameters (low voltage). With such a malfunction, the digital set-top box tries to start, but cannot fully enter operating mode.
Solution to the problem.
External power supply
This problem is not difficult to solve on your own if you have an external power supply. Most consoles have standard and interchangeable power supplies. The main thing is to make sure that the power supply produces the same parameters as your old one. And at the end of the wire it has the same plug for connecting to the set-top box. But even if the plug doesn't fit. You can solder it from an old power supply using simple soldering skills and observing polarity. The power supply can be purchased at a specialized store, for example, one that sells over-the-air antennas. You can ask the seller to connect the power supply to your set-top box and make sure that it is suitable.
However, it will be more difficult if you have a built-in power supply. A characteristic sign of this may be a wire coming out of the body of the set-top box and at the other end there is a plug for the socket. This repair requires more serious intervention, which the service center will help you do.
The image freezes.
In some cases, when the digital set-top box does not work. You may notice that shortly after turning on the tuner the image freezes. Such a defect occurs quite rarely, but if it occurs, repairing the set-top box is impractical. A clear sign that the malfunction is coming from the set-top box is distortion or freezing of the image after turning on the receiver after 15-20 minutes, after which the problem remains. A similar malfunction occurs when the signal from the antenna is weak, but the image distortion is in no way related to the operating time of the digital set-top box.
However, in this case, the problem may lie in a faulty power supply. Although most often it is a processor malfunction. But still, if the power supply is external, you should check it by replacing it with another one that is known to work. If this does not produce results, then most likely there is a malfunction in the processor and subsequent repairs will be impractical. You should purchase a new console. For example here - TV set-top box SELENGA T81D
72, total, today
Liked it! Share with your friends.
Tuner freezes
The next problem that needs to be addressed is when the Selenga set-top freezes and does not work properly. Try the following steps:
- Restart the equipment. Remove power completely and then reapply voltage.
- Check the signal quality. It should be 80% and above.
- Make sure the device is working properly. As in the case when Selenga stopped working, dry capacitors may be the cause.
- Reset to factory settings.
- Update the software using a USB stick (mentioned above).
- Check the quality of the connections of the wires to the connectors.
As a rule, these actions are sufficient if the Selenga set-top box does not work normally, freezes during viewing or immediately after turning on.
DIY console repair
What is a sign that the power supply in the set-top box has failed, and not something else? If the set-top box connected to the outlet does not show any signs of life, neither the digital indicator nor the LED on the front panel lights up, then with a 99% probability the reason is in it, in the power supply.
If at the same time the warranty period has already expired, then you can safely start disassembling it. As experienced craftsmen say, “An autopsy will show.” I think you can figure out this part of the work without a detailed description, just be careful, usually two screws on the back wall, sometimes also on the sides, allow you to release and open the top cover. Plastic latches on the sides and bottom hold the front panel, and the board itself is also secured with screws to the bottom of the case and in the area of the connectors on the rear wall of the case.
The console is disassembled
So, the set-top box is disassembled, the power cord is also removed from the connector, it will no longer be needed. On the bottom of the case there are traces of a “fire” left behind by a burnt-out power supply.
PS The power supply here is not a separate unit, as you might think from the name, but a section of the board on which radio elements are located that provide the required supply voltage to the set-top box.
What is the modification?
I’ll outline the general picture, and for those who already know a little about radio engineering, this will already be enough to grasp the basis of the idea and repeat it. So, the power circuits of this set-top box produce only one voltage - 5 Volts. Since this circuit has burned out and repairs may not be practical (given the total cost of radio components and repairs), there is a simple solution. Replace the internal power supply with an external one. It's not very difficult!
We replace the internal source with an external one
In the photo above, a yellow frame highlights the area of the power supply that has failed. The board has already been washed so no traces of burning are visible. By the way - Among repairmen, the expression “Burned” does not always mean literal combustion with charring and other similar manifestations, it only means that the radio components have failed.
For our repair, you will need to purchase an external power supply with an output voltage of 5 Volts and capable of delivering a current of 1.5 or better 2 Amperes. Nowadays there are a lot of similar ones that can be purchased inexpensively, or maybe you have something similar, for example, an unused charger from a tablet or smartphone.
When a suitable adapter is available, all that remains is to find the desired point on the set-top box board and, observing the polarity, apply voltage to it from the external power supply. All! All that remains is to lay and secure the wire, or you can organize a detachable connection, as you like. I think the basics are clear, let's move on to the details.
Doesn't show TV channels
A common malfunction is when the Selenga set-top box does not find channels and the television does not work. Take the following steps:
- Check that all wires are connected correctly and the required mode is selected on the TV.
- Study the map of digital channels for your region and make sure that where you live has access to the necessary multi-complexes.
- Make TV channel settings manually. For example, if a channel has stopped showing, find its frequency and enter it manually.
- Update your software to the latest version.
- Wait until scheduled work is completed if it is this that caused the problem.
If nothing helps, and you cannot understand why the TV on the Selenga set-top box does not work, try replacing the receiver or contact a technician. The latter can come to your home and help with the setup.
The remote control doesn't work
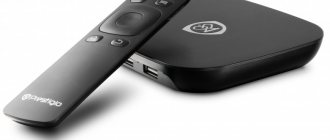
Another situation when the remote control on the Selenga console does not work. In this case, the tuner does not respond to user commands in any way. The following steps may help:
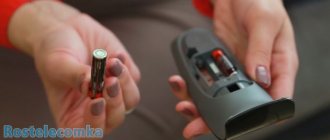
- Check that the remote control is working properly. To do this, turn on the camera in your smartphone, point the remote control at it and press different buttons. If you see the indicator light, it means the device is working properly and is working. If the light bulb does not respond, replace the remote control, repair it, or simply change the batteries.
- Reboot the Selenga console.
- Update your software.
- Check the operation of the receiver with another remote control or using a program on your phone.
In most cases, if the remote control does not work, the reason is precisely in the remote control, and the set-top box itself is working.
Questions and answers
Supported standards: DVB-T2 and DVB-T HD/SD, support for Multiple PLP mode
HDMI 1.3 1080p HD media player supporting DivX, MPG, MP4, H.264, AVI, MKV, MP3, WMA, etc.
Automatic and manual tuning of all available TV and radio channels
Control menu in Russian / Convenient menu and clear interface
Availability of viewing IPTV, Megogo, ivi, YouTube via Wi-Fi adapter
Support for subtitles and Teletext / TimeShift - delayed viewing function
7 days Electronic Program Guide (EPG) / Parental Controls
Function for deleting channels, sorting, skipping channels, creating a list of favorite channels
Personal video recorder (PVR) for recording and playback of television programs
Software update via USB 2.0
Support for external HDDs
Low energy consumption, in accordance with European Directives 2009/125/EC PMO
12 month warranty and ongoing support from the manufacturer
Processor/demodulator:
Avalink AVL 1509C
Tuner:
Tuner Maxliner MXL 608
RAM DDR 64Mb, DDR-2 512Mb. Flash memory 32Mb.
Supports DVB-T2 and DVB-T HD/SD MPEG2/MPEG4 (H.264) standards
Demodulation:
Orthogonal frequency division multiplexing (COFDM)
Data transmission mode: 1~24Mbps
Demodulation (stream capacity): QPSK, QAM 16, 64 QAM, 256 QAM
Transmission mode: 2K, 4K, 8K, 16K, 32K / Guard interval 1/4, 1/8, 1/16, 1/32, 1/128
Decoder FEC (Interference-Effective Coding) 1/2, 3/5, 2/3, 3/4, 4/5, 5/6
Video decoder:
Profile: MPEG2, MPEG4 AVC/H.264 [email protected]
Input speed: max. 80 Mbps @ MPEG2, Max. 60 Mbit / [email protected] / AVC
Aspect ratio 16:9 full screen, 4:3 letterbox & full screen
Video resolution 576i /576P /720P / 1080i
Tuner:
Input frequency: 170~230MHz (VHF-H); 58 - 100 MHz (group I-II),
VHF: 174MHz - 226.5 MHz, UHF: 470MHz - 862MHz, bandwidth - 8 MHz
Input Impedance: 75 Ω, unbalanced / Signal Level: -90 dBm ~ -20 dBm
Connectors:
Antenna input (low frequency),
A/V outputs: HDMI, composite 3.5 stereo
USB port: USB 2.0 (for media playback, PVR, software updates)
Input voltage: DC 5V, 2A / Maximum power consumption 7W / Standby 0.5W
External power supply DC 5V/2A
Equipment / Accessories:
Set-top box for digital television, AC power supply, Remote control, AAA batteries, 3.5 stereo-3RCA connecting cable, User manual, Warranty card.
Physical characteristics:
Dimensions (WxHxD): 175 x 55 x 75 mm
Weight of the set-top box included: 0.26 kg.
The consoles are packed in a box of 40 pcs. Box weight and size: 10 kg, 58×36.5×17 cm.
Working temperature:. 0°C ~ +35°C / Storage temperature:. -10°C ~ +70°C
Multi-channel audio support - stereo only:
Media file formats: Video: AVI, VOB, MOV, MKV, TS, MPG, MP4, etc. / Audio: MP3, WMA, WAV / Photo: JPEG/BMP/PNG/GIF
_____________________________________
The manufacturer of SELENGA brand products reserves the right to make changes to the design, construction and configuration of the product. When purchasing, check the information about the product with the information on the company’s official website or clarify the specifications of the model you are interested in with the supervising manager.
The manufacturer of DVB-T2 digital set-top boxes - the SELENGA trademark - is responsible only for the performance of the DVB-T/T2 standard reception and playback technology, provided that the television antenna is correctly configured.
All additional services and functions of the set-top box, such as: media player, YouTube, Меgogo, ivi, IPTV, Stalker, RSS, multi-channel sound and others, are third-party developments. The SELENGA trademark is not responsible for the quality and stability of their work.
Reboots periodically
Another unpleasant situation is when the Selenga set-top box turns on and off. The following steps may help:
- Check the power supply.
- Make sure the device is connected correctly.
- Examine the remote control for sticky buttons.
- Update your software.
- Check the buttons on the tuner itself.
Sometimes, if the device does not work normally or takes a long time to turn on, you may need the help of a technician.
Now you know what to do if the Selenga set-top box is malfunctioning, and what actions may be required to restore functionality. Do not rush to immediately take the equipment for repairs, because many issues can be resolved on your own. Sometimes the problem can be solved with a simple reboot.


