The VCR is a real rarity. Almost no one uses this technology. Therefore, modern models from LG, Samsung, Philips and other manufacturers are not equipped with special interfaces for connecting a VCR to a TV.
Fans of vintage equipment continue to use it with great pleasure. Therefore, the issue of synchronizing VCRs with modern TVs is still relevant. It is quite possible to do this. The main thing is to choose the right connection type.
Now we will determine how to connect a Philips VCR or any other brand to popular TV models. There is nothing complicated about it. Every user can cope with the task. No special skills or equipment are required.
Connection options
The instructions should tell you how to connect the VCR to your TV. Installing the equipment takes a minimum of time. It is necessary to connect the connectors with a special cable. However, users have many questions. Not everyone understands the names of interfaces and their purpose.
There are several ways to connect a VCR to a TV:
- coaxial cable;
- RCA cord;
- SCART wire.
Each of these options has its own advantages and disadvantages. The final choice must be made in accordance with the interfaces that your TV is equipped with. For example, some modern models have an RCA connector, while others have a SCART connector.
It is possible that you will not find the necessary interfaces. This applies to new products on the TV equipment market. In this case, you will need to purchase an adapter.
Now let's take a closer look at each of the options presented above. We will create step-by-step instructions for setting up a correct connection.
Peculiarities
Everyone has heard the phrase that progress does not stand still. Usually the expression is relevant for digital equipment that has replaced things that were popular several decades ago. Who now remembers cassette players, pagers, and other achievements of science and technology?
Nowadays such rare equipment is practically not used, taking into account the fact that the devices do not even have the appropriate connection connectors. Some users, out of nostalgia or technical curiosity, try to synchronize the VCR with the TV. At the same time, the question of how gadgets interact with each other is relevant.
RCA cable
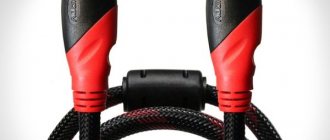
The RCA connector is called a “tulip” by many users. The cable has three plugs of different colors: red, yellow and white. Some modern TV models are equipped with such an interface.
How to properly connect a VCR and TV? Follow the step by step instructions:
- Take the VCR cable with the yellow plug and insert it into the Video Out connector of the VCR. Connect the second end of the cord to the TV, namely to the Video 1 or Video IN input.
- To prevent users from getting confused in the connection diagram, many equipment manufacturers make a colored interface shell. Therefore, insert the yellow plug into the yellow connector.
- Using a similar principle, connect the white and red plugs, connecting them to the connectors of the corresponding color. These plugs are responsible for transmitting Audio.
- Plug in the VCR. Then click on the “Start” or “Start” button. The name may vary depending on the device model.
- Take the remote control and turn on the TV. Activate the appropriate operating mode. This can be Video 1, Input 1 or AV.
If you did everything correctly, the image from the VCR will be broadcast on the TV screen.
SCART interface
SCART interface is the optimal solution. Using this cable will allow you to achieve the highest quality image. If this connector is not available, use a special adapter whose plug is inserted into the USB or RCA input.
How to connect a VCR to an old TV? As simple as possible. New TVs are not equipped with this interface, so you will have to spend time finding an adapter. Plus there may be compatibility issues.
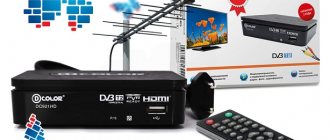
If an adapter to RCA is used, a cable with two plugs (tulips) will be used. The VCR RF/ANT In connector is used to connect an antenna cable. Therefore, you can watch your favorite TV series, programs and films without any problems.
The algorithm for connecting plasma TVs to a video recorder is approximately the same. The difference lies in the connectors connected and the cable types. Be as careful as possible. Sometimes connection problems occur because the user has connected the wrong connectors.
Recommendations
Before you start connecting, it is better to study the instructions that come with each device (if available), this will help you understand the principle of subsequent actions.
It is also better to adhere to the following rules and tips:
- check the serviceability of each equipment, otherwise the connection will be pointless, or even dangerous;
- prepare the necessary wires and adapters - if during the work it turns out that the cord does not fit or is faulty, replacement will take a lot of time;
- Observe safety precautions - do not connect cables to switched on equipment, this can lead to breakdown or short circuit;
- on the VCR, clean the magnetic head - if you do not know how to do this, contact a service center, where specialists will carry out diagnostics and cleaning;
- After each connection, reboot the equipment, this will help save the connection settings;
- If during video playback you hear “crackling” inside the equipment, you should contact a technician; the head may be dry;
- try not to bend the wires, as this can lead to a quick “break” of the microwires.
Now you know how to connect a VCR to your TV and watch your favorite videos from cassettes. The connection procedure is quite simple, the main thing is to treat it with due attention. If problems arise, it is advisable to contact specialized stores where they will provide assistance.
Via coaxial cable
To connect the VCR to TV using a coaxial (antenna) cable, follow the simple step-by-step instructions:
- Insert the cable into the radio's RF/COAX Out connector.
- Connect the other plug of the wire to the TV - RF/COAX In.
- Turn on the video recorder, insert the cassette into it and press Play.
- Use the channel search to find the frequency on which the video and sound from the VCR will appear. Set the channel number through which the recording will be played.
- Enjoy watching.
As you can see, nothing complicated.
The obsolescence of VCRs happened a long time ago. But sometimes cases arise when it is necessary to make a connection, for example, to watch a home video on a video cassette or some significant event that is preserved only on such a medium. If a similar situation arises, then you need to know how to connect the VCR to the TV correctly.
About the manufacturers
The MATSUSHITA company, whose VHS/Hi-Fi video recorders are widespread in the post-Soviet space, made products using MACLORD chips. This was evidenced by the corresponding logos. Own processors were also supplied to other manufacturers, including Hitachi, JVC, Mitsubishi. Some of these companies developed separate audio channels that had better performance than their competitors.
Among the popular models in Russia, Panasonic is worth noting. The video films used a multifunctional BIS sound system. The package included several modules, unique microcircuits, fixed working heads, and various input and output switches.
Methods for connecting a VCR
Detailed instructions on how to connect the tape recorder can be found in the technical manual supplied with it. The connection itself does not take much time; you just need to follow all the necessary steps sequentially. Problems can arise if the connectors are mixed up. There are several ways to connect a VCR to a modern TV:
- using a coaxial cable;
- RCA cable;
- SCART wire.
You need to choose a connection method based on what connectors are on your TV. Because some models can be equipped with, for example, an RCA port, while others can be equipped with a SCART port. There should be no questions about how to connect a cassette recorder to an old TV, because they were all equipped with RCA ports, but modern TV panels may require the purchase of adapters, because manufacturers do not consider it necessary to install ports for “tulips”.
Using an RCA cable
The most popular and easiest way to connect an old VCR to a new TV is to use a cable with “tulips”. Tulips are the colored plugs that transmit video and audio signals (right and left). They must be inserted in accordance with the color designation.
To connect your VCR to your TV, follow these steps:
- The yellow “tulip” is connected at one end to the Video OUT port on the VCR and, accordingly, at the other end to the Video1 or Video IN port on the TV panel.
- Connect the white and red “tulips” in the same way. These are audio signals.
- Connect the tape recorder to the electrical network and start it.
- Turn on the TV and select the device from which the signal will be read from the menu that appears. Often called AV.
- If connected correctly, video data from the tape recorder will begin to be displayed.
A situation may arise that there are only 3 tulips on the cord, but there are 9 sockets on the body of the TV panel. In this case, you should be guided by the color designation: yellow – video, white – audio left, red – audio right. Numerous sockets on the TV are designed to accommodate color channel layouts. Therefore, we must be guided by the following principle: the output on the tape recorder must be connected to the input on the TV panel (OUT-IN).
Via wired Scart interface
A good alternative to the previous method is to use the Scart interface, because it allows you to achieve high-quality signal transmission without data loss. If there is no such port, then you can connect the tape recorder to a modern TV using an adapter.
Using coaxial cable
The VCR can be connected to the TV using a coaxial cable. To do this you need to do the following:
- Insert one end of the cable into the RF/COAX Out port of the tape recorder.
- Insert the other end into the TV receiver into the RF/COAX IN port.
- On the TV panel you need to find the frequency at which the video and sound from the tape will be played.
- Turn on the tape recorder and start playing the tape.
- If everything went correctly, the video will be displayed.
Connection in parallel with cable TV
The relevance of this method works if the channels are broadcast through a set-top box. In this case, the tape recorder is connected to a set-top box, which serves as a kind of adapter. This will require purchasing two sets of RCA cables and one set of coaxial cables. You need to perform the actions in the following order:
- Use a coaxial cable to connect Cable Out on the tuner and RF In on the VCR.
- One wire with “tulips” connects to the Audio Out and Video Out ports on the tuner and to the Video In and Audio In inputs on the VCR.
- Another set of wires is used to connect the tape recorder and TV.
- Turn on the devices and select the data broadcast source on the TV in the menu.
Common problems and ways to solve them
When connecting, problems may arise, for example, the plasma is not equipped with the appropriate connectors. In this case, the connection should be made through adapters. Just first you need to study what ports are available.
The TV device does not see the signal
This occurs for the following reasons:
- The TV panel is not configured or is incorrectly configured to receive a signal from the VCR;
- cables or ports are deformed;
- The plugs do not fit tightly into the connectors.
Make sure that the wires are intact and that the “tulips” fit tightly into the connectors. Having ruled out these problems and still not receiving a video display, check the settings of the TV receiver. If the video still does not start, replace the cables with new ones and make sure the ports are working properly.
Overdubbing audio from channels
If there are no problems with displaying video content, and the sound is reproduced not only from the broadcast source, but also in parallel from the TV channel, then the solution to the problem must be sought in the antenna, namely in its position. Data from a tape recorder is transmitted at low frequencies, so a working antenna may interfere. Change its position and the situation will change.
As you can see, there should be no difficulties when connecting and transmitting data from an old tape recorder to either an old TV or a new one. You only need to follow the color indicators when connecting using RCA ports or using adapters.
Relatively recently, “video” was the only opportunity for the general public to independently choose which video to watch: a wedding chronicle, a feature film or a cartoon. You could not only play them completely, but also enjoy your favorite moments using rewind.
Video cassettes, storage media that can be played on tape recorders, have a limited resource - on average up to 500 views, after which the quality will begin to deteriorate noticeably. And the device itself does not last forever. Therefore, to preserve valuable video materials, it is best to transfer the video from the cassette to the computer. All that remains is to connect the VCR to the computer.
How to connect a VCR to a computer
Connection methods
Before moving on to step-by-step instructions, it is useful to learn about ways to connect a VCR to a computer. There are several video capture methods:
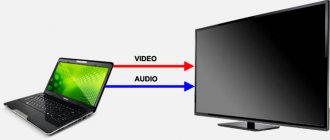
- via video card. An easy way to connect directly. Examine the back panel of your computer and find the video card connectors. It is easy to recognize: the cable from the monitor should go to it. If it has three colored connectors (white, yellow and red), we are dealing with an RCA card. This means that it is possible to connect the VCR directly to the computer. The most common cable is used for connection; you definitely have one;
- video card with only S-Video. It happens that instead of a yellow input, the video card has an S-Video connector. It requires an adapter. There are cases when the video card is equipped only with an S-Video jack. Then you need to connect the video signal from the tape recorder through this socket, and the audio through the sound card. There are video cards that only have S-outputs. You won't be able to connect a VCR to them and you'll have to use other methods;
Adapter for video card - TV tuner. This device allows you to watch TV channels through your computer and record them. You can also record a signal from a VCR in the same way. Devices come with a USB interface or as a separate board;
Board for computer with TV tuner - via video capture card. A simple and convenient way. The video capture card is purchased separately. It is inserted into a free slot on the motherboard. To do this, you need to know what it looks like and be able to remove the cover from the system unit. If you are not confident in your engineering skills, have a master do it;
Video capture card - USB video capture device. The method is so simple that it doesn’t even need instructions. You purchase the device itself, connect it to your computer via USB, and install the driver on your PC or laptop. And you can start digitizing immediately;
USB video capture device - via external devices. Special external devices are sold that connect to the computer via the FireWare port. It is worth considering that these ports often differ in PCs and laptops in the number of contacts. This is special equipment; it doesn’t even need drivers.
Special equipment
Possible faults
Connecting a VCR to an LG, Samsung, or Philips TV directly or through adapters is quite simple. The main thing is not to get confused in the inputs and outputs. But after connecting the equipment, various technical problems may arise, which can be resolved quickly enough:
- No signal due to broken cable or connector. Before connecting equipment, carefully inspect the wires for broken braiding, bends or clamps. Check the condition of the connectors. You can clean them with a soft brush. If the problem persists, try another connection option.
- No required entry. Inspect the ports on the video and TV. If the latter does not have a single suitable option, you will have to buy an adapter. To purchase the desired option, you should write down the names of the ports from the video recorder and TV.
- The TV does not recognize signals. The reason may be a cable, connector or broken socket. The test takes place using a different connection method. If the problem persists, you need to replace the connectors on the equipment or send it in for repair.
- Overlaying sound from a TV channel with cues from films from videotapes. The reason is the overlap of the antenna signal with the audio. You can solve the situation by moving the antenna cable from side to side to shift its position. Then the lower frequencies from the VCR will not be interrupted by TV channels.
These are the most common faults. It's also worth considering that VCRs are old technology and may not work on their own. They encounter problems such as cassette jamming, failure to rewind, and many other defects. In such a situation, you need to take the video camera for repair or digitize the tapes into a new format onto DVD discs.
Found a mistake? Select it and press ctrl+enter
Subscribe
When new materials are added, you will receive a notification on .
Instructions
Since connecting a VCR to a computer using a video capture card or a special external device is extremely simple, let’s look at how to connect via a video card and a TV tuner.
Note! The tuner in this case will not be used to watch TV channels, but as an intermediary between the tape recorder and the computer. As for the video card, whether it is suitable or not for direct connection is described above.
- Purchase. A TV tuner can cost about $50. There are cheaper ones, but they usually produce poor video quality. The tuner must have a tulip-type tape recorder input.
Connecting the TV tuner to the computer - If your video card has an S-video jack, buy an adapter at any kiosk. Once everything is ready, connect the wire (video signal only) from the tape recorder to the video card or tuner.
- The wire from the audio signal must be connected to the audio card. To do this, you must first purchase an RCA-minijack adapter. Some video cards have the ability to connect both video and audio signals, then you don’t have to use a sound card.
Connecting the wires to the computer - Next you need to install the software. You can use the simple and familiar KMPlayer. There are also special programs for recording a stream from a VCR, for example, EyeTV or Pinacle. The KMPlayer program
- You will also need a video editor, which can also be downloaded from the Internet. A fairly simple program for these purposes is VirtualDub. Since the image quality will most likely deteriorate when transferred from a video cassette to a computer, it will have to be corrected in such programs in any case. Video editor VirtualDub
As you can see, there is nothing complicated in connecting a VCR to a computer; even a person without technical knowledge and training can do it.
Historical reference
The first real results of video transmission were achieved thanks to the American scientists Ginzburg and Anderosn. They used magnetic recording using the longitudinal method, or by pulling the tape relative to a stationary head.
This method turned out to be ineffective due to the expansion of video recording compared to audio signals. It was necessary to increase the recording density. Cross-line fixation of files involves the placement of several heads at the same azimuth as the movement of the tape. When the tape and head moved synchronously, transverse recording lines were realized. In this case, the average speed is higher than the pulling of the tape itself. This solution made it possible to increase recording density while simultaneously reducing tape speed and consumption.
