You can disassemble the TV remote control and clean it yourself if you approach this process correctly
The remote control is an important thing in the house. However, people usually begin to appreciate the ability to change channels and adjust the volume of the TV without leaving the couch when the battery runs out or the remote control starts to work poorly. Replacing the battery is a simple task, but it’s a completely different matter when the remote control simply starts to work poorly. Usually the reason is simple - the mechanism is clogged, the buttons become difficult to press, and it becomes clear that the device should be urgently disassembled and cleaned. How to do this correctly?
How to disassemble the remote control for a Sony BRAVIA TV?
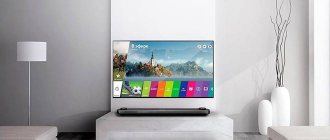
Sony BRAVIA
TV remote control The TV remote control can fail at any time. And if you were wondering how to disassemble the remote control for a Sony BRAVIA TV, then you definitely need our help.
We often encounter buttons sticking on this device; this can be easily dealt with at home. Secondly, the remote control must be cleaned of dust and dirt. Often, due to foreign objects getting into the device, it does not work correctly.
We strongly recommend that you think twice before attempting any DIY repairs. Entrust the work to professionals - contact a Sony TV repair service center.
So let's get started. To begin, take a small screwdriver and unscrew all the screws you see. It's not difficult, the main thing is to be careful.
The remote control is not very difficult to open, but you should use a knife and use it to push back the latches, thanks to which it closes. To begin with, open it slightly, but do it so that the appearance of the device is not damaged. You need to separate the upper part of the case from the lower one.
The keys of the device are rubber; they can be wiped with a clean damp cloth to remove dirt. The microcircuit, if it stops working, can also be wiped with a solution containing alcohol. Just don't overdo it. Allow the parts to dry thoroughly before assembling the device.
The remote control will work stably and correctly only if it is assembled correctly, also please note that if any parts of the device are damaged, it will not function even after you disassemble it.
Source
How to clean the remote control: care instructions
First of all, it is worth noting that any equipment in the house should be properly cared for. Only in this case will it work efficiently and serve you for a long time. The remote control is small, but still an element of technology. Moreover, the lion's share of the load falls on it, because you constantly pick it up and press buttons. To ensure that the remote control works longer without having to clean it, you should only use it with clean hands. Very often the remote control gets clogged because it is handled with dirty hands.
Eating in front of the TV is not only harmful to health, but also to the equipment that comes to hand. Small particles of food get inside and render the devices unusable.
If you eat in front of the TV, try to finish your meal completely, wash your hands, and only then continue working with the remote control.
But what should you do if the remote control for your recently purchased Sony TV has already started to work poorly? First, try simply changing the battery; in most cases, the remote control begins to respond more actively and stops creating problems. If this does not help and you have every reason to believe that there may be a lot of debris inside the remote device, then cleaning is clearly required, which should be done carefully and carefully at home.
How to properly disassemble the TV remote control
This article covers the disassembly of remote controls in detail. You will learn how to disassemble the remote control for a Samsung TV, or almost any model from other manufacturers. The RC (Remote Control) device is very simple, so different companies use the same assembly principles. Whether it's Panasonic or Philips, you most likely won't encounter new design solutions in this area. The scheme presented below is suitable regardless of the manufacturer’s brand.
To disassemble the TV remote without damaging anything in the process, you need to choose the right tools and control your movements.
Connecting and setting up the remote control
After you have disassembled and reassembled the remote control, you will need to reconnect it to the TV.
After inserting the batteries, observing the polarity, and closing the lid. Then find in the instructions how to make the first connection. Different models are activated by different key combinations. But usually you need to set the play and return keys, holding them down until the corresponding icon appears on the screen.
This will mean that the devices have successfully connected to each other. Modern universal remote controls do not require special settings; it is only important to know the purpose of each button.
Owners of modern Samsung TVs with a Smart Touch Control sensor may find themselves having to get used to using the new system.
The remote control is equipped with a hydraulic sensor, and you can control the Smart TV when it moves in space.
The body of such a device has few buttons, since all of its functional part is concentrated on the touchpad, which is located in the center.
So, for example, when you move your fingers, you navigate through the menu, and you can call up a cursor on the panel using the touchpad.
You can select an item from the list by touching the touchpad. Some models have the ability to map the keyboard to the displays, which helps speed up searching.
But even taking into account all the functionality of touchscreen remote controls, users prefer to use universal push-button analogues, because they are cheaper in price and more familiar to operate.
( 2 ratings, average 5 out of 5 )
What you need to do
During the analysis process, you need to have a few simple tools on hand:
- Small diameter Phillips screwdriver;
- Flat blade screwdriver;
- Knife;
- Plastic card or mediator.
The device body can be secured with glue. Subsequently, glue will be needed again to carry out assembly after successfully completing cleaning or repairing the remote control.
IMPORTANT! Do not use a bank card for this operation. Take, for example, a discount card for a store.
Sequencing
Simple instructions for opening almost any modern remote control:
- Inspect the remote control for placement of fasteners. Some manufacturers put some of the screws in the battery compartment. Remove the batteries;
- Take a screwdriver of the appropriate size and remove all fasteners;
It may be difficult to ask the question - how to disassemble the remote control for an LG that does not have screws? Pay attention to the joints on the sides of the device. You need to create gaps in the joints, then widen the cracks and pry to remove the plastic shell. Step-by-step instructions, with a description of the nuances:
- Check the seams on the body. If they are connected with glue for security, use a knife or flat-head screwdriver. Use them to pry up the edges of the case until the edges separate;
- To disassemble the Sony Bravia TV remote control, like many other devices of this type, you need to use a knife to remove the latches located inside the case. Do not pull the body halves in different directions at once, run the blade along the edges and feel for hidden fasteners. Gently squeeze them out;
- Use a plastic card to slide it along the joints between the cases to finally loosen the plastic and open the remote control;
- Take out the keyboard;
- Carefully unscrew the chip without removing the sensor from it;
- Carry out the necessary procedures to clean or repair the product.
How to open the remote control if the plastic is sitting on mounting screws and there is no Phillips-head screwdriver nearby? The fasteners can be rolled using the tip of a knife. It will be convenient to take a knife with a curved blade at the end for this purpose.
Is your TV broken? Contact our service center and our qualified technicians will quickly and efficiently carry out diagnostics and repairs!
We offer you:
- Free visit and diagnostics;
- Free consultation by phone;
- Delivery of the TV by courier to the service center and back;
- Warranty up to 1 year;
- We use original spare parts;
- Certified masters;
- We provide a receipt and warranty card;
- Low price
- We work seven days a week
Leave a request and get a 15% discount!
The Philips remote control can be easily snapped off using even simple tweezers. In Philips, the fastening of the top cover may be slightly recessed into the plastic of the rear surface. How to properly disassemble the remote control in this case? Carefully pry the lid at the joints, preferably not with a blade. A knife may scratch the lid and ruin its appearance. There is also a danger of accidentally running a sharp edge over the buttons. If you damage something, it’s okay - remote controls for Samsung TVs and other common manufacturers are inexpensive, and in some cases are interchangeable.
Model rmctpj1ap2 – original Samsung TV remote control.
The parsing process is not fundamentally different from the scheme already described. If you still can’t open the TV remote control, try pressing on the narrow edges to force the plastic to slide out of the grooves.
Features of disassembling the touch panel
The touch control panel is disassembled according to a similar scheme. Many companies equip their devices with modern remote controls with touch sensors. Despite the significant difference in the control principle between conventional remote controls and sensors, the touch sensor in a Samsung TV does not interfere with disassembly.
IMPORTANT! Try not to damage the cables that connect the touch sensor to the board. Remove these parts from the plastic shell, handling the sensor as carefully as possible.
Samsung TV and its competitors are equipped with approximately the same additional devices. Parsing the remote control from Samsung or any other brand will not be difficult if you understand the general design principle of these devices.
Source
Diagnosis and causes
Regular use of the television remote control, as well as non-compliance with operating rules, leads to the fact that the device fails. If the control panel is broken, has stopped responding to commands, does not turn on, the buttons are difficult to press or do not work, or do not switch, you must immediately begin troubleshooting, which are often not global, but local. Among the most common causes of control panel failure, experts identify the following:
- low battery level;
- frequent falls;
- mechanical wear of contact pads on the board;
- internal and external contamination of the remote control;
- no response to TV signal.
Before the advent of mobile phones, ordinary radio receivers, which were tuned to the required range, served as assistants in this work. Modern experts recommend using mobile devices or multimeters for diagnostics. To carry out diagnostic work, you must have a phone with a built-in camera module, and also perform the following sequence of actions:
- turning on camera mode;
- pressing any buttons on the remote control while simultaneously pointing it at the phone.
How to find out the TV code
Initially, you must find out the code for your Sony Bravia TV. This will allow you to program the remote device for your TV model and set certain commands. The code consists of three or four digits. For this:
- Take a look at the technical data sheet.
- Look at the manufacturer's official website.
It's worth noting that not all situations require codes. If you cannot find the required passwords for your TV, you can perform automatic setup. Each universal remote control has a built-in function that independently selects the desired code. To activate it, you need to enter a certain password, after which auto-selection will start. Such devices use pulse code modulation as the communication method. The main feature is the use of a three-bit sequence. Let's say:
- 000 – turn off the TV.
- 001 – turn on the next channel.
- 010 – return to the previous broadcast.
- 011 – add sound.
- 100 – turn down the volume.
- 111 – turn on the TV.
Thus, each time you press a button on the remote control, the built-in circuit activates the IR LED, which is oriented to the pattern - “111” ON, ON, ON, where the step length can be 3 milliseconds.
Sequencing
Simple instructions for opening almost any modern remote control:
- Inspect the remote control for placement of fasteners. Some manufacturers put some of the screws in the battery compartment. Remove the batteries;
- Take a screwdriver of the appropriate size and remove all fasteners;
It may be difficult to ask the question - what about the LG, which has no screws? Pay attention to the joints on the sides of the device. It is necessary to create gaps in the joints, then widen the cracks and pry to remove the plastic shell
Step-by-step instructions, with a description of the nuances:
Check the seams on the body. If they are connected with glue for security, use a knife or flat-head screwdriver. Use them to pry up the edges of the case until the edges separate;
- To disassemble the Sony Bravia TV remote control, like many other devices of this type, you need to use a knife to remove the latches located inside the case. Do not pull the body halves in different directions at once, run the blade along the edges and feel for hidden fasteners. Gently squeeze them out;
- Use a plastic card to slide it along the joints between the cases to finally loosen the plastic and open the remote control;
Take out the keyboard; Carefully unscrew the chip without removing the sensor from it;
Carry out the necessary procedures to clean or repair the product.
How to open the remote control if the plastic is sitting on mounting screws and there is no Phillips-head screwdriver nearby? The fasteners can be rolled using the tip of a knife. It will be convenient to take a knife with a curved blade at the end for this purpose.
The Philips remote control can be easily snapped off using even simple tweezers. In Philips, the fastening of the top cover may be slightly recessed into the plastic of the rear surface. How to properly disassemble the remote control in this case? Carefully pry the lid at the joints, preferably not with a blade. A knife may scratch the lid and ruin its appearance. There is also a danger of accidentally running a sharp edge over the buttons. If you damage something, it’s okay - remote controls from other common manufacturers are inexpensive, and in some cases are interchangeable.
Model rmctpj1ap2 – original remote control from .
The parsing process is not fundamentally different from the scheme already described. If you still can’t open the TV remote control, try pressing on the narrow edges to force the plastic to slide out of the grooves.
DIY diagnostics and repairs
According to statistics, a large proportion of problems in the operation of the remote control are associated not with global violations, but with local malfunctions, including:
- The TV receiver does not respond to key presses.
- Discharge of batteries (type AA, AAA).
- The remote control was dropped and stopped working.
- Worn contact pads on the board or keyboard.
- The remote control is dirty (inside and outside).
All these difficulties can be dealt with by a semi-skilled home handyman.
No TV response
Typical situation: when you press a button on the remote control, the television receiver does not respond or only fires once. The range of possible causes is wide: from contamination of the emitting LED to abrasion of the thin conductive layer on the keyboard. It also happens that the batteries are discharged or the remote control has been dropped on the floor. Both can be eliminated. But first you need to disassemble the device.
The batteries are low
In the ranking of current problems with remote controls, this is the second most important. While going through all sorts of possible faults, remote control owners often overlook the issue of power supply. Sometimes it is enough to install fresh batteries so that the silent remote control begins to show signs of life again.
You dropped the remote control on the floor
The remote control is not a device intended for extreme use. Therefore, after serious falls on hard surfaces, rustling noises appear in it, and performance decreases sharply. And in order to understand where the fault is hidden and what can be fixed, the remote control will first need to be disassembled.
Failure of some buttons
According to statistics, on the control keyboard unit there is never a simultaneous failure of adjacent buttons: some are used more often, others less often. This causes wear and contamination. It happens that the buttons “stick” in the case due to debris or fat deposits from the hands that have gotten into the gap.
Heavy pollution
A layer of dirt found on the keyboard from above or below (on the board, contact pads) is a serious obstacle to the operation of the remote control. To restore functionality, you will need to wash the surfaces with alcohol. For this, ear cotton swabs and wet wipes are used. After drying, the keyboard is installed in the remote control and it should work.
But you can see and eliminate it only by disassembling the remote control. An eraser and alcohol are used to remove oxides.
It is not recommended to use sandpaper or a knife - the layer of copper on the board tracks is very thin and can be easily damaged.
Erasing contacts
The remote control operates on the principle of closing contact pads: one is applied to the key on the back side, the second is located on the board. The conductive coating is subject to wear due to intensive use and repeated pressing of the buttons.
It can be repaired by gluing special rubber or thin foil. A “resuscitation” kit, including glue and contact pads, is sold in radio parts stores. If you have the skills to work with small parts, it is permissible to cut out circles or squares of foil for previously identified “defective” buttons, and then carefully stick them on the remote control keyboard. Rubber, superglue, and shoe glue are used as glue. By no means PVA.
If some buttons do not work
One of the most common problems is that some buttons on the TV remote control do not work, i.e. The remote control does not work only partially. Usually the most frequently used buttons fail. At first, to switch, you have to press harder and harder, but then this doesn’t help either. There are two reasons for this malfunction. The first is accumulated dirt, the second is wear of the graphite coating.
To restore the TV remote control, carefully disassemble it
Removing dirt
If the buttons on the remote control do not work, it must first be disassembled. Then you need to remove dust and fat deposits. If the remote control has been used without a protective plastic bag for at least a couple of years, you may be surprised at the amount of dirt that has accumulated there. In addition to dust, sticky oily deposits may be present. It is they who break the contact, and because of them the remote control buttons do not work.
Something worse could be waiting for you.
All parts must be cleaned: the case, the board, the rubber block of buttons. If there is only a small amount of dirt, soak a swab or ear stick in alcohol (it is better not to use more aggressive products) and wipe the dirty areas. If there is too much dirt, you can wash both the buttons and the board using dishwashing detergent (it is acceptable to soak for a while to make it easier to scrub). You can scrub off dirt with an old soft toothbrush; do not use harsher products. After the dirt is washed off, rinse in running water, leave to dry or use a hair dryer (only a regular one, not a hair dryer). After this procedure, most of the problems disappear (about 90% of cases).
Remote control test using phone camera
If you have a digital camera or a phone camera, you can test any remote control.
Algorithm for checking the Sony remote control:
- They turn on the camera.
- Point the remote control at the camera lens from a distance of about 25 cm.
- Press any button on the remote control.
- If the user can see the infrared eye of the remote control on the camera's LCD screen, the remote control is working correctly.
- If the above test shows that the remote is working, then the problem is with the sensor in the TV.
- If the above test shows that the remote control does not work, it is recommended that you test a different remote control for that TV.
Extraneous interference
Do not place the TV on or near a microwave oven.
This phenomenon is very rare, but it should not be excluded. Make sure there is nothing obstructing the remote control. Such interference can be caused by flickering LEDs, microwave ovens, and microwave ovens.
Most often, this problem worries those who accidentally placed the TV in the kitchen. So it is worth noting that the TV should absolutely not be placed on the microwave.
Microwave interference may cause the TV to not respond to the remote control.
Mechanical wear
This may also be caused by a temporary factor. When the membrane of the remote control wears out, the buttons become damaged and become unresponsive.
This could also be due to wear and tear on the remote control.
This is just as important as the aperture. Therefore, if the cause is wear and tear, there is only one solution - buy a new remote control
The signal is weak
If the signal from the remote control is not received reliably, the TV's operating system may not detect or respond to the command. In this case, the chassis indicator blinks, but nothing happens. This problem is known to Samsung and Philips TVs. To restore communication with the remote control on the TV, press the Program and Volume buttons simultaneously (plus or minus, they may be different for different models).
A similar problem may occur with devices from other brands, such as Sharp or Toshiba. Especially for those who have SmartTV. If pressing the above button combination does not help, you need to update the device firmware. Most often, the operating system has a corresponding menu item for such an action.
You should also remember that the hardware solutions of different brands of remote controls differ from each other. They have different transmitter powers and LED placement configurations. Therefore, do not go beyond the range that the TV remote control should be within. On some Philips models this is 5 meters. The specific value for your TV can be determined either experimentally or from the instruction manual.
Preparing tools
In order to independently eliminate all technical malfunctions of the remote control, experts recommend preparing the following necessary tools in advance:
- Screwdriver Set;
- plastic plate;
- stationery knife.
Your screwdriver set should include both Phillips and flat head tools. Experts recommend purchasing Phillips screwdrivers not separately, but in special sets that are designed for repairing mobile phones. These tools will be needed to remove the screws, the fastening board and to restore the contact pads. Flathead screwdrivers can be used to remove screws and also to open latches.
A thin piece of plastic will help to gradually increase the gap between the halves of the remote control without damaging the retaining elements. The plastic card can be replaced with a guitar pick or a small piece of plastic from children's toys. Even if you have all the necessary tools, experts recommend using them as carefully as possible, since the design of the remote control is very fragile, and all fixing elements can be damaged even with minimal excessive pressure.
Functionality of Smart TV technology
- Providing access to the Internet, without using a PC or additional set-top boxes. This function allows you to play various videos located on the Internet. Some models have the function of recording a video file to an external drive connected to the TV. You can also open social networks. This allows you to display various content without connecting your mobile phone to the TV.
- A large number of built-in games allows you to pass the time or keep the children occupied for a while. In addition to the built-in games, there are a large number of its applications that are available for download on the Internet.
- This function also allows you to view the forecast of weather conditions and exchange rates and much more.
- Very convenient playback of photo and video materials on connected USB devices. You can also edit them, delete them, create different folders and albums for better sorting.
In this video you will learn more about this remote control:
What to do if liquid gets in?
As previously noted, contact with liquid leads to oxidation of the board and, as a result, failure of the remote control device. To avoid such problems, it is recommended to keep the remote control away from liquids.
Plain water
Initial contact with water usually does not cause significant harm, and the device continues to operate. But even in this case, after filling, it is necessary to immediately disassemble the device and dry it for 24 hours, removing the batteries. The last condition is mandatory. Batteries oxidize faster after contact with water.
Soda
If the remote control is filled with soda, you will again need to disassemble the device and rinse the board under running water. After this procedure, the part must be wiped with a cloth and dried for 24 hours.
Coffee or tea
The procedure in this case does not differ from the previous one. When rinsing the electrical board under water after filling it with a sweet drink, it is necessary to ensure that no traces of sugar remain on the part. The latter will disrupt the transmission of the electrical signal.
Electrolyte from batteries
Electrolyte leakage is possible if old or low-quality batteries are used. In such cases, it is also recommended to rinse the board under water and dry it.
Quickly clean the outside of the remote control at home
It's actually easy to clean the outside of the remote control.
But still, do not forget about caution and attentiveness. Since even minor damage can negatively affect the contacts of the battery and the electrical circuit
Cleaning the remote control yourself
This can be done in two ways:
- wipe the surface of the remote control and buttons;
- carry out cleaning not only externally, but also internally, by disassembling the remote control itself.
Dirt can accumulate on any PU. To avoid buttons sticking, you need to clean it on time.
For some this is not a problem, but some have questions about how to clean the TV remote control and how to do it correctly.
Of course, it all depends on the degree of pollution and the type of dirt itself. If it is only an external coating, then it can be removed with a soap solution or even wet wipes. You can also use cotton pads or swabs, soaking them in alcohol or vodka, and thus get rid of even traces of fat. Sometimes for very small parts, you can take toothpicks and wrap a little cotton wool around the tip so as not to scratch your device.
And if the user is not afraid to disassemble it, then a complete cleaning can be done.
ADVICE. Before you begin any cleaning, you should remove the batteries from the device.
How to disassemble the remote control
Of course, sometimes superficial cleaning may not be enough, and then you have to disassemble the remote control. Let's look at how to disassemble the TV remote control without breaking it.
Many men and even some women love to take things apart and see how they work inside. If you are one of them, then feel free to get to work. When disassembling you need to be careful and careful not to break anything.
This process consists of several important steps:
you need to get batteries; Unscrew all the screws that connect the parts of the remote control; put all small parts from the PU in a safe place (this can be a cup or other small container); it is important to pay attention to the presence of latches, and then you can try to separate the two parts of the remote control; if this does not work, then you need to check all the connections again; Next, you should separate the buttons from the circuit board, and you need to be extremely careful with the latter.
How and with what to wash the inside of the remote control
The board itself can be cleaned with special products, but in no case with water. Because this method may cause you to purchase a new remote control. Here you can use ethyl alcohol on a cotton swab or other means to clean oxidized and dirty contacts. You need to make sure that not a single piece of cotton wool remains on the board after cleaning.
Cleaning the buttons
Of course, there are many means for cleaning remote controls, but if they are not at hand, and the remote control urgently needs to be cleaned, then various folk methods will do, such as soap solution, ethyl alcohol, 9% vinegar solution, vodka, even citric acid, previously dissolved in water.
The buttons themselves can be cleaned with grease remover + water (for 1 tablespoon of dishwashing liquid you need 2 cups of warm water) or with the same medical alcohol. You can use either cotton pads, swabs, or old toothbrushes. After cleaning, the button panel should be completely dry. If the alcohol itself evaporates very quickly, then when using a soap solution, you will have to dry it well with microfiber or other cloth so that when assembling the PU, no moisture remains inside.
What to do if liquid gets into the remote control
Liquid can get into or on the remote control for various reasons, but you should know how to properly get rid of it and bring the device back to life. The algorithm for subsequent actions directly depends on what kind of liquid got on the device.
If coffee or tea, water, soda, or even battery acid gets on the remote control, then you urgently need to disassemble the device.
Rinse the panels under running water, without rough cleaning; in case of heavy contamination, you can use a soft brush. After this procedure, the PU cannot be collected immediately, but it is better to let it dry for at least 24 hours.
Rules for assembling the remote control
Putting the remote control back together is easier than disassembling it, since you need to repeat the already familiar process, only in the opposite order.
To do this, a board is installed, and a panel with buttons is installed on it. Next, the body is assembled and all the screws are tightened. When everything is assembled, do not forget to put the batteries back and check the operation of the device. If nothing works out, then you should think about buying a new remote control.
Sticky buttons
If steam or liquid gets inside the device, a kind of oil condensation occurs. Dirt accumulated over years of service reacts with wet steam or drops. Roughly speaking, the insides of the remote control “stick together” due to dirt and grease deposits, so it becomes impossible to press the buttons properly.
In this case, repair of the remote control is carried out by simply cleaning the device:
- Disassemble the remote control.
- Soak a cotton swab in alcohol.
- Gently wipe the board with a cotton swab, removing any dirt.
- Clean the contacts on the buttons.
- Tidy up the spring contacts for the batteries. You can get rid of oxidation by cleaning the contacts with sandpaper.
- Wait for the device to dry.
- Put it back together.
At the end of the process, you should check the remote control for functionality.
The remote control is completely unresponsive to presses
One of the most common problems is the TV not responding to pressing the remote control buttons. The main feature is that all the buttons do not respond at all. There may be two reasons for this:
- The batteries have run out.
- The remote control was often subjected to mechanical impacts (for example, falling to the floor).
you will have to repair the device yourself.
If after replacing the batteries the buttons do not respond, it means that the connection has been broken somewhere in the product. As a rule, this happens on the contacts of the circuit. You can immediately begin disassembling and repairing the TV remote control, but it is better to check the signal first. To do this you need to do the following:
- Turn on the camera on your smartphone.
- Point the infrared LED of the remote control (the light bulb located on top of the device) at the smartphone’s camera.
- Press any button on the remote control and simultaneously look at the smartphone display.
If there is a signal, a luminous dot will appear on the screen. If not, then you need to start a full repair. As mentioned above, this process is very simple and can be done by yourself. However, TV repairs must be carried out in a certain sequence.
- Remove the batteries from the device.
- Inspect the niche for batteries.
- If there are screws in the niche of the TV remote control, then you need to unscrew them. If not, disassemble the remote control using a thin screwdriver, which must be inserted into the latch between the top and bottom of the device.
- Carefully inspect the board. Typically, LED contacts, battery pads, or a quartz resonator extend from it. In this case, for DIY repairs you will need a soldering iron. It is necessary to carefully solder the contacts to the device board.
- If everything is in order with the contacts, you need to shake the board. If after shaking you hear a slight rustling sound, then it is necessary to replace the quartz resonator (a small soldered box). The cost of this element on the radio market is very small. Installation must be done using soldering.
How to repair the remote control?
Despite the variety of TV models, the design of the remote control remains virtually unchanged for all manufacturers, so doing DIY repairs at home will not cause any difficulties even for beginners. In order to disassemble, repair, reanimate or restore the operation of the device if the device responds poorly to commands yourself, you must prepare the necessary set of tools in advance and open the device for repair as carefully as possible.
Result of the fall
One of the most common reasons for the remote control to break is careless handling, as well as frequent falls, even on a soft surface. If the remote control stops working after contact with the floor, you must immediately check the integrity of the connections between the contacts and the board.
To diagnose the presence of a signal, you can use a modern mobile phone. If after a series of manipulations the mobile phone does not pick up the signal from the remote control, then it is necessary to solder the board or replace the emitting diodes.
The repair process consists of the following stages:
- battery removal;
- opening the latch and detaching the upper and lower parts of the housing;
- examining the condition of the board using magnifying tools;
- soldering of damaged elements or complete replacement of failed parts.
Sticky buttons
Often, watching TV is accompanied by eating delicious food and drinks, which, as a result of careless handling, can end up on the TV control panel. Prolonged contact of steam and liquid with the device provokes the appearance of an oil film on the surface of all parts, which leads to sticking of the control buttons
This defect prevents the device from turning on and brings a lot of discomfort. In order to fix the problem, you need to perform some simple manipulations:
- disassembling the remote control;
- removing dirt from all elements using a cotton swab dipped in an alcohol solution;
- cleaning the springs from corrosive deposits using sandpaper;
- Carrying out complete drying of the device;
- assembly of the entire structure.
It is better to protect cheap device models from contact with alcohol, and dirt can be removed with a regular soap solution. It is strictly forbidden to heavily wet the electrical board, a large volume of water on which can cause the contacts to short-circuit. Before assembly, be sure to remove all remaining water with a clean paper towel. To reduce the frequency of contamination, some experienced housewives recommend wrapping the device in thin transparent polyethylene film, which will not only prevent dirt from getting inside, but will also help preserve the aesthetic appearance of the device for as long as possible.
The buttons are worn out
Long-term and intensive use of the remote control often provokes the disappearance of the graphic coating on the buttons, which serves to improve the conduction of electric current.
If a problem occurs, experts recommend not to rush to the service center, but to try to solve the problem yourself. Before starting repair work, it is necessary to prepare the following equipment:
- thin foil on a paper base;
- silicone glue;
- sharp scissors.
Main stages of repair work:
- disassembling the device;
- dismantling old rubber elements;
- preparing pieces of foil of the required size;
- fixing sheets to buttons;
- installation of parts in their original place.
Features of the SMART remote control for LG
To fully master the capabilities of the LG SMART remote control, you need to study its instructions for use, and also find out why this or that button is needed. Let's consider these aspects in detail.
Functionality
When using a classic remote control, moving between widgets, entering text, as well as any other actions in the SMART section of the LG TV are performed using control arrows, which is very inconvenient and takes a long time. Purchasing and using Magic Remote greatly simplifies these actions. Firstly, it is equipped with a gyroscope and can be used as an electronic pointer. Some users prefer to use wireless mice instead of a remote control, but moving them around the sofa is not always effective, so you have to look for a hard surface, and when working with a remote control, this is not necessary. As an alternative, only an air mouse can be used, which allows you to control the television receiver with hand gestures in the air. However, such a device has a fairly high price, so it is easier to purchase a more functional SMART remote control.
Secondly, Magic Motion is equipped with voice control. Thanks to this option, you can not only open the necessary sections or widgets using sound commands, but also avoid entering text queries into the search bar of your web browser - with the remote control you can simply pronounce them, which is much faster and more convenient.
Important! The SMART remote control of LG TV receivers supports simple gesture control. For example, by drawing a “V” symbol in the air, you can open the “Video” section
The user can customize movements to their liking, thereby further simplifying the operation of the device.
In addition to the main buttons that are on a regular remote control, the SMART remote control also has additional ones. These are keys for quickly jumping to certain applications, a scroll wheel for convenient browsing of web pages in the browser, etc. Thus, Magic Remote is a control panel designed primarily to work with the SMART functions of a television receiver, but at the same time capable of working as a standard remote control.
Identification of buttons
The range of Magic Motion remote controls is quite large - separate accessories are produced for models of different years of manufacture. They have different designs, with newer devices gaining additional features, but the basic set of buttons remains the same. So, on the AN-MR650 remote control, created for 2021 LG SmartTV receivers, the following keys are located:
- Power - turn on and off the TV receiver;
- STB – start or disable the LG SMART TV set-top box (if it is used, you can control the SMART set-top box and the TV from one remote control);
- Block of buttons for dialing numbers and letters;
- 0 – to enter “0” or a space when typing;
- LIST – list of saved programs;
- AD – display of a virtual console;
- “+” and “-” - adjust the volume of the TV receiver;
- up and down arrows – switch TV channels;
- “Mute” or the image of a crossed out loudspeaker – mutes the sound;
- button with a microphone – enter a command or search query by voice;
- button with a picture of a house – return to the main menu page;
- key with a drawn gear – device settings;
- central wheel (can be rotated or pressed) – for convenient browsing of websites;
- circle with arrows – buttons for moving in the menu;
- “Back” - return to the previous section or exit the menu;
- “Guide” — displays a list of TV programs;
- “3D” is a key for viewing 3D video, working only on TVs with the corresponding function;
- “Input” or image of a cable with a plug – displays a list of all connected devices (USB drives, set-top boxes, etc.);
- “Netflix”, “Amazon”, “IVI” - buttons for quick access to a specific widget;
- red, green, yellow, blue buttons - customizable keys for convenient transition to a specific section in the menu;
- “Text” - teletext control;
- “T.OPT” is an auxiliary key for working with teletext;
- “Focus”, “Live Zoom” - enlarges the area to which the control panel is pointing.
On other remote control models, almost all of the listed keys are present, but there may be additional ones. The user can find full instructions for the buttons in the accessory instruction manual.
Instructions for use
Instructions for use are included with each Magic Remote. If it was not there, or the manual is lost, you can download this document on the official website.
Result of the fall
Frequent falls and strong impacts can render the remote control inoperative. If an element bounces off the board, the device will require soldering.
Let's consider the question of how to check the presence of a signal from the board. This can be done using a camera on a mobile phone or a digital camera. In remote controls, the signal is transmitted using infrared radiation:
- Switch the device to shooting mode;
- Place the lens close to the front of the remote control, to the diode;
- Press any button to try;
- If the remote control is sending a signal, you will see a large red dot on the screen of your phone or camera.
The operating principle of this method is based on the ability of digital cameras to capture infrared radiation. The presence of a dot indicates that the board is working properly. In this case, look for the problem elsewhere - for example, in the buttons. If the point is missing, you will have to repair the board itself, or replace the emitting diode directly.
To investigate the problem, disassemble the remote control:
- Remove the batteries;
- Separate the housing parts. Remove the screws with a screwdriver, then pry up the edges of the plastic;
- If the remote control does not respond immediately, use a thin and flat screwdriver. Using it, press out the latches located on the inside;
- Examine the board carefully using a high-magnification magnifying glass.
If a breakdown occurs in the quartz resonator, it will have to be replaced entirely. A quartz resonator is a small box attached to the board. Make sure the contacts leading to it are intact. How to check its serviceability?
Gently shake the resonator. Any noise coming from inside will indicate a malfunction of this board element.
How to fix the remote control in a situation where the contacts on the board have come loose? You will have to use a soldering iron with a small tip. To carry out the work accurately, it is better not to choose a large tip for working on the remote control board. If you do not have the necessary skills, it is better to take the remote control to a repair service or immediately buy a new one.
Download a video and cut an mp3 - we make it easy!
Our website is a great tool for entertainment and relaxation! You can always view and download online videos, funny videos, hidden camera videos, feature films, documentaries, amateur and home videos, music videos, videos about football, sports, accidents and disasters, humor, music, cartoons, anime, TV series and many other videos are completely free and without registration. Convert this video to mp3 and other formats: mp3, aac, m4a, ogg, wma, mp4, 3gp, avi, flv, mpg and wmv. Online Radio is a selection of radio stations by country, style and quality. Online Jokes are popular jokes to choose from by style. Cutting mp3 into ringtones online. Video converter to mp3 and other formats. Online Television - these are popular TV channels to choose from. TV channels are broadcast absolutely free in real time - broadcast online.
There is a reaction only to some clicks
The reason for this malfunction is a large accumulation of dust in the device. Therefore, this requires not repair, but cleaning of the remote control. It is also recommended to act in a certain order:
- Remove the batteries.
- Disassemble the body.
- Take a cotton swab and soak it in an alcohol solution.
- Carefully remove plaque from the board using a swab.
- Wipe the keys and the body itself in the same way.
- Dry the device.
- Clean the spring contacts using a stiff sponge or sandpaper.
- Put the remote control back together.
The fact is that many Chinese analogues of remote control units cannot withstand alcohol and fail. Therefore, if your remote control is one of these products, you must use dishwashing detergent instead of alcohol. Also, instead of a cotton swab, it is better to use a soft sponge.