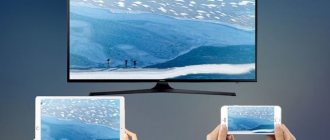
At times, the TV is equipped with only an antenna input - nothing more. Applies to portable models, old, Soviet-made. Why does a TV need to connect a DVD player? Savings: avoid paying for new equipment. Plasma panels are not cheap. Decide for yourself whether it is worth damaging your eyes with a cathode ray tube. Let's discuss how to connect a DVD to a TV. Along the way, we will reveal the reason for the unsuccessful capture of the image directly. Technology moves forward, let’s follow on its heels.
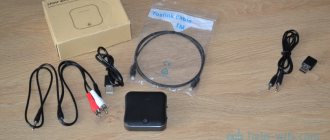
Complex scheme for connecting DVD to TV
Methods for connecting DVD to TV
If you have no idea how to connect a DVD yourself, then you don’t need to call a technician right away. To enjoy watching your favorite videos and TV shows, you will need to properly organize the connection. Before connecting the DVD to the TV, you must read the instructions and check which ports are available on the TV.
Among the popular connection methods are the following:
- using an HDMI cable;
- using an RCA cable;
- Scart connection;
- method using S-video ports.
Possible problems during the DVD connection process
Even having figured out how to connect a new DVD to an LG TV, it is quite possible that you will have to face certain problems in the future.
- Checking the power supply. If there is a separate outlet for the player, make sure there is voltage in it. Be sure to check the extension cord if it is used during the connection process. We inspect the plug and wire going to the device.
- We decide on the channel. If the image does not appear on the screen, check all available channels and additional ones. We study the settings, it is quite possible that the desired signal reception mode is not turned on. By the way, you can look at the TV manual, you will definitely find the necessary tips there.
- Cable. We check how correctly everything is connected, whether the color of the plug matches the connector. Also, the wire should not be stretched. Even if it is installed correctly, the picture may be noisy. If there is another adapter cable, try connecting it. It is quite possible that the plug has become unusable or the wire is defective.
If, after all the manipulations, the image still does not appear on the TV screen, it means there are technical problems with the DVD player. You need to visit a service center, where specialists will carry out diagnostics and, if necessary, repairs.
If after diagnostics it turns out that the DVD is in perfect order, but you cannot connect it, then it is advisable to involve specialists. Although this happens extremely rarely.
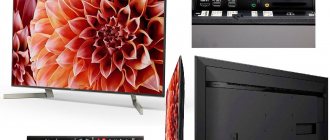
Available connectors
Before connecting a DVD player, you need to familiarize yourself with the availability of ports on the TV. As a rule, manufacturers equip equipment with the maximum number of connectors to make it easier for the user to connect various devices. The most popular are HDMI and “tulips”. But Scart and S-video ports are also used.
Connecting using HDMI
The HDMI port is considered optimal when connecting a DVD player to a TV, because it provides the ability to transfer video to the screen without loss of quality. Outwardly, it is somewhat similar to a USB connector, but only thinner and longer. Experts say that this is the best way to connect the DVD player to the plasma. It is advisable to use cable models 2.0 and higher, which are marked “High speed with Ethernet” and only from leading manufacturers. If you have no idea how to connect correctly, then check the labels on the connectors.
Connecting with Scart
A not very popular method of connecting a DVD to a plasma TV is to use a Scrat connector. Sound and image transmission is carried out in the same quality as when using HDMI. But the problem is that this port is quite rare on modern devices. To connect the player and TV, you will need to purchase a special Scrat-RCA cord, where one end is inserted into the player, and the other (where the “tulips” are) into the TV.
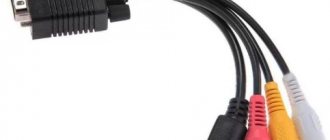
Connection using RCA
For many years, so-called tulips have been considered the most popular method of connecting any TV-video device. The RCA connector has three colors: red and white are needed for audio playback, and yellow is for video. Such connectors can be on one side of the wire or on both. In order not to make a mistake and correctly connect the DVD to the TV, you need to combine the plugs with connectors of the same color.
Connecting with a component cable
The component cord contains five plugs that must be connected to the DVD player. You need to be guided by the color markings and Output inscriptions. The audio ports include red and white, and the video ports have another red, green, and blue. In order not to get confused in the red “tulips”, lay them out on the table and make sure they are positioned correctly: green, blue, red for the video image and white, red for the audio.
Sometimes component cables come in only three colors - green, blue and red - and are intended for transmitting video content. Therefore, when using such a cord, you will have to use an additional red-white cable to transmit sound.
The other end of the cable is connected to the outputs of the corresponding color and labeled Input on the TV. Before turning on, make sure that all plugs are firmly seated in the connectors. Turn on the TV using the required data source.
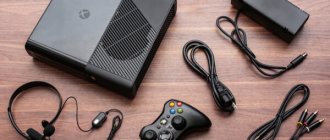
How to connect a DVD player to an old TV
On such models, the user will most likely not be able to find an HDMI connector and an S-Video port. Such devices have only RCA and SCADA ports.
Therefore, you can use the methods discussed above to connect. It is not advisable to buy an adapter from SCADA to HDMI, because If the signal is lost, it will be weak and unstable, and the image will greatly lose quality.
It is easier to connect DVDs to old TVs using “tulips”. In this case, the quality of the transmitted image will be better than on the SCADA interface. The quality can be further improved in the TV settings using the remote control.
Possible problems and solutions
If during testing it was discovered that there is no sound and only a video image is displayed, this means that the cable is connected incorrectly. Check that all color marks match. To connect the DVD to a Samsung TV, you need to use a cable and connect the player itself to an outlet. After turning on the TV panel, select exactly the mode in which you connected the DVD.
If the TV does not see the DVD, then replace the cables. Over time, the cord could become damaged and the connectors lose their tightness. High humidity could affect the connector. When purchasing, try to choose a well-known manufacturer to be sure of the quality of the wire. The cable itself should not be strained after connection, but preferably should sag a little. If the tension is too strong, the image may become distorted.
If the player does not turn on when you first start it, and you have checked that the connection is correct, contact a service center. If the device turns out to be defective, it will be replaced in the store. If it has been determined that the player is operational, then the problem must be looked for in the TV panel. In this case, it is better to call a setup specialist.
Connection methods
The equipment comes with certain wires for connecting the DVD to the TV. Typically used standard cable options:
- The most popular is “tulips” or RCA wire. At the ends there are multi-colored tips (white and red for audio, yellow for video), which must be inserted into the inputs of the same color on the TV. Such a connection rarely raises questions among users; the main thing is not to confuse the colors.
- You can connect the DVD player using a SCART cable, which has a wide input with two rows of contacts. You need to insert the cable into the corresponding hole on the TV.
- Another way is to use the S-video input, through which only the image will come, and to transmit sound you will need to insert tulips of a boring color. This connection is called composite, and it will require a total of five connectors.
- Modern devices increasingly use an HDMI connector, which is similar in appearance to a USB adapter. This connection scheme gives the highest quality signal.
Important! If you do not find the appropriate cable in the kit that would fit your TV model, then you will need to additionally purchase an adapter, taking into account the available connectors.
Connection diagram
To easily connect a DVD player to a TV, you must follow the following procedure:
- Nutrition.
First of all, before the main connection of the DVD player, you should take the power cord and plug it into the outlet. After that, press the power button on the player itself. This way you can check whether the device really works, there are no breakdowns, etc.
Then you need to unplug the power cable from the outlet, and do the same with the TV. It is not necessary to de-energize both devices, but it is highly advisable to reduce the risk of electrical shock.
As an added safety feature, manufacturers of quite a few devices advise connecting power last. And you have to believe that such a call appeared for a reason.
After checking the functionality of the player, you can move on to the next steps, and the power cord will be connected after the devices are finally connected to each other.
- Type and connection of cables.
There are three types of cables that connect a DVD player:
- A/V (audio/video) for 3 color jacks;
- component (5 color connectors);
- HDMI.
The connectors on the TV (can be located on the back or side) also have colors for connection. This is done to prevent users from getting confused when connecting cables:
You can connect the wires to the connectors in any order. This will not entail any negative consequences.
If the purchased player has an A/V cable, then there will be three colors: yellow (video), red (audio, right speaker) and white (audio, left speaker). But what to do when there is no yellow socket on the TV, as in the photo above? You can try using the socket marked "Y". Although sometimes the use of cables with 3 connectors is simply not possible, since this is an outdated connection method, and the HDMI cable is rapidly gaining momentum.
There are always only two audio jacks: white and red, they are located next to each other. If you have difficulties connecting audio, or the colors of the connectors on the TV are the same, read the notes in English. Next to the audio inputs it will be written “LAUDIO” and “RAUDIO” (L/R – Left/Right). And on video connectors, the markings contain the word “VIDEO” or more special ones: “Y”, “Pb”, “Pr”.
Connecting a component cable with 5 connectors follows an identical principle. However, it should be taken into account that there are two red plugs. The problem can be solved in two ways:
- Often, video and audio cables are connected in two bundles: the red one, which is connected to the white one, is audio;
- If connected incorrectly, nothing will break, and the red plugs can eventually be swapped.
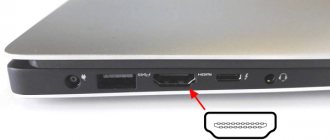
The HDMI connector is a standard: with this method of connecting devices, the picture and sound quality will be first-class, and the connection will not cause any difficulties.
The socket for this type of cable is impossible to miss: it is marked in large letters “HDMI”. If there are no markings, you should remember: the HDMI connector is distinguishable thinner than USB, and does not look like other types.
The HDMI cable is double-sided. It doesn’t matter which side you insert into the player and which side into the TV.
You should always look for the words “IN” (inside) and “OUT” (outside):
- the player is a device that creates video/audio streams (which means it sends data inside the wire);
- and the TV receives them (the data comes out of the cable).
Therefore, if the TV panel has two types of connectors (“in” and “out”, respectively), then the end of the wire must be connected to the sockets marked “OUT”. For the player - on the contrary, into the “IN” socket. It is impossible to make a mistake: if the player is not multifunctional, there should not be connectors with other marks.
- Location of devices.
There is no need to place a DVD player on the TV: the equipment heats up during operation, and mutual warming of each other will certainly damage them. You shouldn’t place the TV on top of the player, because modern models are very heavy, and players have never been distinguished by titanium strength.
The ideal option is to place the player on a shelf, directly under/above the TV, but always without contact or heat.
This location option is especially preferable, because the devices are close:
- if the player is far from the TV, the wires connecting them will be strained, and this directly affects the quality of the transmitted picture/sound (this is especially felt when connecting via HDMI);
- the cables will not be stretched, which means there is minimal chance that the wire will be poorly inserted into the connector.
- Functionality check.
After physically connecting the cables, you need to configure the TV to receive a signal from the player. To do this, insert a DVD with a movie into the player and look for the “Source” or “Input” button on the TV remote control.
After pressing this button, a menu with channel selection will appear:
The names that appear are directly related to the method of connecting the player: if you used an HDMI cable, you should select an identical item on the TV.
Different connection methods have their own names: you can look at the cable descriptions on the panel with connected wires behind the TV, or simply find the desired signal “at random” for each item in the menu (it is extremely rare that there are more than 6-7 names). Sooner or later the desired channel will be found.