One problem with tablets is that they become obsolete quickly. This mainly applies to Android devices, but the iPad is also affected by this problem. Until recently, you used your tablet to its fullest, and now you suddenly found out that the manufacturer does not intend to release a new version of the OS for it. Old programs stop updating, the device starts to slow down, clearly hinting that it’s time to go to the store for a replacement.
At the same time, sometimes a paradoxical situation arises: your tablet is still powerful enough for new versions of Android, but there are no updates for it. At the same time, cheaper and less productive new devices work with the latest versions of Android.
Of course, owners of Android tablets can try installing custom firmware. Provided that enthusiasts have ported LineageOS or AOSP to your device. If a miracle does not happen, buying a new tablet cannot be avoided.
But what to do with the old one? If you're sad to throw away your working iPad or Android tablet, here are some ways to put it to good use.
Media center
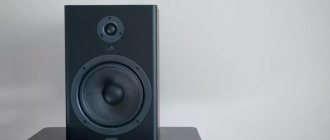
There are many applications for streaming music and videos for Android and iOS. In addition, many Android tablets, even quite old ones, are equipped with HDMI connectors for connecting to a TV and a mini-jack for audio transmission. Put it all together and you get a good media center for those who haven't got a SmartTV.
Connect the tablet to the TV, turn on YouTube, Pandora, any streaming service and listen to music, watch videos even on a TV that does not have an Internet connection.
Wired connection of iOS devices
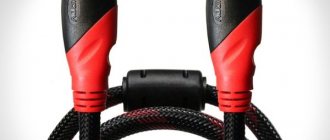
iOS devices can operate using two types of wires. Legacy ones used a “30-pin -> AV” or “Lightning -> AV” cable. There are several exit options:
— VGA (scaling supported); — composite (576p and 480p supported); — component (576p and 480p supported); — HDMI/DVI (scaling supported).
You can read more about compatibility on Wikipedia. There are no problems with such wires on iPods and iPads, iPhone 4 and older.
Remote
Many smart TVs, media centers like Android TV, Roku, Fire TV, Apple TV, or media servers like Kodi or Plex allow you to control them through Android or iOS apps. Just install the appropriate app and make sure both devices are on the same Wi-Fi network. That's it, now you don't need a remote control.
In addition, there are many applications for remote control of your computer through commands from Android or iOS. So you can control not only your TV and media center, but also your desktop computer via Wi-Fi.
Which is better: a smartphone or a set-top box?
The first question I get asked is whether it is profitable to turn a phone into a set-top box, or is it better to buy a separate gadget. For me this question has two answers.
If you have an unnecessary smartphone, a Bluetooth mouse, and at the same time you don’t need to figure out for a long time how to duplicate its screen on a TV, then I don’t see a problem here. Without putting in any effort, without wasting time and money, you can actually turn your smartphone into a full-fledged Android TV set-top box. You will understand the convenience or inconvenience of such an application in the process. And if some nuances are important, for example, the inability to turn off the “set-top box” from the remote control, then you will buy yourself a regular TV device.
But if you need to buy a separate smartphone, separate peripherals, a bunch of wires and adapters, then the answer is obvious. This is not profitable, it is better to buy a separate console. It will cost you less money, and you will spend much less time setting up such a system.
I hope this article will be useful to you, and you can save money, time and effort by turning your unnecessary smartphone into such a useful gadget.
Desktop news source
Do you often minimize the windows on your computer in the middle of the working day in order to once again look at your feeds on social networks or the news? Forget about it. Set up your tablet to show you Gmail, RSS feeds, Twitter feeds, or Facebook feeds all the time. Turn off screen dimming, place your tablet vertically on a table using a dock or mount, and look at it whenever you wonder what's happening on the Internet.
A tablet becomes especially useful if you need to watch something, but you cannot minimize the open window. Some hardcore gamers customize their tablets to show them the system temperature using an app.
Power-Grid
ROCCAT GmbH
Price: Free
Download
Price: Free
TvBox from a tablet.
Surely, many of us still have inexpensive tablets in varying degrees of wear and tear, which for various reasons we no longer use. I have one too. The GS700, which worked honestly for several years, survived two battery changes, the loss of the volume rocker and its replacement with an insert cut out of a visa card, resoldering of buttons, and, in the end, it lay in a drawer for exactly two years. On the Internet, I have never found an article on the full cycle of converting a tablet into an attachment to a monitor. I suggest you use this tablet as an example to see how difficult it will be if you try to make something resembling a TVbox out of the tablet’s motherboard. Yes, the modification applies only to those tablets from which HDMI video can, in principle, be output. In my case, I don’t have a monitor with an HDMI input, I only have one with VGA, which means we’re talking about an HDMI to VGA converter. In addition, I encountered software and hardware problems, one of which, the most important one, I circumvented as best I could. So, I had the tablet itself. Its GS700 motherboard is quite compact.
I also have several ADSL modems that have been replaced with wireless versions about five years ago. There is no one to give them to, it is impossible to sell them, but their cases are quite attractive.
The first thing I did was cut off the narrow part of the modem board, leaving the part on which the network sockets, power socket and power button were mounted. Also, I dismantled those of them that, according to my vague guesses, would not be useful.
For several days I thought about how to carefully cover the long rectangular window left by the four LAN slots, until my eyes fell on the PCI modem.
From it I took a steel mounting plate with an existing rectangular cutout for two standard telephone jacks. All that remains for me is to try on the HDMI to VGA converter and cut out recesses for attaching two hexagonal stands, to which the VGA cord attachment point is screwed. Yes, and to the right of this rectangular window, I had to drill another hole to accommodate the WIFI antenna socket.
I was just about to unscrew the hexagonal racks from the VGA socket of the converter, when it broke off quite badly. It turned out that the racks on the other side were flared, and I had to cut them off. True, that’s what I got from it – two cut tails, I decided to use as nuts.
Fitting. To get sound out, I also had to drill a hole for mounting the audio jack. I took the WIFI connector and antenna for it from an old PCI Linksys WMP54GS.
But I didn’t like the power socket - I don’t have such soldered or solderless plugs, I had to get a socket from another device.
Now everything is in order.
Out of stubbornness, I did not want to lose a single button, namely volume control and, of course, power on.
In general, they will have a good effect on the appearance.
And from the inside, they will also not be clearly superfluous.
It's time to think about how to connect them to the patches of contacts left over from carefully picking off the micro-nano switches? For two years, while the tablet was lying idle, I was thinking about a homemade Android TV, and I read many times how sculptors picked off these same spots, and I know very well that if I screw them up, I won’t be able to restore them. =) So we are talking about a circuit board. No sooner said than done. On it I brought out the contacts for volume control, power on, the tablet and the reset button.
I immediately soldered the conductors. Although I decided later that this might hinder me in further installation, I wanted to see at least the first results so much that it made my jaw ache =)
About nutrition.
I have a power supply from Sony PSP at 7.5V and a step-down switch on a reliable lm2596, and I didn’t want long-term construction (since I had already taken it on), it was decided to use them. My HDMI to VGA adapter is not equipped with an external auxiliary power socket, and I immediately found, soldered and connected external 5 volts to it. But it turned out that the tablet HDMI socket produces these 5 volts. Setting the lm2596 to 4.2 volts, I connected the assembled junk on the table and pressed the power button. After fifteen silent seconds, the desktop loaded. But after a while, the tablet turned off. This behavior was also known to me - I soldered the electrolyte prepared in advance at 2200 uF. The situation has improved - the tablet stopped turning off, but the screen began to blink. This, I realized, was the adapter’s fault; most likely it was draining the common power bus - that’s what I concluded. I began to slowly increase the voltage at the output of lm2596 until stable operation was achieved. I was happy with 4.6 volts.
Periphery.
The tablet has a single micro USB socket, and I have an OTG stub, I decided to use it, but despite the fact that it is just an adapter, it is quite large, and having slept with this thought, I decided that it was necessary solder homemade OTG. However, this did not resolve the issue that one USB socket is not enough. At a minimum, two are required.
So, I found a four-port hub lying idle, from which I will leave only two inputs and outputs, and also a +5 volt stabilizer left over from remaking the FM modulator. Although the tablet USB socket produces system +4.6 volts, I suspected that the connected peripherals would load the common power bus, which could cause sudden screen blanking or sudden shutdowns. The hub itself is already adapted for connecting external power, and has a mini USB input jack.
Actually, soldering the micro USB plug did not cause any difficulties. You can see that although I only had three wires left to solder (excluding the positive power wire), I also soldered a fourth.
For what? I already wrote that for fifteen seconds after turning on the tablet, nothing is visible on the monitor - the standby indicator on the monitor is still blinking. But at about the sixth or seventh second, power is supplied to the standard tablet USB socket. And it was this that I decided to use to power the green LED through a damping resistance - this is not exactly a direct output, but nevertheless...
When unsoldering the plug, I looked here. The fourth and fifth contacts must be closed, which I did with a jumper from a resistor leg.
The hub board had a mini USB on board - this helped me, since I most likely would not have been able to tinker with the micron tracks, and therefore I simply sawed off the top part of the socket and soldered it directly to the gold-plated contacts of the socket. You can see that I simply bent back the “1 Vcc” contact, since I was going to supply power from the contact points of the external power socket. I bent over contact “4 otg” and I don’t need it either - I already connected it to contact “5” in the plug.
In doing so, I was guided by the picture below.
Having connected the hub to the +5 volt stabilizer (from the FM modulator), I saw that the red LED on the hub lit up - great - as long as I’m doing everything right.
External USB sockets should be secured. I already had them - collapsible. I had to cut them to length, use a round file to make grooves along the outer perimeter of the housings - halves of the sockets, so that, in the cut-out landing windows of the future TVbox's housing, they could be securely fastened without gluing them tightly.
It was, I won’t lie, boring and it turned out like this.
It's time to put it all together.
Upper left corner counterclockwise: - separate power stabilizer +5 volts; — two USB sockets; — USB hub board; - green LED - lower left corner - the LED housing is ground off to half its height; — lowering stabilizer lm2596 glued through a foam polyethylene gasket to the bottom of the case; — capacitor 2200 uF; — GS770 board glued through a foamed polyethylene gasket to the bottom of the case; — buttons; — wifi socket; — audio jack soldered to the corresponding contacts of the VGA to HDMI converter; — the converter itself; — the reset and power buttons that I don’t use.
Green was not chosen by chance - it is clearly visible and not blue =)
I already connected the power and shook the homemade product - zero reactions - everything sits tightly inside.
Perhaps I didn't screw the body halves tightly together.
Hardware features.
As it turned out, the functioning of the tablet via the HDMI output, in mode without a touch panel, has its own characteristics in terms of the functioning of pointing devices. Namely: when a static picture is displayed on the display, the coordinates of the cursor, in this case the mouse cursor, are updated jerkily. For example, jerks in the coordinates of the mouse pointer are clearly visible when loading the working screen. But they disappear if you select an animated background as wallpaper. As soon as you go to a static window, for example, to the system settings window, lags and freezes resume. Exactly the same friezes and lags will occur if you go from the animated desktop to the window of any IPTV manager, but as soon as you start the video (i.e., constantly updating the screen), the friezes immediately disappear. When I completely assembled the console, this conclusion unpleasantly surprised me. But after thinking about it, I found a way out.
You need to force the system to constantly update the screen by displaying information, say, about the loading of the network interface in real time. There are programs that display this (and other) information in the notification bar, where battery icons, wireless interface states, and so on are displayed.
Almost everywhere and always I install “Network Monitor Mini Pro” and as soon as I installed it, setting the update interval to 0.5 seconds, it immediately became easier. But if you do nothing on the network, the counter will show zeros, which means the display will stop updating, and hello frieze and hello lag. “Monitoring Pro” seemed like a half-measure to me.
Cool Tool - this utility, in addition to showing network traffic, is also able to show the processor load in real time. In general, it has enough output information that will never allow the picture to freeze.
The information update interval can also be set to 0.5 seconds. In the case of battery power, this counter would contribute to the depletion of the battery, but when powered “from the wall” there is no such problem.
And, the result.
I’ll say right away that if you have a VGA monitor, then if there is enough space in it, it’s better to build it all in there, and not mold it, like I did. Now, I would do exactly this - but that’s what it is.
How else to use a VGA monitor
? For example, through the same HDMI to VGA converter and through Female to Female Extender
Connect AndroidTv like this one. True, the HDMI to VGA Converter must provide +5 volts to the AndroidTv Stick, but this is not a problem.
You can get by with little expense, and gradually, I am leaning towards the “Miracast” solution
Then, by connecting this thing to the HDMI to VGA converter, you can simply send video from your tablet immediately and without wasting money. In both the first and second cases, you will need an external speaker system.
That's all! The most important thing is good solder, and, oddly enough, good flexible wires, which I’ve already run out of, and I don’t know which ones to buy without holding them in my hands, maybe what can you recommend?
Topics on PDA in which I somehow found myself
:
Profile topic on w3bsit3-dns.com in which Lions, Tigers and Bears sit (D. Simmons); Second life of LCD displays and monitors; What can you do with an old tablet? Glass/screens/touchscreens - repair, replacement, discussion; Mediacenter; Remote controls for Android miniPC, TV, media centers and more.
General topics for media consoles.
Utility "Network Monitor Mini Pro"; Cool Tool utility; Network TV "Glaz-TV" and there are several interesting modifications of it.
Home weather station
Do you live in a private house outside the city? Of course, you can spend money on all sorts of smart gadgets like a thermostat or barometer with Wi-Fi connection, but why if an old tablet can show you the weather, temperature, barometric pressure and moon phases?
Hang the gadget on the wall, connect the charger, turn off the display dimming, and expand a weather app or widget to full screen. Fortunately, there are so many of them on Google Play and the App Store that there is nowhere to put them.
At the same time, set up your “weather station” to signal if it’s going to rain - this way you’ll have time to bring home things left outside. And in addition, it can be used as an alarm clock.
Wired connection of Android devices
They support video output in two ways, each must be supported by hardware (see the specifications):
— HDMI (full, mini/micro – it doesn’t matter) — connect directly to the display; — MHL — connection via the appropriate microUSB->HDMI/miniHDMI adapter.
The resolution on the external display with an MHL connection matches the resolution of the device.
Options
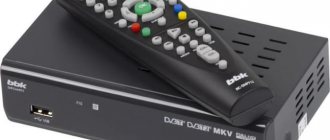
Modern television repeaters are real multimedia centers with Internet access and support for a variety of services. However, with maximum functions, such a thing will be very expensive. It is much easier and cheaper to build a “Smart” with your own hands from improvised devices and wires.
You can do this in one of the following ways:
- Using a compact and inexpensive media player.
- Via a smartphone or tablet computer.
- Using a universal Blue-Ray player system.
- With help
Watching movies, videos and photos on TV from a USB flash drive
First you need to download the movie and put it on a flash drive. Or copy some photos or music to the drive. You can create folders and put files in them.
- We connect the flash drive to the computer (format it if necessary) and copy movies (or other files) to it.
- We turn on our TV.
- We connect the flash drive to the USB port on the TV.
- Most likely, a message will appear on the TV that a new device is connected (USB device detected. Reading files...). And the TV will either automatically open a window (Media) to view files on the flash drive, or offer to open it. This depends on the specific TV model. My Philips TV automatically opens the USB flash drive.
- You may have to manually change the signal source on your TV after connecting the drive. Open viewing of media files on a USB drive. Usually, to do this you need to press the “SOURCE” or “INPUT” button on the remote control. They look like this: Among the sources there should be “USB” or “Media”. If the TV is Smart TV, then in the menu you can launch an application that is responsible for viewing media files on external drives. On Sony, Philips, DEXP, Kivi TVs (which are on Android TV) this is the “Media” application. Or you can install some third-party explorer or player and use it.
- Open the flash drive and start playing our movie. There should be “Folders” (this is viewing files on the drive) and sorting by “Video”, “Photo”, “Music”.
- Playing a video file. Playback can be controlled (pause, rewind, next/previous video/track) using the buttons on the screen or on the remote control. On my Philips, for example, if you close a movie and start it again, it will offer to play it from the point where you stopped watching it.
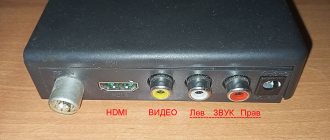
How to connect Blue-Ray?
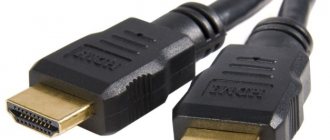
All Blue-Ray players have an HDMI interface. If the player did not come with a suitable cable, you can easily buy it at any electronics store. You can also use adapters for SCART or RCA (“tulip”) connectors.
Often such connectors are provided in a standard set. It is worth considering that when connecting the player via the SCART or RCA interface, the image will not be as high quality as via HDMI. But if we make “Smart TV” from a regular TV, this point is not critical. To connect a Blue-Ray player to a device, you may need an RCA-SCART or HDMI-SCART adapter. When interacting with RCA, you will have to independently switch the television receiver to AV mode, since this connection does not provide an autonomous transition to the decoder, unlike the SCART mode. You should also choose an adapter carefully: too cheap copies may cause interference when playing files.
Results
In general, Smart TV Duo makes a pretty good impression and, for an Android stick, it copes with its tasks quite well - the system performance is sufficient, interface slowdowns and other problems that we have previously encountered with Android players that are weaker from a hardware point of view were not noticed here . Of course, “naked” Android is not the most optimal solution for a large screen without touch control, but the presence of a gyroscopic remote control partially solves this issue. I just wish that its receiver had a more reliable signal reception - in our case, from a distance of 3 meters (the player was behind the TV), the cursor did not move quite smoothly, while from a closer distance everything was much better. Well, in general, the rather large (and not the lightest) remote control, which requires precise positioning in space, still loses to the mouse control, and even more so to the “native” touch control for this system.
| Type | Media center |
| Chipset | ARM Cortex A9 RK3066 |
| Ethernet | — |
| e-SATA | — |
| USB | + |
| WiFi | Wireless 802.11b/g/n |
| Composite | — |
| Component | — |
| S-Video | — |
| RGB Scart | — |
| DVI | — |
| HDMI | + (1.3) |
| Linear audio | — |
| Digital optical | — |
| Digital coaxial | — |
| Remote control | + |
| Hard drive (type/volume, GB) | — |
| Card reader | +yes (MicroSD) |
| TV tuner | — |
| IP-TV function | + |
| PAL | + |
| NTSC | + |
| Audio | AAC, AAC+, eAAC+, AMR-NB, AMR-WB, QCP, MP3, WMA, WAV, MIDI, M4A |
| Video | WMV, ASF, MP4, 3GP, 3G2M4, AVI, MJPEG, RV10, DivX, VC-1, MPEG-2, MPEG-4, H.263, H.264 |
| Photo | JPEG, GIF, BMP, PNG |
| Dimensions, mm | 9,7×2,8×1,2 |
| Weight, kg | 0,2 |
| Peculiarities | Android 4.0 |
The product for testing was provided by Yug-Kontrakt.
Features of connecting your phone to different TV models
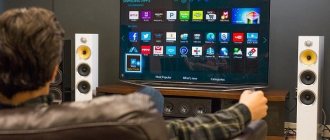
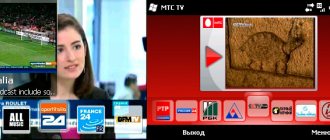
Different TV manufacturers have their own features - options that allow you to quickly and easily connect your TV to your phone. For example, Samsung has the All Share function, and LG has Smart Share. They work on the same principle and require one condition to be met - connecting both devices to the same Wi-Fi network. However, these methods have one drawback - the devices must be from the same company, that is, for example, a Samsung phone can only be connected using All Share to a TV from the same company.
Samsung also has a Screen Mirroring option, which allows you to set up screen duplication from your phone to your TV.
Phone image duplication can be enabled using Screen Mirroring
With the help of special programs developed specifically for a particular manufacturer, the phone can be turned into a control panel. For example, for Philips this is the Philips MyRemote program, and for Telefunken it is WildRed Remote Control. These applications can be found and downloaded from the Play Store or App Store.