Satellite MTS TV is a system for transmitting encoded broadcasts to the subscriber's receiver. It will not be possible to use a regular television tuner or a standard receiver to receive and decrypt them. To decode the streaming signal, you will need a separate set-top box for MTS TV. Today, the provider offers a number of convenient packages, the list of channels in which is carefully selected to meet the needs of different consumer groups. These include children's programs and separate adult content, including broadcasts in HD and UHD quality standards.
Advantages of satellite TV from MTS
A set of equipment for MTS satellite television can be installed by users throughout almost the entire territory of the Russian Federation. In some areas, signal reception is slightly below rated.
Unfortunately, in the Chukotka Autonomous Okrug the MTS set-top box is useless; this territory is not in the operating area of the provider’s satellite.
The main advantage of MTS's proposal lies in the use of the latest generation encoding and compression protocols . This guarantees maximum picture and sound quality on all channels. This is also evidenced by the level of broadcast characteristics. Apart from MTS, practically no provider offers ultra-high quality television.
Broadcasts of this format will allow you to fully enjoy both the picture without the slightest flaws and excellent sound. The proposed set of equipment, even with minimal user knowledge, can be installed and configured independently. To complete the work, just follow the instructions of the provider. Detailed instructions for installing and configuring the antenna are included.
Ways to terminate cooperation
There are two ways to stop using services connected for business.
Personal appeal
As in the case of an individual, all settlements with Rostelecom must be settled and the debt issue closed.
When providing equipment, it must be returned to the company or purchased, in accordance with the agreement for its provision.
After writing an application at the Rostelecom office and checking documents and debts, communication services will be disconnected.
On call
The corporate customer support service can be found by phone number or 8-800-200-30-00. You can discuss your disconnection request directly with the manager, and also find out how to quickly complete the procedure and what documents will be needed.
Providing documents is possible remotely.
What set-top boxes does the provider offer?
A set-top box is needed to decode the data stream received from the satellite to obtain video and audio signals. Using the equipment is very simple. All you need to do is connect the set-top box to your TV, tune in the channels and enjoy your favorite shows. The only thing that can upset a demanding consumer is that it will not be possible to get a video stream higher than 1080p.
Today, the provider offers a number of set-top box models both in complete sets of equipment with an antenna unit and in small sets.
Advice! It is recommended to purchase devices that support the HEVC protocol. Such set-top boxes can receive more than 200 channels and work with HDTV broadcasts.
EKT DSD4614i (H.265/HEVC)
This set-top box can record broadcasts to an external device connected via USB. When using it, the owner can pause programs and receive other viewing control options. There is a parental control option, teletext, TV guide functionality, subtitles and much more. The current operating mode and service information are displayed on the built-in display.
Castpal DS701 (H.265/HEVC)
MTS Castpal satellite set-top boxes are one of the most common solutions offered by the provider for receiving television broadcasts. The device is equipped with a display and can work with external USB media (recording TV shows and playing content). There is both an outdated analog RCA output for connecting to old TVs, and a modern digital-to-analog HDMI for the most advanced models of receivers.
- MTS set-top box does not show channels error 201. Errors in the operation of MTS TV television
AVIT S2-3900 (H.265/HEVC)
The functionality of this set-top box includes a TV guide, teletext, parental control function and much more. The MTS AVIT S2-3900 receiver works with both regular television signals and the HDTV format. You can receive more than 200 channels, write programs to a flash drive, and play content from it.
For lovers of good sound, a digital audio output is provided.
Functional
IPTV HD Mini set-top box is a device designed to provide reception, decryption and display of a signal. This is the main purpose of the receiver. Let us briefly list the main functionality of the set-top box of this model:
- playback of content in video format;
- subscribing to view paid content;
- recording content to various memory storage devices;
- electronic guide;
- information and entertainment widgets.
The functionality of the device is not limited to this. The console has quite a lot of useful parameters. All settings are divided into two groups: “System” and “My”. Experts strongly do not recommend changing system parameters, since incorrect values can lead to malfunctions in the operation of the set-top box.
Special attention should be paid to the parental control option. It can be accessed through the “Access Level” section. The user will be able to configure age restrictions in this section. The “Social Networks” and “Weather Forecast” widgets will also be useful. All these features can be customized.
We've sorted out the functionality. It's time to briefly list the main advantages of the console in question:
- small and compact body, the device takes up minimal free space;
- intuitive and simple interface;
- playback of content in Full HD format;
- elegant and original design of the console;
- loyal price.
There are indeed many advantages, but there are also disadvantages. The main flaw is the lack of an internal portal. This means that the set-top box will not function without firmware from the provider. Therefore, users will not be able to use the device as a media player. If in the future you refuse the services of the operator, the set-top box will lie idle.
Another drawback is compatibility problems when connecting Wi-Fi adapters. For example, currently the firmware from Rostelecom does not support devices manufactured by Smartlabs. Of course, this may create additional inconvenience. Today, the set-top box in question is also actively used by the operator Bashtel.
How to connect the set-top box to the TV
You can connect the MTS set-top box to any of the output interfaces available on it.
Advice! To get the best image quality, it is recommended to use the most advanced one. So, if your TV has RCA and HDMI inputs, you should give preference to the latter.
Before connecting the set-top box, it is advisable to carefully read its operating instructions, which outline important points. In particular, it is recommended to connect the HDMI cable when the equipment is turned off. We are talking about both the console and the TV.
Connecting the device is done as follows:
- the satellite antenna cable is connected to the DVB-S2 input of the set-top box using the F-connector;
- a cable corresponding to the available inputs on the TV is connected to the receiver output;
- the second end of the cable is connected to the corresponding connectors of the TV receiver.
After this, just turn on the equipment, select the desired input on the TV using the Source button on the remote control (or another, depending on the model) and make sure that the MTS TV set-top box is working. A blue loading window or a red main menu will appear on the screen.
Preparation
The preparatory stage before updating the firmware of a set-top box includes:
- computer with Internet connection;
- network cable for connecting the set-top box to a computer (LAN);
- USB drive (you can use an 8 GB flash drive);
- firmware from Infomir;
- special utilities for work (dualServer, mcast).
Software replacement is carried out by installing the official firmware. First you need to install the stock one, and then an alternative one, which will remove the restrictions.
Equipment activation
To configure the set-top box, find channels and sort them, you need to activate the device . This will already be done if the user bought equipment and entered into an agreement with the provider in MTS showrooms or from the provider’s official dealers.
If the console was purchased in stores, the activation procedure will have to be completed online. This can be done on the official MTS website. To go to the subscriber profile, you need to follow the line of sections “For private clients”, selecting “Help”.
On the page that opens, find “Satellite TV” and “Self-registration”.
- Complete instructions for the MTS TV set-top box: setup, error codes and malfunctions
Important! The data must be correct, because if it does not match the real data, the provision of the service will be terminated.
Disabling your home phone
Turning off your home connection can come in handy if you're going on vacation or planning to completely switch to mobile communications. Accordingly, Rostelecom allows you to either completely terminate all relations on this issue or place a temporary block.
Online
A disconnection request can be submitted online, but a visit to the office is often unavoidable.
Usually, via the Internet without a personal visit, communication services can only be limited for a certain time; you can only completely abandon the phone only in person, but access can be blocked.
Initial setup of the set-top box
Further user actions are described in detail in the operating instructions, which are included with each set of MTS equipment. In general, when you turn on the set-top box for the first time, the main menu of the operating system is launched and the initial setup of the MTS TV set-top box is done.
- The user is prompted to select a language for the entire control system.
- You need to select the image format. It is set according to the characteristics of the TV, 4:3 for almost square and 16:9 for widescreen.
- The system will offer to search for channels. To do this, just press OK on the remote control.
- Next, you need to switch the channel sorting mode by pressing the Menu button on the remote control, selecting the “On-Screen Menu Channel Settings” section, clicking on the “Channel Sorting” option and setting the value to “MTS Sorting”.
After this, it is highly recommended to update the firmware of the set-top box. This can be done through the system menu by pressing the corresponding button on the remote control, going to the “Settings” block and selecting “Update”. When prompted for a PIN, enter 0000 and confirm your choice of action by pressing the OK button.
The console will do everything itself. After updating the firmware, the device will reboot automatically. It is turned off to install a smart card. It is inserted into the socket with the contact area downwards, with an outward beveled angle directed towards the rear of the case. Then the set-top box is turned on and the reading of the identification medium is checked.
To do this, you need to press the Menu button on the remote control, enter “Settings”, the “Conditional Access System” block. There is an item “Smart card status”, which you need to highlight and click OK. If the reading is correct, the value D04-4 will be displayed. If the status code is different, it is worth checking the position of the smart card and, if necessary, installing it correctly.
Important! This must be done with the obligatory shutdown of the set-top box.
The last step is to set the time to display it on the display for some models and set the time zone. The operating system of MTS set-top boxes has a function for blocking channels, restricting age access and much more.
Published: 06/03/2019
Firmware on TV set-top boxes occurs automatically. This happens immediately after the release of a new software version. Currently, more and more Rostelecom subscribers are planning to reflash their receivers themselves.
- Setting up the MTS remote control to control the TV.
Firmware on TV set-top boxes occurs automatically.
What to rely on when choosing?
It is necessary to decide on the correct type of connection for the IPTV set-top box (SMARt-TV). If we are talking about a modern TV, then it is better to use an HDMI connector. And in the case of older versions, this is a VGA or AV port. Let's consider other parameters:
- The processor must have at least four cores. This guarantees operation without any noticeable problems;
- It is better to use RAM at least 2 GB of memory. But, if possible, purchase versions with a larger volume. And the built-in memory, although not so important, we recommend about 8 GB - it can be significantly expanded using a MicroSD card;
- The operating system is also important. Android-based models usually cost less. And many useful applications have been created for it, gaming, social and office applications.
Pros and cons of flashing the Rostelecom set-top box
Digital television users want to update the firmware of Rostelecom set-top boxes in order to improve the capabilities and functionality of the device. This procedure has its advantages and disadvantages.
The positive side of flashing the Rostelecom set-top box is the ability to watch a larger number of TV channels without renewing your tariff plan. In addition, this procedure makes the device connected to the TV more functional. The receiver's firmware turns it into a multimedia center that supports a wireless connection.
The disadvantage of reflashing the computer and receiver is that some standard services will disappear, for example, weather and exchange rates. There are also cases when, after this procedure, receivers stop functioning or are unstable.
When the need arises
The need to stop using communication services may arise under a number of different circumstances. Here are some of them:
- You were not satisfied with the quality of service and the services themselves.
- You are moving to another city or another apartment.
- You do not plan to continue using Rostelecom’s services, and are moving to a new operator.
- You no longer need certain services from the company.
- The tariff schedule no longer suits you, nor do the new offers from Rostelecom.
- The person for whom the contract was signed has passed away, and you do not plan to use the connected connection.
- You need a temporary disconnection so as not to pay for communication while you are, for example, abroad.
Methods for flashing the sml 482 hd base console
You can reflash the equipment in several ways, each of which has its own positive and negative aspects.
Official firmware from USB flash drive
Most Rostelecom subscribers use USB flash drives to flash their equipment. To work, you need to have good Internet speed and stability, a computer, a USB drive, and working interfaces on your gadget and set-top box.
Reflashing the receiver takes about 30 minutes and is carried out according to the following scheme:
- download official software;
- creating a folder on a flash card with a name similar to the device;
- sending downloaded files to a folder for flashing;
- fixing the USB drive in the device;
- connecting the receiver;
- in the “Settings” section, search for the item for software update;
- selecting the “update via USB4” function
- pressing the "ok" button.
If all of the above steps are carried out correctly, the system will be flashed. It usually takes about 10 minutes.
Official firmware via multicast
If you don’t have a flash drive or the previous flashing method fails, you can use another option. Multicast is usually used in cases where the router and set-top box are connected using a patch code. Multicast is one of the methods of transmitting information over the Internet. Therefore, USB is not required here.
The procedure takes a lot of time and is performed according to the following scheme:
- moving utilities - files and firmware into a single gadget folder;
- connecting the receiver to a PC using a patch cord;
- turning on equipment;
- pressing the “menu” key;
- select upgrade tools mc;
- selecting a network connection using the control panel;
- registering an IP address;
- Press Win+X and open command line;
- prescribing the combination “dualserver”;
- selection and data input select;
- registering the IP address of the first stream;
- pressing the “start” button and waiting for the procedure to complete;
- enter the engineering menu, hold down the “menu” key;
- clicking “Upgrade Tools” and then selecting “MC Upgrade”;
- waiting for the process to complete.
Official firmware
- We move the downloaded files from Informir to the Mag250 folder created on the flash drive (for working with the corresponding set-top box model).
- We insert this flash drive into the console.
- We go to the receiver menu and in the settings we find “Update software”.
- Select USB update and click “start update”.
- We check the integrity of the files on the flash drive and click “OK”.
It happens that errors occur during the flashing process. Nothing bad happened, just follow the instructions below:
- We delete all data from the media and write it again (there should be no broken files).
- We check the folder name, if there is an error, we correct it.
- We start the flashing process in a different way.
The second option includes the following points:
- Insert the flash drive into the set-top box/receiver.
- Press “Menu” on the remote control until the BIOS parameters are displayed.
- Select Upgrade Tools in it.
- Enable USB Bootstrap.
Immediately after flashing, the device will automatically reboot. If you are flashing via a computer (multicast), then you need to do the following:
- Copy all files to a previously prepared folder.
- Turn on the set-top box and in the BIOS (after holding down “Menu”) click on Upgrade Tools.
- Connect the device to the computer's LAN using a network cable.
- On your computer, open connection properties and select IPv settings.
- We set the IP of the connected device with a subnet mask.
- Launch the dualserver utility.
- Select the connection type and press SELECT.
- We drive two streams into the window. The first is 224.50.0.70:9000, the second stream is 224.50.0.51:9001.
- We start both threads and wait for the process to complete.
- Next, in the BIOS of the TV set-top box, select MC Upgrade.
- After notification of the start of the firmware process and its completion, we reboot the set-top box.
This was the process of flashing the official program. Now you need to install alternative firmware, which removes the restrictions.
Alternative firmware for Rostelecom set-top box for free viewing of all channels
Thanks to the modified firmware, the Rostelecom set-top box will retain all its functions, but at the same time new channels will be added to the existing ones.
- MTS TV set-top box - new MTS satellite receiver
How to hack a Rostelecom console through the menu
To hack the receiver through the menu, you will need to perform the following steps:
- Select “settings” in the menu;
- press the “SETUP” key;
- stop selecting the “update software” section;
- select “update via USB”;
- click “start”;
- check the integrity of the data;
- select the "start" key.
After completing the procedure, the receiver will boot itself.
Alternative firmware via BIOS parameters
Flashing from BIOS is almost the same as the method described above. The procedure is carried out according to the following scheme:
- opening Bios;
- start for both streams “Upgrade Tools” and “USB Bootstrap”;
- fixing the drive in a special slot;
- pressing the “ok” key;
- Waiting until the flashing and rebooting process takes place.
Hard RESET (parameter reset)
The set-top box contains firmware in which the settings are set. These settings must be reset, that is, brought to factory values. To do this, use the RESET or DEFAULT button on the back of the console. It is slightly recessed so as not to accidentally reset the settings. This button must be pressed and held for several seconds. If such a reset does not work (this happens very rarely), then you can reset the settings through the standard menu in Default settings. After confirming the selection of this item, the set-top box will reboot with clean parameters (factory settings).
How to reflash a Rostelecom set-top box
Almost everyone knows how to reboot a Rostelecom set-top box, but reflashing a device without certain knowledge is quite difficult. Firmware for a Rostelecom receiver is a complex undertaking that requires several steps:
- Preparation;
- data reset;
- downloading new software;
- application of imageupdate alternative firmware.
Preparation
For those who do not know how to flash a Rostelecom console, it is worth remembering that you need to carefully prepare for this procedure.
Preparation for firmware includes the following steps:
- Internet stability check;
- Having a computer or laptop at hand;
- downloading files for firmware;
- download mcast or dhcp server win r cmd c;
- Reset official settings.
Each of the above points should be followed extremely carefully, since the slightest mistake can lead to failure during the software installation process.
hard reset reset parameters
Resetting factory settings is the most important step in flashing a Rostelecom device. Without this point, the receiver will continue to work unstably. This is a fairly simple procedure, in which it is important not to make a mistake in entering your login and password.
There are two ways to reset to factory settings:
- Press the button, which will completely reset the firmware. The key is located on the back of the Rostelecom console.
- If the button does not solve the situation, then you can reflash the receiver in another way. First you need to turn on the device, then find the menu. In the “settings” section you need to find a button and reset the software.
How to reflash
The procedure for flashing a TV set-top box consists of four stages:
- Preparation;
- hard reboot (RESET) or factory reset;
- stock firmware;
- flashing with alternative software.
Attention! Not all console models can be reflashed. The procedure was successfully carried out on MAG200\250, as well as RTSTBHD Standart.
Reflashing the Rostelecom TV set-top box is carried out in two ways:
- By connecting to a computer.
- Using a USB stick.
FAQ
Anyone can reflash the Rostelecom set-top box at home, the main thing is to know the principle of the sequence of work.
If you have any questions, you can always seek help from specialists.
How to activate after flashing
Many subscribers of a digital television provider have a question about how to activate the receiver after flashing it. Often, this is not necessary. If the work is done correctly and step by step, the device will be ready to work. The consumer will only need to restart the equipment and configure the channels.
Which consoles can be reflashed
Not every console can be reflashed. The program can be downloaded for the following models of Rostelecom receivers: IPTV RT-STB-HD Standart, MAG-200, MAG-250. Each case requires an individual approach.
Firmware for MAG-250 and IPTV RT-STB-HD with Rostelecom on Infomir: 838 comments
Pavel - no, you can’t. They are not interchangeable.
Apparently the freebie is over. There is nothing special to advise here: if you want to watch all channels, go to the official software.
There is an RT-STB-HD set-top box with a remote control from Rostelecom. Please advise the firmware so that this remote control is also supported. Very necessary.
Hello. Tell. Prefix mag250 firmware bottom. The other day all channels stopped showing. Can Rostelecom block the signal? Or maybe it needs to be activated again somehow?
Andrey - what firmware do you have? Is the service officially activated?
The mag250 prefix from RT, I just can’t get into the BIOS. I press the menu button on the remote control, but it doesn’t react at all.
Andrey, if the set-top box was activated, then everything is shown on the latest firmware version. Perhaps you just have an old firmware, you need to update. Forum four padea to help.
In the near future, I think everything should fall off due to a change in the verimatrix version.
Is it possible to view encrypted channels on Impulse firmware?
As far as I know, no.
Just a man! Everything is simple and accessible. Everything worked out almost without problems! Thanks for the useful information, site! I jumped off this shitty Rostelecom. I watch free TV for pennies. I hope I will)))
Hello, the channels and all services do not work, I think it’s because of the Internet, it is connected via a cable from the router. How can I configure the Internet on this firmware? Thank you in advance
Hello. .
I posted the one that was available in the VK group.
Hello, I'm stuck on step 7, the BIOS does not open, I press the menu button but nothing happens. Help me please.
Most likely you are not getting there at the right time.
I still have a set-top box from Rostelecom Promsvyaz IPTV HD MINI I can’t read further, it’s covered with a sticker.. what can I do with it if I switch to another provider?. or I’ll have to throw it away.. thanks in advance
If another provider does not support it, then nothing.
Is this legal
Every user of Rostelecom digital television must remember that flashing equipment is an illegal act. Violators may receive a fine.
Reflashing the receiver is a procedure that can significantly improve its functionality. When deciding to perform this work, the subscriber must remember the negative consequences of the procedure.
- 17/06/2020
- Reads: 7,248
Half price per logo
It’s hard to suspect me of loving camera devices. For as long as I can remember, I have been fighting against “free” routers, and before that I was dissuaded from buying branded smartphones. Yes, of course, saving is sacred, but if it devalues the whole point of a new thing, then what is the point of it?
But nature has become so clear that I with a clear conscience recommend taking a closer look at the new operator device - an OTT set-top box for a TV, which MTS began selling in its showrooms in June. This small but very useful box, being decorated with a logo with an egg, has radically lost in price, but has retained all the user functions. Today this is the cheapest way to qualitatively add intelligence to a TV in the country or at home. So high quality that you can sometimes forget about the built-in Smart TV.
Iron
At the end of last year, the ZTE B866 TV set-top box appeared on Russian shelves. It runs on a fairly recent (penultimate) version of the Android TV 9 platform, and inside it is a relatively old (2016) but peppy Amlogic S905X chipset. The prefix cost 6 thousand rubles. In December 2019, they asked for about the same amount for a Xiaomi Mi Box set-top box with similar hardware. Compared to quite numerous analogues, the ZTE product stood out only with a more recent version of Android TV (competitors usually have 6.0 or 7.1), which did not contribute much to sales.
I don’t know who agreed with whom, but on June 1, B866 appeared in MTS stores with a logo on the case for 2999 rubles. For the same price, in at least some official retail you can only buy absolutely terrible boxes with primitive chipsets and an ancient version of Android TV.
Business colleagues grunted grimly at this price. The fact is that the Amlogic 905X chipset, despite its age, remains very popular and in demand. The quad-core Cortex A53 with a penta-core ARM Mali-450 GPU easily delivers images up to 4K with support for 60 frames per second. And, of course, HDR10. The wholesale price of one chip is $15. That is, a thousand rubles are spent just on it, but you still need to solder it on the board, add connectors, a housing, a power supply, fill in the firmware, package it, and deliver it to Russia. Plus, the kit includes a fairly advanced remote control that works via IR and Bluetooth. According to the most minimal estimates, the cost of the set-top box is 2,500 rubles. Taking into account the minimum margin of ZTE, MTS gives the set-top box at zero. Well, I hope they manage somehow.
The set-top box has 2 gigabytes of RAM (this is a normal amount for this type of device) and 8 gigabytes of flash. The latter is quite enough to install applications (more on them later), but if you decide to use the set-top box as a player, the storage will have to be expanded. Fortunately, this is easy to do: there is a slot for microSD cards up to 64 GB and two full-size USB 2.0 ports. You can connect flash drives and external hard drives.
To connect to the Internet, you can use a 100-megabit Ethernet port or a dual-band Wi-Fi module with support for 802.11ac. If you are the owner of an Android smartphone, the initial setup can be completed with virtually no interaction with the console remote control: your Wi-Fi account and password will be transferred to it directly from the phone.
Bluetooth is built into the remote control not only for comfortable control when the set-top box is not in line of sight (for example, behind the TV), but also for issuing voice commands. The built-in microphone allows you to radically reduce the time it takes to search for the desired content in applications and YouTube. It is difficult to underestimate this opportunity. I'd say there's simply no better way to navigate the sea of content on Android TV. Huge saving of time and nerves. For set-top boxes for 5-6 thousand rubles, a microphone in the remote control is the norm, but for 3 thousand, go and find one. I note that such a smart remote control separately costs 600-1000 rubles on Aliexpress, and up to one and a half thousand in domestic stores.
In general, the hardware part already strongly induces one to buy a set-top box. But it is very useful to check how functional the control software is? As practice shows, crooked hands can ruin the impression of even a very smart piece of hardware.
Watch live in video version
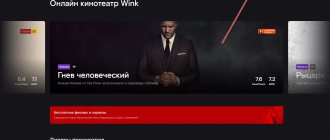
MTS TV and everything, everything, everything
When we turn on the set-top box, we are greeted by the MTS TV shell. The main page contains Greatest Hits according to the owner of the service, but I didn’t stay there for long and immediately went through the rubricator.
The “TV” tab offers you to watch broadcast channels. The first 20 are free (you just need to register via mobile), the rest are by subscription, of which there are quite a few.
It is interesting that all traffic that is generated within the framework of MTS TV services is free within the operator’s network. And this also applies to the free twenty channels. I didn’t really believe it and decided to experiment. I took a Saratov MTS SIM card (and this is happening in Moscow), where no traffic packages are connected at all, inserted it into a TP-Link mobile router, connected the set-top box to it via Wi-Fi and had a great time watching the cartoon “Shrek Forever After” on STS. In total, this took about three gigabytes of traffic with an average flow rate of 6 megabits per second. Probably, in the city such tricks are not very necessary, but outside the city, where the Internet is often not completely unlimited, the savings will be very useful. You can even plug a USB modem into an old router with an MTS SIM card with a near-zero tariff, and they will work perfectly with the set-top box.
The TV channel rubricator is not only thematic, but also, so to speak, of high quality. That is, you can select only HD or only 4K channels. There are not enough of the latter yet, only three of them, but there are already dozens of HD ones. As for subscriptions, there are many different ones, and it is better to look at them on the MTS website. Yes, if you have already subscribed to something on other devices, everything will work here without additional charges.
The Movies tab contains a catalog of – you won’t believe it – films. There are a lot of them there, from all sorts of ancient to new ones. To ensure choice, MTS TV pulls up partner selections - Amediateka, Start, IVI, MEGOGO. All this is already for money and by subscription. It is, of course, a little upsetting - how can I, a free person, pay someone money for pleasure? But the amounts, frankly, are ridiculous, and if you don’t want to bother finding free sources, it’s easier to pay. Well or not.
The same story with TV series: there is almost everything (MTS says that the database, including films, includes 15 thousand titles), and if someone doesn’t have enough, you can install the Netflix application.
Yes, yes, an application. Having rolled out its shell, MTS left Google Play in place, where applications from all content providers are available, including direct competitors - Megafon and Beeline. The application store on Android TV is somewhat different from a smartphone, but still the choice is really large, and with some diligence you can even find a bald devil.
And for the most advanced guys there is the opportunity to install third-party applications. The first thing I did was download the Kodi player, which allows you to play 4K movies on the Amlogic S905X with almost any bitrate (well, without fanaticism, of course). It was not without pleasure that I rewatched “Ford v Ferrari” with a 50-megabit stream. It drags from an external drive without problems.
Online filibusters will definitely ask what’s with the support of software like HD Videobox. You won't believe it, but everything is fine with them too. And even torrents download, it’s terrible.
Total
The metamorphosis from ZTE B866 into a product with a long official name “Interactive OTT set-top box on the Android TV operating system for access to the MTS TV service” was painless. Other than the appearance of the signature shell, nothing is trimmed or blocked. If you want, use MTS. If you don’t want to, well, that’s your business.
The Xiaomi Mi Box S, which is almost identical in filling, costs 5,500 rubles in official retail, and from 4,100 on Aliexpress. The unbranded ZTE B866 costs at least 4,800 rubles.
MTS offers the same thing for 3 thousand. It seems to me that doubts are unnecessary.
The digital set-top box allows you to watch the provider’s television and TV channels in HDTV format. Small dimensions make it possible to use such equipment in a room of any size. Unlike other equipment, which is similar in functionality, the MTS device has a reprogrammable remote control, through which it is possible to control the TV.
Specifications
In terms of appearance and connectors, the IPTV HD Mini set-top box from Rostelecom is no different from most similar devices. It is made in a compact case made of matte plastic. All connectors are located on the back side:
- RJ-45 (LAN) for Internet via fiber optic cable;
- USB 2.0;
- 3.5 for sound output;
- HDMI;
- optical output S/PDIF;
- power connector.
The filling can also hardly be called unique:
- chipset STi105;
- RAM – 256 MB;
- ROM – 128 MB;
- OS - Linux 2.6.35;
- support for drives formatted FAT16/32, NFS, Ext2/3;
- video support - 1080i/p, 720p, 576p, 480p, NTSC, PAL.
Step-by-step instructions for connecting an MTS set-top box
In the kit, along with the receiver and control device, the buyer receives “little finger” batteries, a power supply, and wires. Additional options worth noting include:
- pause and then watch a TV program from the place where it was paused;
- record television according to a schedule on a USB flash drive in order to watch the recorded content in the future;
- play audio, videos, photos from a flash drive (data on a flash drive can be recorded using a personal computer, laptop, or other similar device).
By following the algorithm below, you can connect the equipment to the TV yourself:
- Before connecting the receiver to the TV, make sure that the supplied wire is connected to the MTS operator. To do this, find MTS INFO among the TV channels. If you can’t find it, it means that the wire was connected to another provider; subsequent configuration does not make sense.
- Connect the receiver's output jacks to the TV's input ports. Make sure that the input jack to which you connect the device is marked “IN”.
- Connect the power adapter to the DC IN jack located on the rear of the receiver. Connect it to the mains.
- Turn on the TV, using the remote control, activate the mode for receiving a signal from the input connector to which the receiver is connected. Switch modes using the TV/VIDEO, TV IN, AV keys. The name of the port that you need to select using these keys is indicated next to the connector to which you connected the receiver. Usually it is labeled as AV1, Ext1, SCART.
If you connect equipment to a plasma, the output connectors may not be located on the TV itself, but on the receiver that controls the plasma panel. You can find where it is located by following the wires that come out of the TV.
Ports for connecting an MTS receiver can be located either on the back of the TV or on the front panel (under the cover that covers the keys). If other equipment is connected to all ports, use the SCART input.
In addition to the basic packages, you can access additional packages for an appropriate fee:
- "Match! Football" – live broadcasts, match replays, reviews, news content, interviews with football players.
- "Match! Premier” – broadcasts of all RPL games, Russian Cup, RPL friendly matches.
- “Amedia Premium” is a selection of the most interesting TV series filmed both in Russia and abroad.
- “Get in the movie mood!” – a selection of the best films, both classic and modern.
- “VIP” – premieres of foreign and domestic films, modern television series, educational programs about nature and sports.
- “Children’s” – cartoons and programs for children aged 1-12 years and their parents.
- “Kaleidoscope” is a selection of exciting TV shows for the whole family.
- Discovery is a channel for people interested in science, new inventions, and innovative technologies.
- “Adult” – erotica.
Also, MTS subscribers can connect certain channels to their liking:
- movies;
- music;
- High definition TV;
- entertainment content;
- scientific broadcasts;
- family channels;
- erotic content (it is recommended to block such channels so that your children cannot access them).
Connection diagram
Often, after purchasing a Rostelecom set-top box, you have to wait several days for a technician to connect everything. If you are connected to the Internet and television from the same provider at the same time, it is better to wait for a specialist. But if you already have Internet access, you can try connecting the device yourself using an Ethernet cable or wireless connection.
Once you connect the wire, the setup menu will appear on the screen. Changes will need to be confirmed by entering a PIN code, by default 0000. For a wireless connection, just go to the “System Settings” section, select “Network”, “Connection Type”, “Wireless”, then select your Wi-Fi network and enter your login and password.
Set-top box equipment
The kit includes:
- the device itself;
- universal remote control;
- power adapter;
- RCA-SCART adapter;
- connecting wires: network, composite, HDMI cable;
- instructions;
- documents for warranty service.
Initial setup of the set-top box
After connecting the receiver to the TV, a loading window should appear on the screen. If this does not happen, inspect the port to which the equipment is connected. It must be signed as “IN”, that is, it must be input. A common mistake is when people connect the receiver to the output port marked “OUT” or an arrow pointing away from the TV. The problem may also be that the TV has not been switched to the mode of receiving a signal from the port to which the equipment is connected.
Install batteries in the remote control. Once the receiver has finished loading, the language setting window will appear on the screen. By default, the language “Russian” is activated. To confirm your choice, click on the “OK” button on the remote control.
If, after the equipment has booted, you do not see the language installation window, reset the factory settings:
- Click on the “MENU” button on the remote control.
- Click on "System Settings".
- Click on "Factory settings".
- Dial PIN code “0000”, click on the button.
For the device to work normally, you need to aim it at the receiver, and not at the TV.
Next, a menu for selecting the picture format will be shown. By default, the 4:3 format is activated. You need to confirm your choice by clicking on the “OK” button on the remote control. If necessary, you can activate the 16:9 widescreen mode after completing the setup.
Now you need to find TV channels. To start the search, click “OK” on the remote control. Once the search for TV channels is complete, the menu will show how many channels were found. There should be at least 150 of them. If there are fewer TV channels, this indicates that:
- a filter is installed in the house (you need to fill out an application for dismantling the filter);
- the house does not fully support MTS digital television;
- wire is damaged;
- The apartment splitter is installed.
Now you need to sort the TV channels. Click on the “MENU” key on the remote control. Click on “Channel settings”, “OK”, “Sorting channels”, “OK”, “Sorting MTS”, “OK”.
Next you need to update the software. For this:
- Click on the “MENU” key on the remote control.
- Click "System Settings", "Software Update".
- Dial PIN code "0000", wait for the software to update.
Once the software is updated and the receiver turns on, install the SMART card. The place for it is located on the right of the receiver. Before installing the card, carefully remove it from the holder frame. It must be inserted so that the contact area faces “down” of the device. The beveled corner after card insertion should be visible from the outside and located near the rear end of the equipment.
After the SMART card is inserted, make sure that it is read correctly by the device. For this:
- Click on the “MENU” key on the remote control.
- Click System Settings, Conditional Access System.
- Click on “Smart Card Status”.
A menu will appear showing whether the card has been read and whether the DO4-4 status has been activated. If the error “Card is faulty” is displayed, it means that the device was unable to read it. This may be due to the fact that the card:
- installed by the wrong side;
- not inserted completely;
- is faulty.
To resolve the problem without exiting the menu, try removing the card and reinserting it before the DO4-4 status appears. After the SMART card is successfully installed, you can consider that the receiver setup is complete.
Blog about modems, routers and gpon ont terminals.
Recently, more and more advertisements for the sale of various equipment received from Internet providers upon connection have appeared on Avito and other sites with free advertisements.
The leader is the Rostelecom router and STB set-top boxes. This happens because this operator provides its equipment either immediately at full cost or in installments. In the latter case, upon termination of the contract, you usually have to pay the remaining amount. Accordingly, after the subscriber disconnects, he is left with hardware that is no longer needed and he gets rid of it in an attempt to get at least some money back. Moreover, you can often find very good offers. In this article I want to answer a question that readers very often ask me in the comments - “I bought a used Rostelecom set-top box. What should I do with it? A lot here depends on whether you are still a subscriber of this provider or not. Let's consider both cases. Note: There is an option to use the set-top box unofficially and still watch all channels for free. This is only possible with the Infomir MAG-250 and Promsvyaz RT-STB-HD Standard models by installing the DNA firmware. You can read more about this here.
Case two: you have a different Internet provider
Here, unfortunately, there are few options for the development of events. The problem is that without access to Rostelecom's digital TV network, its video receivers are useless hardware. The exception is a few models. Smartlabs SML-292 HD and SML-482 HD can be used with other telecom operators. In particular, at MTS. That is, if the firmware is available, it will be possible to reflash them and use them.
Another successful model that is not currently being purchased, but which can be found in advertisements, is the Infomir MAG-250 and its full clone Promsvyaz RT STB HD Standard (not to be confused with the RT HD Mini). This is an excellent multimedia player in itself, which, if you reflash it, you can connect to a router and watch videos on Youtube, as well as movies online and through online portals and cinemas on the Internet (Megogo, ivi, etc.) .
I heard several times from blog readers that they managed to flash the SML-482 HD with firmware from Moyo TV in order to use it as a media player. There's even a video on YouTube:
I have not tried this method myself and therefore cannot recommend it. It is also complicated by the fact that this requires a USB-UART adapter plus work via the console, which is already quite a difficult task for the average ordinary subscriber.
Did it help? Recommend to your friends!
Setting up the remote control
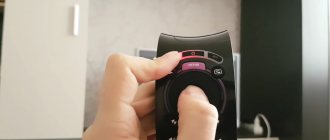
By following the recommendations below, you can configure the remote control to control all the functionality of the TV:
- Place the TV and receiver control devices so that the infrared emitters are directed at one another.
- The universal remote control has special keys that can be “taught” various functions (increase, decrease, turn off the volume; switch TV channels; turn off and turn on the TV). To put it into training mode, click on the gear key and hold it pressed until the LED indicator lights up (constantly).
- While the training mode is activated (no more than 15 s in standby mode), press and immediately release one of the customizable keys. The LEDs should start flashing. After that, on the TV remote control, hold down the key whose functions you want to transfer to the universal remote control. If the command is successfully transmitted, the LEDs will blink 3 times and return to steady light. Other keys are “learned” in a similar way.
- After completing the procedure for setting up all the special keys on the universal remote control, click on any key to fix the result. The LEDs should go out.
- Make sure you can control your TV using the universal keys. If any of them do not work, repeat the above procedures again.
Tuning channels using the remote control
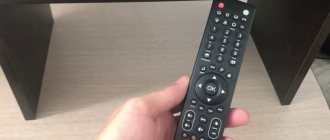
To configure TV channels using the remote control, follow this algorithm:
- Go to the receiver menu by pressing the “MENU” key.
- Go to the “Channel Editor” subsection.
- Go to the “Channel List” subsection.
To block an MTS TV channel, do the following:
- Specify the TV channel, click on the yellow button.
- Enter your PIN code.
- A “lock” sign will appear next to the name of the TV channel. Now this channel can be viewed only after specifying the PIN code.
To add a TV channel to your favorites list:
- Specify the TV channel, click on the red button.
- A “heart” sign will appear next to the channel name.
- Now the channel is in the list of favorites.
You can also edit the list of MTS digital television channels:
- To view the editing list, click on the blue button.
- To remove a TV channel from the list, select it using the navigation keys, click on the red button, and confirm the action.
- To change the position of a channel in the list, select it. The green key moves the TV channel to the top, the yellow key to the bottom.
- To rename a channel, select it and click on the blue button. A virtual keyboard will appear. To type letters and numbers, use the navigation keys. You can delete characters with the yellow key, switch the language with the red key, and save changes with the green key.
Is it possible to replace the remote control?
It is possible to replace the remote control with another one if the existing one breaks down. You just need to choose the right new model. It is advisable to purchase a new device by comparing it with the existing remote control that came with the rest of the equipment.
Table of remote controls for the MTS digital set-top box:
| Model | Average cost, rub. | Compatible receiver models |
| 5304-MTS | 720 | Avit S2-3220, SkyWorth HSD11, EKT DCD 2204/2304/4404/3011 |
| DCD2304 | 350 | EKT DSD4614i, EKT DCD4404, EKT DCD2304 |
| DN300 | 330 | DC300A, DS701, DN300 |
| SML-482 | 390 | SML 482 Base, SML-292 HD Premium |
| WS-28A | 290 | EKT DCD3011 |
| ZTE-B700V7 | 490 | ZTE B700 V7 |
The most common problems when setting up and operating IPTV
In some cases, even properly installed equipment may not work properly. This happens with any device. What problems may a Rostelecom client encounter:
- If the code of the set-top box and the TV matches, a conflict will occur with the set-top box receiver. In this case, the screen will not display the channels available according to the connected service, but regular television. The solution to the problem may be to change the set-top box code. To do this, the setup mode starts on the set-top box. You can call it by holding the OK button for a few seconds. Next, a code is selected in the range from 3020 to 3024.
- Another possible problem is outdated firmware. In this case, a screensaver with a rabbit appears on the screen.
- A blue screen appears if the video input is selected incorrectly.
- If you forget to pay your subscription fee on time, most channels will be disabled. You will have access to only five to ten channels, instead of the usual hundred or more.
Error codes for MTS set-top boxes
MTS receivers may display the following errors:
- E06-4. The SMART card is not installed correctly and the contacts are dirty. This error may also indicate that the card is faulty or belongs to another provider. Make sure the card is installed correctly, or carefully clean the contacts.
- E16-4. The error indicates that the funds in your subscriber account have been exhausted or that you have selected a TV channel to which you are not subscribed. Top up your balance or switch to a channel included in the package available to you.
- E33-4. The error indicates that the software installed on the device is out of date. Update the software version by going to the “System Settings” section and selecting “Software Update”.
- E120-4, E30-4, E19-4. The MTS receiver has been restarted and has not yet received the data used to decrypt TV channels. An error may also be displayed if the set-top box was turned off for an extended period of time (it was not used to watch MTS digital TV). Leave the device turned on for half an hour. It must be connected to a TV signal source (antenna).
Knowing how to connect and configure a digital set-top box from the MTS operator, you can easily use this modern device to watch television channels in high quality. There is no need to resort to the help of specialists; all the necessary procedures can be performed independently by any person, regardless of his knowledge in the field of technology. The main thing is to follow the step-by-step instructions given here.
Additional features
They affect the quality of use of the device and its price level. You need to figure out what you need and what you can refuse. It may turn out that a high price implies the presence of unnecessary functions, and a low price provides truncated functionality. What you can count on:
- Using a card reader;
- HDMI type connector for enhanced media clarity;
- LAN – input for simplified use of the Internet;
- The presence of an increased number of USB connectors for various purposes;
- Own browser for the Internet of high quality;
- Simultaneous viewing of two different video streams;
- Using a hard drive to record and save various video information;
- Functionality that allows you to listen to sound files and view photos;
- Simultaneous recording of high quality video information based on three different sources;
- Using the capabilities of the DVB-S2 format.
What gives?
In addition to the fact that firmware provides certain benefits, each user may face some risks. The most popular among the available models is IPTV RT-STB-HD Standart. In terms of functionality, it resembles the MAG-250. In this case, the subscriber is given the opportunity to return to the original settings. To do this, you need to get an answer on how to flash the Rostelecom set-top box. It is worth noting that you should use standard firmware from Infomir, as well as slightly modified ones. As practice shows, it is best to initially work with the standard one, only after that, if necessary, use the modified one.
It is immediately worth highlighting some of the advantages that the subscriber acquires when performing such manipulations:
- Supports DLNA as well as Wi-Fi.
- Watching television channels without any restrictions from the provider at the set tariff.
But we must not forget that in any case negative qualities will also appear. Here they are:
- Interactive services of Rostelecom will stop working. To operate them, you should use only original software.
That's where the cons end. There will be no more difficulties for the user.
Preparatory activities
In order to learn how to flash a Rostelecom set-top box, you should complete some preparatory steps. Almost always and every subscriber should be able to complete the flashing process. There are no difficulties in this. To perform the action you must:
- A computer with a wire used to connect a set-top box.
- The software itself. This could be mcast.exe, as well as a dhcp server.
All files must be in one folder and placed on drive C. Then the fun begins.
Step-by-step instruction
When you have confidence in performing actions independently, you can begin, following the sequence.
- The settings of the set-top box are reset to factory settings. For this, the “Reset” button is most often used. Otherwise, the work is performed through the menu, where the “Def.Settings” item is selected.
- The work switches to the computer, where after selecting “Run” in the main menu, enter ncpa.cpl and click OK.
- A list of network connections will be displayed, from which you need to select the required item. After this, work continues with the “Properties” section.
- When working with protocol version 4 (TCP/IPv4), in the property parameters, enter IP – 192.168.1.1, and instead of the subnet mask, write 255.255.255.0.
- Having launched the mcast.exe program via WIN + R, click on “Local Area Connection”. On the right side, click the “Select” button.
- The IP address values are entered - stream No. 1: 224.50.0.70:9000 and stream No. 2: 224.50.0.51:9001. Each thread must be running.
- After connecting to the set-top box and starting it, click Upgrade Tools, and then MC Upgrade.
After everything has loaded, you should reboot the device. Now the user can enjoy the functionality of the new media center.
The Rostelecom digital set-top box is a mandatory device for receiving broadcasts. According to the company's rules, subscribers can watch using the receiver only a certain number of channels, which is determined by the connected tariff package. The firmware of the Rostelecom set-top box is carried out to enable free viewing of all possible channels, as well as to increase the capabilities and functionality.