Many owners of TV from the Samsung brand cannot always quickly and easily understand the features of setting up a new device, especially when it comes to Samsung Smart TV, which is worth buying for all fans of modern technology. Don’t think that setting up a Samsung TV can cause a lot of problems - in fact, this process does not take much time, especially if you know exactly what needs to be done in each specific case. In any case, you need to use the instructions or find all the necessary information in advance, which will be the subject of this article.
Features of Samsung TV
The well-known company Samsung is deservedly considered one of the leading brands in the household appliances market.
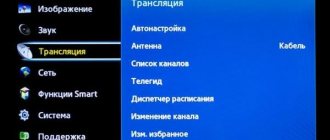
TVs from this company are considered one of the best, as confirmed by numerous users. The manufacturer strives to expand the available range of device models and every year releases a certain number of new options equipped with a full set of all necessary options. Each series has its own settings, and sometimes understanding them is not so easy. A modern LCD TV, for example, model 5500, with improved functionality, is equipped with additional options and can be configured quite easily. In fact, setting up an LCD TV from this brand rarely causes problems for users. You can set up such a TV as quickly as possible, even if you lose the instructions: all menu interface options are extremely clear and accurate on an intuitive level for everyone. For this, a remote control and an existing connection to the most standard antenna will be enough. So that the question of how to properly configure a Samsung TV does not confuse you, you should remember that all options are available in the Service menu, which can be accessed by pressing the Menu button on the remote control.
Any new TV owner wants to figure out how to set up channels on their new TV. This can be done through the Menu, where the default language is English, which you can change if you wish. The features of the Samsung TV allow you to do this without much effort.
It is better to change the language in advance, since the Russian-language interface will help you quickly get used to the functionality of the new TV.
LG - color settings
Also on LG TVs with webOS (almost all smart TVs from this manufacturer currently available on the market) we have the opportunity to save the changed settings of this mode for all sources, but to do this we need to call the parameter with this name, available in the picture settings menu .
Otherwise, changes will only apply to the currently active image source. In our opinion, this is the best solution.
Let's start changing colors with the Color element. After calling it, you will see a slider on the screen with which you can adjust the saturation of all colors. The closer the value is to zero, the more “black and white” (shades of gray) the image becomes. Selecting the second extreme means very saturated colors.
Color tones (as on Samsung TVs are a choice between red and green intensities) can be changed by selecting Tint from the menu. In the illustration above, the effect of shifting the hues to very red is clearly unacceptable, but a slight shift to green can improve the image.
It's also worth choosing Temp. colors, i.e. setting color temperature. After activating this option we will see on the screen a slider set by default to C20, which means a slightly cool white color.
Setting it to 0 is a neutral value (in fact, the color temperature of white at this value is still too high in most cases), and moving the slider to the left and increasing the W (warm) value displays warmer colors.
Interesting settings can be found by selecting from the menu: Advanced controls and then Preferred color. This will bring up a screen where you can adjust the shades of certain objects: skin, grass, and sky.
This is an intuitive solution because all you have to do is output an image containing one of these things to the TV (eg portrait, landscape with blue sky, etc.) and then change one of the available values.
How to set up channels
The correct way to set up should start with the channels, once installed, you can move on to the next steps. After installing a language more familiar to the Russian-speaking user, setting up the channel list will seem like a very simple task for everyone:
- you need to go to the menu;
- select settings item;
- then click on the button Search and configure channels;
- Choose manual method or automatic setting.
If you select the second option, all channels on the TV will be tuned in automatically. The user will only need to monitor the process while Samsung independently searches for all available channels and assigns names to them.
After finishing the search, you can rename certain channels using the standard menu. When the device has finished scanning all available bands, the first channel found will turn on automatically. Then the user will be able to view the entire list using the corresponding remote control buttons. If you are using an external device, you will need to adjust it yourself, especially if it is a satellite receiver. To do this, you will need to select a special source of information intended for TV by clicking on the Source button. You can learn more about setting up digital channels for Samsung TV in this article.
Philips TV 32 inches manual – 4apple – a look at Apple through the eyes of a Geek
Setting up a Philips TV of any modern model is a fairly simple procedure. Anyone can cope with it without any problems and without requiring outside help.
This article will be devoted to resolving this issue. General recommendations will also be given when choosing such a device.
In addition to this, the software of such multimedia systems will be briefly discussed.
Recommendations for selection
Modern televisions are quite complex devices. They are capable of receiving not only broadcast broadcasts, but also cable and satellite broadcasts.
That is, the presence of a universal tuner is a prerequisite when purchasing such a device. Also, its communications set should include ports such as HDMI, SCART, VGA, RCA, USB and 3.5 mm audio jacks.
This will allow you to connect any additional device to it.
Separately, it should be noted that the picture quality must be at least FullHD. Of course, there may be devices with an HD matrix on the shelves, but they are currently outdated.
In addition, modern requirements for such systems indicate that they must operate under the control of a special operating system. This allows you to significantly expand their capabilities. It is based on the previously stated recommendations that you need to choose a new TV.
Operating system. Its nuances
Setting up a Philips TV of any current modification must be carried out taking into account the system software installed on it. Conventionally, all such devices can be divided into two large groups.
One of them does not support the Smart TV function. In this case, the device allows you to view only channels. The second group of TVs has a special operating system and due to this, support for such an option as Smart TV is fully implemented.
Due to this, such household appliances turn into full-fledged multimedia entertainment systems. Such system software allows you to install additional programs with which you can play various multimedia content. Also, the software of such a system has a built-in browser.
Therefore, it is possible to browse various sites on the Internet.
Today, there are three types of main operating systems for such devices - Tizen, WEB OS and Android. uses the latter of these in its multimedia centers.
Again, it is important to understand that smartphones use an extended version of this operating system, while TVs use a “stripped-down” version. That is, some options in it are forcibly disabled at the software level.
For example, support for integrated cameras or instant messengers.
Equipment. Installation. Connection
The supply list for this group of devices usually includes the following:
- TV.
- A stand for it.
- Control panel with a set of batteries.
- User guide.
- Set of various advertising brochures.
- Warranty card.
Setting up a Philips TV starts with assembling it. At this stage, the device is removed from the transport box. Next, you need to install a support on it for mounting on a horizontal surface or hanging fasteners on a vertical wall. After that, we install it at the place of future use.
Then you need to bring communications and connect them. At this stage, the power cord is connected to the system power socket at one end, and the other to the outlet. Also, the cable with the television signal is connected to the ANT IN input. If necessary, a twisted pair cable is supplied, and with its help the multimedia center is switched to the Internet.
Search channels
Next, setting up digital channels on a Philips TV comes down to searching for available TV broadcasts. To do this, go to the device settings menu. Then select the “Channels” sub-item. In the list that opens, select “Autosearch”. Next, the device will start the automatic search procedure for TV programs.
Before this, you just need to set the type of input signal (analog, digital or analog-to-digital) and the type of equipment to be connected (local antenna, satellite or cable equipment). After this, the TV will scan the entire frequency range. At the end, you will need to save the previously received list of programs.
How to switch to digital using the remote control?
To switch to digital for modern Philips models (after 2011), the steps will be as follows:
- Take the remote control, find the “Menu” button on it and press it.
- Select “Install” there.
- Next, click “Search for channels” → “Reinstall”.
- In the window that appears, you need to select a country. Choose the one indicated on the sticker of your TV. For TV series **PFL*** choose Sweden.
- Now go to “Digital Mode” and select “DVB-C Cable”.
- Once the list appears, select manual mode for the transfer speed.
- A window will appear that may have different names, for example Network frequency/Baud rate/Symbol value. Enter the value there - 6.750.
- Select either “fast” (10 minutes) or “full” (from 30 minutes + more channels) frequency scan:
- For quick. Set the frequency difference to 8 MHz and click “Finish”.
- For complete. In network frequency mode, select "manual mode". Set QAM-256, frequency -298.00. Then run the search and then click “Finish”.
Now let’s talk about how to switch to digital for owners of old Philips models (before 2011). The actions will be as follows:
- Press the “Home” button on the remote control (it is usually indicated by a house) and go to “Configuration” → “Installation” → “OK”.
- In the additional menu that will immediately appear, select the “Channel setup” button → “Automatic settings” → “Start”.
- Then, in order to find and install channels, click “Reinstall”.
- Select your country in the same way as for modern models. It is better, of course, to choose a country in Western Europe.
- Click on “Digital Mode” and select “Cable” as the signal source.
- Next, select “Automatic” channel search and then click “Start” and when the settings are complete, click “Finish”.
If you are asked for a password when performing any actions, enter a combination of numbers such as 0000, 1111 or 1234.
Selecting applications. Their installation
After setting up your network connection, you can install additional programs. To do this, in the main menu, which opens with the Home button on the remote control, select the Play Market item.
Next, you can use an existing Google account or create a new one. After this, a menu will open with a set of available applications.
The user then installs applications at his own discretion.
It is recommended to choose ivi and Tvigle. These resources have a certain set of free content.
Source: https://TwNews.ru/ustrojstva/instrukciya-po-ekspluatacii-televizora-filips.html
Image Adjustment
When it comes to how to set up a Samsung TV, it's worth paying attention to the image. This can be done in the simplest way using the remote control. Often the picture on the screen may seem too dark or light - in order to get the desired color, you need to go to the color settings. You will need to open the Service Menu using the button indicated above and select the Image section, then go to the menu with the appropriate parameters.
- Using Contrast, you can set parameters for the relationship between the brightest and darkest images.
- Clarity helps you adjust the sharpness of the image.
- The Brightness command allows you to make the picture lighter or noticeably darken it.
- An option called Color helps you make colors richer or lighter, and also switches to black and white mode.
A correctly configured color rendering mode is very important, since the perception of the image depends on this.
There is also an additional and very convenient option that allows you to reset the image completely if you cannot fix it after changing several settings modes.
Samsung - Color Settings
Photo komputerswiat.plTV settings
After enabling the expert settings menu, we have access to a much richer set of control parameters. Among the items displayed in this menu, you will find an option called Apply Picture Settings. I mention this now because it specifies that our changes will only be applied to the image displayed from the currently used source, or they will be assigned to everyone. A much better solution is to set the image for each source independently.
For example, when we select the Color option in the Expert Menu, we can influence the color saturation on the screen. The manufacturer's default is 25. A value of 0 will make the image "black and white" (that is, grayscale), and increasing it (maximum value of 50) will make the colors much more intense. If you are annoyed by the "postcard" saturated colors in the default settings, you can try reducing this setting a little.
Another element that affects colors is hue (Z/C), which is a function that adjusts the intensity (not to be confused with saturation) of green or red. The default setting is a balance between these shades. By increasing the green tint value, we will make the image a little easier on the eye.
We already had the saturation of colors and shades, it’s time to tint. By selecting the Color Tone item in the expert menu, we can influence whether the image will be cool (high white color temperature) or warm. Samsung provides four preset settings for this setting, it's worth experimenting with, I'm just guessing warmer tones are more natural.
There is one more feature worth mentioning that affects color, but remember that it is only available when the TV is first switched to Cinema mode. We can then select 20-point color settings from the Expert Settings menu. This allows you to influence each RGB component (red, green and blue). The “Interval” item allows you to specify the accuracy of the change. If you go too far, you can restore the default settings at any time by selecting “Reset”
In other picture modes (except Cinema), individual colors can be influenced by selecting Color Space Settings from the Expert Settings menu. The color palette should not be changed because the default value (DCI-P3) is optimal and corresponds to the cinematic color space. Instead, we can influence individual components (primary colors: red, green and blue).
Features of Samsung TVs
The popular South Korean brand regularly releases new models of television equipment, which differ not only in screen diagonal, price, but also in the range of functionality. Analyzing consumer reviews, we can come to the conclusion that absolutely every user can set up a Samsung TV, but there are still some characteristic features, and of course, they need to be taken into account.
The company constantly makes every effort to expand its model range, annually releasing several new television devices. Each series has its own characteristic features regarding the process of setting basic parameters. Sometimes this can be difficult.
For example, 6 series TVs with an LED matrix are mainly equipped with a Smart TV function. Potential buyers who have not previously used “smart” technology do not want to set up such devices themselves, so they pay exorbitant amounts of money for the services of specialists. This is not the wisest decision, since the operating system has a Russian language, therefore, to set up the equipment, you just need to follow the step-by-step tips that pop up on the screen.
What to do if you have lost the instructions? Manufacturers are well aware that only a small part of consumers continue to use traditional paper instructions, so they try to simplify the interface as much as possible and make it intuitive.
You won't find any overly complex or confusing commands in the menu. Simply connect your TV to the network and turn it on using the remote control. You can tune in free TV channels with a connection to the most ordinary antenna.
Of course, devices released by Samsung have their own “tricks” that distinguish them from other brands, but believe me, they mostly relate to additional functionality, so they won’t be a big problem.
Sound adjustment
Easily customizable and properly installed, the sound also makes as much of a difference as the picture. To do this, you will also need to go to the Service menu, to the Settings section and select Sound. It is in this section that you can choose the quality and method of sound transmission.
It is also worth noting that many modern models are equipped with additional options, such as an equalizer, Dolby function and surround sound mode. The speaker system of each Samsung TV model has individual features that are worth paying attention to, since the sound quality and overall impression of it will depend on their correct settings. You also need to know how to properly configure the Smart TV interface from Samsung - access to all provided multimedia functions, in particular, connection to the Internet, will depend on this.
Setting up channels
Of course, immediately after connecting the TV, users have the question of how to properly set up the reception of TV channels? The predominantly Russian-language interface is selected by default, so you just need to follow simple steps in accordance with this step-by-step algorithm:
- Open the main menu by pressing the corresponding button on the remote control.
- Go to the basic settings section.
- Click on the “Search and configure TV channels” section.
- Choose one of two channel search methods - manual or automatic.
- Wait until your TV device finds channels, and then save the programs to your Samsung TV.
If the user begins to tune in to television broadcasting automatically, then, in fact, the whole process will take a few minutes. The device will find available channels and then assign them numerical values, which, by the way, can be changed later.
Immediately after setting up your Samsung TV, the first channel in the list will turn on automatically. To view the full list of broadcasts, use the corresponding buttons on the remote control.
Many people do not know how to connect and configure an external receiver, especially if it is a satellite set-top box. It’s actually not difficult to do this either, since most of the interface of modern receivers is also translated into Russian and is as simple and understandable as possible.
Now let's talk about the features of automatic and manual search for channels that are included in free digital TV multiplexes.
Auto mode
It is the auto-tuning function that is the reason that many experts define Samsung TV equipment as the most “smart” among all those on the market. Each user will be able to automatically configure TV programs and arrange them alphabetically.
First you need to select the signal source: antenna, cable, satellite. Some Smart TV models offer the user the most popular providers: NTV+, Telekarta, Rostelecom, Tricolor. If you want to use the services of the listed operators, the channels will be found automatically and arranged according to the traditional order.
After auto-tuning is completed, select programs from a specific provider. They will be arranged in accordance with the settings of the television broadcast operator. To change the position of channels, use the “Move” function:
- Press the Main Menu button on the remote control.
- Then select the “Broadcast” command, it is represented as a white satellite dish icon.
- Scroll down until we come across the “Change TV channel number” command, activate it by selecting “Enable”.
- To move on to the next step, return to the “Home” tab, and then again open the “Broadcasts” section, click to the right and select the “Edit” command.
- Select the channel whose location you would like to change, select it with a checkmark, and then click on “Change number”.
You can start automatic search without the remote control. If you are using an LCD Smart TV, then you can enable auto-tuning using a keyboard, mouse, or a regular smartphone. Regular TVs can be configured through navigation buttons located on the front panel of the device.
Manual mode
To reconfigure TV channels on an old Samsung TV model manually, without calling a technician, you need to take into account several extremely important nuances:
- old models differ from new ones in a complex and incomprehensible interface, which causes problems;
- outdated TVs are not equipped with an automatic tuning function;
- Old Samsung TVs are not capable of broadcasting images in high definition.
Manual configuration involves changing many important basic parameters. Sometimes this scares off users, although in fact there is nothing complicated about it, you just need to set the frequency correctly, you definitely won’t be able to break the TV.
How to set up your TV manually? Follow the simple step-by-step instructions:
- Open the main menu, and then go to the “Antenna” section.
- Select “Manual setup” – “Set up digital TV channels”.
- Click on “Create”, which will open a window with additional indicators: purity, module, transmission.
- First you need to set the following parameters: 170000 kHz, 128 QAM and 6900 KS/s.
- The TV will tune in for a certain amount of time, searching for channels. The images will change and frames of television programs will begin to appear.
- After finishing, you need to click on the “Save” button, after which a window will appear for adjusting the frequency, module and transmission, leave the last parameters unchanged, but specify the new frequency - 178000 kHz, and start the search again.
Using the same principle, you can continue searching for TV channels, constantly adding 8000 kHz to the frequency. Experiments of this kind can be carried out up to 226,000.
In this way, the quality of sound and picture can also be significantly improved, making them very clear. Go to the menu and select the “Image” section, and then customize the clarity, brightness, contrast and other parameters.
You can also sort channels manually. To do this, open the main menu, and then go to the “Broadcast” section. Check the boxes next to the programs you need. Here you can add your favorite channels to favorites or save the current arrangement.
Setting up the Internet via a wired connection
Smart TVs can be connected to the Internet either wired or wireless. In the case of using a wire, two options are possible.
- Direct connection. The provider cable is directly inserted into the TV. It only works if you don’t need to configure it to access the network, that is, you don’t need to enter a login, password or server address.
- Connection via router. A router is used as an intermediate link. This connection is more convenient and is suitable for any network.
The setup procedure is given for TV series N, M, Q, LS, as they are the most relevant and widespread on the market.
- The cable from the provider or from the router must be inserted into the LAN connector on the back of the TV.
- On the remote control, press the “home” button (the “house” icon) and enter the device settings.
- In the “general” section, set “network” and “open network settings”.
- Next, you should specify the type of network, in this case it is cable.
- An automatic connection will occur, after a window with the corresponding message appears, click on “ok”, and you can start using the smart functions of the TV.
Advice! If the connection does not occur, then you should reboot the router, first disconnecting from the power supply, and also reconnect the cables. If this does not help, then you should contact your provider.
Editing and deleting
To remove unnecessary channels, add new ones, or sort them, placing your favorites at the top of the list, use the “Change” option.
How to set up channels? To adjust TV channels, follow the simple step-by-step instructions:
- Open the menu, select the “Broadcast” or “Live” section.
- Press the remote control to the right.
- Select the Change option.
- Select the checkboxes for the channels that will be deleted.
- To move TV channels, use the arrows on the remote control.
As you can see, adjusting the television broadcast grid is extremely simple. It is enough just to follow the algorithm described earlier.
Particular attention should be paid to the fact that when moving a channel that has a name, you will simply swap it with others. For example, if you want to move TNT from position 20 to position 2, where STS is already located, then there will be no shift, they will simply exchange positions.
However, if the TV program does not have a name, then there will be a shift in a certain direction of the entire grid. Sometimes the set position may be confused, so you have to periodically repeat this procedure again and again.
Setting up picture and sound
When it comes to how to adjust the picture or adjust the volume, many users face problems. This is actually very easy to do. You will need a remote control.
Often the picture is too dark or light; to adjust the optimal color rendering, go to the appropriate settings. Open the service menu by pressing the remote control button, and then go to the “Image” section.
- By changing the contrast, the user adjusts the ratio of dark and light tones;
- clarity allows you to get rid of the blur effect, adjusts the sharpness of the image;
- adjusting the brightness will make the picture darker or lighter depending on the situation;
- Color adjustment allows you to make the image as saturated as possible.
Correctly adjusted color reproduction will ensure the transmission of the highest quality image. Samsung TVs also allow for in-depth image adjustments, but this command is more suitable for advanced users.
Also, a few words need to be said about how the sound is configured. Believe me, this parameter affects viewing no less than adjusting the image. Go to the service menu, namely the “Settings” tab, and then select the “Sound” subsection, here you need to select “Quality and method of sound transmission”.
Newer models of television equipment are equipped with additional functionality for adjusting sound parameters. Firstly, we should note the equalizer, Dolby and surround sound mode.
The acoustic system of absolutely all TV models has individual characteristics that, of course, need to be taken into account in order to properly configure the sound. Each parameter in the final score affects the overall sound.
Of course, Smart TV models are equipped with a more detailed system of sound and image settings, so the user will be able to adjust the operation of the television equipment to suit themselves. When setting up a picture, open the image and compare how much the template you created differs from the default settings.
That's all. We looked at all the intricacies of Samsung TV settings and gave specific recommendations that will allow you to choose the optimal settings.
Setting up a Philips TV: step-by-step instructions, tips and tricks
Setting up a Philips TV of any modern model is a fairly simple procedure. Anyone can cope with it without any problems and without requiring outside help.
This article will be devoted to resolving this issue. General recommendations will also be given when choosing such a device.
In addition to this, the software of such multimedia systems will be briefly discussed.
Software initialization
At the next stage, setting up the Philips TV image comes down to setting the operating system parameters.
After turning on the device, a request window will be displayed in which its location, time and date are specified.
If any of these parameters are not set correctly, some options may be disabled at the software level. Also at this stage you need to select the most convenient interface language.
Network connection
This completes the channel setup on your Philips TV. Now you need to set the network connection parameters. To do this, go to the settings menu again and select the “Network connection” section.
Next, select the method of switching to the World Wide Web. This could be a twisted pair cable or a Wi-Fi transmitter. It is also necessary to indicate the characteristics of the network connection (address, mask, login, password).
Then you need to save your changes to the multimedia center software.
Reset. Its features
Now let's figure out how to reset a Philips TV. First, you need to find out the special password in the operating instructions and remember it.
Then go to the device settings menu and select “General”. Next, moving through its items, you need to find “Reset settings” and go into it. After this, the multimedia system will ask you to enter a password.
We enter a set of numbers from the user manual and confirm the action.
Then within 10-15 minutes the device will reset the software. At the next stage, you need to repeat setting up the software, network connection and searching for channels that were previously described in detail.
Conclusion
In this material, the algorithm for setting up a Philips TV was discussed. Moreover, both without support for Smart TV technology and with this option. This is a very simple operation.
Therefore, any owner of such a device can handle it.
Usually, new owners of such new multimedia systems try to resort to the help of specialists, but everything that has been said previously indicates that they can cope without their participation.
Source: https://FB.ru/article/439173/nastroyka-televizora-philips-poshagovaya-instruktsiya-sovetyi-i-rekomendatsii
How to adjust TV pictures
The image on the device consists of five parameters:
- Size.
- Brightness.
- Contrast.
- Color.
- Focus.
All these components are necessary to adjust the basic image if the user does not know how to work with settings at a special level. Professional setup is as follows:
- Test ones. They contain test zones.
- Required for customization at a special level.
- Taken from real life.
Depending on model
The basic settings do not differ in different models. The menu will still have 5 components, and the method for setting them up is the same. We just need to go to the menu, select settings and set the required values. The only difference can be in the interface. But the basic appearance is the same (black and white stripes for brightness, gray and white for contrast).
Test pictures will differ. Photos are of two types:
- Plain. They are needed to check that the pixels on the monitor are working correctly.
- Colored. To check that the color stripes are working correctly.
Attention! Depending on the model, the image format most often differs. For example, some devices require Full HD, and some require Ultra HD 4K.
What parameters to set when setting up
There are common mistakes when setting up a picture. If they are allowed, the picture will be of poor quality. Errors concern all five components of the pictures. Therefore, we set the following parameters:
- Set the image format or size. Correctly place two whole triangles. It is wrong if one of the corners is cut off.
- Brightness. Consists of several black cells. The correct option is if all cells have a different tone, from black to white. It's wrong if it's the same.
- Contrast. Consists of several gray cells. The correct option is if all the gray cells are of different colors from gray to white. It's wrong if it's the same.
- Color or saturation. The picture will be in the form of human skin. Several shades will be presented, choose the one that suits you. It is wrong for a person’s skin to be an unnatural color, for example, red.
- Focus. It is responsible for the sharpness and clarity of the image. It is correct if we see all the lines as accurately as possible. It is wrong if we only see a few lines.
Connection
Before connecting the TV receiver, you need to study the instructions.
After studying the user manual, it will become clear that this process is simple.
If you have cable Internet, then you need to connect the provider's cable to a special socket. If you are using a wireless network, it will be enough to connect it in the settings.
After connecting, you need to turn on the TV using the remote control and accept the user agreement from.
Adjusting the TV picture: step by step
The easiest way is to go to settings. To do this, press the corresponding button on the remote control. A menu will appear with a list of all components. We move the sliders, setting the values we need.
But there are ways to configure components at a professional level. For example:
- For brightness, download the “Pluge pattern” image (use the Internet). We will have a vertical stripe of several cells running in a row. The left cell will be completely black. We need to set the image in such a way that all the cells are of different shades (starting with black, getting brighter until it turns out that the right one is completely white). It is important to clearly see the difference between all cells. Special disks are also sold to set the brightness.
- The contrast is adjusted accordingly, only the left cell is completely gray. We adjust it so that in each subsequent cell the gray tint becomes whiter. The last cell is completely white. It is necessary that all cells have different tones.
- To determine saturation, you will need a high-quality photo. It is necessary to compare the picture on the device and in the photo, making it identical. We choose several different images (necessarily photos of nature, since they have a lot of green flowers). This shade is the most difficult to perceive, so it will be very difficult to expose it to the eye. In addition to pictures of nature, it is necessary to have a high-quality photo of a person (for comparisons of skin tones).
- To set the focus, download the “Sharpness pattern” application. Using this program, we adjust the clarity. First you need to choose a comfortable location in order to see all the pictures on the TV. Launch "Sharpness pattern". We build clarity in such a way that everything is visible, even the thinnest lines.
To install formats, you are unlikely to need special programs. The picture sizes do not provide for settings at a special level, rather standard ones are sufficient.
Reference! The difference between a regular setting and a professional one is that you can adjust all the image parameters, taking into account the smallest details. The picture will become better quality.
There are many programs on the Internet that will help you set up pictures on your device. Download the appropriate ones and install them on your TV.
LG - Picture Modes
Also on LG TVs, you can quickly change image parameters, its brightness, dynamics, colors, shades or color temperature by selecting one of several image modes in the TV menu.
We have here, among other things, modes such as: Vivid, Eco, HDR Effect, Cinema, Sports, Standard, Expert Technicolor or isf Expert (for light and dark rooms). There are plenty to choose from.
Vivid and Sport modes are definitely the brightest with oversaturated colors and very high color temperatures. They are best for watching football matches or other sporting events.
For films, Technicolor Expert and isf Expert modes are definitely the best choice. The latter is available in two options - for light and dark rooms (you can see a clear difference in image brightness). If we are not satisfied with the modifications that consist only of changing the mode, the TV will allow us much more.
After bringing up the main settings menu (also in the case of LG, the Picture category is activated by default), select and tap Picture Mode Settings. Remember that the settings are independent for each mode. It's best to make changes in Standard mode.
Contrast
One of the most important characteristics of a TV when choosing is the contrast value of the image on the TV screen. If you choose a TV based on picture quality, be sure to pay attention to the contrast value of different models.
By definition, contrast is the ratio of the brightness at the lightest point on the screen to the brightness at the darkest point on the screen. In other words, we divide the white level by the black level and get contrast. Only the values of these levels can only be obtained through a special test of the TV using specialized instruments. Therefore, the average user has to trust either the manufacturers or various reviews on sites where TVs are tested. Who to trust more and how to check the contrast, and we’ll talk further.
We said that contrast is one of the most important characteristics of a TV. Therefore, manufacturers try to maximize this value to improve sales. The manufacturer can measure the brightness of a pixel in the laboratory when applying a signal that is never used in real conditions. Then measure the brightness of this pixel in the absence of a signal, which is impossible during normal viewing. After this, the contrast value is calculated. And the values measured under such conditions are included in the product passport. Because of this, we see today that the contrast values of many TVs are simply off the charts. All this is possible because there are no mandatory rules in the world for measuring the contrast of displays.
high contrast normal contrast insufficient contrast
They separate static (natural) and dynamic contrast. Natural contrast depends only on the capabilities of the display, while dynamic contrast is obtained as a result of the use of additional technologies.
Static contrast is measured by the brightness of points in one scene (brightest and darkest). When measuring dynamic contrast, technologies are used to increase it. When playing a video, the TV itself adjusts the contrast depending on the scene currently shown on the screen. That is, the backlight in the LCD matrix is adjusted. When showing a bright scene, the luminous flux from the backlight increases. And when the scene changes to dark (night, dark room, etc.), then the backlight begins to reduce its luminous flux. It turns out that on bright scenes, due to the increase in light from the backlight, the black level is poor, and on dark scenes, the black level is good, but the luminous flux will decrease. This is hard for us to notice because in bright scenes even backlit black appears completely black. And in dark scenes, the brightness of light objects seems sufficient. This is a feature of human vision.
This backlight control scheme increases contrast, although not as much as the manufacturers claim. And indeed, many TVs with dynamic contrast have superior image quality to devices that do not have such an adjustment scheme.
But still, displays with high natural contrast will be valued higher. This can be demonstrated by displaying a picture of white text on a black background. On a screen with high static contrast, the text will indeed be white and the background will be black. But a display with high dynamic contrast, if it shows a black background, then the letters will already be gray. Therefore, when playing regular video on a screen with increased natural contrast, the picture will be as close as possible to the real image. For example, there will be bright street lights against the evening sky. And against the background of a bright daytime sky, a black car will really be black. This is the image we see in cinemas.
The image was as real as possible, in terms of contrast, on the screens of CRT televisions. But with the advent of the HDTV era, these television receivers gave up their place in the market to other devices. Today, high natural contrast values are achieved using LCOS home projectors. The first place among these devices is occupied by JVC devices with their version of D-ILA. Next we can mention Sony with SXRD technology. In third place you can already put plasma TVs.
LCD TV manufacturers have introduced several technologies in recent years to achieve the level of contrast that is possible in other models. The best results in increasing contrast are achieved by using LED backlighting with local dimming. In this case, it is impossible to adjust the backlight of each pixel and each LED is not controlled individually, but the result is still good. But manufacturers have abandoned the most effective type of backlight, when LEDs are located over the entire screen area. Such production turned out to be expensive. Today, so-called side lighting is mainly used. Here the LEDs are located at the top and bottom. Local dimming schemes have also been developed for side lighting. TVs with such backlighting show fairly good results in terms of contrast.
When choosing a TV in a store, it is difficult to evaluate the quality of the display contrast. External bright lighting interferes; screens can have different coatings: anti-glare or glossy. The passport does not always contain the true contrast value, because manufacturers measure it in laboratories and by applying special signals to the screen. Even after reading several reviews on the Internet, it is not always clear what the real contrast value is. After all, everyone measures it in their own way.
There are several methods for measuring contrast. First, a black field is fed to the input and the brightness is measured, and then a white field is applied and the brightness is measured. The result is good contrast, but during actual viewing there will never be a completely white or completely black picture. At the same time, when displaying a regular video signal on the TV, video processing is turned on, which also makes its own changes. More accurate readings are given by the ANSI test, when a checkerboard field with white and black fields is shown on the screen. This is more consistent with the normal image. But in this case, the white fields will affect the measurement of the brightness value of the black fields. So there is no single correct method for measuring contrast.
So the recommendations for choosing a TV with good contrast remain the same. If you'll mostly be watching movies in a darkened room, then plasma is your best bet. In a lit room, an LCD TV with LED backlight will show good results due to its high brightness. Between these models you can put an LCD TV if there is a reserve in light output. And the main thing you need to remember is that any TV needs to be properly configured. Adjust the brightness and contrast of the device correctly to obtain the highest quality image.
Additionally:
- All TV specifications
- How to choose a diagonal
- What TV screen resolution to choose
Best Picture Settings for Samsung 4K TV
10.11.2018
Samsung 4K UHD TVs offer good video quality, but there are additional settings that can further improve picture quality for TV, sports, movies and games. Here are the best picture settings for a 4K Samsung TV.
The following applies to most Samsung LED/LCD TVs and QLED TVs. OSD appearance, labels, and options may vary depending on model series and year of manufacture.
Samsung
Before you start
Before using the picture settings on your Samsung 4K UHD TV for the best viewing experience, please check the following:
- Placement on TV : The TV should be positioned so that you can look directly at it. It should not be placed where the user must look up, down, or at an angle to the screen. The further away from the center you view at an angle, the brighter the colors will be and the contrast will decrease.
- Room lighting . Light from windows or lamps on the side and front of the TV will reflect off the screen. Even on models that may have an anti-glare or anti-glare screen coating, the image will not look very good if light hits the screen. Models with curved screens further distort reflections. Lights that can be dimmed or turned off, or curtains and drapes that can be drawn, help improve the TV picture.
- Select home mode for your TV . During initial setup, you may be asked to select Home or Retail. Home or Retail" or "Store Demo Mode". (Store demo mode). The Retail/Storage demo mode is set to the highest picture settings, resulting in an overly bright image with saturated colors and contrast that is better for car showrooms.
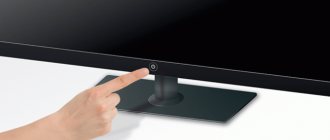
You can also access your Samsung TV's home mode through your TV's system settings by following these steps.
- On Samsung TV Smart Hub mediator Settings". .
- In settings select System .
- In the system, select » Expert settings". .
- In the expert settings, select » How to use" and select » Home mode." .
Smart Picture Settings
If you have a Samsung 4K QLED TV, Frame or Serif, there may be two options in the General Settings menu that automatically adjust picture quality.
Smart mode
The TV is capable of recognizing and analyzing room, content and usage patterns to provide you with the best viewing experience. Smart mode can be turned on or off.
Adaptive Brightness
The TV automatically adjusts its LED backlighting using ambient light sensors that analyze the light level in the room.
Adaptive Brightness may not be supported by some modes or applications, such as Environment and Game modes (discussed below).
Picture mode presets
In addition to Smart Modes (or if your TV doesn't support them), all 4K Samsung TVs offer additional picture mode presets that can improve picture quality for both video and film sources.
Picture presets may differ depending on the Samsung TV model and the selected input source (HDMI or analogue).
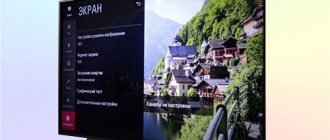
- As shown above, select Settings. in the Smart Center.
- In settings select Photo .
- Under Image, select Picture Mode .
- Samsung has preset shooting modes:
- Dynamic : Uses higher levels of contrast, brightness and sharpness. This setting should be avoided, but if used, it is best used in natural light or bright rooms.
- Standard : Provides an acceptable viewing experience for video and video sources and is usually turned on when you first turn on the TV. It is suitable for most viewing conditions and also meets EnergyStar requirements.
- Natural : A more discreet appearance than the Dynamic and Standard modes described above, reducing eye fatigue.
- Movie : This preset provides the appropriate level of brightness, contrast, and color temperature for movies. It is darker than Dynamic or Standard and provides a warmer color temperature. This is the best picture preset for use in darkened cinema environments. Video mode also disables any additional processing, so movies retain a cinematic sense of movement.
Samsung Special Viewing Modes
Samsung offers special viewing modes on its 4K UHD TVs.
From the Picture Settings menu, select Special Viewing Mode .
The following options are available in the Special View category:
- Sports Mode This setting provides the best picture preset for sports and other fast-moving content. Displays a brighter image with a lower color temperature and enables faster motion response. Sports mode also activates the stadium sound mode.
- Game Mode : This mode is the best picture setting option for gamers as it puts the TV into low latency mode. However, there may be slight degradation in video graphics quality. A connected game controller or console is required to activate Game Mode. When Game Mode is enabled, you may need to disconnect your game console from the TV to switch to other devices connected to the TV.
- HDR+ mode : Available only on 4K TV models that support HDR. HDR-encoded content from compatible sources (such as Ultra HD Blu-ray discs and selected streaming content) automatically activates the HDR feature on the TV. When HDR+ is turned on, the TV adjusts the brightness and contrast of HDR-encoded content to make objects appear clearer.
HDR+ also allows you to add an HDR effect to SDR material. Because this process requires conversion, it is not as accurate as real HDR material. The result may be blurry or uneven depending on the scene. If you find that the HDR+ setting is not effective, turn it off.
What is TV contrast, its types
As such, no units have been invented to measure this characteristic. It is expressed in relation to the lightest point (white) to the darkest (black). That is, this value shows how many times the brightest point on the switched-on screen is brighter than the darkest one. The 1500:1 indicator indicates to buyers that this TV model transmits white color one and a half thousand times brighter than black.
You are unlikely to determine the contrast level by eye in a store; its exact parameters can be seen in the device’s data sheet or checked with the seller. To test screen contrast, special high-precision instruments are used, but keep in mind that for inexpensive fake TV models this characteristic may not be tested and is indicated arbitrarily.
REFERENCE! A contrast ratio higher than 30,000:1 is not perceived by the human eye, so there is no point in buying an expensive model with this indicator in pursuit of image quality.
There are 2 types of contrast:
- Natural (or static). Measured at a specific moment, as if you pressed a freeze frame and compared the brightest and darkest colors in the same display picture.
- Dynamic (DC). Measured in motion. During the film screening, the TV independently regulates the flow of light, reflecting dark and light points, focusing on the features of the changing images on the screen. Smart modern TVs analyze the plot and adapt to it, increasing or decreasing the brightness of the backlight at the right time. When showing a sunny day, the light flux dims, and when showing a night landscape, on the contrary, it increases.
Controlling the backlight in modern LCDs allows you to increase DC, but not as noticeably as advertised in TV advertising. In terms of image quality, such TVs are superior to simple models that do not have such a function.
But still, screens with high static contrast are valued higher for picture quality. For comparison, a picture is given - white letters on a black background, with a high level of natural contrast, the letters and the background are the colors that should be in real life, that is, white and black. And on displays that have high dynamic performance, the letters will turn gray. It follows from this that video recording on a TV with a high static contrast ratio will more accurately convey the image with a minimum of halftones. You can appreciate all the advantages of natural color contrast while watching a film in a cinema.
The closest thing to a real vision of the world in terms of contrast was at one time the image of picture tubes of old tube televisions. In the modern world, the palm in natural transmission of the relationship between white and black has been divided among themselves:
- The leader is JVC (D-ILA technology).
- SONY brand devices (SXRD technology).
- New generation TVs with plasma screens.
In recent years, LCD TVs have used LED backlighting with local dimming. This gives good results in increasing the contrast ratio of screens. Due to high costs, the backlight is not full, but side, but this is enough. LED monitors have matrix backlighting, which significantly increases contrast. Therefore, the picture of plasma panels is much brighter and richer than that of their LCD counterparts.
What is TV calibration and why is it needed?
Every frame of the film or scene you watch is planned in detail by the people working to create the material. The authors carefully select, among other things, colors, contrast, brightness and tonal range, so that the scene presents the most natural visual effect. TV calibration sets the picture attributes as close as possible to what the creators intended.
TV calibration in the store
Professional TV calibration is not performed on devices intended for mass sale. The reason for this is the cost of adjusting the settings - this will significantly increase the cost of the device. Of course, the image of the receiver that leaves the production line is usually completely satisfactory for the average user (it has the so-called factory settings).
However, if you want the picture to be the way the creators intended it to be, professional TV calibration is the only solution .
Optimization can be entrusted to a professional, but you should know that there is another option - to adjust the image on your TV yourself using built-in functions and modes.
What do the indicators 1200, 3000, 5000 mean?
1200 – low contrast, which is usually what budget TV models have. This means that the darkest area of the picture on the screen will be 1200 times different in brightness from the brightest area. The numbers 3000 and 5000 reflect the same thing. But LCD screens with such contrast ratios show a better picture than the first model.
REFERENCE! The indicator 5000 and above has a TV with an average price. For expensive models, indicators start from 20,000:1 and above. But keep in mind that unrealistically high numbers are a publicity stunt.
A clear answer to the question: “Which contrast is better?” No. The perception of the image depends on the settings and conditions in which you are going to watch your new TV. Therefore, first of all, configure the device for yourself - the factory settings are not suitable for everyone.
Keep in mind that depending on what time of day you like to watch TV, you can choose different backlight levels. For housewives who watch TV series and shows during the day, an LCD screen with zonal backlighting is sufficient. But lovers of gothic horror films at night will need a screen with increased contrast to clearly convey dark landscapes.