In this article, we will discuss the steps to root any Dexp device using Magisk. If you are using any of the DexP devices, this guide is for you. As we all know, to customize or change system settings, your Android device must be rooted first.
Because most smartphone OEMs don't provide rooting access or too many customization options out of the box. Now let's take a look at a brief description of rooting smartphones and the pros and cons.
What is smartphone rooting?
Rooting is a process that allows users of smartphones, tablets and other devices running the Android mobile OS (operating system) to gain privileged control over Android subsystems. Android mainly uses the Linux kernel. Thus, rooting an Android device offers administrative access or superuser rights.
Advantages:
Root gives permission to customize or remove system applications and settings, run some specialized applications, install mods or also helps to flash a custom ROM. It offers system UI changes, full kernel control, full application control, backup, restore, malware removal, etc.
Flaws:
- Getting root access may brick your device.
- Your device's warranty may be void.
- You may not receive official OTA updates on a rooted device. Be sure to check with the device manufacturer.
Root rights
If you want to get root access, you can use the universal program Rookthp Pro 3.2 , download here . Instructions for using the program can be found here. We can also recommend ZYKUroot version 2.2 among the universal ones. You can find out information about it at zykuroot.info We won’t talk about more popular programs, the same Kingo and Framaroot are always popular, although they are losing ground a little
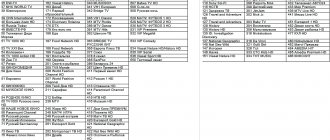
List of supported devices:
- DEXP A240
- Aircraft DEXP 7594 3G
- DEXP Ursus S380
- DEXP AL240
- DEXP Ursus VA110
- DEXP Ursus N310 4G
- DEXP Ursus S180
- DEXP B260
- DEXP GS155
- DEXP Ursus N570 4G
- DEXP Ursus N470
- DEXP Ursus N370
- DEXP Ursus S470 MIX
- DEXP Ursus S280
- DEXP Ursus VA170
- DEXP Ursus VA210
- DEXP Ursus P410
- DEXP Ursus N210
- DEXP B340
- DEXP GS150
- DEXP AS260
- DEXP Ursus M210
- DEXP G253
- DEXP B355
- DEXP BS155
- DEXP Ursus M110
- DEXP AL140
- DEXP Ursus P380i
- DEXP GL355
- DEXP G355
- DEXP B245
- DEXP Ursus S370
- DEXP Ursus L170
- DEXP Z250
- DEXP BL150
- DEXP Z455
- DEXP Ursus L180
- DEXP Ursus L110
- DEXP B255
- DEXP T155
- DEXP BL250
- DEXP B450
- DEXP G255
- DEXP A150
- DEXP BS650
- DEXP BS550
- DEXP Z355
- DEXP A140
- DEXP AS160
- DEXP Ixion XL 150 Abakan
- DEXP Ursus H170
- DEXP GL255
- DEXP G250
- DEXP B350
- DEXP Ixion B140
- DEXP Ixion B145
- DEXP Ursus S110
- DEXP BS150
- DEXP Ixion Z150
- DEXP B160
- DEXP Ursus P380
- DEXP Ursus S270
- DEXP Ixion Z255
- DEXP Ixion G155
- DEXP Ixion G150
- DEXP Ixion ML450 Super Force
- DEXP Ixion ML245 Electron
- DEXP Ursus P310
- DEXP Ursus S190
- DEXP Ixion Z155
- Iron DEXP Ixion ES850
- DEXP Ixion M850
- DEXP Ixion XL 155
- DEXP Ixion ML350 Force Pro
- DEXP Ixion M355 Mercury
- DEXP Ixion ES1050
- DEXP element Ixion MS255
- Iron DEXP Ixion MS650 Pro
- DEXP Ixion ES950 Hipe
- DEXP Ixion M750 Surf
- DEXP Ixion M545
- DEXP Ixion EL450 Force
- DEXP Ixion M340 Steel
- DEXP Ixion X150 Metal
- DEXP Ixion M445 Onyx 2
- DEXP Ixion ES355 Ice
- DEXP Ixion E345 Jet
- DEXP Ixion ES750 Connect
- DEXP Ixion MS550
- DEXP Ixion M240 Strike 3 Pro
- DEXP Ixion E245 Evo 2
- DEXP Ixion E340 Strike
- DEXP Ixion P245 Arctic
- DEXP Ixion ML250 Ampere M
- Coil DEXP Ixion MS155
- DEXP Ixion ES255 Fire
- DEXP Ixion ES550 Soul 3 Pro
- DEXP Ixion E350 Soul 3
- DEXP Ixion MS450 Born
- DEXP Ixion P350 Tundra
- Model DEXP Ixion X245 Rock Mini
- DEXP Ixion ES650 Omega
- DEXP Ixion ES450 Astra
- Navigator DEXP Ixion ES260
- DEXP Ixion MS250 Sky
- DEXP Ixion E250 Soul 2
- DEXP Ixion M345 Onyx
- DEXP Ixion E240 Strike 2
- DEXP Ixion X355 Zenith
- DEXP Ixion EL250 Ampere E
- DEXP Ixion EL350 Volt 8
- DEXP Ixion ES350 Rage Plus
- Hotline DEXP Ixion X255
- DEXP Ixion XL145 jerk SE
- Armor DEXP Ursus GX180
- DEXP Ixion M350 Rock
- DEXP Ixion ML150 Ampere M
- DEXP Ixion P145 Dominator
- DEXP Ixion XL140 Flash
- DEXP Ixion X147 Puzzle
- DEXP Ixion X145 Nova
- DEXP Ixion M250 Ferrum
- DEXP Ursus KX110 AVA
- DEXP Ixion XL240 Triforce
- DEXP Ursus NS110
- DEXP Ixion XL145 Jerk
- Charger DEXP Ixion EL150
- DEXP Ixion X250 OctaVa
- DEXP Ixion X LTE 4.5
- DEXP Ixion M LTE 5
- DEXP Ixion ML2 5
- DEXP Ursus 9X 3G
- DEXP Ursus 8X 4G
- DEXP Ursus 7W
- DEXP Ixion W 5
- DEXP Ixion X 5
- DEXP Ixion Y 5
- DEXP Ixion M 5
- DEXP Ixion ES 4
- DEXP Ixion X 4.7
- DEXP Ixion P 4
- DEXP Ixion ML 5
- DEXP Ixion Energy
- DEXP Ixion XL 5
How to update Android OS manually
If there is no access to the global network from your Android device, you can manually update its OS by first saving the firmware file in the gadget’s memory.
Step-by-step instruction:
- Enter the Recovery menu. To do this, turn off the gadget and press the combination of buttons that is indicated in its instruction manual, for example, the “Off” button and one of the volume keys;
- Go to the “Apply update” tab;
- Specify the location of the archive with the latest firmware in the gadget’s memory;
- Wait for the process to complete;
- Ready.
Good to know: How to update your Xiaomi Redmi Note 7 smartphone to the latest version of MIUI Global 11 step by step instructions
Steps to Root Dexp Device via Magisk
Now let's move on to the rooting steps along with the requirements and download links. Here in this guide, we will only mention how easy it is to root your MediaTek phone.
Pre-requirements:
- Keep your device's battery charged to 60% at least for a smoother process.
- Take a full backup of your device before following these steps.
- Requires Windows or Mac PC/Laptop and USB cable.
Download links:
- Download ADB and Fastboot tool for Windows/MAC and install it first.
- Then download Dexp USB drivers and install them on your computer. (USB drivers for Android)
- You need to download the latest Dexp Stock ROM and extract the boot image file: Mediatek Device: How to Extract Boot Image Using MTK Droid Tool.
- Spreadtrum Device: How to extract a boot image using the Spreadtrum Flash tool.
Androidelf is not responsible for any problems encountered with your device during or after following this guide or reprogramming any file. Do this at your own risk.
Why update the firmware on your Android smartphone?
Everyone is motivated by different reasons.
- Problems with the camera, blurry macro photography, for example.
- Poor display response to touch.
- I would like to see the new Android Pie 9.0.
- I'm tired of the old version of Android and want new features and capabilities.
- The phone doesn't want to turn on.
- The phone battery has stopped charging.
Steps to Extract and Fix Boot.image Using Magisk
- After downloading the Stock ROM, simply extract it to your computer.
- Now connect your Dexp device via USB cable and copy the boot.img file from the extracted folder only to the device storage.
- Open Magisk Manager on your device. Select the Install to select the file.
- Now click on “Fix boot image file” .
- go to the folder where you previously moved the image file.
- Now wait a couple of seconds and Magisk will start fixing the boot image.
- After patching the boot image, copy the "patched_boot.img" file from the internal storage and replace it in the same folder of the extracted ROM on your PC.
Now follow the second step to flash the patched boot image file.
Preparing before upgrading
Before updating the Android version, you must complete the following preliminary steps:
- Save important information for the user from the device’s memory on external media or carry out a full backup of the OS;
- Fully charge the device;
- Decide on the version to install (official or from third-party developers) and download it.
Basic methods
There are several basic ways in which you can update your operating system. Some involve the use of special software and a PC, others allow you to flash the device directly, from the smartphone itself. We recommend using the wired method as it is the safest.
A.D.B.
ADB (Android Debug Bridge Utility) is a PC debugger utility for flashing and changing many Android settings. For correct operation, you will need a USB cable and access to the Windows command line with administrator rights.
Download the archive with the firmware in ZIP format in advance (read below for how to choose the version). It is worth taking only proven options: from the official websites of manufacturers or that have been installed by other users on similar smartphone models.
Instructions for reflashing:
- Download and download the Java Development Kit from the official website. Choose the JDK version that matches the operating system bit depth (x86 for ancient computers or x64 for modern ones) on your PC or laptop.
- Connect your smartphone to a PC with ADB utility installed. Check for ADB drivers on your PC. If they are not there or they are installed incorrectly, reinstall them manually. Drivers are looked for on the official websites of the brand companies that produced the equipment. You can also use an alternative driver installer.
- Enable “USB debugging” by activating developer mode and open root rights. Instructions are a little lower in the article.
- Check the visibility of the utility for your smartphone and allow authorization. In the folder with the installed ADB program, press the right mouse button and the “shift” button at the same time. Select “Open a command window” or “Open a PowerShell window here” (for Win 10 version). Now type “adb” and press enter. The utility will launch via the command line.
- Check the visibility of the gadget, as well as its authorization. Enter the command “adb devices”. The phone will display a window for authorization. Confirm the command with “ok”.
- Upload the ZIP archive to the folder with the utility.
- Enter the command line (Win + R), then enter the command: “cd”. Drag the folder icon (in the directory path input field on the left side) to the path to the specified ADB location directly into the command line.
- Put your phone into recovery mode. This can be done by entering the command: “adb reboot recovery”, or using hardware keys.
- From the recovery menu on your phone, go to the “apply update from ADB” item and confirm the action using the lock button. This way you run the ADB sideload bootloader command.
- Go back to the command line and write in it: “adb sideload”. Hold the ZIP archive with the left mouse button and drag it into the command line field. It will contain the path to the specified archive. Press "enter".
The utility will show the process of downloading data from the network, after which the installation of the operating system will begin automatically. Important: all specified commands must be entered without quotes.
Fastboot
Fastboot is a utility for fine-tuning the Android system. Comes with an SDK and is downloaded in the same way as ADB. Unpack as a single archive along with the debugger.
Simply put, Fastboot is a cellular operating mode in which the gadget is visible to the PC not as a flash drive, but as a working terminal. In this state, you can manipulate the phone at a low software level. That is, this mode is suitable for developers and people who own code.
Usually, through firmware using this method, individual image files of the “img” format are replaced or installed. They are taken for each OS partition separately. We do not recommend using this method if you are not confident in your own abilities!
Instructions:
- Start fastboot mode.
- Enter the command line (Win + R), then write the commands one by one: “cd /” (press enter), followed by “cd adb”.
- Connect your mobile phone to your PC using a USB cable.
- Now put your cell phone into bootloader mode. To do this, enter the command: “adb reboot bootloader”. Sometimes you need to unlock the bootloader. Read about this below in the article.
- Check if the PC sees the smartphone. Enter the command: "fastboot devices". If everything is correct, the gadget model will be displayed in the command line.
After these steps, you can proceed to flashing. Usually the phone is sewn in sections, or one full file is uploaded. Each section is first formatted, after which the image is uploaded in “img” format. Commands for removing/installing an image:
- cache (Cache): “fastboot erase cache/fastboot flash cache name.img”;
- date (Data/UserData): “fastboot erase userdata/fastboot flash userdata name.img”;
- systems (System): “fastboot erase system/fastboot flash system name.img”;
- Recovery: “fastboot erase recovery/ fastboot flash recovery name.img”.
First, the first commands are executed, then the images are uploaded step by step (they go through a slash “/”). Instead of “name”, use the real names of img files.
It is important to respect the letter case when writing the firmware name, otherwise the system will generate an error!
Another command allows you to upload the OS from one zip file: “fastboot update name.zip”. Before flashing the system via fastboot, download all update images (.img or .zip) to the folder with the previously installed utility.
Using RECOVERY
Recovery is a system menu with a set of specific routines that allow you to configure the software at the “hardware” level; it can be compared to the BIOS system on a PC. Typically, Android devices have stock recovery, which is not always convenient to use. To expand functionality, users install custom versions, such as:
- C.W.M.
- TWRP Recovery.
You can flash your phone using these bootloaders. It is assumed that the gadget already has one of the versions of the specified recovery.
CWM Recovery
CWM (ClockWorkMod) is a modified recovery. The interface is similar to many stock Recovery, but with more functionality.
Update algorithm for CWM bootloader:
- Connect your smartphone to your PC or laptop in Data Transfer (MTP) mode.
- Move the .zip file to the root section of the gadget, or to an SD card.
- Put your phone into recovery mode.
- Find the “install zip” item in the main menu.
- Select the firmware file from the list and install the update.
Control in CWM is carried out in the same way as in the stock version of the recovery - through hardware buttons on the case.
TWRP Recovery
TWRP (Team Win Recovery Project), another recovery option. Unlike stock programs and CWM, this version has more convenient navigation through the sensor. All functionality is displayed as a tile on the desktop. The action is confirmed by swiping to the right side of the slider at the bottom.
Firmware algorithm via TWRP:
- Connect your smartphone to your PC or laptop in Data Transfer (MTP) mode.
- Move the zip file to the root partition of the gadget, or to an SD card.
- Switch to Recovery mode.
- In the menu that opens, tap on “Wipe”, then select “Advanced Wipe”. Oh, “Internal Storage”, “Data”, “System”, “Dalvik Cache”. Confirm the action with a swipe. The gadget's memory will be completely cleared.
- Go back one step and click “Reboot recovery”.
- In the main recovery menu, click on the “Install” button.
- Select the zip file of the same name and confirm the action by swiping.
- When the process is finished, click on the “Wipe cache/delvik” button, then “Reboot system”.
The software download procedure is not demonstrated on the screen in any way. The user learns about the result of the procedure only after rebooting the smartphone in normal mode. For some gadgets you need to first unlock the bootloader (instructions below).
From phone
The easiest way is to use a special application for firmware. One of the most popular software at the moment is the ROM Manager program. The application was developed by the creators of CWM Recovery. You can download the program on the official page in the Play Market.
Before you start, you will need to get root rights and install CWM Recovery on your smartphone. Otherwise the program will not start. Also, the phone's SD card should already contain an archive in zip format. You can download it in advance via an adapter or USB cable from your computer.
Work algorithm:
- Install the application, setting all the permissions that it will require.
- In the main program window, tap on “Install ROM from card”.
- Specify the path to the firmware file and confirm the action.
The firmware is installed automatically. If everything is done correctly, the smartphone will reboot and start with the updated OS. In the free version of the application, the user searches for and selects the file himself. In the full edition, you can click on the “Download ROM” button and the program will download a safe and verified version of the updates for your model.
What do we need for the firmware?
- smartphone Dexp Ixion ES 150, or ES 150 fit
- firmware, download here
- drivers, get here
- program for firmware, download from this link
- program for restoring IMEI codes, take here TYTS
We unpack all the files from the archives onto the desktop, it is advisable to flash the smartphone on Windows 7. How to find out the IMEI, in the phone dial the numbers, press the following combination *#06#, a window will open with two sets of numbers, you need to remember them or write them down.
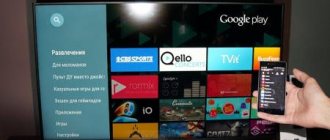
How to install a new Android without connecting to a computer
The easiest option to change the OS version is to start the process on the smartphone itself.
Usually the system notifies you about the availability of a new version (a notification appears at the top of the gadget screen):
Note: the algorithm for updating to a new version of Android is always the same: it doesn’t matter whether the operating system update to 5.0, 7.0 or 9.0 is launched.
Depending on the phone model and the current firmware modification, the text and design of the notification on the screen may differ.
After receiving the notification, you should click “download” and wait until the software is downloaded to the device.
When Android is downloaded, a message will appear in the notification bar and the user will be asked to install or postpone the process.
Important: before clicking “install now”, it is recommended that you read the information provided above, where the developers warn about the possible loss of personal data and the need to make a backup.
The system does not always notify the user about the availability of a new version of Android. The reason may be a lack of Internet connection or refusal to receive notifications (can be set in the “Software Update” section).
In this case, you can download the new Android manually. To do this you need to follow these steps:
- go to “Settings”.
- select the “About phone” or “About device” section.
- Click "Software Update".
- After checking for the presence of new software, either a proposal to install the firmware or a notification that the devices have already been updated will appear on the device screen.
Installing drivers
Here we go. Let's start installing drivers. Open the driver folder and run the .exe file. Drivers install pretty quickly.
The installation wizard window will open, click “Next”, then “Finish”. That's all, firewood is in the system.
Firmware for smartphone Dexp Ixion ES150, ES150 Fit
Now let's proceed directly to flashing the device's firmware. Run the firmware program FACTORY DOWNLOAD.
List of programs for downloading
I’ll leave a list of programs for flashing Android, with an active download link:
- ABD tools,
- Odin,
- SP FlashTool,
- Lenovo Downloader
- KDZ Updater,
- LG Flash Tool,
- Sony PC Companion,
- MiFlashPro,
- ASUS Flash Tool
- Qualcomm Flash Image Loader,
- QPST Flash Tool,
- Wileyfox Flash Tool,
- Qualcomm Smartphone Multi-Port Software Upgrade Tool,
- Smart Phone Upgrade Tool,
- FastbootFlasher
- Firmware Factory Tool
- Infinix Flash Tool.