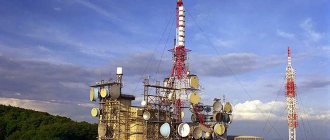
The key advantage of satellite television is the ability to connect and watch it where other types of television are not available. Other advantages include high-quality image and sound, a large number of television channels for every taste. Moreover, many of them can be watched absolutely free.
Today, in literally every city there is a company that offers a set of services for installing and configuring satellite television. However, with some knowledge and skill, you can do this yourself. The main points of connecting satellite television will be discussed in the article below.
Design of satellite antenna converters
Any LNB for receiving satellite TV at home consists of:
- irradiator – volumetric metal resonator;
- receiving device (probe);
- waveguide;
- boards - electronic part.
The irradiator is needed so that the electromagnetic waves focused at one point by the dish mirror do not scatter, but are collected into a parallel beam. The feeds of direct-focus antennas differ from the feeds of offset-type dishes: in the former it has the shape of a disk with concentric circles on one side, in the latter it is in the form of a cone.
A waveguide is often a metal pipe through which electromagnetic waves collected in a parallel beam move. In cross section it can be either round, square or rectangular.
In Ku-band heads, the feed and waveguide are made as one unit and form the converter body. In C-band heads, only the waveguide is integral with the housing; the feed is a separate part that is attached to the converter.
The LNB also includes: a waveguide-strip junction, a low-noise amplifier, a bandpass filter, a balanced mixer with a local oscillator, an intermediate frequency preamplifier, and a power supply unit. Depending on the design and purpose, each converter contains one, two or more local oscillators. The converter is usually powered from the tuner via a coaxial cable with a constant voltage of 13 or 18 volts, depending on the parameters of the currently selected time for viewing or listening to the channel.
A polarizing switch was also once an integral part of the converter, but is no longer used in practice. At the dawn of the development of satellite technology, switching between polarizations was mechanical, later magnetic switches appeared. And integrated heads have been around for many years, so few people remember this important element.
An integrated LNB for receiving signals of both vertical and horizontal polarization is known as a universal converter.
The circular satellite converter contains a depolarizer – a dielectric plate – in the waveguide. It converts a circularly polarized signal into a linearly polarized signal.
Types of satellite converters
The main difference between converters from each other is the direction of incoming radiation for which they are designed to receive:
“C” band converter
Setting up a satellite dish: instructions on setting up a dish for a satellite with your own hands
The frequency range is 3.5 - 4.2 GHz, which is used for terrestrial and satellite communications. It broadcasts on a small number of transponders, and there are no Russian television operators among them.
“Ku” band converter with circular polarization
Frequencies 10.7 - 12.75 GHz, which are used by most television satellites. This frequency spectrum is not used for communications and other transmission formats due to lower reliability.
Universal “Ku” band converter (vertical and horizontal polarization)
In addition to the frequency spectrum (range), converters, again, like a radio signal, differ in the type of signal polarization. Moreover, two types of polarization can be present in one converter at once.
The receiving element of the converter is a whip antenna (probe). A single probe converter can receive a signal in one polarization (linear vertical or horizontal), depending on its orientation on the antenna. Some converter models designed for television reception have two orthogonal antennas, switching between which allows you to receive two polarizations without changing the orientation (rotation) of the converter. There are also dual converters (in fact, two converters in one housing with a common reference oscillator), the antennas of which are located in orthogonal planes. Such converters allow you to receive signals simultaneously in two polarizations to two different receiving devices.
To receive signals with circular polarization, a depolarizer must be installed between the antenna feed and the converter, converting circular polarization to linear. The operating polarization (right or left) is determined by the relative position of the depolarizer and the converter whip antenna. A converter with two orthogonal antennas can receive both circular polarizations without changing its orientation relative to the depolarizer.
In Russia, circular polarization is mainly used in the C band. For satellite communications and broadcasting in the Ku band, linear polarization is used, circular polarization in the Ku band is used in the upper sub-band (11700-12750 MHz) on satellites carrying out direct broadcasting.
Vertical polarization (V)
- There is no tricolor signal on all channels: reasons, what to do?
The heads receive a direct beam from the transponder. Found only in television receivers.
Horizontal polarization (H)
Universal devices that interact with radiation of any polarization.
Satellite circular converter for television and communications, designed to receive a signal both from a satellite and from the ground. Such devices are distinguished by a more complex board circuit, which converts linear radiation into circular radiation.
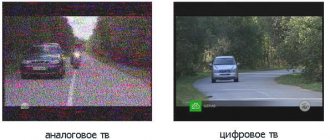
Types of television signals
There are only three main types of TV broadcasting - it depends on the method of receiving the signal.
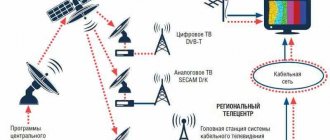
- Terrestrial television broadcasting
- broadcast from a television tower to an indoor antenna, without the use of additional equipment. - Cable television
- from a special server in the operator’s distribution center, the signal is transmitted via cable to network subscribers. - Satellite system
- a pulse from a satellite hits a parabolic antenna, and then is converted by a receiver and sent via cable to the TV.
Next, we will look in detail at setting up analog TV channels manually or automatically. Setting up cable channels has virtually no fundamental differences, i.e. digital channels are set up identically.
( 1 rating, average 5 out of 5 )
Which converter should I buy to watch Tricolor TV and other satellite companies?
Most operators offer a kit with a converter that is most compatible for delivering content; sometimes it is better to purchase it yourself.
And here are a few reasons for this:
Free TV
More than ten satellites with open channels broadcast in Moscow and the rest of Russia (Amos, HotBird, Intelsat, Express, Yamal, etc.).
Multi device
- How to set up a satellite dish tuner
You can choose a functional head that can operate in both polarization modes and also distribute television to several users.
Universal converter
The second generation Ku-spectrum receiver can be used to connect television to any operator. The branded kit always contains a weak and inexpensive device that is perfect for satellite TV from a specific provider, but cannot be used for other purposes.
Based on practice, we would recommend using circular converters manufactured by Galaxy Innovations - GI-121
(1 output converter),
GI-124
(2 output converter), and 2 output converter
SLWI-52E
.
What is included in the satellite TV package
Literally at every thematic forum the idea will be voiced that a kit for receiving satellite TV can be assembled independently from individual components. But the solution to this problem is not for the average user. He simply does not have enough knowledge for this. Today there is an easier way out. It is enough to pay a visit to the nearest satellite television provider. At the provider’s office, you can sign a service agreement, buy a ready-made kit for receiving satellite television, and select the best package of channels for yourself in terms of price and content.
The average kit for receiving satellite TV includes (minimum set) the following components.
- The dish is a deflector, a reflector of radio frequency radiation from the satellite. Today, the provider offers the optimal characteristics of this element for a particular area. That is, 60 cm dishes for good coverage areas, 80, 90 or 120 cm for areas with weak signals.
- A converter needed to convert a high frequency radio signal into electrical energy.
- Mounting kit for fixing the antenna.
- A rod for attaching the converter to the deflector.
- Basic set of cables.
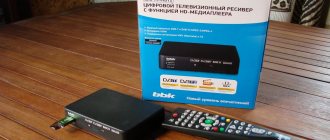
- Receiver for signal conversion and connection of conventional TVs.
The equipment set can be expanded or reduced according to the user's wishes. For example, it will not be difficult to buy only an antenna, its mounting kit and a converter for those whose TVs are immediately equipped with a satellite tuner. Or purchase a more complex receiver instead of the basic version, including one with the ability to organize an in-house signal distribution network or connection to the Internet.
How to check the converter during installation
Tricolor converters purchased from official dealers or ordered from the company's customer service branches are almost always of high quality. However, if the device was purchased from third-party companies, ordered from online stores, or purchased on global trading platforms, you should make sure that it is working. You can check the satellite dish converter as follows:
- install it on the deflector posts;
- connect a specialized device to the device, for example, Satfinder for setting up satellite dishes and check the indicator readings;
- If you do not have a setup device, switch the receiver to the signal indicator display mode and make sure the converter is working.
Important! It is worth immediately noting that a working device will always produce a non-zero level. Even when the antenna unit is not aimed at the satellite.. Another way to check the converter: connect it to an already installed and correctly configured deflector and Tricolor receiver
Another way to check the converter is to connect it to an already installed and correctly configured deflector and Tricolor receiver.
In case of any problems, lack of signal, reception of some channels, first eliminate all possible problems in the form of an incorrectly inserted card, old receiver firmware, damaged cables and other problems. Only then do they decide that the cause is a broken converter. This may be indicated by:
- some channels do not show with the error “No signal”;
- on the channel information banner, one of the indicators shows a normal value (signal strength), and the other (quality) shows zero.
The Tricolor converter cannot be repaired; the device must be completely replaced. It is recommended to order a high-quality, certified converter from authorized dealers or Tricolor customer service branches. But if you are confident in your ability to make the right choice, you can buy a suitable model from third-party sellers.
How to connect a TV to a satellite dish
There are 2 ways to connect a TV to a satellite dish:
- the cable connects directly to the TV receiver;
- connection occurs through the receiver.
Direct connection to TV receiver
As you know, a receiver is required to watch satellite TV. But modern TVs have begun to install DVB-S2 digital tuners, which make it possible not to use an external receiver, connect a cable to the TV directly from the dish, and catch TV from a satellite.
To find out whether your TV supports this function, you can look at the description of the device, which can be found on various websites that sell consumer electronics.
But, unfortunately, the TV will only receive free (not encrypted) foreign channels. In order to watch domestic TV via satellite, you will need to buy a smart access card that connects to the TV via a PCMCIA interface.
The card is purchased together with a suitable satellite TV package, which can be chosen from among the many operators offering this service. The convenience of using such a connection is obvious:
- there is no need to purchase a separate receiver;
- You only need one remote control to change channels.
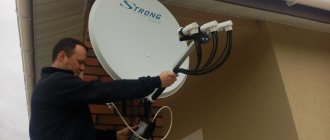
How to choose a location to install an antenna
For an antenna to show good reception, it must be positioned and aimed correctly. The easiest way to solve this problem is espionage. That is, you can spy on where the antennas are installed on neighbors who also use the services of the same provider.
But a more correct course of action is to use the information provided on the website of the telecom operator itself. Here, at a minimum, the satellite from which television channels are broadcast is indicated. Next, the user can:
- use interactive maps that are offered on the website of the satellite television provider;
- use applications that can be downloaded on the service operator’s website;
- install the SatFinder program on your mobile device, which has an extensive list of satellites from which you just need to select the one you need.
The main thing that the user will receive based on such data and services is an understanding of which wall of the house to install the deflector on. This is the most important step. It is the correct placement of the antenna that will ensure direct visibility of the satellite.
Important! The height of the future location of the deflector is chosen so that there is no interference in the signal path in the form of tree branches, wires, large objects, or other buildings.
Accurate plate orientation
The data that the user receives from the provider’s services or third-party applications includes horizon and azimuth indicators. They describe the orientation of the antenna in space to create a direct line of sight to the satellite. This will ensure effective signal reception.
This is how you should use this information.
- Azimuth describes the rotation of the antenna relative to the north direction. That is, using even the magnetic compass of your phone, you can easily correctly rotate the deflector in the horizontal plane.
- The horizon indicator describes the angle of inclination of the antenna relative to the vertical. To correctly orient the deflector, you will need a plumb line (weight on a string) and a protractor.
In order to make the work of setting up the antenna easier, you should immediately take some measures when installing it. Thus, a rod located at a great distance from the wall will allow you to rotate the antenna without the danger of blocking it. If the device is installed on a balcony, it is better to mount it on a corner, a vertical fence post or a concrete structure.
How to attach the antenna
The antenna is supplied with a mounting kit in the form of plates or a rotating block. To fix the device, you need to firmly tighten the bolts by tightening the corresponding nuts. This is done after fine-tuning the position of the device. The option offered by the manufacturer is quite reliable.
However, the antenna vibrates during its operation. She has a high windage and trembles in the wind. Birds land on it. Sometimes the latter arrange long gatherings there. Therefore, over time, the mount suggested by the manufacturer may weaken and the antenna will move. To prevent this from happening, it is recommended to make reinforcements.
A simple option looks like this: the clamping nuts are duplicated. After it is finally clamped, another one is screwed on top of the main one. This is done very tightly. If there is a washer to prevent the joint from coming loose, it can be placed between the two nuts. The price of such strengthening is minimal, and its reliability is very high.
Advice! Welding the antenna tightly is not recommended. Firstly, it cannot be removed, for example, during a move or for a period of long absence of the owners. Secondly, any reconfiguration becomes impossible.
Therefore, the option of duplicating the clamping nuts on a conventional antenna mounting kit is preferable.
Cable preparation
When the installation of the dish is completed, you will need to prepare the F-connector and cable to connect the antenna to the TV. The F connector is a simple grommet that is screwed onto the cable, so it is important that it is threaded.
If the output on your TV or receiver is adapted for an F-connector, then connecting the TV to a satellite dish will not be difficult. If your TV has a regular antenna output, you will need to buy an adapter.
You can, of course, buy a regular antenna plug, but they are often of poor quality. In the case of an F-ki with an adapter, you get a universal plug that can be connected to both the F-output and the antenna.
Before connecting the cable to the TV, do the following.
- Remove the top layer of insulation from the cable. You will see a primary screen consisting of intertwined thin wire that needs to be bent.
- Under the primary screen you can see the second one - made of foil. The foil screen is cut as shown in the figure below.
- After this, remove the insulation to get to the central (copper) core.
- Before connecting the F-connector (antenna plug), the core must be cleaned with a knife from the enamel applied to it, after which the F-connector is screwed onto the cable. Now, it can be connected to the receiver, or, by screwing on an adapter, to the antenna output. The second end of the cable is connected to the converter located on the antenna.
Connection and setup
To prepare to watch TV, you need to do the following:
- The plug must be connected to the TV connector called “LNB Satellite IN” (the setting is carried out using the example of an LG TV receiver).
- Now, after connecting the antenna to the TV, you can turn on the device, go to settings and select automatic channel search.
- When asked where to look for broadcasts, you need to select “Satellite” and click “Next”.
- At this step, it becomes possible to select the required satellite for its subsequent scanning. Other settings related to this satellite are also available on this page. After selecting it, click “Next”.
- When you select additional settings, a window with various parameters will appear, displaying values related to the quality of the received signal, as well as its level. In the image below it is noticeable that the signal level is at its maximum value. To add a new satellite, there is a corresponding button located at the top of the window. After closing this menu and clicking “Next”, you need to set the search conditions.
- If you do not have a CAM module and want to find free broadcasts, then check the box next to the “Skip encrypted channels” line. After installing the necessary data, click on “Run”.
- Next, the search for broadcasts will begin. During the search, you can see the number of TV and radio channels that were found. If you stop the search prematurely, the previously found channels will still be saved.
- After the scanning is completed, you can start watching satellite TV. If you go into the TV settings in the “Channels” section, you can see many more options. For example, you can sort channels, edit a transponder, configure a satellite, etc.
To switch between different television signal sources, be it satellite TV or cable, HDMI signal or another, press the INPUT button on the remote control and select the required one.
What is a converter
First of all, a satellite converter is a device that is a guide to the world of high-quality satellite TV. It is an element of a satellite antenna that amplifies received signals and converts their Ku-band frequency (10.7 - 12.75 GHz) or C-band (3.5 - 4.2 GHz) into a lower intermediate frequency 950 - 2150 MHz.
It works in the following scheme. Satellite services are provided by appropriate transponders. The video signal from the transponders hits the satellite dish umbrella, is reflected from it and hits the focal point where the converter is mounted. It irradiates the antenna and further enhances the signal. From it, amplified and converted to a lower frequency, the signal is transmitted to the input of the satellite receiver. It is in this device that real miracles happen: the converted signal comes to the TV via a coaxial cable, and you enjoy watching high-quality images.
LNB converters get their name from the abbreviation, which translated from English means “low noise block”. And in the Russian user environment you can hear the simplified name “head”.
Why do you need LNB satellite in on your TV?
For satellite digital broadcasting, a DVB-S2 or DVB-S tuner is used. Models with a built-in satellite receiver easily find all channels available for viewing. The search is possible in manual or automatic mode. In most cases, a stable signal is received from at least four satellites. It is important to understand that just a built-in satellite receiver and an installed antenna will not be enough, because each television channel is encrypted and requires special decoding.
The standard in question has the following important characteristics:
- broadcasting programs in high definition;
- using an Internet connection to view additional content;
- providing access to viewing thematic programs;
- the ability to connect additional devices to the same network to distribute television content.
The transition to the modern DVB-S2 standard is due to the need to improve the quality and speed of digital information transmission.
Converter or splitter: which is better to choose?
Splitters, also known as signal dividers, are simple devices with one input and several outputs. In the eyes of many consumers, they look like a cheap alternative to laying cable lines and buying a converter with the required number of outputs for TVs installed in the house. In practice, using splitters can lead to negative results. Broadcasts in HD quality are extremely sensitive to signal level. For splitters, it is lower at each output than at the input. As a result, the following happens:
- some TVs do not show all channels of an active subscription;
- On HD channels, video glitches occur, the picture has artifacts, freezes, and crumbles.
Important! It is recommended to use the splitter wisely. The subscriber will not notice any negative consequences of his connection if he watches only channels in normal quality and sends the signal to two TVs
But when the network of consumers in the house is large, you want to watch broadcasts in HD format; you simply cannot do without purchasing a converter with the required number of outputs.
Rules: how to set up digital channels
The TV creators tried to restore justice. Today, cable and analog television have replaced digital television, and now a person can program a non-standard package of channels. The user can set and edit channels in the desired order - First, Friday, 2x2, Russia, Fusion, Muz TV and others. Editing the order is very simple. We live in times of the highest technologies, and all of them are aimed at changing life for the better.
They allow you to make life:
- Pleasant;
- Comfortable;
- Free.
So what are the other advantages of digital TV and can I set it up myself? Firstly, this is a huge number of television channels, many times greater than the number of analog keys. Secondly, such digital TV always provides super-quality images, which are not affected by weather conditions and features of the place of residence and BCS. Thirdly, the user can create a list of channels at will. That's why many are interested in how to set up and search for the desired channel on digital TV, how to catch the wave and do everything as the instructions for plasma TV Elekta (Japan), Grundig, Haier, Bravis, Rubin, LGI 32lf2510, Rainford, Daewoo, Supra or another.
You can update the channel list on your TV completely free of charge.
HD, translated from English as “high definition”. HD TV is television of the highest definition, with a resolution of 1920x1080 pixels. Analogue television has a resolution of 720x576 pixels.
If the user is using a plasma or LCD panel, the difference in picture quality will be more than obvious, this is a real miracle in the world of TV at the best frequency. Perhaps the only drawback of digital TV is that it is not free to use. Naturally, the money spent on DTV is insignificant, but most people will definitely not be happy with the expense. However, additional expenses can be avoided without ignoring the terrible pleasure of watching DTV. You can update your channel list for free. For free DTV, you need to know how to properly configure new programs and digital channels and remove unnecessary ones. It is important to find out how to set up the TV, what broadcasting standard is supported by the TV and whether there is digital television broadcasting. There can be 2 standards - DVB-T or DBV-C.
Number of outputs
The choice of a suitable dish head depends on the number of devices that need to receive the satellite signal.
One way out
LNB with one connector is the simplest type of converter that supports one receiver. The tuner controls the converter depending on what range and polarization it receives. The signal from such an LNB cannot be divided into two tuners with full access to the entire range. The two tuners may provide different control signals to the unit and its operation will become incorrect.
Double output
A satellite circular converter with 2 outputs is suitable for most viewers. It has two independent outputs. Essentially, these are two converters in one housing. This two-port head can support two tuners or a tuner with two signal inputs.
LNB with four outputs
More demanding users will be satisfied with a circular satellite converter with 4 outputs. This quad LNB is equipped with four independent outputs. Its housing contains four individual converters. It can support, for example, four independent tuners or two tuners with PVR function, or two conventional set-top boxes and one with PVR function. A separate antenna cable is supplied to each tuner.
LNB for eight outputs
And for dessert, for those who want to compete with the “cable guys”, a converter with eight outputs. It also has four outputs, but it is a converter designed to work with a signal splitting device called a multiswitch. Each of the outputs of the quattro block has a different range and polarization. The signal from such an LNB, supplied to a multiswitch, can be divided into several tens or even hundreds of satellite set-top boxes. Therefore, eight-port heads are used with a multiswitch in installations where it is necessary to connect more than four satellite receivers to one antenna.
Double monoblock for one output
When using it to receive from two satellites, there is no need to install two separate LNBs complete with double multifeed and a “Dysec” switch to control their operation. The signal from this LNB model is intended for one receiver.
Double monoblock with two outputs
Similar to a single-port monoblock, but with two independent outputs. Allows reception from two satellites. Can support two independent tuners or one PVR tuner.
LNB with Unicable technology
It has the same functions as a four-pin LNB, but allows you to transmit a signal to four tuners over one cable. To split the signal to different set-top boxes, a satellite splitter will be enough. Thanks to the Unicable solution, there is no need to use a multiswitch or lay separate cables from the dish and converter for each tuner.
The TV does not show - is the problem with the converter or not?
When channels paid for by the subscriber stop showing, the problem may lie in any link in the antenna-receiver-TV chain. A malfunction of the LNB can be judged by the following signs:
- in the set-top box settings, when manually searching for channels, the signal strength scale is more than half filled, and the quality shows 0%;
- Some channels disappeared (“No Signal” screensaver).
There is simply no simple answer to the question of how to check that it is the Tricolor satellite antenna converter that is “to blame”. First, other possible causes of malfunctions are excluded:
- bad weather (including heavy clouds and icing);
- damage to the cable and poor connection of plugs to connectors;
- lack of contact between the smart card and the decoding device.
Faulty converters, as a rule, cannot be repaired; they are simply replaced with new ones. It is more attractive to purchase certified Tricolor products, since they are covered by a guarantee.
https://youtube.com/watch?v=Kgh-tp04Dkk
Title holders
|
|
|
Polarization type
The signal coming from transponders, like any electromagnetic wave, has a parameter called polarization. Its main characteristics are the vectors of electromagnetic field strengths: electric and magnetic. The geometric location of these vectors determines the type of polarization of the coming signal.
Main types of signal polarization:
- linear (vertical and horizontal);
- circular (right and left).
The converter rotation angle is the maximum orientation of the LNB body relative to its own axis for reliable signal reception. It is not always important, but only if the angle of linear polarization does not converge. With circular polarization, it does not matter, and therefore, to receive Tricolor and NTV+, the converter does not need to be rotated.
Tuning to the HotBird satellite
The HotBird satellite is most popular among users due to the large number of free channels. HotBird catches satellite channels from various parts of the world - about 100 Italian and Arabic channels are available, about 20 Russian, as well as German, English, from Belarus and other countries, but in smaller quantities. This is an excellent option for a summer residence where people spend little time and do not want to pay money for a subscription fee, but occasionally watch TV.
Important! The necessary equipment can be purchased in specialized stores or bought second-hand, which will cost a couple of thousand rubles, and you can actually connect and configure it yourself. After this, you can forget about the subscription fee forever. To receive a signal from the HotBird satellite, the satellite dish must be pointed south
The antenna is mounted on the wall; there should be no obstacles in the form of poles, trees, or buildings opposite it. Next, to watch free channels, you need to configure the dish to the HotBird satellite. On the TV, broadcasting from satellite equipment is turned on and the following settings are specified in the settings:
To receive a signal from the HotBird satellite, the satellite dish must be pointed south. The antenna is mounted on the wall; there should be no obstacles in the form of poles, trees, or buildings opposite it. Next, to watch free channels, you need to configure the dish to the HotBird satellite. On the TV, broadcasting from satellite equipment is turned on and the following settings are specified in the settings:
- satellite name – HotBird;
- polarization – auto;
- flow rate – 27,500;
- FEC – auto.
Another parameter required for the search is frequency. To catch all possible channels, you will have to register it manually several times. Different channels are broadcast at different frequencies.
| FREQUENCY | CHANNELS |
| 10758 | 4 Fun TV |
| 10815 | CNL Europe, Fashion One, Russian MusicBox, Revival TV, TBN Russia |
| 10930 | UA TV |
| 11034 | Channel 8, NTV Mir, Russia 24, RTR Planet, Russian bestseller, STS International, TNT, Chanson |
| 11623 | Belarus-24, Soyuz, Juce TV, Life TV, Smile of a Child TV |
| 12092 | Fashion TV |
| 12149 | Kazakh TV |
| 12226 | Present (HD) |
| 12245 | Italian Fishing TV |
| 12476 | RT English (HD), RT DOC (HD), Super Tennis (HD) |
| 12597 | Euronews, RT DOC, Channel One |
After finding channels on one of the frequencies, the result is saved and the procedure is repeated for the next one.
Important! The frequencies above are not a complete list - you can find others on the Internet to access foreign channels.
Does your TV support DVB-T2
Most new LG TVs accept digital TV broadcasting. But there are also exceptions.
Is LG a cool TV?
Cool! Sucks!
Before you start setting up digital channels, it doesn't hurt to check whether they will be available on your device. All you need to do is enter the model number in the “Search” line below.
| Model | Diagonal | DVB-T2 support |
| 22LB491U | 22 | + |
| 22LN450U | 22 | + |
| 22LN457U | 22 | + |
| 22LN548M | 22 | + |
| 22MA33V | 22 | + |
| 22MA53V | 22 | + |
| 22MT45V | 22 | + |
| 22MT55V | 22 | + |
| 23MA53V | 23 | + |
| 23MA73V | 23 | + |
| 23MT55V | 23 | + |
| 23MT75V | 23 | + |
| 24LB457U | 24 | + |
| 24MA53V | 24 | + |
| 24MN33V | 24 | + |
| 24MN43T | 24 | + |
| 24MT35S | 24 | + |
| 24MT45V | 24 | + |
| 24MT45V | 24 | + |
| 24MT55V | 24 | + |
| 26LN450U | 26 | + |
| 26LN457U | 26 | + |
| 26LN467U | 26 | + |
| 27MA53V | 27 | + |
| 27MA73V | 27 | + |
| 27MS53V | 27 | + |
| 27MS73V | 27 | + |
| 27MT55S | 27 | + |
| 27MT75S | 27 | + |
| 27MT93V | 27 | + |
| 28LN548M | 28 | + |
| 28LY340C | 28 | + |
| 29LN450U | 29 | + |
| 29LN457U | 29 | + |
| 29MA73V | 29 | + |
| 29MN33V | 29 | + |
| 29MT45V | 29 | + |
| 32LA615V | 32 | + |
| 32LA620V | 32 | + |
| 32LA621V | 32 | + |
| 32LA643V | 32 | + |
| 32LA644V | 32 | + |
| 32LA660V | 32 | + |
| 32LA662V | 32 | + |
| 32LA667V | 32 | + |
| 32LB530U | 32 | + |
| 32LB551U | 32 | + |
| 32LB552U | 32 | + |
| 32LB561U | 32 | + |
| 32LB561V | 32 | + |
| 32LB563U | 32 | + |
| 32LB570U | 32 | + |
| 32LB570U | 32 | + |
| 32LB570V | 32 | + |
| 32LB570V | 32 | + |
| 32LB580U | 32 | + |
| 32LB580V | 32 | + |
| 32LB582V | 32 | + |
| 32LB628V | 32 | + |
| 32LB650V | 32 | + |
| 32LB653V | 32 | + |
| 32LM340T | 32 | + |
| 32LM580T | 32 | + |
| 32LM620T | 32 | + |
| 32LM660T | 32 | + |
| 32LM669T | 32 | + |
| 32LN536U | 33 | + |
| 32LN540V | 32 | + |
| 32LN540V | 32 | + |
| 32LN541U | 32 | + |
| 32LN541U | 32 | + |
| 32LN541V | 32 | + |
| 32LN542V | 32 | + |
| 32LN542V | 32 | + |
| 32LN548C | 32 | + |
| 32LN570V | 32 | + |
| 32LN575V | 32 | + |
| 32LN655V | 33 | + |
| 32LS359T | 32 | + |
| 32LS570T | 32 | + |
| 39LB561V | 39 | + |
| 39LB570V | 39 | + |
| 39LB572V | 39 | + |
| 39LB580V | 39 | + |
| 39LB650V | 39 | + |
| 39LN540V | 39 | + |
| 39LN548C | 39 | + |
| 42LA615V | 42 | + |
| 42LA620V | 42 | + |
| 42LA621V | 42 | + |
| 42LA643V | 42 | + |
| 42LA644V | 42 | + |
| 42LA645V | 42 | + |
| 42LA660V | 42 | + |
| 42LA662V | 42 | + |
| 42LA667V | 42 | + |
| 42LA669V | 42 | + |
| 42LA690V | 42 | + |
| 42LA691V | 42 | + |
| 42LA741V | 42 | + |
| 42LA790V | 42 | + |
| 42LA860V | 42 | + |
| 42LB551V | 42 | + |
| 42LB551V | 42 | + |
| 42LB552V | 42 | + |
| 42LB561V | 42 | + |
| 42LB563V | 42 | + |
| 42LB565V | 42 | + |
| 42LB569V | 42 | + |
| 42LB580V | 42 | + |
| 42LB582V | 42 | + |
| 42LB588V | 42 | + |
| 42LB628V | 42 | + |
| 42LB639V | 42 | + |
| 42LB650V | 42 | + |
| 42LB653V | 42 | + |
| 42LB658V | 42 | + |
| 42LB673V | 42 | + |
| 42LB679V | 42 | + |
| 42LB680V | 42 | + |
| 42LB689V | 42 | + |
| 42LM340T | 42 | + |
| 42LM580T | 42 | + |
| 42LM585T | 42 | + |
| 42LM620T | 42 | + |
| 42LM640T | 42 | + |
| 42LM660T | 42 | + |
| 42LM669T | 42 | + |
| 42LM670T | 42 | + |
| 42LM760T | 42 | + |
| 42LM860V | 42 | + |
| 42LN540V | 42 | + |
| 42LN540V | 42 | + |
| 42LN541V | 42 | + |
| 42LN542V | 42 | + |
| 42LN542V | 42 | + |
| 42LN548C | 42 | + |
| 42LN549E | 42 | + |
| 42LN570V | 42 | + |
| 42LN575V | 42 | + |
| 42LN655V | 43 | + |
| 42LS340T | 42 | + |
| 42LS560T | 42 | + |
| 42LS570T | 42 | + |
| 42LY345C | 42 | + |
| 47LA615V | 47 | + |
| 47LA620V | 47 | + |
| 47LA621V | 47 | + |
| 47LA643V | 47 | + |
| 47LA644V | 47 | + |
| 47LA645V | 47 | + |
| 47LA660V | 47 | + |
| 47LA662V | 47 | + |
| 47LA667V | 47 | + |
| 47LA669V | 47 | + |
| 47LA690V | 47 | + |
| 47LA691V | 47 | + |
| 47LA740V | 47 | + |
| 47LA741V | 47 | + |
| 47LA790V | 47 | + |
| 47LA860V | 47 | + |
| 47LA868V | 47 | + |
| 47LB561V | 47 | + |
| 47LB570V | 47 | + |
| 47LB580V | 47 | + |
| 47LB582V | 47 | + |
| 47LB650V | 47 | + |
| 47LB653V | 47 | + |
| 47LB673V | 47 | + |
| 47LB679V | 47 | + |
| 47LB680V | 47 | + |
| 47LM620T | 47 | + |
| 47LM640T | 47 | + |
| 47LM660T | 47 | + |
| 47LM669T | 47 | + |
| 47LM670T | 47 | + |
| 47LM960V | 47 | + |
| 47LN540V | 47 | + |
| 47LN548C | 47 | + |
| 47LN549E | 47 | + |
| 47LN570V | 47 | + |
| 47LN575V | 47 | + |
| 47LY345C | 47 | + |
| 49LB551V | 49 | + |
| 49LB628V | 49 | + |
| 49LB860V | 49 | + |
| 49UB820V | 49 | + |
| 49UB830V | 49 | + |
| 50LA582V | 50 | + |
| 50LA620V | 50 | + |
| 50LA644V | 50 | + |
| 50LB650V | 50 | + |
| 50LB653V | 50 | + |
| 50LB675V | 50 | + |
| 50LB677V | 50 | + |
| 50LN540V | 50 | + |
| 50PH470U | 50 | + |
| 50PH670V | 50 | + |
| 50PN452D | 50 | + |
| 50PN650T | 50 | + |
| 50PN651T | 50 | + |
| 55EA970V | 55 | + |
| 55LA620V | 55 | + |
| 55LA643V | 55 | + |
| 55LA660V | 55 | + |
| 55LA662V | 55 | + |
| 55LA667V | 55 | + |
| 55LA690V | 55 | + |
| 55LA691V | 55 | + |
| 55LA741V | 55 | + |
| 55LA790V | 55 | + |
| 55LA860V | 55 | + |
| 55LA965V | 55 | + |
| 55LA970V | 55 | + |
| 55LB650V | 55 | + |
| 55LB673V | 55 | + |
| 55LB680V | 55 | + |
| 55LB860V | 55 | + |
| 55LM620T | 55 | + |
| 55LM625T | 55 | + |
| 55LM640T | 55 | + |
| 55LM660T | 55 | + |
| 55LM760T | 55 | + |
| 55LM761T | 55 | + |
| 55LN575V | 55 | + |
| 55LY345C | 55 | + |
| 55UB820V | 55 | + |
| 55UB830V | 55 | + |
| 55UC970V | 55 | + |
| 60LA620V | 60 | + |
| 60LA740V | 60 | + |
| 60LA741V | 60 | + |
| 60LA860V | 60 | + |
| 60LB680V | 60 | + |
| 60LB860V | 60 | + |
| 60PB560V | 60 | + |
| 60PH670V | 60 | + |
| 60PN651T | 60 | + |
| 65LA965V | 65 | + |
| 65LB680V | 65 | + |
| 65LM620T | 65 | + |
| 65UC970V | 65 | + |
| 72LM950V | 72 | + |
| 84LA980V | 84 | + |
| 84LM9600 | 84 | + |
| 84LM960V | 84 | + |
| DM2752T | 27 | + |
| M2752T | 27 | + |
Where to find the serial number
The model name is a combination of numbers and letters in which technical information about this device is encrypted.
If you don't know the model of your TV, don't worry - it's easy to find out:
- Examine the box. The model name is always indicated on it.
- Look at the back of the TV and look for a sticker with technical information about the device. The required line is labeled "Model" or "Model".
- Check the instructions. The model is indicated on the cover or on the first page.
- Look at the warranty card. The fields of this document are not always filled in, so it may not contain the necessary information.
- Examine the receipt or invoice. The “product” line indicates both the brand of the TV and its model.
- Use the system menu. To do this, turn on the TV and enter the settings menu by pressing the “Settings” button on the remote control (if your device is equipped with the “Smart TV” function, use the “Smart” button). Go to the Help menu and select Product Information.
What to do if your TV does not support digital TV
In this situation, you can go the following ways:
- buy a new TV from a later year;
- purchase a digital DVB-T2 set-top box and connect it.
Buying a set-top box is significantly cheaper than buying a new TV. It is easy to install even for an inexperienced person. Therefore, many people prefer this path. If this is your option, then all that remains is
configure your digital set-top box yourself
.
If your TV supports digital, move on.
Frequency conversion[ | code]
The need for frequency conversion after signal amplification is due to the fact that in most cases, satellite communications use radio bands with frequencies in the units and tens of Gigahertz (C, X, Ku, Ka). Transmission of such radio frequencies via coaxial cable leads to high signal attenuation, and the use of long waveguides greatly complicates and increases the cost of the system. Frequency conversion to the 1-2 GHz range (L-band) allows you to place the receiving equipment (satellite receiver, satellite modem, DVB-S/S2 card, etc.) at a considerable distance (tens of meters) from the satellite converter.
If it is necessary to move the receiving equipment to an even greater distance from the satellite dish, then additional L-band signal amplifiers installed in the cable route, or a fiber-optic line and additional devices - L-band optical transmitters and receivers, can be used. The optical transmitter can be integrated into the satellite converter. It must be taken into account that amplifiers and optical transmitters and receivers introduce additional noise of their own, increasing the noise coefficient of the system as a whole.
Frequency conversion occurs by mixing the signal of the reference oscillator (local oscillator, LO) of the satellite converter and the input signal (radio frequency, RF) received from the satellite. At the output of the mixer, a signal of intermediate frequency (IF) is generated, equal to the difference between the frequencies of the reference oscillator and the input signal. Converters are divided into two main types depending on the design of the reference oscillator - with a dielectric resonator (DRO) or with a frequency synthesizer (PLL).
Dielectric Resonator Converters (DRO LNB) | code
Dual (two polarization) DRO LNB; dielectric resonator - in the center under the screen.
The most popular satellite converters have a reference oscillator built on the basis of the Dielectric Resonator Oscillator (DRO).
The disadvantage of such reference oscillators is the low frequency stability. The typical range of instability of the DRO LNB local oscillator is from 250 to 900 kHz in both directions of the nominal frequency (depending on the converter model; cheap television converters may have more). Accordingly, the frequency of the converter output signal also changes. For this reason, DRO LNBs are poorly suited for receiving narrowband signals, since the signal at the output of the converter may be outside the band in which the receiver is looking for it. The minimum bandwidth over which a DRO LNB can be reliably used depends on the receiver characteristics (the range over which the demodulator searches for a signal) and is typically a few megahertz (or a few megasymbols per second).
The advantages of DRO LNB are lower phase noise than other types of converters and lower price.
DRO LNB is used in satellite television reception and in the reception of broadband channels in satellite communications. To receive narrowband signals (some television carriers, SCPC channels and TDMA channels in satellite communication networks) converters are required that provide higher frequency stability.
High stability converters (PLL LNB) | code
The reference oscillators of highly stable converters are built as a frequency synthesizer with automatic tuning based on a reference source (Phase-locked loop, PLL). A signal with a frequency of 10 MHz is usually used as a reference signal. The stability of the reference oscillator frequency of a PLL LNB depends on the source of the reference signal.
With internal synchronization | code
PLL LNBs with internal synchronization (English internal reference) have their own thermostated or temperature-compensated crystal oscillator, which is used as a reference frequency source. The reference frequency stability of an internally clocked converter can range from +/-2 kHz to +/-500 kHz, depending on the model.
With external synchronization | code
PLL LNBs with external synchronization (external reference) do not have their own reference frequency source. An external generator is used as such a source; a reference frequency signal is supplied through the same cable through which the signal from the converter is transmitted (some converter models have a separate input for supplying a reference signal). The stability of a converter with external synchronization can be arbitrarily high and depends only on an external generator, which can be GPS and GLONASS signal receivers, rubidium atomic clocks, etc.
Why do you need LNB satellite in on your TV?
For satellite digital broadcasting, a DVB-S2 or DVB-S tuner is used. Models with a built-in satellite receiver easily find all channels available for viewing. The search is possible in manual or automatic mode. In most cases, a stable signal is received from at least four satellites. It is important to understand that just a built-in satellite receiver and an installed antenna will not be enough, because each television channel is encrypted and requires special decoding.
The standard in question has the following important characteristics:
- broadcasting programs in high definition;
- using an Internet connection to view additional content;
- providing access to viewing thematic programs;
- the ability to connect additional devices to the same network to distribute television content.
The transition to the modern DVB-S2 standard is due to the need to improve the quality and speed of digital information transmission.
What device options are there?
First of all, let's look at the main types of converters, such as:
- C-band converters;
- Ku-band converters.
The main difference is the different frequency range of the received signal. For the first group of devices it ranges from 3400 to 4200 MHz, for the second from 10700 to 12750 MHz.
In our country, devices of the first type are practically not used and, as a result, they are almost impossible to find on sale, however, when buying a converter, you need to pay special attention to this indicator so that the device works correctly in the future. All Russian satellite television operators use the Ku band for signal transmission.
This is the type of converter you choose.
All Russian satellite television operators use the Ku band for signal transmission. This is the type of converter you choose.
If you do not purchase a device from an official Tricolor representative, be sure to check its operating range in order to avoid conflicts in the operation of the equipment.
In addition, when buying a converter for Tricolor TV, you need to make sure that it is a type of circular polarization converter; this will be indicated by the Circle inscription on the product packaging.
There are also linear polarization converters that have the inscription Universal in their designation. Such devices are not suitable for Tricolor TV. Be careful! Despite the Universal designation, which translates as “universal,” converters with this marking are linear, not universal. And in our case they don’t fit!
Rare connectors
This category includes inputs and outputs that are either already outdated and almost never used in TV, or are new, and therefore have not yet become widespread.
Component (YPbPr)
Sometimes, looking at the back panel of the TV in search of the usual tulips, users see a similar output, but painted in different colors (blue, red, green) and labeled Component in. YPbPr is a digital video input capable of transmitting images in high quality (FHD). It is considered obsolete, as it was replaced by HDMI, which also transmits a digital signal, but in higher quality.
Important! The component input can be supplemented with an analog audio connector - white and red. In this case, five connectors will be located nearby. Assignment of colors:
Purpose of colors:
- green (Y) – brightness;
- blue Pb – brightness and level of blue color;
- red Pr – brightness and level of red color.
Accordingly, additional white and red inputs are the right and left audio channels.
Used to connect DVD players, game consoles or home theaters.
S-Video
An outdated video connector for transmitting an analog signal. Although the signal is split like a component jack, only one wire is used for the connection. Used in old DVD players and satellite dish receivers.
DVI
Provides input and output of digital or analog video signal. The output is quite outdated and is almost never used in modern TVs. It allows you to connect a PC or laptop to it so that the TV acts as a monitor. This connector is still found in computers, but the connection to the TV is usually made through a DVI to HDMI adapter.
VGA
Another video output that allows you to use the TV as a monitor. Unlike DVI, it transmits exclusively analog images. Despite the fact that the VGA input is conditionally worse, it is more widespread, but mainly on cheap or Chinese TVs.
On a note! Sometimes VGA is called PC IN connector
It is important to understand that the name is unofficial and not everyone knows.
SCART
The SCART connector is an obsolete type. It can transmit analog and digital video signals, but due to limited bandwidth it was replaced by HDMI. Very rare in modern technology. At the time of its use, it was widely used for DVD players and set-top boxes for satellite dishes.
Connection via receiver
After satellite TV appeared, the receiver became an indispensable device that connects between the TV and the satellite dish. The receiver acts as a decoder, receiving a signal in one format, converting it, and transmitting the decoded signal to the TV through a television cable connection . Read more about choosing this device in the article Digital TV set-top box.
How to properly connect a satellite antenna to the device? In modern television receivers, you can connect the cable to the TV through the receiver using the following connectors.
- HDMI connector. Connecting to this input provides a high-resolution picture, and this is the most modern and high-quality type of connection. HDMI does not require conversion from digital to analog signal. In this way, you can connect the tuner to a laptop to use the latter as a TV.
- SCART connector. Popularly called “Scallop” and is a European standard audio and video connector. Provides good image quality, no worse than through a component cable.
- Component connector (Y Pb Pr). It is the highest quality connection using a special component cable that can be used both to transmit a high definition signal (1080i) and to connect a television antenna through the receiver. It is called a component cable because the components of the video signal are transmitted through several channels. This connector can be used for HDTV transmission.
- RCA is an interface better known as “Tulips”. The main advantages of this interface are simplicity and accessibility in connection, and how to connect the TV to the receiver cannot be difficult. Simply insert plugs with a certain color into a socket of the same color. It can be called one of the most ancient ways of connecting peripherals to a TV, and it is present in almost all television receivers. The unit connected in this way produces a picture that is not of high quality, but quite acceptable for a TV with a small diagonal.
- Regular antenna plug. This connection is also called an RF connection and is familiar to anyone who has connected an indoor antenna. The quality of signal transmission with such a connection wants to be the best.
Thus, connecting satellite equipment to a television receiver is not a difficult matter. The main thing is the correct choice of antenna direction, connecting equipment with cables and setting up TV reception. You can learn about setting up the receiver yourself by watching this video.