Each person would prefer to watch, in addition to central television channels, another 20-30 thematic TV channels in high definition. What is needed for this? Choose one of the Russian satellite broadcasting operators, purchase a set of equipment and configure it.
In most cases, configuration and installation of equipment is included in the purchase package, so after purchasing the “plate”, installers come to perform the necessary work. However, you can completely cope with this task yourself, and we will tell you how to do it.
Antenna structure and equipment set
Considering that the instructions are designed for a beginner, let's start with the basics. All satellite antennas present on the domestic digital television market are divided into two groups:
- Offset.
- Direct focus.
The difference between the models lies in the operating principle.
In direct focus antennas, the signal reception converter is located exactly in the center at a short distance from the mirror. In offset ones, the signal is reflected at an angle, and accordingly the converter is shifted relative to the axis.
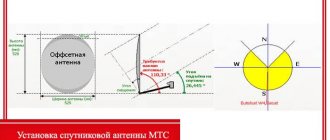
The method of installation depends on the type of antenna. Direct-focus ones are mounted at a right angle, which corresponds to the satellite’s trajectory above the horizon. With offset analogues the situation is different. Here you need to turn to the school physics course and remember that the angle of incidence of the beam is equal to the angle of reflection.
Therefore, such models are installed with a slight inclination relative to the satellite.
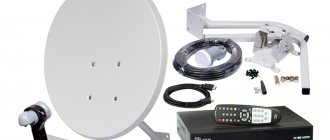
The satellite dish consists of the following elements:
- Mounting bracket.
- Reflector mirrors.
- Irradiator with a removable casing that protects from precipitation.
- Depolarizer – converts circular polarization into linear frequency.
- Converter with signal amplifier.
In addition, the basic package includes:
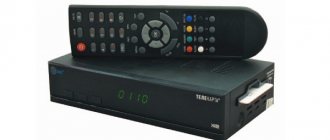
- tuner responsible for broadcasting channels;
- disek – switch between converters that receive a signal from a satellite;
- coaxial cable with connection connectors.
The package also includes connecting plugs, anchor bolts and dowels.
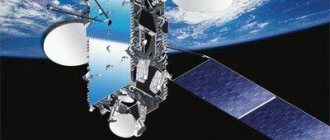
General information about converters
This device is installed together with a satellite dish, and together they receive a satellite television signal and transmit it through a cable to the receiver.
Technically, the converter is an antenna, and the satellite “dish” is a mirror that collects the signal at one point, where the converter is located.
The converter receives and amplifies the satellite signal, and then converts it into a frequency suitable for transmission via television cable.
Antenna installation
Let us immediately note that installation must be carried out in strict accordance with the manufacturer’s instructions, which are included with the equipment. If you don’t follow the mandatory rules about high-quality images, you can forget. Correct installation of the antenna consists of the following steps:
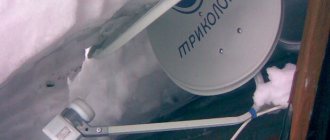
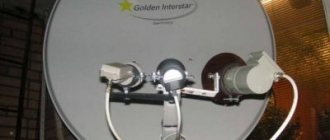
Choosing a direction . The mirror of the “plate” always faces south, and no foreign objects should fall into the target. If the antenna is installed in a private house, it makes sense to mount it at a height of 7-10 m from the ground: this will reduce the level of dust in the air and help to significantly improve image quality.
Installation of fasteners . First, mounting brackets are installed, which are secured with anchor bolts or collet pins. The main rack is installed strictly vertically, otherwise setting up the equipment will be problematic.
Assembly and installation of the “plate” . An antenna is assembled to which the converters are screwed. These elements are always installed with the connectors down to avoid oxidation of the contacts. All connections are reliably insulated and covered with a layer of sealant for greater reliability. The assembled antenna is hung on a bracket and secured with fasteners.
After this, the finished “dish” must be oriented in the direction of the broadcast satellite. To do this, exact geographic coordinates are determined; a mobile device with a satellite navigation module will help here.
The azimuth of the broadcast satellite can be found on the provider’s website, where there is an inclination angle calculator.
Next, all that remains is to align the “plate” in accordance with the coordinate grid. To do this, it is recommended to use an engineering compass.
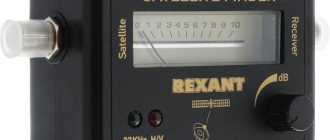
To configure the antenna to receive a signal, perform the following steps:
- The TV and tuner are connected to the converter via a coaxial cable. The equipment is connected to the network, and the following menu items are selected sequentially in the receiver menu: Installation -> Manual search.
- Then the antenna itself is adjusted by swaying relative to the installation axis. This is necessary for the equipment to “catch” the satellite.
- above 60% is good .
After this, the mirror is carefully tightened, trying not to disturb the azimuth.
During pre-tuning, you should not be in front of the antenna: any objects in the reception area will negatively affect the image quality.
How to choose a converter for MTS TV?
When choosing a satellite converter, you should not have any difficulties, since all satellite operators provide characteristics of their converters, according to which you need to select them.
The main characteristics of the converters are as follows:
- Frequency range Can be Ku-band or C-band. MTS requires a converter operating in the Ku-band.
- PolarizationCan be circular or linear. For MTS you need a linear polarization converter.
- Noise figure - the lower it is, the better.
- The number of outputs must correspond to the number of connected TVs.
Converters from different providers differ in polarization, so they are not always interchangeable. As can be seen from the table, only the Telecard converter is suitable for use with MTS.
| Converters for different providers | |
| MTS | linear |
| Tricolor | circular |
| NTV+ | circular |
| Telecard | linear |
Tuner settings
The next important step in installing a satellite dish is setting up the tuner. The equipment of some providers automatically detects the satellite, the user only has to catch the necessary TV channels.
If there is a need to fine-tune or change the parameters specified by the manufacturer, go to the “Menu” section and select the “Installation” sub-item. There will be several sections here, so we will consider in detail what each item is responsible for.
Satellite. The first line indicates the name of the broadcast satellite and its location in geopolar orbit. The name of the translator does not affect the equipment settings.
Sometimes the desired satellite is not on the list at all. In this case, select any translator and tune in to its frequency.
LNB type . The type of installed converter is determined here. There are two types of devices: C and Ku , depending on the reception range. In the first case, the menu is set to “Standard”, in the second – “Universal”.
TP number . This section displays a list of transponders. Using the buttons on the remote control, you can scan the frequency and save all broadcast channels. Information about the required parameters can be found in the provider's frequency table.
DISEQC . This is a switch between converters configured for a broadcast satellite. If the antenna works with one translator, you need to set the menu to DISABLE (disabled). When the antenna is configured for several satellites, the line indicates the connection port to the desired converter.
Positioner . This function is responsible for automatically adjusting the antenna to the azimuth of another satellite. For this purpose, the “plate” is driven by a built-in electric motor. If there is no corresponding key on the remote control, then the equipment does not support this function, so the menu is set to “disabled”.
Polarization . This item can be left in automatic search mode. If you select the vertical or horizontal settings, only TV channels located in the specified plane will be broadcast.
LNB power supply . The item must be in the on position so that power is supplied to the converters.
The interface of equipment from different providers may differ, so carefully read the manufacturer's instructions for setting up the equipment.
Instructions for setting up your TV
The next step is to activate the equipment. This can be done in different ways:
- call the call center "NUMBER">' data-sheets-userformat=''>0890;
- send an SMS from the operator's number to "NUMBER">' data-sheets-userformat=''>9909, writing in the message "smart_card_number, set-top box_chipID_number" or "smart_card_number, CAM_module_number";
- go through authorization at https://lk.ug.mts.ru/#/satellite_testview
- If you did not buy the package from an official dealer, log in yourself at https://lk.ug.mts.ru/#/satellite
- Then the MTS TV satellite set-top box is configured from the menu, find the parameters and set up the profile, indicating the age and access code in the “Access Levels” section.
- To search for channels, run the auto scan function.
- For older TV models, the following parameters are indicated independently:
- "Channel" - cable.
- “Country”—Russia or Eastern Europe.
- “Cable channels” - frequencies 29800KHz-362000KHz.
- If prompted for a password, it is usually "000".
The values for setting the CAM module are given in the table.
If you encounter any problems, open the Setup Wizard.
After completing the process, all that remains is to sit more comfortably in your chair with a sense of accomplishment, since you managed to set up the MTS TV satellite dish yourself.
How to set up your TV
This is the easiest stage of setting up the equipment. After connecting the antenna and debugging the receiver, testing of available TV channels is carried out. Typically, programs are arranged in a random order depending on the broadcast frequency.
Using the remote control, you need to connect the channels in a convenient order.
Cable installation
Before installing the cable, you need to select a place where you can make a hole for it. If the antenna will hang on the facade of a building, it is recommended to drill in the following parts of the wall:
- in the corner of the window frame;
- in the wall at floor level.
If the antenna will be on the roof, the cable must be routed along the facade of the building. It must be secured both on the roof and near the window on the wall through the window frame. It is also allowed to run the cable through low-current risers of the structure.
Connecting the F connector
In order to connect coaxial cables, they must be stripped. After this you need to put on the F-connectors . This happens in the following order:
- cutting off the upper cable sheath at a distance of 2 cm without damaging the screen;
- carefully bending the wire onto the sheath;
- removing insulation from the central core protruding 2 mm from the screen;
- screwing on the F-connector;
- shortening the excess stock of the central core, leaving 2-5 mm from the plane of the connector.
The described method of connecting the F-connector is the simplest.
Multiswitch connection diagrams
The choice of a multiswitch should be made based on two important factors: the number of cables and the number of TVs in the house. The following basic connection diagrams for these devices are most often used:
- For the Amos 2/3 4.0w you only need 1 SAT cable. Reception of TV channels: horizontal polarization (H) and lower range (Low) – multiswitch input H, Low.
- The Astra 5.0E satellite requires 2 SAT cables. Reception of TV channels: horizontal polarization (H) and upper range (High) – multiswitch input H, High, vertical polarization (V) and upper range (High) – multiswitch input V, High.
- For the Eutelsat 36.0E , which has NTV+ TV channels, you need 2 SAT cables. Reception of TV channels: horizontal polarization (H) and upper range (High) – multiswitch input H, High, vertical polarization (V) and upper range (High) – multiswitch input V, High.
- For the Eutelsat 36.0E , which has Tricolor TV channels, you need 1 SAT cable. Reception of TV channels: horizontal polarization (H) and upper range (High) – multiswitch input H, High.
Common connection errors
If, after installing the equipment, the image leaves much to be desired, it means that errors were made during setup, which led to a deterioration in the quality of signal reception. In most cases, users make the following mistakes:
- insufficient diameter of the antenna mirror - leads to loss of signal in bad weather conditions;
- errors when choosing the polarization of the converter - do not allow the equipment to tune to the desired satellite;
- lack of a protective casing - at low temperatures the irradiator will become covered with ice;
- connection via an unsuitable cable - the core must be copper: a steel core noticeably worsens the reception quality;
- poor-quality cable crimping at the connection points.
In addition, most users make mistakes when connecting two or more TVs to a satellite dish.
If you are not confident in your abilities, you should not install the equipment yourself. In the best case, specialists called to fix the malfunction will require partial compensation for the cost of damage; in the worst case, the repair is completely carried out at the user’s expense.
Converters for satellite TV MTS
If you connect two TVs to one antenna or change operator, you may need to purchase a separate converter.
ATTENTION: the converter is already included in the complete set of MTS equipment (with antenna), you do not need to purchase it separately.
On this page you will find the following information: - what a satellite converter is needed for - types of devices, how to choose the right one - which converters are suitable for MTS, Tricolor, NTV Plus and Telekarta - list of recommended converters for MTS