There are several ways to reboot a TV set-top box, and I will talk about all the options in this article. This may be required if there is a malfunction. You don’t even need to figure out what is causing it, whether it’s a software or hardware problem. As soon as you notice a problem, the simplest solution is to restart the digital television set-top box. I also recommend rebooting the device periodically, for prevention.
In what cases is a reboot necessary?
You need to restart your TV device not only in case of obvious failures. Here is just a sample list of situations in which I recommend performing this action:
- “freezing” or “slowdown” of work;
- TV channels do not switch;
- incorrect response to remote control buttons;
- any atypical behavior, any failures or “glitches”;
- You need to restart the smart set-top box if the loading speed of the browser or applications drops, or if the Internet connection fails;
- just slower than usual.
For some problems there may be other solutions. For example, if channels do not change and the remote control does not work well, this may be due to the batteries of the remote control itself.
In any case, a reboot helps to “refresh” the operation of the TV device. This device is a kind of computer. It runs programs, stores data in memory, and uses the processor. Therefore, simple problems will disappear after restarting the digital TV set-top box.
Some of the remote control buttons do not work or do not work the first time.
Every owner of a remote control sooner or later encounters this defect. The only exceptions are modern remote controls with touch controls, due to a completely different design.
Over time, after 2-3 years of use, the quality of the rubber decreases (apparently some kind of chemical reaction occurs due to temperature or something else). An oily substance begins to leak out from under the buttons onto the board, interfering with normal contact of the conductive coating with the graphite elements of the printed circuit board. In addition, remote controls become clogged with dust, oily or wet hands, and other household dirt. It is not uncommon for all kinds of liquids to be spilled on them.
All this beauty remains between the buttons and contacts of the board. Having disassembled the remote control, on the side of the circuit board at the contact points, you will probably notice a thick layer of adhesive mass. It is this fatty layer that prevents contact between the graphic coating of the board and the conductive layer on the rubber base of the buttons.
Conductive rubber buttons on remote controls cannot be wiped with alcohol or solvents, as The conductive layer is washed off!
You can remove oily dirt with a damp cloth, but it is better to use dishwashing detergent, which easily breaks down grease. Just as you wash dishes, we wash the rubber band with the buttons, the remote control body and the board itself (you can use a toothbrush for this). After that, we thoroughly wipe and dry everything (it’s faster to dry the board with a hairdryer). After this procedure, the remote control becomes like new.
What to do if the conductive coating of the contacts and graphite elements of the printed circuit board wears out?
The rubber itself is a dielectric, but a conductive coating is applied to the “patch” of the buttons. They can be checked with a multimeter for conductivity (acceptable knowledge from units to several hundred kOhms).
Over time, the contacts under the buttons physically wear out. In this case, you can use a special repair kit for remote controls, which includes conductive rubber bands and a tube of silicone glue. If you don’t have it, you can try sticking aluminum foil (for example, from a cigarette pack) onto the buttons, but this option is usually short-lived. And in the case of small flat buttons, the stickers generally fly off instantly.
An unnecessary film keyboard will help restore the operation of any remote control buttons for a long time. It consists of 3 films glued together: two with contacts, and the central one is an insulating layer. You need to cut out the contact with the insulator (the third film with the contact is not needed) and stick it directly onto the remote control board above the graphite contact. When you press the remote control button, the contact pad from the keyboard will close the contact. I hope that you understand the essence of the method.
The graphite contacts of the printed circuit board are also subject to wear; they can be easily restored using a “soft” clerical pencil.
Roundcube Webmail 500 Internal Server Error. An unexpected solution to a problem. Discounts at M.Video are a strange thing - they seem to exist, but it’s as if they are not there... Gas generator and uninterruptible power supply APC. It's not as simple as it seems... They say that charging to 100% is dangerous. Is it really? Creating a local copy of the site The Internet works, but browsers do not want to open the pages
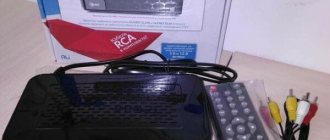
is one of the largest satellite television providers in the Russian Federation. In parallel with providing citizens with TV and the Internet, the organization sells special equipment of its own production. When contacting a company to connect to television broadcasting, you must also purchase a receiver necessary to recognize channels and display images on the TV. Although the company's products are characterized by manufacturers and consumers on the positive side in terms of quality characteristics, sometimes problems occur in the operation of the set-top box or its remote control.
In this article we will talk about malfunctions in Tricolor receivers that a consumer may experience when using the device, consider methods for diagnosing the causes of the problem and options for eliminating them.
All reboot methods
There are several options for rebooting a TV device. Usually it is not enough to simply press a button on the remote control. Additional steps are required.
Method 1: from the remote control
This option depends on the specific model you are using and should be described in the device documentation. Here are some cases of how to reboot a set-top box in this way:
- for Rostelecom TV box – press the power button on the remote control for 10 seconds;
- on Apple TV devices – simultaneously press “Menu” and “Down” or “Menu” and “Home” until the light on the device starts blinking;
- for other set-top boxes, see the instructions - this can be by pressing several buttons at the same time or by long pressing a key on the remote control.
Method 2: through the menu
Use the TV menu of the device. Using the remote control, you need to find the “Restart” item. It's usually found in the "main" settings or device options. This action should not cause complications. When you find the desired item, press the select or OK button on the remote control.
Method 3: Disable and Enable
This method of rebooting a digital television set-top box to a TV is also called “hard”. It should be used if the previous two do not work, for example, everything is completely frozen. There is a small chance that such a reset itself will damage something, for example, reduce the resource of the hard drive, if this device has one, or disrupt the settings, so use it only if necessary. Simpler models of consoles tolerate such a reboot more easily and this does not entail any complications.
- If there is a shutdown button on the case and it works, then press it. For example, Rostelecom does not have such a button, so immediately move on to the next point.
- Remove the wire from the outlet and disconnect it from the power supply.
- If you are using any other devices besides the device, then turn them off as well.
- Leave them without power for 10-30 seconds. This is necessary to discharge the capacitors that can maintain power to the memory chips after being disconnected from the network. Only in this case will the console reboot be complete.
- Now perform all the steps in reverse order: connect the other devices that you turned off, then press the device button, if there is such a button. Turn on your TV gadgets using the remote control and see how they work now.
Method 4: Hard reset
If the previous methods did not help, then you need to figure out what causes the problems in the operation of the set-top box. I will tell you about another way to reboot a digital TV set-top box with 20 channels, although this does not mean “reboot” in the usual sense, but resetting the device. Where it leads:
- all data that was in memory will be erased;
- all the settings you made have been reset;
- The device will return to the same condition as after purchase.
Therefore, this action should be performed as a last resort. There are often other ways to fix the problem. But if you need to quickly reload channels on your TV set-top box, and you don’t have valuable data and settings on your device, you can perform a reset:
- Go to the menu or device settings.
- Find the item “Restore and reset” - “Reset settings” or “Restore factory settings”.
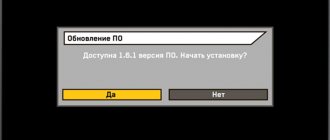
- Confirm the action.
- Wait for the operation to complete. Never turn off the TV set-top box while it is resetting.
As you can see, restarting the TV set-top box is a fairly simple action. But even for this, several implementation options are possible; there are important nuances. I am confident that you will complete all the steps described without complications. If the TV set-top box does not return to normal operation, then you need to study the problem deeper, and perhaps contact service.
The remote control for the console is broken. What to do?
If the commands coming from your fingers to the buttons do not want to be executed clearly, you need to find out why this is happening. Not everything is lost. First of all, you should check what is faulty: the remote control or the device itself. In order to test the remote control, you can use a digital camera - it will allow you to see whether the LED on the surface of the switch emits an infrared ray. Alas, this cannot be done “by eye”. You should bring the remote control to the camera of your tablet, smartphone or camera and press any button. If it is working, you can see a blinking LED on the screen. If there is no such response, recovery measures must be taken.
First, you need to check whether the batteries in the device are dead - in a kind of rating, this “fault” is in the lead by a huge margin. It happens that batteries are used for an extremely long time and even have time to leak. The batteries have been replaced with guaranteed serviceable ones, but the remote control still doesn’t want to work? We'll have to resort to other, more serious repair options.
How to reboot the TV receiver:
Hello, please advise what to do if the set-top box is frozen on one channel and even when disconnected from the network and again when plugged in, everything remains immediately turned off on one channel. Even the indicator is immediately turned on. .
Is the problem resolved? We have the same
Good afternoon. I went into the image settings, I don’t remember exactly what I clicked and the image disappeared. The set-top box itself responds to the remote control, but does not display the menu on the screen. When I press v-format, the image appears for a second and disappears again. Prefix mrm power mr020. Tell me how I can get the image back. Thanks in advance.
How to reboot in MTS TV
MTS TV. Did a factory reset. Now the screen says “no service”. What to do?
Hello Irina. Besides resetting the settings, were there any other manipulations? Disconnected/moved? Is the sign on all channels? Or only on some specific ones? Have you tried rebooting again? Also, check all wires and connections. You can also try to manually find channels, maybe something is wrong. More serious problems may include that the antenna settings have gone wrong, or that the antenna itself or the receiver have failed. We have some tips for eliminating the error when “No service” is on on MTS TV in a separate article: https://besprovodnik.ru/pristavka-mts-net-servisa/
Hello! My situation is the same as in Victor’s first comment on 06/07/2020. The set-top box depended on one channel and even when unplugged and plugged back in, everything remains on on the same channel with the operation indicator on. Please advise how to get out of this states!
Receiver settings
When connecting to digital TV, the provider provides special equipment. You can set up an NTV receiver yourself, but those who are not confident in their abilities are advised to contact a specialist.
Repairing the remote control for a digital set-top box
We examine the contact group. Sometimes the cause of problems is very simple and lies precisely in the deformation of the contacts - then the problem can be quite easily solved with the help of a screwdriver or other improvised means. Did not help? Let's move on. But to do this you need to disassemble the device. Be careful not to damage both the fingers and the fasteners.
Having done this, you can make sure that the device consists of:
- boards with a chip, quartz, LED, contact pads, etc.;
- rubber mat with graphite coating and buttons;
- panels – back and front.
Let us note that console remote controls are very resistant to such frequent falls in everyday life. A blow to a hard surface can crack the quartz of the board - it is extremely fragile. Typical problems include the following:
- the buttons do not work or you need to press hard on them;
- the remote control controls the console only from a close distance;
- The device either works or doesn't.
The main cause of the latter “disease” is contamination of contacts. The deposited dirt accumulates and shorts or opens them. When you press a number of buttons at the same time, a blockage usually occurs and this means that the remote control is considered inoperative. Cleaning required! The pads located on the board, and the mat itself with buttons. This can be done using alcohol, but not vodka, which has various impurities. To clean the rubber band, use regular kitchen dish soap and water. The main thing is to dry everything thoroughly afterwards.
More serious breakdowns of remote controls require some experience and some costs. In some cases, it is much easier to contact a service center and purchase a new device. You should choose it by strictly following the recommendations - otherwise, the remote control simply may not suit you.
Warranty for remote controls
| Remote controls are consumables for home appliances. They are not subject to warranty service, exchange or return in accordance with the legislation of the Russian Federation. But our organization meets our clients halfway! We provide the opportunity to return or exchange the remote control purchased from us within 14 days, provided that the remote control remains in its presentation condition, there is no mechanical or other damage, and there are no signs of use. |
How to choose equipment for watching NTV Plus
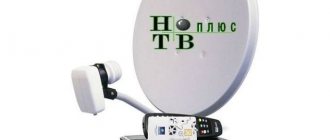
When compared with other Russian operators, NTV Plus has all the advantages for attracting new subscribers. Every year the company improves the quality of its services and modernizes the equipment it provides. Users often wonder what kind of receiver is needed to connect television from the NTV Plus provider. The main selection criterion is the cost of equipment, as well as prices for tariff plans. By paying 150-200 rubles per month, the viewer gets access to a package of approximately 180 channels. The receiver itself from the NTV operator costs about 3,000 rubles.
If the user installs a satellite dish himself, he should adhere to several basic rules. Firstly, the receiving device must be installed in an open area so that there are no obstacles in the signal path. Secondly, the product must be protected from adverse weather conditions. It is best to install the antenna on the roof of the house or fix it on the wall using special brackets. Before connecting the equipment, the subscriber must register on the provider’s website.
Before you set up the DVB-S2 set-top box, it is important to prepare all the equipment, including the satellite dish. It is recommended to comply with certain conditions:
- The satellites of the NTV operator are above the equator, so the receiving structure will need to be positioned along the southern vector. The tilt angle of the plate ranges from 17 to 38 degrees.
- To begin with, the fasteners need to be fixed not to the very end. Additional adjustment may be required, in which the antenna is rotated a few centimeters in the vertical or horizontal plane. After all channels have been found and the signal quality is at a high level, the brackets can be mounted as firmly as possible.
- Particular attention should be paid to the choice of cables for connecting devices. Since the antenna is located outside, the products must be high quality and have additional protection from adverse weather conditions.
- Even if the user does not know the exact settings, approximate parameters can be used. In this case, the plate will have to be adjusted independently, moving it in different directions by 1-1.5 cm. After each change in position, you should take a short pause, since the signal arrives with a slight delay.
- After the picture appears on the screen, the plate must be moved until the signal strength scale rises to 70% and the quality level is at 90%.
After authorization on the operator’s website, the subscriber will have access to various packages with channels. You will need to top up your account, after which you can choose a tariff plan.
Setting up the mts remote control to control other devices
One of the advantages of the remote control for MTS receivers is the ability to configure it to control other devices. This could be a TV, stereo, DVD player or other equipment other than game consoles.
You can do this using the function keys:
- TV – setting up the remote control to control the TV receiver;
- DVD players, TV tuners, Blu-Ray, etc.;
- Audio – music centers, audio receivers, etc.;
- STB – change the decoder control code.
Self-tuning of the receiver
You need to start setting up the tuner when all the equipment has been installed in place, and all connecting components have been connected. To find available channels, you will need to run an automatic or manual search. The first method requires a minimum of effort (press a few buttons on the remote control). You need to open the main menu, find the “Automatic channel search” item there and click on the “Ok” button. The search will give positive results provided that all parameters have been entered correctly, including the desired frequency.
The second option is suitable for those who have at least a little experience in this area. How to configure the NTV-Plus receiver manually:
- If you have previously made any settings on the receiver, it is recommended to reset them.
- Next, you need to select the signal source by specifying the satellite dish. A tab will open with a list of different azimuths. Satellites marked with a checkmark are available by default. If you plan to receive a signal from only one source, you will need to uncheck the other azimuths.
- In the list of available sources, you should find the one you need; if there is no checkmark next to it, check it. Access may be blocked in some cases, and then a special card from the operator will be required.
- The next step is to configure the transponder parameters. By default, the following data should be specified: 12130R, the lower level of Lnb is equal to zero, and the upper level is 10750.
- The final stage will require entering key parameters into a special line. The broadcast frequency is indicated in the section called “Manual tuning”.
After selecting the transponder, the network search will begin. It may take some time, but if all the characteristics were specified correctly, the user will find the maximum number of available channels.
- MIGSAT.RU »
- FAQ »
- Setting up channels in a satellite receiver on NTV plus
Setting up channels in a satellite receiver on NTV plus
If you receive TV channels using standard settings for digital receivers included in the list located in the recommended HTB equipment section, and you have an individual satellite antenna installed, then your satellite receiver will be reconfigured to the new parameters automatically. It is enough to turn it off - turn it on with the button on the remote control. If the reconfiguration does not occur, then turn off the power to the terminal and reconnect the 220 Volt power supply. If, after rebooting the receiver, automatic tuning of all or part of the NTV-PLUS channels does not occur, you will need to perform the following steps.
1. Reset the receiver settings to factory settings:
| Receiver model | Menu path to reset settings to factory settings |
| Opentech OHS 1740V | Menu - Installation - Reset settings - Yes - 0000 |
| Sagemcom DSI87-1 HD | Menu - Settings - System Configuration - Factory Reset - 0000 - Yes |
| Sagemcom DSI74 HD | Menu - Settings - System configuration - Reset to factory settings - 0000 - OK - OK |
| NTV-PLUS 1 HD VA | Menu - Settings - Default settings - Yes - 0000 - OK |
| NTV-PLUS 1 HD VA PVR | Menu - Settings - Default settings - Yes - 0000 - OK |
| Humax VAHD-3100S | Menu - Settings - Installation - 0000 - Factory settings - Yes - 0000 |
| Humax VA-4SD | Menu - Installation - 0000 - Factory settings - Yes - 0000 |
| Humax VA-5SD | Menu - Settings - Installation - 0000 - Factory settings - Yes - 0000 |
2. After turning on the satellite receiver, it will automatically tune in NTV-PLUS channels.
For Humax VA-4SD terminals, after turning on, you must confirm the use of the NTV-PLUS automatic setup procedure by clicking - Yes.
3. If, after these steps, automatic tuning to NTV-PLUS channels is not completed or is not completed completely, it is recommended to repeat the procedure for resetting the satellite receiver to factory settings.
For Humax VA-4SD receivers, it is recommended to repeat the automatic setup procedure up to four times, if the first three attempts fail.
If you are the owner of a Humax VHDR-3000S tuner, and restarting the terminal did not help, we recommend doing the following:
Go to Receiver Menu > Installation > NTV-PLUS auto search.
Baud rate 27500
Press the button> SEARCH
Baud rate 27500
Clicks the button> SEARCH
4. If, after resetting the settings to factory settings again, the receiver cannot automatically configure/update all or part of the TV channels, it is recommended to check the system’s receiving path in the following order:
Check the quality of the antenna tuning using the values / indicators of the quality scale in the tuner menu:
a) turn on the terminal to a channel on which there is no image,
b) check the value/indicator of the signal quality scale in the corresponding menu item:
| Receiver model | Menu path to check the level and quality of the received signal |
| Humax VHDR-3000 | Menu - Settings - System - Signal information |
| Humax VAHD-3100S | Menu - Settings - System - Signal information |
| Humax VA-5SD | Menu - Settings - System - Signal information |
| Humax VA-4SD | Menu - System - Signal Information |
| Opentech OHC1740V | Menu - Installation - Channel search - Edit TP - Q scale |
| Sagemcom DSI87-1 HD | Menu - Technical information - Signal strength |
| Sagemcom DSI74 HD | Menu - Technical information - Signal strength |
| NTV-PLUS 1 HD VA | Menu - Settings - Manual channel search |
| NTV-PLUS 1 HD VA PVR | Menu - Settings - Manual channel search |
c) if the value on the Quality / Q scale is less than 80%, adjust the antenna to achieve the maximum level.
— Check the quality of the coaxial cable and the condition of the F-connectors connecting the cable to the antenna converter and the receiver.
— Replace the antenna converter.
— Replace the coaxial cable connecting the antenna converter to the terminal.
Manual adjustment to new parameters will be required if you use:
— CI+ CAM Viaccess or NEOTION CAM CI+ 1.3 MV module with an LED LCD TV that does not provide the NTV-PLUS auto-search function (it is necessary to reconfigure the channels in the TV itself according to its operating instructions);
— Digital terminals that do not provide the NTV-PLUS auto-search function; digital terminals that provide an automatic configuration function, but are configured by the user with the option disabled;
— If you receive the specified TV channels using non-standard settings for digital terminals included in the list posted on the TV Company’s website, as well as channels from other satellites, then we recommend that you contact the installers of your equipment to reconfigure the channels.
— If your digital terminal is connected to a cable IP network or a collective antenna and has not been reconfigured automatically as a result of turning it off and on, or if you need to set up a digital terminal with an individual list of TV channels, then we recommend contacting the installers of your equipment to set up TV channels.
Author: silver from 10/27/2017, views: 12915
How to restore broadcasting after payment
As mentioned above, after payment, only free channels are shown in the user’s personal account, so it is necessary to restore broadcasting. For this:
- in your personal account, click the button with the advising inscription;
- call the technical support service and, following the prompts, select the appropriate voice menu item.
Advice! If the receiver does not respond to the remote control with fresh batteries, it is recommended to take the device to a service center. Especially if the receiver is still under warranty.
Setting up NTV Plus channels in a satellite receiver
In the event that you receive NTV Plus channels and use standard settings and parameters of digital television receivers. And if you are using an individual satellite dish, then the NTV Plus channels in your receiver will be configured to the new parameters automatically. It is enough to turn off and turn on the receiver again using the button on the remote control. If in this case the reconfiguration did not occur, then disconnect the receiver from the mains power (de-energize) and reconnect the 220-volt power plug.
However, if after rebooting the TV receiver, automatic tuning of NTV Plus channels does not occur or occurs partially, you must perform the following steps.
1. It is necessary to reset all settings of the satellite receiver to factory settings.
2. After turning on the receiver, perform automatic channel tuning.
Note:
After loading the Humax VA-4SD receiver, you must confirm the automatic tuning of NTV Plus channels by clicking - Yes.
If the above manipulations did not lead to the desired result and the tuning to the channels was not automatically completed or was partially completed. It is recommended to perform a factory reset again.
Note:
For the Humax VA-4SD receiver, it is recommended to auto-tune channels up to four times.
If you are the owner of a Humax VHDR-3000S TV receiver, and rebooting the set-top box did not produce results, then you must perform the following steps.
Go to Set-top box Menu > Installation > NTV-PLUS auto search. Choose:
Option 1:
Baud rate 27500
Modulation 8PSK FEC ¾
Option 2:
Baud rate 27500
Modulation 8PSK FEC ¾
4. If after the above steps and resetting to factory settings, the satellite receiver still cannot automatically configure or update all or part of the channels. We recommend checking the system's receiving path in the following order.
— It is necessary to check the satellite dish for high-quality tuning to the satellite. Using the values of the quality scale indicators in the TV receiver menu.
a) turn on the set-top box to a channel on which there is no picture, b) check the value / indicator of the signal quality scale in the corresponding menu item:
c) if the value on the Quality / Q scale is less than 80%, adjust the antenna to achieve the maximum level.
— Check the condition of the F-connectors and the quality of the coaxial cable connecting the converter on the satellite dish and the satellite receiver.
— Replace the satellite converter.
— Replace the coaxial cable connecting the TV receiver and satellite converter.
Attention!
Manual tuning of NTV Plus channels will be required if you use the following to receive the services of the Television Company:
— CI+ CAM Viaccess or NEOTION CAM CI+ 1.3 MV module with a TV that does not automatically tune in and search for NTV Plus channels. To do this, you will need to reconfigure the channels in the TV itself according to the operating instructions for this TV;
— Digital TV set-top boxes that do not provide the NTV-PLUS auto-search function; digital set-top boxes that provide an automatic tuning function, but are configured by the user with the option disabled;
— In the case of receiving the specified TV channels, using non-standard settings and parameters of satellite receivers included in the list posted on the TV Company’s website, and also viewing channels from other satellites. In this case, you need to contact the installers of your satellite equipment;
— If your set-top box is connected to a cable IP network or to a collective antenna. And I couldn’t automatically tune in channels as a result of turning off the power on. If you have an individual channel list configured on your digital set-top box, then it is recommended that you contact the installers of your equipment for configuration.
11 total today
Many users prefer to install satellite equipment themselves. What you might encounter in such cases, what subtleties accompany the installation process, how to set up NTV Plus channels - you can find out below.
The TV remote doesn't work at all. Main causes of malfunction.
- The most commonplace and at the same time effective solution is to replace the batteries with new ones. It may turn out that “new” batteries installed very recently will turn out to be defective or “dead” right out of the package.
- Next, you should check how tightly the batteries sit in the compartment. Poor contact of batteries with terminals is the most common defect. Over time, spring-loaded contacts can bend and lose their former elasticity.
If after manipulating the batteries the magic does not happen, then you cannot do without disassembling the remote control. The battery compartment usually has one or two self-tapping screws, and the case halves are usually secured with latches. It is best to pry them off not with a screwdriver, but with the necessary plastic card, so as not to leave dents on the case.
- IR LED blade. If dropped, the contact of the LED with the remote control board may be broken. Carefully inspect the contact tracks suitable for the IR LED and solder if a break or peeling of the track is found.
How to check the IR LED or remote control operation without a TV?
We will need a camera on a smartphone or laptop. Turn on the camera and point the remote control at it so that the LED is in focus. The option with a laptop seems to me more convenient, since your hands remain free, and the result is immediately visible on the screen.
When you press any buttons on the remote control, LED flashes will be clearly visible through the camera (provided that the remote control is working). If the remote control is faulty, simply supply power from the same batteries to the LED, observing the polarity. It should glow.
The reason for a complete failure of the remote control may be the simultaneous short circuit of several contacts on the board. In this case, the control chip stops sending code pulses to the LED. This problem can be treated by cleaning the remote control board (more on this below). Failure of one of the elements on the remote control board. The cat made them cry. In addition to the infrared LED (you already know how to check it), for HUAYU remote controls the cause of the malfunction may be a capacitor or poor contact of one of the legs of the microcircuit. The microcircuit itself is usually fine. In any case, it is not possible to find such a microcircuit for your remote control on sale; it is easier to buy a new one.
Setting up equipment and channels
The first thing you need to do to install NTV Plus is to install and mount all the necessary equipment. If the user does not use the services of the company’s specialists, but decides to do it on his own, then it is important to follow several basic rules:
- The direction of the plate is south. The reason is that the company's main satellites, Eutelsat 36A and Eutelsat 36B/36C, are located above the equatorial zone of the planet. To make the process easier, you can use an ordinary compass. The satellite direction angle is in the range of 17-38 degrees, depending on the equipment manufacturer, since the provider uses the services of several;
- Another very important parameter is the clean area in front of the plate. Make sure that there is no interference in the direct line in front of it, such as trees, high-rise buildings, etc., as they can greatly degrade the quality of the received signal;
- Attaching the bracket should be given no less attention, and installed as securely as possible, since otherwise over the years it will become loose, the plate will get knocked down, and the image quality will greatly decrease;
- You should not save when buying a cable - its resistance to various weather conditions is extremely important.
Disassembling and cleaning the remote control
To eliminate dirt stuck to the board and contacts of the mat, proceed according to the following algorithm:
- remove the batteries;
- unscrew (if any) the fastening screws - most often they are located in the battery compartment;
- insert a flat sharp object (screwdriver, sharpened plastic card) into a noticeable gap between the two halves of the plastic case and use it as a lever;
- after opening the device, wash all its parts with warm water with the addition of detergent (it is better to take a soft brush - for example, an old toothbrush);
- rinse well and thoroughly dry components;
- The electronic board is additionally wiped with alcohol (vodka and cologne are not suitable);
- assemble the remote control and check its functionality - on the phone camera (camera) or on the receiver itself.
Important: if the flickering of IR radiation does not appear, and the Tricolor TV remote control still does not switch channels, then it has most likely served its purpose. You can, of course, contact a repair shop or the operator’s dealer about its “resuscitation,” but it will be easier to purchase a new remote device. Such a replacement will cost an average of 350 rubles.
Antenna
And now, the installation is complete, everything is fine, and you can proceed to the next stage - setting up the NTV antenna.
- The converter cable is connected to the receiver, and the receiver itself is connected to the TV. It is important to follow all instructions from the manufacturer, this will help avoid breakdowns.
- Slowly and carefully rotate the antenna dish vertically and horizontally towards the location of the satellite until excellent quality pictures and sound appear. To make the process go faster and more comfortably, it’s better to do everything together – one rotates the antenna, the other coordinates by phone.
- And now, the screen pleases with a high-quality picture, the next step is to activate the “received signal level” command on the receiver. Try to make the scale as full as possible.
With due patience, setting up an NTV satellite will not cause problems.
Upon completion of registration, the card is automatically activated within 24 hours.
Debugging channels
To tune NTV channels, you can use two available options - manual and automatic tuning.
Setting up NTV manually is not so simple, but with due care everything will go well:
- In the receiver settings section, enter the default settings. There you need to enter the “channels” menu, then “antenna” and “satellite settings”.
- If the set-top box asks for a password, try entering four zeros, this is the standard password.
- A tab will appear in which we leave only the EutelsatW4 36E satellite, and uncheck the rest. If the tuner does not allow you to carry out the procedure, you need to remove the access card.
- The next item is transponder settings. Set the upper level of Lnb to 10750 and the lower level to zero. Settings - 12130 R.
- The last step is to select the above transponder in the manual configuration section and click “network search”. The process is quite lengthy, so no need to worry. Upon completion, depending on the selected tariff plan, the required number of channels will appear.