Modern TVs perform significantly more functions and have a more extensive toolkit than before. Chatting with friends, surfing the Internet, favorite videos - and this is not a complete list of possibilities. Messengers such as Skype help you see your loved one even across thousands of kilometers.
By connecting your webcam to your TV, you can hear and chat with your friends on the big screen. In this article we will take a detailed look at which camera is better to choose, how to connect and what features you need to know.
Connecting to a webcam
Before purchasing a webcam, you need to consider the type of TV and purpose of use.
You can connect the camera to your TV only if you can download programs from the Internet. If your TV only accepts analog signals, additional systems are required.
After purchasing an accessory, you must complete the following steps:
- Install the driver using your computer.
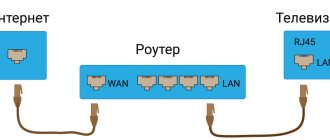
- After connecting the TV and PC via cable or adapter, configure the ability to use the screen as a monitor.
- Change the control panel settings for proper operation. If necessary, you can purchase an additional USB extension cable.
Smart TV
Cameras for connecting to Smart TV have a number of functional features. You can use this technology by connecting the devices to each other using a USB cable. This automatically detects all configurations. To make video calls, simply open one of the specialized programs such as Skype or Viber.
Smarttv offers a new level of possibilities.
Benefits of use include:
- Increased screen size;
- Ability to use a large group of people at the same time;
- Easy connection of a webcam and its small size;
- Better image quality;
- Modern look.
The process for connecting Smart TV from different manufacturers is similar. Let's take a closer look.
Samsung Smart TV
Samsung devices are universal and suitable for different TV models. To answer the question of how to connect a webcam to a TV, you must follow the instructions exactly:
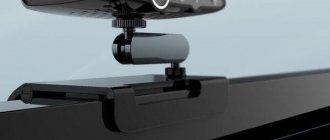
- Turn off the Samsung TV and connect the external camera using a magnetic device, which will help not damage the case.
- We connect the device to the TV via a conductor and transfer the captured video to the screen.
- Turn on the TV and launch the desired program. Then you can take photos, record videos and make video calls without any problems.
The technology eliminates the need to make settings manually and connects everything automatically.
The most popular webcam model among Samsung products is called VG-STC3000 / RU. The state-of-the-art sensor provides HD 720p images and 30 fps bit rate. The model guarantees excellent sound quality thanks to the noise reduction function and four built-in microphones.
Samsung Smart TV cameras support gesture controls.
Lg Smart TV
The principle of connecting the camera to an LG TV is similar to Samsung. To connect, follow these steps:
- With the screen turned off, install the video call module using a magnetic installation.
- Connect a long adapter cable to the USB port at the required distance.
- We turn on one of the video communication programs. All settings are automatic.
By following all the steps correctly, you can get the most out of your webcam's functionality.
Lg offers its own webcams. The most optimal model in terms of characteristics and price. An-VC400. Transmission frequency. 30 frames per second. The matrix, equipped with two megapixels, supports screen expansion of 1200x780. The camera has a built-in microphone, and the device weighs only 78 grams. It is possible to get stereo sound.
The CY-STC1100 webcam is also very popular among the products of the South Korean manufacturer.
Sony Bravia
Sony products have become especially popular in recent years. At an affordable price, the manufacturer offers high quality, advanced technology and wide functionality.
There are no distinctive features when connecting equipment from this Japanese manufacturer. The general scheme looks something like this: turn off the TV, mount an external device. Then connect the USB cable to your webcam and TV. Turn on your TV and take full advantage of Sony Bravia.
If you carefully follow the instructions, there will be no problems with settings and connection.
There are also universal webcams available on the market that can be connected to TVs from different manufacturers. Logitech, a leader in this segment, uses HDMI connection technology. The kit includes a special control panel and power supply. Most of them have wide-angle lenses and are equipped with multiple microphones.
Other connection options
For older TVs, a more complex connection scheme is used. The connection via “Tulips” (RCA) and VGA is still used.
AV-IN/OUT is a connector that is present in almost all TVs. It looks like a plug with a diameter of 3.5 mm. In everyday communication it is called a “tulip”. Mono TVs have 2 inputs, while stereo TVs have 3.
Typically, such a cord is included with the TV, or you can purchase it at a specialty store. To connect, just connect the AV-IN/OUT plug input and the three “tulip” outputs.
In a similar way, you can connect a webcam to a TV using HDMI, VGA or DVI connectors. The image is clear, rich, with sound.
Please note that VGA cables are fragile and you should be careful when connecting them.
Regardless of the model of TV or webcam, establishing a connection is very simple. By taking just a couple of minutes and applying basic skills, you will be able to use the wide functionality of modern TVs.
The devices can be used for different purposes: for communicating in instant messengers, taking photos or recording videos.
The market offers webcams from leading manufacturers and universal models that are suitable for different types of TVs.
Branded companies are developing their own webcams to ensure greater demand for their products. However, their cost directly depends on the technical characteristics, and the products themselves are distinguished by high quality and sound.
Setting up audio transmission
Setting up Wo Mic on Android
Unfortunately, the IP Webcam application, although it can broadcast sound from the phone’s microphone via Wi-Fi, does not have a corresponding driver for Windows. Therefore, Skype will not be able to access the phone's audio stream. Fortunately, there is the “Wo Mic” application for Android, which allows you to transfer sound from your phone’s microphone to your computer via Wi-Fi (Bluetooth, USB).
Price: Free
Attention! For normal operation on 64-bit systems, Windows must be running in test mode (see below)
Install on your phone and open the “Wo Mic” application. Go to Settings > Transport and switch to Wi-Fi transfer mode.
Return to the main screen of the application and click the "Start" button.
Download and install the Wo Mic Client program from the developer’s website.
From there, download and install the “Wo Mic device driver” driver.
Installing the driver on Windows
Run the installer and follow the onscreen instructions. The installer should automatically detect your Windows version. In the warning that appears during installation, click “Install this driver anyway.”
Restart your computer. If you have a 64-bit Windows system, after rebooting it will start in test mode (and will continue to do so until you uninstall the application and driver, read below), which allows you to run unsigned Microsoft drivers.
Launch the "Wo Mic Client" program, select the menu command "Connection > Connect...", set the switch to Wi-Fi, enter the phone's IP address and click "OK".
In Skype settings, select the "Wo Mic Device" device.
Proper removal of Wo Mic on 64-bit Windows systems
If for some reason you change your mind about using the Wo Mic application, go to Start > Control Panel > Uninstall a Program and uninstall the Wo Mic Client program. Next, remove the driver. To do this, right-click on the “Computer” icon and select the “Properties” command. In the computer properties window, click "Device Manager". In the manager window, in the “Sound Video and Game Devices” branch, right-click on “Wo Mic Device” and select the “Delete” option. In the device removal confirmation window, check the “Remove driver programs for this device” checkbox.
If the "Test Mode" message does not disappear after rebooting the system, run Command Prompt as an administrator.
Run the command:
Bcdedit.exe -set TESTSIGNING OFF
and restart your computer.
How to display an IP camera on a TV via Android TV Box?
Android TV Box is a set-top box (modulator) that runs the Android mobile operating system; most phones and tablets run on it, almost all except Apple products. Implementing image output is very simple, since Android has a browser and a large number of applications.
Through the Ivideon service
- When the camera has Internet access, you need to download the Ivideon program from the Play Market and launch it.
Select the manufacturer and model of your device.
Select "Connect camera to Ivideon".
Next, you will have to enter the MAC address of the camera, which you can find on the box or on the body of the device itself.
Follow the instructions and you can connect power to the device. In a minute you will see the image on your TV screen.
Via browser
You can access the camera through a browser. It is available on any TV Box or via Smart TV. You can watch video in two ways - through the Ivideon cloud video surveillance service or directly.
Through your Ivideon personal account
You cannot add a third-party camera through the Ivideon website; for this you will need the Ivideon Server program on your computer or the Ivideon application for your smartphone. That is, you must first add the device to your profile, and then you can view it through your personal account.
If you are the owner of a model with a built-in Ivideon service, then you can connect it through your Ivideon personal account. Go to your personal account and select “Cameras” and click “Connect device”.
Select “Camera with Ivideon support”. The camera must be connected to the Internet, but do not turn on the power.
Enter the model name, MAC address or serial number. This information can be found on the box or on the camera itself. Next, click “Continue” and connect power to the device. After a couple of minutes, the device will appear in the list. Now you can make settings and start watching.
Via browser directly
The camera must be connected to the same network as your TV Box and powered. Go to your browser and enter the IP camera in the address bar. You can find the IP on the box if the device is new. If the camera is already connected and working, then the IP address can be found in the list of devices on your router or from the system administrator.
When you go to the internal IP address of the camera, you will need to enter your username and password. The network interface will open and you can view the image from it.
Best models
In an electrical store, you can find a wide range of different cameras that can be connected to your TV. Each sample has its own advantages and disadvantages, which you need to know in advance before purchasing
Users who have already bought a camera for their TV recommend paying attention to two models with good technical characteristics
LG Smart TV Camera
LG is a major supplier of television equipment. The company has also begun to develop its own cameras that are suitable exclusively for LG Smart TVs of its brand.
To install a proven model on a TV, it is recommended to buy the LG AN-VC400 model. The camera has the following characteristics:
- 2 megapixel matrix.
- The screen resolution is 1200 by 780 pixels.
- Image transmission frequency is 30 frames per second.
- Using the device, you can get high stereo sound.
- The camera is connected to the TV via USB.
- Weight is only 78 g.
Samsung Web Camera
Since the Samsung company has also been manufacturing TV equipment for many years, the company did not stand aside and offered users its camera for Samsung Smart TV - CY-STC 1100. The model is identical in technical characteristics to the previous version, but additionally 4 microphones were built into the equipment, with which you can achieve a high degree of sound transmission. Users have LG or Samsung TV units in their homes, so these two cameras are an ideal option. The Samsung webcam for TV is a high-quality product from a well-known and trusted brand.
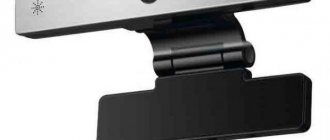
Philips PTA317
Another development from a popular manufacturer is released in a laconic design. The equipment is equipped with a reliable mount, triple zoom and a built-in microphone. When buying a camera from Philips, you can be sure of the reliable assembly of the equipment, since the company has long established itself on the positive side in the electronic equipment market.
Transferring images from one video camera to several receiving devices
The situation is quite common if a video surveillance system is installed at the entrance. The signal from one camera must be distributed to all apartments, taking into account that not everyone will want to buy a monitor with an hdmi vga connector for viewing. In this case, you will have to purchase an additional device at the rate of one per landing - a TV signal modulator.
The device displays the image transmitted by the DVR to all televisions located in the building, provided that they are all connected to the same cable television provider. Otherwise, you will need as many devices as the number of providers used by the residents of the house. The operating principle of the device is quite simple: the device adds another information stream to the collective television signal transmission channel, which will broadcast on a free frequency. You can tune it to a specific channel yourself using standard TV settings. It is very rare to interrupt/replace an actual broadcasting channel. How to connect an outdoor video camera to a TV using a modulator? It’s quite simple - the device is installed into the TV transmission cable “at break”, it is most convenient to do this directly in the apartment. A signal from the DVR or directly from the video camera is supplied to the same device through a regular “tulip” connector. On the device body, the frequency (channel number) is set over which the image from the video camera will now be transmitted. A standard television divider is installed at the output, with which you can connect up to 4 televisions. Considering that the modulator is an active device and improves signal quality, its purchase will be very useful.
Necessary materials and tools for connection
If you decide to set up signal transmission from a video camera to a TV, you will need the following materials:
- Power unit;
- Connecting cables for connecting the DVR, possibly additional adapters if the connectors on the TV and camera are different.
In order for the video camera to operate, it needs power. The output voltage of the power supply must be rectified and stabilized in the range from 9 to 15 volts (the most common power supply parameter is 12V). And the maximum current is not less than 0.1 ampere (preferably 0.7-1A).
Each camera has its own power needs, so the power supply must be selected according to the marking: for example, most often devices are marked as follows: 9-15V DC/0.1A. That is, you will need a power supply of 9-15V and with a current of 0.1A.
If several recorders are connected to one power supply unit, then the last parameter is summed up: for two cameras the current should be from 0.2A, for three – from 0.3A, etc. The voltage remains the same - 9-15V.
The cables that can be used to connect a camcorder to a TV can be of five types:
- Coaxial;
- "Tulips";
- S-video;
- SCART;
- HDMI or Mini-HDMI.
Coaxial cable is a familiar wire that is used to connect an antenna to a TV. “Tulips” is an RCA jack, or composite cable, this standard is widely used in audio and video equipment. Its plugs and sockets are painted in different colors, which greatly helps you navigate when connecting the wire.
The S-video cable is not very common, although it perfectly transmits digital images without loss of quality. SCART connectors are a fairly common European connection format for television equipment, which cannot be confused with anything else: its plug is a metal box with 21 pins.
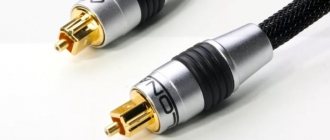
Well, the HDMI cable is considered the leader of all digital technologies. It is capable of sending video signals and multi-channel audio digitally without conversion.
The most popular cable for connecting a video camera to a TV is considered to be AV RCA, in which one end is an AV 3.5 mm input plug, and at the opposite end there are three tulip output plugs. The efficiency of the transmitted image very much depends on the quality of the connecting wires.
Household or CCTV camera
In order to ensure high-quality connection and debugging of equipment for video surveillance, it is enough that the TV model has an RCA connector (“tulip”). And the clue itself lies in the color of the connecting cable, which consists of yellow, red and black (or white) colors, where each of them has its own purpose.
Thus, in systems of general use, certain functions are designated by colors:
- yellow – video signal broadcast;
- red – transmitting stereo/mono signal to the left channel;
- black/white – transmits a similar signal to the right channel.
In the concept of analogue video surveillance, the last two cables are designed to “feed” the equipment itself. That is, when connecting this type of device, which often has only two cables - for video and power supply (sound is optional in this case), a 12 V power source (unit) is additionally included in the circuit.
If a real-time picture appears on the TV screen after selecting a specially designed AV channel and turning on the home camera (or powering up the video surveillance), then you can be sure that everything was done correctly.
How to view and broadcast?
There are a number of differences between an analog and IP camera. The latter broadcast a higher quality picture and are equipped with additional intelligent functions. Connecting cameras to your TV requires only 4 steps:
- connect video surveillance devices to the NVR using Ethernet Cat 5/6 cables;
- connect the NVR security camera to your TV using an HDMI cable;
- turn on the network video recorder using the power adapter;
- turn on the TV, after which a real-time image will appear on the screen.
As a result, there is no need to download an application and there is no need to connect to the router. All accessories needed to connect security cameras to your TV are included in the standard NVR package.
There are 5 main reasons why a user should choose an NVR system to connect a security system to a TV:
- easy connection;
- large storage space and 24/7 recording;
- work without a network (without connecting to a router);
- stable signal;
- simple controls.
To connect a video surveillance system to broadcast equipment, you will need either a physical HDML cable connection or some software that broadcasts video streams from the camera from another location (PC or phone) to the TV.
Having tried and tested various methods of connecting the security system to the TV directly, users have identified the most popular methods that are most profitable to use. The most convenient is the NVR system.
If you choose other connection methods, it is important to consider the brand of TV that is used to broadcast video, as well as the model of the camera itself. Advantages. Large storage space is the biggest bonus of connecting a CCTV system to your TV
There is no need to worry that the saved video may soon be overwritten
Large storage space is the biggest bonus of connecting a CCTV system to your TV. There is no need to worry that the saved video may soon be overwritten
Advantages. Large storage space is the biggest bonus of connecting a CCTV system to your TV. There is no need to worry that the saved video may soon be overwritten.
After connecting the video surveillance equipment to the TV with NVR, you can both view the image from the cameras online and record the image. For example, the Reolink RLK8-410B4 can record continuously for weeks at 4MP Super HD resolution. But you can choose a lower resolution - then the recording may last longer.
After connecting the CCTV cameras to your TV and network video recorder, the device is ready to broadcast live images and save them to your network video recorder (NVR). In this case, the router is not used.
There are often situations where the user tries to connect security equipment to the TV, but receives a warning that there is no signal. This mainly happens when connecting security systems to the TV using third-party software. When connecting video surveillance equipment to a TV with an NVR, this option is excluded. Once the user connects all the devices using the correct and simple wired connection, an online picture with good signal quality will appear on the screen.
Easier to manage security cameras throughout your system. For example, once connected to a TV (PC or other monitor), you can easily update all IP cameras at once using the NVR operating system.
Other ways to connect analog cameras
In addition to the above, there are also less common methods of using non-digital video cameras. One such method is through connections through an old VCR, most of which were capable of outputting images from various devices. The disadvantages of this method are obvious. Firstly, few people still have a live VCR. Secondly, they have not been sold in stores for more than ten years. For these reasons, only a few "lucky" people will be able to connect the camera in this way. Another disadvantage of this connection is that it records exclusively on old magnetic cassettes, which are very difficult to find these days.
Therefore, using a video cassette recorder is not suitable for almost anyone nowadays, and almost all newer DVD players do not have the ability to connect an analog camera (or there is no disc recording function). It is completely impossible to connect any analog devices to modern players from flash drives using standard methods (such players can only work with digital IP cameras).
"Underwater rocks"
The first difficulty that you may encounter in the process of organizing such video surveillance is the number of wires that will have to be installed. If in a digital video camera power supply, video signal transmission and control of the rotating mechanism are carried out through one wire (PoE technology), for an analog one, you will have to use three cables (with very rare exceptions). It is not always possible to conveniently lay one single cable; it’s not worth talking about three.
It is also very desirable to have an outlet or power supply near the video camera, from which the device will operate. While a digital camera can receive power directly from a DVR, router or computer via PPoE, analog devices do not support such technology (for obvious reasons).
The length and quality of the cable in non-digital video surveillance systems affect the video quality much more than in digital cameras. Therefore, if you use a cable that is too long and of poor quality, severe noise or distortion may appear in the image received from the camera.
Main connectors for connection
One of the most popular connectors is RCA (in simple language “tulips”). This type of connection is distinguished by good video transmission quality and minimal interference, which is why it is quite widespread.
There are also video cameras with the ability to connect to input F (antenna). Their advantage is the ability to connect to almost anything (even an old Soviet TV). The disadvantages are the frankly poor quality of the transmitted video and noticeable interference, so they prefer not to use the antenna input, connecting the device using “tulips” (which is often even cheaper).
conclusions
Despite the rapid obsolescence and emergence of more advanced technologies, analog video surveillance is still widely used in homes or at various facilities. Not everyone wants to change a time-tested video surveillance system to a newer one, especially considering the huge costs of such an upgrade.
Connecting analog cameras is not as difficult as it might initially seem. The main thing is to choose the right equipment (for analog cameras you should buy a DVR with analog inputs), with the rest everything is extremely simple. It is enough to connect the cameras to the appropriate inputs in the DVR, TV or computer video capture card.
Although in some cases problems may arise (in particular when trying to connect analog video cameras to exclusively digital devices). But even in such situations it is not difficult to find solutions, because there are many converters or other devices that allow you to make switching.
Other articles:
- Interference on an analog camera
- Electronics manufacturing process
- dvr and nvr
- Application of Teflon for food production
Types of cameras and features of their switching
The modern market offers several video surveillance technologies. Each of them has not only its own characteristics of image transmission, but also connections to the TV.
Switching analog cameras
Analog cameras are good because of their low cost and simplicity of equipment. They, unlike all other cameras, can be directly connected to the TV. At the same time, they provide a low-resolution image, which most often does not allow one to see the small details of the object. Analog video recorders (DVRs) have a number of standard features. This technology is considered obsolete, and in most cases, suppliers abandon it in favor of other solutions.
Analog CCTV camera
Switching IP cameras
IP video cameras are considered one of the oldest technologies. They developed in parallel with analog cameras, but were always much more complex and expensive. First of all, you need to understand that an IP camera is a network device that requires a computer network to operate. They connect to the network via an RJ45 computer connector, and some are equipped with a WiFi interface. The camera has its own firmware, one might even say an operating system.
When installing an IP camera, it is not enough to simply connect it to the DVR. In most cases, it is necessary to configure it, which is difficult for a simple user. At the same time, IP cameras allow you to receive high-resolution images (up to 4 megapixels), have built-in digital filters that improve image quality, as well as many other useful functions. There are cameras with a built-in microphone and even a speaker for two-way communication. In addition, the IP camera can be used without a DVR: it can be replaced with a computer or tablet/smartphone with special software.
IP camera
Connection diagram for IP video cameras
TVI/HDCVI/AHD Cameras
TVI/HDCVI/AHD replaced analog cameras. In most cases, these are simple devices that produce high-resolution images (from 1 to 3 megapixels). Some more expensive solutions come with built-in additional features.
They cost less than IP cameras, but more expensive than analog cameras. These cameras can only be used with DVRs. In terms of image quality, they are inferior to IP technology, but one of their advantages is the absence of delay in the resulting image. There is a delay in IP cameras, and sometimes it can be quite sensitive.
Connecting such a system is the same as with conventional analog cameras, but it is impossible to connect them directly to TV, since the signals are incompatible. There are models that have a button to switch the high-resolution video mode to analog video mode - such cameras are connected like analog cameras, all connectors are the same. The picture will appear on the TV when switching to analogue mode.
Connection diagram for HD cameras to TV
Best answers
master:
1- what camera? 2- what TV? 3- Is there a common connector between the TV and the camera? for example, I have a connection to a “tulip” camera on a TV using an HDMI or Scard connector - that is, to connect, you need to either buy equipment for converting one signal to another, or buy another TV. And this despite the fact that I have such an opportunity with the camera. My previous camera did not have this option. The latest cameras have an HDMI connector, which older TVs do not have.
Anatoly Ratomsky:
It depends on what kind of camera it is. And in general, a cord with a yellow “tulip” (from the camera kit). “Tulip” into the corresponding connector on the TV, the other end into the camera. TV is in AV mode.
S€RGEN:
For this purpose, the kit includes two cords, for the computer (USB) and for TV (JECK) - connect and enjoy, from the settings - the TV to VIDEO viewing mode...
Nikolay Egorov:
I connect via a USB cable. With the photo turned off, I connect it to the TV, then turn on the camera, the TV in media player mode and enjoy.
Opium:
I connect via HDMI. In this case, there is an option - viewing on TV instead of the camera display or the option of viewing the contents of the memory card. But everything naturally depends on the hardware models.
Setting up a router to access the camera via the Internet
If you have successfully completed the steps above, your camera will be available on your local network. You can work with it from any device connected to your router. However, if you want to access the camera via the Internet, you will need to make additional settings.
First you need to find out whether your provider provides you with a static “white” address
This is important for gaining access to the router via the Internet.
"White" IP addresses
There are two types of addresses: real ones, which are called “white”. And virtual ones, usually called “gray”
They can be static or dynamic, but in this case it is not important. The main thing is that if you have a “white” address, then you can connect to your router from the network directly by specifying it
If the provider distributes “gray” virtual addresses on the network, and access to the network is carried out from a common IP provider, then it will not be possible to find your router on the network by IP address.
You can check what IP you have as follows. Look at what address is used when you connect. After that, go to any service that allows you to determine the IP from which you are accessing the network. For example, the site 2ip.ru. If the IP of your connection and the IP determined by the service match, then you have a real address. If the addresses are different, then you have a virtual IP. Most providers provide real IP addresses for a fee upon application. Contact technical support to resolve this issue.
When using the mobile Internet - connecting an IP camera through a router with a 3G/4G modem, the operator often issues an external dynamic IP address. It may change over time, for example after the device is rebooted. It is advisable to activate the external IP address service. In this case, you will receive a static address. It will not change after a reboot.
We will assume that you have resolved the issue with the “white” address. But that is not all. Now you need to open ports on the router for incoming connections.
Port forwarding
By default, the camera uses port 80 for connection. You don't have to change it, but you can change it if you want. To do this, go to the camera’s web interface and enter any number in the network settings instead of 80. For example, 3000. Now, to connect to it from the local network, you need to enter its IP address, colon and port number. That is, in the browser line you need to write: 192.168.1.25:3000, where 192.168.1.25 is the local IP address of the network web camera.
Don't forget to change the default password for your camera so that no one can access it!
Now you need to perform port forwarding on the router. A separate article on our website is devoted to this topic. In it you can find detailed instructions on how to configure port forwarding on various routers and why it is needed. Here we provide brief instructions.
We look for the item “Port forwarding”, “Port forwarding” or something similar in the menu of your router. Enter here the IP address of your camera, the port through which the external connection will be made to it, let’s say 4000, and its port (the default is usually 80, but if you changed it as described above, then 3000). After saving the settings, check if the connection is working. To do this, from any computer connected to the Internet, go through a browser to the address xx.xx.xx.xx:4000. If the login window to the web interface of the IP camera opens, then the connection is configured correctly.
Please note that here we have forwarded ports for the camera 192.168.1.25. For example, we added another camera with IP address 192.168.1.25
We chose external port 4001 for it. Thus, we will connect via xx.xx.xx.xx:4000 to one camera, and via xx.xx.xx.xx:4001 to the second.
Check on TV
You can check the rear view camera before installing it on the car using a TV. First you need to prepare the power source. Its role can be played by a 12 V car charger or a battery for a computer UPS with similar characteristics. If your camcorder is designed for lower voltage, you can use a lab power supply with adjustable parameters.
If necessary, the power source can be made of 8 D-size batteries connected in series. The plus is supplied to the red wire, which during the test is protected by a fuse with a rating of at least 0.5 A. The minus is connected to the black wire or to the side outer contact of the video cable.
The next step is to check the camera's functionality using a TV. To do this, it must be equipped with a composite video output with a yellow tulip socket. The devices are connected using an RCA-RCA video cable. The TV then switches to the desired signal source.
After this, power is supplied to the rear view camera. At this moment, an image of the objects in the lens will appear on the TV. Brightness, contrast, color and clarity must be sufficient to distinguish small and large details. If the image is blurry, you should check whether there is a filter on the camera lens and remove it if necessary. You also need to make sure that the lenses are not dirty.
Using the TV, you can check the functionality of the microphone built into the device. First, you should find another white or red tulip nest in the bundle. If it is present, then there is a microphone.
In this case, the audio output connector is connected with another shielded cable to the corresponding jack on the TV. After this, you should turn on power to the camera and point the microphone at the TV speakers. If it works, a loud howling sound will be heard, which will disappear if you move the device away. Chaotic stripes will appear on the TV screen with a kinescope. A camera tested in this way can be installed on a car.
Device connection diagram
Let's take a closer look at how to connect a camera to a TV using different types of cables.
The connection diagram via SCART looks like this:
- Connect the camera to a 12-volt power supply;
- Connect the cable from the camera to the low-frequency input on the TV;
- Then switch the TV receiver to the video signal receiving mode (in older models it is called AV).
If you did everything correctly, the image from the video camera should be displayed on the TV screen.
Quite often, residents of multi-storey buildings install a small camera on the landing. The video signal from such a device can be transmitted to each apartment on the floor or even on several floors. Analog video cameras have two connectors:
- Red – for connecting a power supply;
- 2 RCA connectors (yellow and white).
To connect an analog camera to your TV, you will need to do the following:
- Connect the power supply to the video device;
- Connect the video output of the camera (yellow) to the video input of the TV;
- Connect the camera audio output (white cable) to the TV audio input;
- To view the image, the TV receiver must be switched to “AV” mode.
Also, an analog video camera can be successfully connected via a combined coaxial (CC) cable. Due to the peculiarities of its design, both a signal and power can be supplied simultaneously through such a wire. In the picture you can see a diagram of such a connection:
BNC connectors can be used on each side of a coaxial cable.
Directly connecting a digital camera to a TV follows the same scheme, only using an HDMI or Mini-HDMI cable:
- We connect the power supply to the camera;
- Using a cable, we connect the “Output” port on the camera to the “Input” television port.
If your TV does not have inputs of the required format, you can use adapters. But remember that an adapter is not a device for converting a signal, but only for transferring contacts. If you use a SCART-tulip adapter, the signal will be transmitted stably and reliably, since the algorithm for working with information is the same for both standards. However, using an HDMI adapter - tulip will not be able to display a digital image on your screen; you will need a signal converter.
Parking video cameras or car rear view cameras are also an integral part of our lives. They help you park more confidently even in the most restricted areas. But it’s one thing to buy a car camera and install it correctly, and quite another to connect the camera to a TV set. No matter how difficult it may seem at first, the design of such cameras is standard. They also have three plugs:
- The red wire (+) must be connected to the reverse light signal cable;
- Black or white wire (-) for grounding (the same place where we get power);
- The yellow wire transmits a video signal, so we combine it with the video input of the television unit (VIDEO IN).
Tip: since short circuits can occur in electrical networks, it would be advisable to install a 0.5 A fuse in the yellow wire, and after that do not forget to insulate all connection areas.
Connecting a CCTV camera to a computer
Connecting a CCTV camera to a computer will help you, unlike a TV, save video footage to your hard drive. Plus, in this case the camera can be programmed. For example, for shooting at a certain time.
There are three ways to connect a CCTV camera to a computer. Let's look at them in order. First, you need to install a video capture card on your computer - without it you won’t be able to work with the camera. It will help you when working with analog cameras, and it will also be used to process video and encode.
Such a board can have from four to sixteen video inputs - this will be quite enough if you decide to create your own video surveillance system. If you buy the board in a specialized store, and not from hand, you will receive a program bundled with it, with which you can perform the functions of recording from a dome camera, recording at a set time, etc.
Please note that since the video capture card is installed inside the computer, this excludes its connection to a laptop
The second method is to connect the camera to a computer using a USB converter. Such a device connects to a computer via a familiar USB input, but allows you to convert an analog signal to a digital one. The picture quality will be low, but the connection option itself will be the most budget-friendly.
The last way is to use a video server. With its help, you can digitize the video signal and get a more functional camera. The video server has a BNC input, to which you can connect a video surveillance camera, and a LAN output, which, in turn, connects to a computer. In this case, you can work with the camera both through a desktop computer and through a laptop.
Common problems that may occur
There may be problems setting up your webcam. Please ensure that you have taken all necessary steps to complete this process. Press the Enter button on your remote control or Smart TV to change your TV settings.
Pressing the button again should cycle through the screen settings. Continue this step until screen sharing starts.
On most Smart TVs, settings are usually related to applications rather than input screen options. You need to find a screen sharing app and enable the camera connection. If you are using Zoom, Skype or any other program, you will need to request permission to share your screen by granting permission for the video feature to function.
In short, the connection process is very simple and with a USB camera or connecting the camera through a mobile phone or laptop, it should work the same on the TV.
Web camera for smart TV
First of all, it is worth noting that it will not be possible to connect any old standard webcam directly to your TV. Regardless of whether your device has a USB or HDMI input, the image will not be recorded.
All this means that your only choice will be cameras designed for specific TV models.
Here, another limitation also appears. These types of equipment are actually only prepared for smart TV models that support programs like Skype.
All this means that before you buy a camera, you need to check which models are compatible with your TV.
The best camera for TV
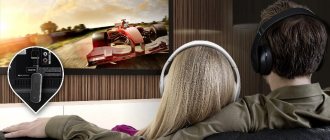
Modern Smart TVs often go on sale with a television camera already installed. But if such equipment is not available, you can install it yourself. Using the capabilities of the webcam on the TV, you can use various communication applications, for example, Skype. Thus, the user gets the opportunity not only to chat, but to have visual contact with his interlocutor.
TV webcams have a high-quality microphone built into them, so you can easily make video calls without purchasing additional equipment for this.
Not any webcams are suitable for connecting to TV equipment, but only those that were specifically designed for connection to Smart TV.
Therefore, the best camera for a TV device is the one that is designed to be connected specifically to this device.
Connection via TV modulator
Quite often you may be faced with the need to install a video surveillance system inside or outside the entrance. In this case, it is necessary to distribute the signal from one video camera to each of the apartments. At the same time, not all residents will agree to purchase a separate monitor with an HDMI VGA connector, which will allow you to view the image.
Therefore, special devices - television signal modulators - have become very popular in the video surveillance market. One such modulator can be installed on each staircase.
The modulator helps display the picture transmitted by the recorder to any of the televisions present in the building. It should be taken into account that they must have the same cable TV provider. Otherwise, you need to purchase one modulator for each provider.
The TV modulator works on a very simple principle. It creates an additional flow of information on the television signal transmission channel, broadcasting on a free frequency. At the same time, it is quite possible to carry out the settings yourself using the standard TV menu.
To connect an IP camera to a TV via a modulator, you need to install the latter in the television cable. This can be done inside the apartment. Using a standard connector, the signal coming from the recorder or camera is supplied to the modulator. Next, you will need to set the broadcast frequency - indicate the channel number on the modulator body. And by means of a divider at the output of the device, you can connect up to four TVs to it.
How to display an IP camera on a TV via a DVR?
So, to connect an IP camera, you need either a network recorder (NVR) or a hybrid recorder (HVR), to which you can connect analog and IP devices simultaneously. If you want to connect analog equipment to your TV, you can do this using a regular analog video recorder (DVR), but in this case, video surveillance will be exclusively local, without the possibility of remote viewing. The connection principle for all recorders is the same - you need to output the image to the TV through one of the available connectors, usually VGA, DVI, RCA, HDMI. Below are pictures to make it easier to navigate.
| VGA | DVI | RCA Jack (tulips) | HDMI |
There is no difference in the quality of the connection, the only difference is that if the recorder supports audio playback and the design has a microphone, then an RCA or HDMI cable is preferable, only they have an audio channel. VGA and DVI transmit only images.
As soon as you connect the recorder, it will immediately show the image from all cameras. You can manage settings using the mouse and keyboard. To continue viewing channels, you can switch the signal source on the TV using the remote control or manually.
CONNECTING TO A MONITOR AND TV
If you connect a video surveillance camera directly to the monitor, then naturally you can only watch the image online and nothing more.
Direct connection of the camera to the monitor is only possible if it has an input for a composite signal. These are usually specialized monitors for video surveillance, they are not cheap, so it is easier to use a computer monitor and a BNC-VGA converter.
When purchasing a converter, you should pay attention to such a characteristic as resolution. As a rule, it is about 740x576 px, which corresponds to a camera resolution of about 420 TVL
Thus, if you have a high-definition video camera, part of it will be “eaten” by this device.
In conclusion, let's look at how to connect a CCTV camera to a TV.
To do this, your TV must have connectors for connecting a composite signal (RCA). In this case, the central contact serves to supply the video signal directly, and the outer contact serves as a screen (see photo).
Since analog CCTV cameras usually have either wire leads or a BNC connector, you will have to make a corresponding adapter. For the version with a connector, we place a BNC male on one side of the connector, a tulip on the other, and connect them with a coaxial cable (resistance 75 Ohms) as shown in Fig. 1.
If the video camera has wire leads, then we make the connection in accordance with Fig. 2. Don't forget to supply power to the camera. If the camera has 4 outputs, then look at its data sheet; most likely there will be two double wires coming out.
Yellow, as a rule, is always a signal, and red is a power plus. The other two can be connected to each other - this will be a common one. But, in order to avoid complications, do not be lazy to find a description of the video camera.
After that we connect the corresponding connectors and that’s it. Keep in mind that to view you need to select the appropriate mode:
- “SOURCE” button on the remote control or TV;
- then on the TV screen menu item “AV” or “composite”.
As you can see, nothing complicated.
* * *
2014-2020 All rights reserved. The site materials are for informational purposes only and cannot be used as guidelines or regulatory documents.
Selecting a camera or video surveillance system
Recent advances in video surveillance technology are allowing more people to build their own video surveillance systems. The use of so-called "nanny cams" helps to monitor our children, explore the outside perimeter of the house from the inside, and monitor any workers inside the house.
Cameras vary in size and recommended use, but the basic function remains the same: the device must be connected to a monitor or TV. Let's get acquainted with the main criteria when choosing a camera or video surveillance system.
First of all, if you organize a video surveillance system via a TV, you should pay attention to the technical capabilities of the latter:
- What is the size and format of the television screen;
- What type of signal can it receive;
- Indicators of scanning frequency and screen response time;
- Does the TV support smart TV?
The following four characteristics are important for a camera:
- Lens viewing angle;
- Focal length;
- Matrix resolution;
- Photosensitivity.
It is wrong to think that for a high-quality video surveillance system, only good camera resolution is important. The image output device also plays a significant role. If you buy an expensive video camera model, but connect it to a simple and small screen, you will get a blurry and unclear image that you will have to look closely at to make out what is happening at the object of observation.
The size of the TV must be chosen depending on the size of the room in which it will be installed. There is such a convenient formula with which it is easy to determine the optimal distance from the TV receiver depending on the size of its screen. It's called "Five Diagonals".
That is, if you buy a TV with a diagonal of 40 inches (or 102 cm), then it is better to watch it at a distance of 5 * 102 = 5 meters and 10 centimeters. By back-calculating, you can find out what size TV you should buy for your room.
When it comes to screen format, the choice is very simple: almost all the latest plasma and LCD flat-screen TVs, as well as most video projectors designed for home cinema, are produced in widescreen format, which means they have a 16*9 display aspect ratio.
The sixteen by nine aspect ratio, also known as high definition (HD), has become the leading aspect ratio since the beginning of the 21st century. This is the international standard for HDTV, non-HD digital television and PALplus widescreen analogue television. Standard television, which has existed since the mid-50s and has an aspect ratio of 4:3, is confidently becoming a thing of the past.
Different TVs can receive different types of signals:
- Analog – PAL, SECAM, NTSC;
- Digital – DVB.
You will not be able to use high definition analog cameras with HD-TVI, HD-CVI and AHD technologies as they are not compatible with your TV. A standard analog CCTV camera that can be connected to a TV uses Composite Video Baseband Signal (CVBS) technology.
Analog signals are significantly inferior in image quality and stability to the digital channel. Therefore, if possible, it is worth buying both a camera with the ability to capture video in digital format and a TV capable of receiving a DVB signal.
There is another new type of video surveillance device - an IP camera. IP stands for Internet Protocol, which now refers to a digital video camera that can send and receive data over a computer network, as opposed to sending a feed to a digital video recorder (DVR).
Megapixel IP cameras capture a much wider field of view than comparable analog cameras, meaning that one IP camera can potentially do the work of three or four legacy cameras. Today such web devices are available in 1.3-; 2- or 3-megapixel configuration.
The scan frequency and screen response time are two parameters that determine the quality of the picture on the screen. The first value indicates the screen refresh rate (frames per second). The higher the scanning frequency of the TV, the clearer the image will be; the minimum value for comfortable viewing is 85 Hz.
Response time is a measure of how quickly pixels can change their state: from active to passive or vice versa. The smaller the number of milliseconds, the faster the screen will update the picture, this is especially important in dynamic scenes of films or games. The best response time today is 0.002 ms.
Now let's explain the main characteristics of video cameras. The viewing angle of the lens is a parameter responsible for the coverage of space. This is the angle of the subject area that is projected onto the camera sensor by the lens. In simple terms, this is the angle at which the sensor can “see” through the lens.
The focal length of a lens is the distance in millimeters between the sensor and the optical center of the lens. This parameter is not measured from the sensor to the front element of the lens, but is the point at which light rays intersect and are directed towards the sensor.
If you hear the term “wide-angle video camera,” this is what they call lenses with focal lengths of 3.6 mm or less. Such devices will be able to perfectly survey a wide area, but the detail in them will not be at the highest level. For example, if the visitor’s face or an object in his hand must be clearly visible on the camera, then it is worth installing a video camera with a focal length of about 16 mm.
A camera's light sensitivity is measured in units called LUX. The higher the number, the more light is needed to capture images. Cameras that have a very low LUX value, close to zero, are capable of collecting images in almost any lighting. If the area is bright and constantly changing, an auto iris lens is needed to get the best image. Manual or fixed iris lens is compatible with areas where light output remains constant.
The camera's image quality will be measured in TVL, or TV Line Resolution. A larger TVL will result in more lines of resolution and the image quality will be much sharper. Standard camera size ranges from 380 TVL to 420 TVL, high quality – from 480 TVL to 570 TVL.
The best camera to connect to your TV will be the one that best suits your application environment. If you need to record the finest details, consider purchasing a camera with a high TVL. An infrared camera is required to record images at night or in low light. If you need a large space to save time, a device with a wide viewing angle will be a priority.
Possible problems
Let's say a little about possible problems and malfunctions with video cameras when connecting to a TV and their further use. One of the most common problems is the disappearance of the picture on the TV. To figure out what the problem is, you should look through the archive, if available, to see whether the shutdown was a one-time event or has already been repeated with a certain frequency. There may have been some interference before the camera turned off, or the device turned off instantly.
An equally common cause of various kinds of problems and malfunctions with the image from the camera is the poor quality of the connectors. It is imperative to ensure that the connectors are connected correctly and of high quality.
Another possible problem or cause of problems is the failure of the device’s power supply. If there is a suspicion of its malfunction, you need to check the voltage with a multimeter under load, that is, with a connected video camera, and make sure that the voltage values are within the standards.
If it is determined that the measured voltage does not correspond to standard values, then the power supply must be repaired or replaced. Although the latter option will still be preferable.
Another cause of problems with video cameras is problems with cable lines. To make sure that the cables are in good condition, you should check them for physical damage, breaks, or kinks.
As you can see, there are a large number of ways to connect different camera models and there is an opportunity to choose the most convenient and affordable connection option. The only thing you should know is that when carrying out any actions to connect a video camera to a TV, you should clearly understand the sequence and essence of the actions being carried out.
Below you can watch a video with tips on connecting an analog video camera to a TV.
Equipping your TV with a webcam
Not everyone needs to equip their TV with a webcam or, as people say, a webcam. However, if your TV is the latest model and has Smart TV technology, you have a unique opportunity to use it to communicate for free with your friends, including those from other cities, via Skype.
To organize video conferencing and visual communication, you need to connect a web camera to your TV. It is somewhat different from those used with computers.
If the television device does not have the functions of receiving signals other than analog, then it is not possible to connect to it a regular webcam equipped with a USB interface. This can only be done after adding a special system unit used as an adapter.
Step by step guide
- Step one. After making sure that your TV has the necessary functions, purchase an analog web camera via the Internet or in a specialized radio engineering department. To recognize the webcam using the supplied driver, you can use a personal computer as a transition device. You should immediately assess whether the computer and TV have identical inputs and outputs: SVideo, DVI, VGA, HDMI, etc.
- Step two. Using a specialized cable, and, if necessary, an adapter, the TV is connected to the computer. It is necessary to achieve such a resolution that the TV screen can be used as a monitor. Then the web camera is connected with a connecting cable to the computer via a USB connector.
- Step three. The installation disc included with the camera contains a driver that needs to be installed on your computer. The appropriate resolution and other parameters are configured using a special utility or through the “Devices” menu section located on the computer in the control panel.
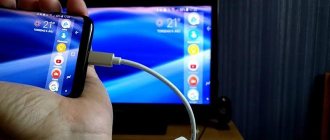
- Step four. The webcam is installed so that the required sector falls into its field of view. When the connecting cable is not long enough, use a special USB extension cable. The most advanced latest models of TVs are immediately installed with operating systems similar to computers, but they also do not allow you to work with webcams, which are designed for a different platform and are not recognized by the systems, so the camera cannot work and you cannot do without a computer.
Connecting to Smart TV
This option is the most preferable because it is the simplest. As you know, TVs with Smart TVs are quite common, so they can no longer be called market novelties. Connecting a CCTV camera to such a TV has the following advantages:
- Thanks to Smart technology, it is possible to access the Internet directly from the TV;
- To make entering information and working on the network easier, you can use additional accessories, for example, mice and keyboards for TVs;
- a wide screen that allows you to view the image from the IP camera in detail, even while in another room.
To connect an IP camera to a Smart TV, you need to follow several steps. On the video surveillance service, you need to register an account, and then use a unique numbering to add all the camera’s IP addresses there. In this case, it is possible to group devices according to their true location or the subject of information transmission. As a rule, the service interface is not complicated, so you can easily select and enable image transmission from one camera in the list.
Next, the TV is configured to access the Internet using the data provided by the provider. Once you have succeeded in logging into the network, you need to enter the address of the video surveillance service in the search, enter your personal account and select the required device to view.
Smart TV is not safe for the privacy of TV owners
Why?
Because it allows an evil and skilled hacker to observe the owner of the TV.
How come? How can he do this? It’s no longer news that TVs with Smart TV systems are unreliable, especially in terms of software.
It turns out that hackers have the opportunity to monitor what is happening in your room, where you have a TV with a webcam and Smart TV support. Devices of the model range starting from 2012 produced by the South Korean company are at risk.
It seems that a patch has been released that fixes this problem, but as far as I know, in some places and who, except malicious hackers, are watching you. You probably guessed who is interested in such actions.
Of course, you can say, loudly, that I have nothing to hide!
However, I note that this is not audio, but video, from your room. Where do you and your wife play the main role or...