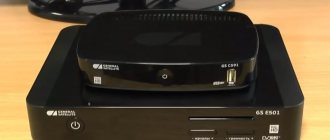
Updating software on receivers is a simple process, but there are several nuances that should be taken into account. If you do not do this, you can completely break the system, but restoring it will not be easy. Today we’ll talk about how to reflash a satellite tuner.
What will you need?
- RS232 modem cable
- Bootloader (utility)
- Firmware or dump
- A computer with a corresponding port or a USB-RS232 adapter for it
Tuner firmware
And before we look at the question of how to flash a tuner, it’s worth understanding this process itself and understanding whether it is so important and whether it is necessary to do it. Firmware is an update of all software parameters of the device, which allows you to either get additional functions or simply make the basic functions better and more efficient. This process takes place automatically or manually - it all depends on the tuner model and your understanding of this matter. How to flash a satellite tuner? It is possible to do this, it’s not even worth talking about the process, but for the sake of complete instructions, we will further consider all these points, and in just a few minutes you will personally be able to figure out exactly how to carry out this procedure.
Why do you need firmware?
In the domestic market, the most popular devices are from Rostelecom and Cadena. They pick up all free Russian television channels.
Receiving a good quality digital TV signal results in excellent picture and sound. Channels can be caught automatically or searched manually. For those who upgraded the Rostelecom TV set-top box, it became possible to watch TV channels from the playlist, regardless of tariff restrictions. In addition, after updating the firmware, the set-top box turned into a convenient media service with WiFi and DLNA connections.
Negative factors include the lack of some services. The device itself is a modified foreign set-top box, and unnecessary functionality has been removed.
For domestic consumers, the interface is made in Russian. The Cadena console regularly receives updates, which are published on the official website. They mainly affect the interface and menu design. The receiver provides a TV program for the week ahead, support for subtitles and teletext, parental controls and many other useful functions.
For those who like to record certain broadcasts, this function is provided. To do this, you need the appropriate firmware version and a memory card with enough capacity to record video.
In the future, the recorded material can be played back using the media player built into the console.
The need to collect information
So, before we begin to consider the question of how to flash a satellite tuner yourself, it is worth remembering one very important component of this process. It consists of collecting information about your tuner, from the model to the license plate number of the set-top box processor. To get all this information, just read the documentation for the device. If there is none, then it is worth considering the device: it must have license plates and identification marks, you need to write them down on a piece of paper.
To find out the license plate number, you need to remove the cover of the device and find a special barcode inside it that relates exclusively to the processor. Write down the processor number on a piece of paper where you already have the initial information. After these steps, you need to launch the tuner itself and go to settings, where you need to look at the device model and carry out authentication, which will show whether there is an update or not. If your tuner does not have such a function, then you need to use the manufacturer’s official website, where all the necessary information is available. You need to enter all your data into the site search, the site will give you the model of the tuner, where, in fact, there will be information about the new firmware version. Check it against your version in the menu and this will determine whether you need the update or not.
What is needed for firmware
To flash Android TV BOX, you will need:
- computer with Internet access;
- RockChip Batch Tools (RCB Tools) – a program with which the firmware will be installed;
- drivers for TV set-top box;
- firmware file;
- USB cable.
It is important that Windows is installed on the computer, since the program with which the device is flashed is written specifically for it. You also need to carefully inspect the cable to ensure its integrity. On the set-top box itself, you need to enable USB debugging.
Model difference
We've figured out how to flash a tuner through a computer, now it's worth talking about why linking a model to an update is so important? Let's return again to the program that is supposedly capable of updating any device. It is worth remembering that, although all devices have the same basis, the software shell itself is completely different. If you want to use a different numbered firmware that is different from your model, it will install, however, there is no guarantee that the device will work. And if you accidentally do this, consider that you have overwritten a software setting, which is very difficult and very expensive to restore. Even resetting to factory settings will not help you, since this function simply will not exist. Be careful and attentive during the update!
Methods for replacing the firmware in the receiver.
The Tricolor satellite receiver can be flashed in the following ways.
- By downloading the receiver firmware from the satellite.
- Firmware for the receiver from a computer.
- Download the update from a USB flash drive
You choose the option to update the satellite receiver software yourself. For example, if you are good at computer literacy, then it will not be difficult for you to use the second version of the receiver’s firmware.
Tuner firmware using a computer
The first thing you need to do when updating the receiver's software is to find out the model of its processor. This is a very important point, since the version of the downloaded firmware will depend on the brand of the chip. There are two options: look in the “System Information” menu or remove the cover and look at the markings directly on the processor.
Once you know the processor model, you need to find the appropriate software version for it. All of them are publicly available online and available for download. As a rule, the firmware name indicates the type of processor supported. Be careful and check all symbols carefully. Once the required version has been found, you can begin.
You will need:
- bootloader (we will use the Upgrade Tool Version program);
- null modem cable (RS232);
- firmware file;
- COM port on the computer.
The procedure will be as follows: the bootloader program will install the previously downloaded firmware on the receiver connected to the computer with a null modem cable. Let's look at everything in order.
- Disconnect the tuner from the power source.
- Using a null modem cable, connect it to your computer.
- Launch the downloader program. After launch, a window will open in which you need to select the port to which the tuner is connected. Immediately, opposite the “Process” inscription, select the “Record” item.
- Connect the receiver to the network (without disconnecting it from the computer). You will see a flashing inscription on the tuner display.
- Click the “Connect” button that appears and see that the program offers several options for installing software. Use the very first All Chunk method. It will download the entire firmware as a single dump.
- Select the previously downloaded file.
- If you specified the correct path to the file, the program will mark this with a red checkmark on the All Chunk icon.
- Click Next. A window will appear on the screen showing the download process.
- Then the firmware will be written to the receiver's memory. Do not interrupt this process under any circumstances.
- Once the program finishes recording, you will see a success message and the tuner will reboot.
This completes updating the receiver via a computer. As you can see, there is nothing complicated and the whole process is completely automated.
Firmware using the “tuner to tuner” method
Using this method, you copy the contents of one tuner's memory to the memory of another. This option will be useful for people who do not have a computer, and it is also used by installers.
We will need:
- null modem cable (RS232);
- tuned tuner with firmware installed on it;
- “clean” tuner on which installation will be carried out.
The process can be roughly divided into two stages. On the first one, we will copy the software from one device to another, and on the second one, we will transfer all the settings (channels and settings lists).
- Connect both receivers to each other using a null modem cable.
- Connect to the network the tuner from which the settings are copied (hereinafter we will call it the main one). Then put it into software transfer mode. To do this, you need to hold down the following combination of buttons on the control panel - 74620. The word Soft will appear on the tuner display. The receiver is ready to transmit data.
- It is necessary to power the tuner on which the software will be recorded (hereinafter we will call it a secondary tuner). On its display you will see 8888, and on the main display - _-_-_-. These characters signal the start of data transmission. Do not disconnect the receivers from each other and from the network until the process is completed.
- As soon as the data transfer is completed, End will be displayed on the main display, and four eights will disappear on the secondary display and Lang or the channel number will appear.
The first stage is completed - the software has been successfully copied from one receiver to another. Now let's start transferring the settings.
- Similarly, connect both devices with a null modem cable.
- Connect both devices to the network.
- Put them in standby mode. To do this, you need to turn on the tuner from the remote control or from the res panel. A successful transition will be indicated by a red light that lights up on the display.
- Put the main receiver into settings transfer mode. For this, there is also the necessary combination of buttons on the control panel - 74621. The successful start of the mode will be indicated by the inscription dAtA. ATTENTION. After activation, the master should not receive other commands from the control panel.
- The secondary receiver must be switched to settings receiving mode. We press the following combination of buttons - 24680. The data transfer process should begin. The receivers will display the symbols - _-_-_-.
- After the data transfer is complete, you will see End on the main tuner, and the channel number on the secondary tuner. Be careful when disconnecting receivers from each other and from the network. First unplug them from the outlet and only then disconnect them.
This completes the firmware process. As you can see, doing this yourself is not only possible, but also quite simple.
Update via WiFi
This opportunity to reflash a digital set-top box for a TV is not available on all gadgets. Often devices with Smart TV and Android are equipped with it. The process looks like this:
- Go to the menu.
- Find the item about updating your device. This could be “Firmware”, “System” and so on.
- Complete all the steps that appear on the screen.
- Wait for the process to complete without taking any action with the device during this time.
If all points are completed correctly, then the firmware of the set-top box will be successful. Reboot your gadget and enjoy new or improved features. The problems that were on this device due to unsuccessful firmware will disappear. I hope that this article will be useful to you and that you can easily cope with this simple procedure.
Official firmware via Multicast
It is not always possible to find a flash drive at hand. Plus, both methods of flashing using a USB drive can result in failure. In this case, do not despair, as there is an alternative option to update the software.
An alternative flashing method is multicast. It is used in situations with set-top boxes that are connected to the router via a patch cord. If the connection is via Wi-Fi, it will be enough to connect the mentioned cable, provided that the equipment has a connector.
Multicast is a method of transmitting data over the Internet. Accordingly, no flash drive is needed here. At the same time, it certainly cannot be called simpler. Firmware via multicast will take a lot of time and, most likely, can fray the user’s nerves. So, without self-confidence, you should not consider this option.
To reflash via multicast, you need to:
- Place the utility and firmware files in one folder on your computer or laptop.
- Connect the set-top box to the PC via a patch cord.
- Turn on the equipment.
- Press and hold the “Menu” button on the remote control.
- In the window that opens, select “Upgrade Tools”.
- Open the properties of network connections on your computer through the Control Panel.
- Select the section “Internet Protocol version 4 (TCP/IPv4)”.
- Enter the data for the IP address – 192.168.1.1, for the subnet mask – 255.255.255.0.
- Open the command line using the Win+X key combination.
- Enter “dualserver”.
- Select the previously changed connection type and click on the “Select” button.
- Register the IP address of the first flow – 224.50.0.70:9000, the second – 224.50.0.51:9001.
- Click on “Start” and wait until the processes complete.
- Go back to the engineering menu of the console by holding down the “Menu” button.
- Click on “Upgrade Tools” and select “MC Upgrade”.
- Wait for the process to complete.
On average, it takes 30 minutes to flash the firmware via multicast. Users have difficulty working with the command line and update files. But if you properly prepare for the procedure, problems will be avoided.
Tuner firmware using a USB flash drive
The methods described above are suitable for all models of receivers, but there is another way. Unfortunately, it is only suitable for devices with a USB port. This method is the easiest, and most importantly, safe.
To update the firmware we need only two things - a flash drive and a tuner.
- Find the software version suitable for your receiver on the Internet.
- We transfer it to a flash drive. Typically, firmware downloaded from the Internet is archived. Before copying it to a USB flash drive, be sure to extract the file from the archive. It is best to drop the file onto an empty drive - this way you will definitely not get confused.
- Insert the flash drive into the USB port. After a few seconds, the receiver will report that a USB device has been detected and display its contents.
- Find the firmware on the drive and click on the “Download” button.
That's all. The software will update itself. Do not remove the drive or turn off the tuner until the process is complete.
I would like to draw your attention to the following points:
- Firmware or reflashing the tuner will not expand the list of available channels. In fact, this is simply a software update (the operating system on a computer or laptop is similarly updated).
- As you may have noticed, updating the firmware is not difficult at all. However, any deviation from the recommendations may lead to undesirable consequences, such as breakdown.
- There are many loader programs, but they operate according to a similar scheme given in the article. As a rule, only the interface differs.
This concludes our article. We examined in detail the process of flashing the tuner and talked about all the important points. We hope the article was informative and helped you update the tuner software yourself.
Flashing with one ZIP file
With this method we will perform the update, also called OTA, it always comes in a file with a ZIP extension, which we must not unzip because the file signature will be damaged and it will not be possible to apply it.
- Copy the update ZIP file to a USB drive or SD card
- Launch the UPDATE & RESTORATION application on your set-top box. You can find it in the settings menu or among installed applications.
- Click on the Select button and select the ZIP update file
- Click the Update button to begin the update process
- The process will take a few minutes.
- After updating the firmware, you may need to restore the factory settings.
Flashing with the UBOOT.BIN file (unscrapping)
Using this method, you can restore the device from a “bricked” state if you are not able to connect it to a PC, this is another way to restore TV-Box. At the same time, we have several files and “u-boot.bin”.
- For this procedure, we will need a MicroSD card, which we will format using the Amlogic BootcardMaker tool for greater security (although we can do the formatting on a PC), which we download HERE.
- We install Amlogic BootcardMaker on our PC and launch it by selecting the letter of the device on which we have the MicroSD card and the u-boot.bin file that we downloaded. After selection, click “Create” to format the MicroSD.
- Copy all files to update the firmware to the root of the MicroSD card (one archivo.zip, factory_update_param.aml, recovery.img and U-boot.bin). The u-boot.bin file is optional or may also be called bootloader.img. Insert the card into the slot of the TV set-top box.
- Now press the RESET button located at the bottom or inside the A/V connector and at the same time connect the power to the TV box. If done correctly, you will see that Android has started updating with a percentage scale. When it reaches 100%, the TV-Box will restart with the new firmware installed.
- After installing the new firmware, it is recommended to restore the factory settings.
Hard RESET (parameter reset)
The set-top box contains firmware in which the settings are set. These settings must be reset, that is, brought to factory values. To do this, use the RESET or DEFAULT button on the back of the console. It is slightly recessed so as not to accidentally reset the settings. This button must be pressed and held for several seconds. If such a reset does not work (this happens very rarely), then you can reset the settings through the standard menu in Default settings. After confirming the selection of this item, the set-top box will reboot with clean parameters (factory settings).
An alternative way to flash the MAG-250 console
The best option for an alternative device update is DNA firmware.
Thanks to it, functions such as:
- TV program from Yandex;
- recording broadcasts to disk;
- autostart of iptv broadcasts from Rostelecom;
- Recovery after the update occurs automatically.
It is important to install the original version before installing alternative firmware. Otherwise, problems often arise with updating the device.
The DNA firmware process itself occurs without the use of a network cable. To work, you will need a flash drive with a capacity of up to 8 GB, formatted in FAT32.
Then, on the USB drive you should create a folder with the name of the device and install the firmware files there: “Bootstrap” and “imageupdate”. In the future, there are two options for updating the device:
- from the internal portal;
- from BIOS.
In the first case, you need to go into the settings and go to the service menu by pressing the “SETUP” button. Selecting “Update software”, select the option “via USB” and click “Start update”. Before starting the process, you will need to click the “Check” button.
The program will check for the presence of the necessary files on the flash drive. If all requirements are met, the “Start” button will light up.
A common error: “Invalid file header.” In this case, it is recommended to reformat the USB drive to FAT32. In addition, you should check the name of the folder on the flash drive. It must be without spaces, for example, MAG250. If this does not help, then you should use the firmware option from the BIOS.
After connecting a USB drive with files, you need to reboot the device. In this case, you should hold down the “Menu” button. After the menu appears, select “Upgrade Tools”, then go to “USB Bootstrap”.
If everything is in order with the information on the flash drive, the process of updating the software version will begin. The successful completion of the installation will be indicated by the message: “Writing image to flash successfull”.
Then, the device will reboot and will start with the new firmware.
Updating DVB T2 set-top box
The process of flashing such set-top boxes is similar to the devices from Rostelecom described above. After downloading all the necessary files and installation manual from the official website, you need to place a file with the .ssu extension on a formatted flash drive.
Having gone to the set-top box menu, select the “System” tab and select the “Update and save” item. Then, you should reboot the device and disconnect the power from the network.
After turning on, the set-top box will have a new firmware version. All that remains is to configure dvb t2 to automatically or manually search for channels.
Preparation
If the image on your TV has deteriorated or doubts creep in that digital TV is not working as it should, you should think about updating the software.
It is necessary to prepare for this process. To do this, you will need to download the necessary files and have a computer or laptop.
Firmware for a TV set-top box from Rostelecom is done using a computer with a free Ethernet input.
The set-top box will be connected to it. In addition, you will need a network cable that will connect the set-top box and the computer.
The software you will need is mcast.exe and dualserver (or its equivalent). You need to download the latest firmware files from the company's website. They will be called " bootstrap " and " imageupdate ".
It is not recommended to flash the device using third-party tools if at least one official update has not been installed.
Cadena devices will require a USB flash drive with a capacity of up to 8GB formatted in FAT32. The firmware downloaded from the site will be recorded on it.
How to reflash a satellite dish tuner yourself from another device
If you do not have a personal computer, you can use this method. The point is to copy files from the reflashed receiver. To do this, you need a ready-made set-top box with installed software, and yours, which we will reflash with our own hands.
You will need a null modem cable, a configured satellite receiver (hereinafter referred to as Master) and an “empty” set-top box (hereinafter referred to as Slave), and we will install the software on it. It is important that both devices have the same bootloader version.
- Connect the devices with a cable.
- Connect Master to the network.
- Switch the system to software transfer mode. To do this, press 74620 on the remote control. “SOFT” will appear on the infobar.
- Enable Slave. Its display will display “88:88”, and the second tuner will display “_-_-_-”.
- Wait for the transfer to complete until “END” lights up.
That's all. Additionally, you can copy the settings to finally reflash the tuner at home.
- Turn on both receivers, enter 74621 on the master console, “dAtA” will appear on the display. Put the remote control away and don't press anything else on it.
- On Slave, press 24680. The transfer will begin.
- Upon completion, “END” will light up, and the channel number on the device being flashed will light up.
Cardsharing
If the method described above does not help, then you can access the official card over the network even in the absence of a conditional access module (CAM module) and a card reader. This method is called card sharing and consists in the fact that the satellite receiver, to decrypt the signal, accesses the smart card installed in the server’s DVB board via a network connection. In this case, it is not so much the connection speed that is important, but its stability. A large signal delay can affect the quality of reception.
Cardsharing can be used to watch satellite TV on multiple TVs without the need for additional payment. For example, the operator Tricolor TV, for the opportunity to watch its TV channels on two TVs at the same time, increases the subscription fee by two-thirds, which is 800 rubles. in year.
Where can I get the firmware?
The software update is stored in one file, most often a zip archive that will need to be unpacked. Finding it is quite simple if your console belongs to a certain brand. To do this you need to follow these steps:
- Go to the device manufacturer's website. Make sure this is the brand's official website.
- Go to the "Download", "Download" or similar section. It may be called “Files”, sometimes called “Support”. You need a section where the firmware for the digital television set-top box will be listed.
- Enter the name of the device model or find it in the list. It is very important that the model matches exactly. Otherwise, it may lead to its malfunction after the procedure is completed.
- Select the version you want to install. Usually this is the latest version, but perhaps you know that the previous or some other version is more stable and efficient. In this case, select it.
- Download the file.
If you cannot find the manufacturer’s website, but can clearly recognize the receiver model, then instead of the first point, you can check thematic forums. For example, 4PDA. With a high degree of probability, you will find the software you need there.
However, flashing a Chinese TV box that does not have obvious recognition marks may be more difficult. If you cannot find information about what kind of device it is, but you still need to flash it, then you can follow these steps:
- Study all the data about the TV set-top box: model, processor, software version and others. Often they are indicated on the box, in the instructions, in the “About the system” item in the settings. As a last resort, you can even look at the markings on the device’s board.
- Using this information, look for data on thematic sites and forums, for example on the same w3bsit3-dns.com.
- You can find your device or the most appropriate one, or the community.
- This way you will find the firmware file.
This is a suitable option where to find software for Chinese receivers. If they sold you this model, then someone else already had it, and someone probably found solutions to all the problems. However, if you are not 100% sure that the software will work, then install it only at your own risk. Forums and websites will be able to advise, but will not give you a guarantee. It may be easier to replace the console from the seller.
More about drivers
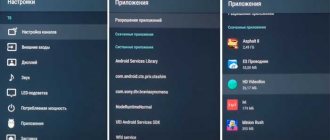
Installing this software only needs to be done once. Please note that installing drivers from your computer may require your permission. The window in which the installation request appears looks like this:
It is safe, viruses do not threaten you. You can find drivers for RCB Tools by following the link. After this, you can start flashing the firmware.
Required software
It is not surprising that the process of setting up a device requires a special program that allows you to update the system as quickly and efficiently as possible. The tuner firmware program is individual software that is designed for a special device model. Yes, on the Internet you can find a lot of so-called utilities that can flash this or that tuner without problems. But you shouldn’t fall for it, since each device needs its own program, otherwise you risk encountering breakdowns, viruses or incorrect updates. Therefore, in order not to take risks, it is better to use the manufacturer’s official website and find all the necessary software there. If there is no such resource, then you should contact the website of the company that was a partner or the leading organization in the production of this device.
Important Rules
You understand how to flash a tuner, now it’s worth learning some mandatory rules during this procedure. Before updating your device, you should disconnect it from the main process, that is, make it so that it stops receiving signals and performing its main function. Before updating, be sure to check your computer for viruses, as they can greatly harm you and your activity. And thirdly, you should make sure what the likelihood is that your electricity may disappear. Interrupting the process may damage the device. If the weather is good and no work is planned in your yard or on the lines, then you can safely begin the procedure. All these rules should apply to all firmware methods; they should not be avoided.
Why is it needed?
And before starting this procedure, you should definitely think about whether it’s worth doing this at all? In fact, setting up the tuner plays an important role in its performance, so you should not avoid this requirement, otherwise you risk simply being left without all the functions that you are used to, that is, your tuner simply will not work. How to flash a tuner, do you need technical knowledge for this? No, it is not necessary to know the technical components, so you can safely start the update procedure yourself. It does not take much time, and you should treat it responsibly and with caution, since if you follow the recommendations carelessly, you can damage the set-top box, which can only be restored at a service center.
Possible problems
We understand how to flash the tuner with our own hands, but what problems might arise during the update? They are only possible if you have not used our recommendations. Mostly, users simply performed the update incorrectly or interrupted it. To fix this error, just reset the settings to factory settings. You can read how to do this in the instructions for the device. A serious problem is incorrect firmware and electrical failure, which can cause damage to the device itself. In this case, you will have to contact service or buy a new tuner. Be careful and you will definitely succeed.
Sources
- https://pomogaemkompu.temaretik.com/710684551205882776/kak-proshivat-tyuner-programma-dlya-proshivki-tyunera-pereproshivka-sputnikovyh-tyunerov/#!/
- https://televizore.ru/pristavki/kak-proshit-tv-pristavku
- https://androidguid.ru/proshivka/proshivka-android-tv-box.html
- https://digitsattv.ru/samostoyatelnaya-proshivka-resivera-trikolor/
- https://nastroyvse.ru/devices/raznoe/kak-proshit-pereproshit-tyuner-sputnikovoj-antenny.html
- https://besprovodnik.ru/proshivka-tv-pristavki/
- https://KakOperator.ru/lifehacks/kak-proshit-tv-pristavku-rostelekom-na-vse-kanaly
- https://hd-mediaplayers.ru/firmware-update-guide-tv-box-soc-amlogic/
- https://lk-rostelecom.ru/kak-pereproshit-pristavku-ot-rostelekom/
- https://sat-tv.xyz/kak-pereproshit-tyuner-v-domashnih-usloviyah/
[collapse]
Update process
How to flash a tuner through a tuner, is it possible to organize this? In fact, if you are well versed in these devices, then in theory it is possible. But why do you need extra difficulties when there are simpler ways? Therefore, you should not overload yourself with unnecessary and practically unnecessary information. As for the update process itself, there is nothing incomprehensible about it, since it is completely automatic; you just need to monitor the status of this process and promptly solve problems that may arise during this procedure. Don’t be scared - you definitely won’t be able to break the device completely, but it’s quite possible to reset the settings, although this can be fixed by calling a specialist.
Null modem cable
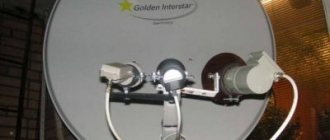
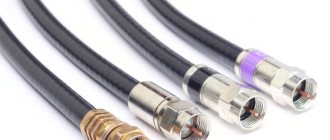
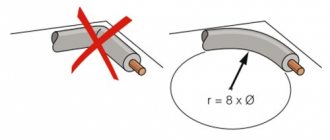
To flash the receiver firmware from a similar device or PC, you will need a null modem cable. The reception and transmission lines in it are cross-connected, which makes it possible to connect two devices via the RS-232 protocol without a modem. Mostly 9-pin female connectors are used. Data is transmitted sequentially in full duplex mode.
If desired, you can make a null modem cable yourself using two regular cables for the COM port. To do this, you need to unsolder the plug connector of one cable and solder the female connector in its place in accordance with the diagram. It is enough to connect contacts 2-3, 3-2, 5-5 and “body-to-body”.
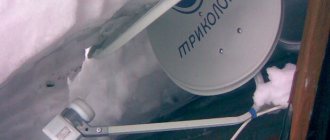
Digital satellite television broadcasting
Almost all satellites broadcast FTA channels, the reception of which does not require conditional access systems. The Hot Bird satellite, for example, broadcasts about 500 open television channels, including 17 high-definition channels and more than 260 radio stations. Paid channels broadcast in Conax, Mediaguard, Irdeto, Viaccess, Betacrypt, Cryptoworks, Nagravision, PowerVu, BISS encodings. To access them, you will need to buy a smart card, an expensive satellite receiver and pay a monthly fee.
Sometimes encrypted TV channels can be viewed using a smart card emulator - a program that simulates the operation of cards in different encodings. To decode the signal, the emulator needs keys that can be entered manually from the remote control or obtained from the network if the satellite receiver has such a capability. The firmware of the satellite tuner is also used.