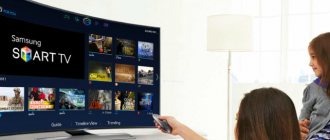
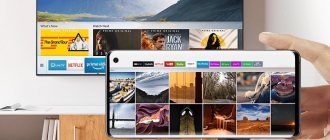
First, let's figure out why this is needed. LG Smart Share is a proprietary interface that allows you to view media files on your TV that are stored on all devices on the local network.
For example, you have some photos, movies, home videos on your phone, tablet, computer or laptop that you want to watch on TV. And if earlier for this you had to connect via wire to the screen, now it is enough to download and install a licensed program.
It’s convenient – you download the movie to your computer and watch it on a wide screen. I previously used a flash drive, which is also not very convenient. The most interesting thing is that LG SMART TV has its own special program that automatically makes all the settings for shared folders and the local network.
HELP! If you encounter any difficulties or questions during the setup or connection process, feel free to write about them in the comments under this article, and I will try to help you. But as practice shows, you should not have any difficulties with these instructions.
Preparation
Before downloading the program, you must connect your TV and computer or laptop to the same local network. Usually at home it is built by a router, so we will connect to it.
The connection can be either via a network cable or via Wi-Fi. Let's connect our TV to the router:
- Turn on the TV.
- If you will connect the device to the router via wire, then find a special input on the back panel and plug the wire there. The second end must be inserted into the yellow connector on the router (LAN port).
- If there are no wires, then we do nothing, but will connect via Wi-Fi.
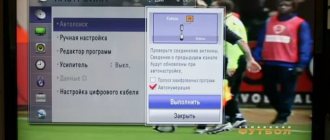
- Press the “HOME” button on the remote control.
- Select “Settings”.
- Go to “NETWORK” and then “Network connection”.
- Select “Wired” or “Wireless”;
- If you chose to connect via Wi-Fi, then there is nothing complicated, you need to select your home network, enter the password and connect.
So, we have connected the TV to the local network, now we go to our computer and laptop.
NOTE! If you do not have the “Network” option, then most likely your smart TV does not support a network connection. If there is no “Wireless Network” section, or it is highlighted in gray, then this means that your TV does not have a Wi-Fi module. It can be purchased separately. But be careful, you need to buy a module from LG and look at the list of supported TVs.
General description of SmartShare technology
The SW DLNA program is a technology that provides devices connected to the same network and supporting DLNA technology with the ability to exchange media content. Currently, almost all devices support this technology.
SmartShare is a proprietary LG application. It is even called a shell when working with SW DLNA.
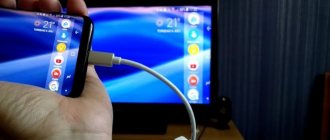
The technology provides easy access to music materials, videos, photos from one device. Using this application, you can send your favorite media files from computers, tablets, laptops, smartphones directly to your TV. This does not require any wires. Previously, for such data transfer you had to connect to the TV using a cable, but now it is enough to download and install a licensed program.
How to play a movie or video?
The first method is playback via a computer. You simply select a movie from the list of video files directly in the program, right-click on it, select “Play using” from the drop-down menu and then select the name of our TV.
The second way is to play back from the TV. Let's go to our screen and take the remote control.
- Click on the house icon on the remote control or the “ HOME” button.
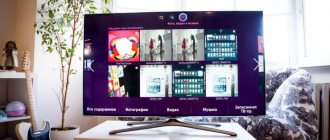
- “ Smart Share” section in the main menu
- Next, go to “Connected devices”.
- On some firmware there is also a “ DLNA” and you need to click on it. And on the rest, you should immediately see the name of our computer.
- We go to our server and see the folder that was added in the program. Once you enter it, you will see all the films. If you added more folders with music and photos, they will also be here.
Now you can watch your favorite movies, home photos and listen to music with your whole family on your computer or laptop.
Setting up DLNA on TV (LG Smart Share)
On the TV, just go to Smart TV and select Smart Share (unfortunately, I don’t know how to do this on other TVs, or in models without Smart TV).
Go to the Connected device . We already have two DLNA servers there. The one in the form of Windows Media Player is a server created in a standard player (the first method). You can open it and view the files.
The second DLNA server is the one we created in the Smart Share program. That's what we need. Let's open it.
We see the available folders. To open our folder to which we have opened access, go to the All folders .
Open it and run the file we need. In my case, a movie.
That's all! Settings are complete!
Update
If you have any problems with setup, with the Smart Share program, or you, for example, have a different TV, then I have prepared an article on how to set up a DLNA server using the Home Media Server program (UPnP, DLNA, HTTP )". Which we have already talked about more than once in the comments. Here are the instructions - Setting up a DLNA server using the “Home Media Server (UPnP, DLNA, HTTP)” program. We view files from the computer on the TV.
I don't see my computer in the Connected Devices section
If you went into the TV settings and did not find your computer, this means that either the TV or the PC is not connected to the router’s network. If the connection is via wire, then first go to the TV and plug the wire into the connector as firmly as possible. Do the same thing near the router - insert the other end firmly into the LAN connector of the transmitter.
If the connection is via Wi-Fi, then take a few steps:
- Turn off your SMART TV and router. After 2-3 minutes, turn it on again.
- Check how good the connection is near your TV. Simply connect your phone or tablet to the same wireless network.
- Press the “HOME” button – “Smart Share” – “ NETWORK ” – “Wi-Fi Screen Share”.
- Reconnect to the router's wireless network on the TV. I wrote about this at the very beginning of the article.
- Set the Wi - Fi Screen Share to On.
- Check that your laptop or computer is also connected to the network. There should be no connection with a red cross in the lower right corner of the screen. If there is a red cross, then the PC is not connected to the network, and you need to solve this problem.
If this does not help, then you need to change the sharing settings on your computer
Windows 10
- «Options".
- "Network and Internet".
- "State".
- "Sharing Options."
- Disable password access in the "Password Protected Sharing" section.
Windows 7
- On Windows 7 everything is much simpler. Click on connection.
- Select the third item in the menu on the left.
- Disable password requests on the network.
Advantages and disadvantages
As for the strengths and weaknesses of the application, they can be characterized by the following points.
Advantages:
- User-friendly interface translated into Russian.
- Fast and free installation.
- Easy to use program.
- Lightness.
- Compatible with all versions of Windows.
- High data transfer speed over a wireless network.
Flaws:
- Difficult to learn for inexperienced users.
Video, photo or audio files are not played
LG TVs do not support all media file standards. So if you downloaded a movie, but it doesn’t play, or it’s not visible in the list, then most likely the TV simply does not support this format.
Here is a list of supported formats:
| Video | .asf .wmw .divx .avi .mp4 .m4v .mov .mkv .ts .trp .tp .vob .mpg .mpeg |
| Audio | Mp3 |
| Photo | Jpeg, jpg, jps, mpo |
If a supported file still does not open, then it may be broken. Check it by running it on your computer or laptop.
Installation
Before you begin installing the product, you need to unpack the downloaded archive “LG_SmartShare_WAL_x.xx” (where xxx is the product version). You should open the folder and find “setup.exe”.
The installation wizard will appear first. In the window you will need to click on the “Next” button.
The next step requires the user to read the license agreement and then accept it. If you want to read the text, you can print it out. Clicking on the “Print” button. After this, all you have to do is click on the “Yes” button.
Then you will need to decide on the installation folder. After this, the installation process will begin. Upon completion of the installation, the user will need to establish access to services by checking the appropriate box, and also select a folder for the shares.
Settings
After starting the program, the user may see a blank window. To figure out which folders you should place your files in, it is recommended to click on the “Options” menu.
In the window that opens there will be 4 groups of settings, namely:
- Service.
- Shared files.
- Device settings.
- Allow or block other devices.
To select a folder with files, you need to go to the “Shared Files” tab, and then click on the icon with a cross.
In a new window you will be able to select a directory with files. To “share” it, all you have to do is check the box and click “apply”.