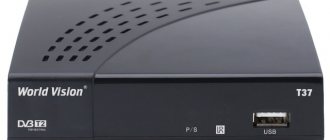
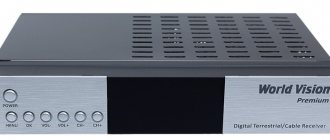
Cable and terrestrial receiver World Vision Premium DVB-C/DVB-T2
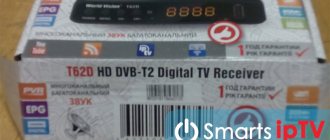
The World Vision Premium receiver comes with the following configuration:
- HD Receiver;
- Remote control;
- AAA batteries, 2 pcs.;
- Cord 3RCA-3RCA (bells);
- HDMI cable (not many receivers come with this cable).
Specifications
| operating system | Closed, proprietary |
| CPU | Ali M3821 |
| RAM | DDR3 1600MHZ 1Gbitx |
| Flash | 64 mb |
| Tuner | DVB-T/T2/C |
| Video resolution | 80i, 576p;576i, 720p,1080i 50Hz, 720p;1080i 60Hz, 1080p |
| Supported Formats | MPEG-1, MPEG-2, MPEG-4, H.264, M-JPEG, AVI, MPG, MP4, TS, TRP, TP, MOV, MKV, VOB, DAT, XVID, M2TS |
| Audio codecs | MPEG-1LayerⅠ,Ⅱ,MP3, AAC-LC,HE-AAC,HE AACv2, Dolby Digital (AC3) |
| Supported file | FAT, FAT32, NTFS |
| RF modulator | UHF 21-69 |
| Dimensions (L*W*H), mm | 155*97*30 |
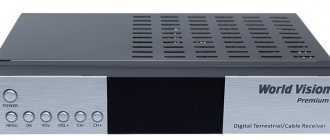
The receiver itself is made in a black metal case, the front panel is made of light-colored plastic. On the front panel there are a number of control buttons (Power button, menu, OK, volume control buttons and program switching buttons) and a display that displays the time in standby mode and channel number when on. It is also possible to replace the display of the program number with the display of the clock when it is on.
The following connectors are located on the rear panel:
- RF IN socket – a standard female television connector used to connect an external antenna to the receiver for receiving digital terrestrial TV in DVB-T2 format or public cable television in DVB-C format.
- RF OUT plug – (built-in high-frequency modulator) standard male television plug is used to connect the receiver to the TV via a regular television cable. From this output we receive not just the same signal as from the antenna (as on many other receivers, but also processed digital signal converted to analog) This output should be used only in cases where the connected TV does not have other inputs. Or in cases where you need to connect several TVs to watch the same program on several TVs (possibly using an over-the-air divider).
- HDMI connector – this connector is used for connecting to a modern TV and is preferable in terms of transmitting high-definition images.
- USB connector – can be used to connect a USB adapter to the Wi-Fi receiver to connect to your home Internet network. Or to connect an external USB drive (it can be a standard flash drive or an external hard drive)
- S/PDIF connector – used to transmit digital audio to an external Hi-Fi audio system.
- 3RCA (bells) – three connectors for connecting to a TV. Two of them are designated by the letters R and L, painted in red and white, and are responsible for transmitting stereo sound, and the third yellow, designated VIDEO, is responsible for transmitting pictures. If your TV has only two connectors - a yellow one and a second white or red one, such a connection is also possible, the sound will be mono.
Among the interesting features noted on all World Vision Premium receivers, the warranty seals are apparently affixed not at the factory, but by the manufacturer in its Russian warehouse, so a corner of the protective film of the case is torn off.
When you turn it on for the first time, the receiver prompts you to configure the basic parameters. The first step is to select the language.
Further, a wide selection of resolutions is offered from the auto parameter to the maximum possible 1080p_60Hz
Next, the “Installation” menu opens where we are asked to choose between two types of settings:
- Setting up terrestrial digital television DVB-T2
- Setting up DVB-C cable television
Setting up terrestrial digital television.
Search for programs.
We set the region we need and turn on the 5V power supply point for active antennas. For antennas with 12V power supply. Or antennas that do not have an amplifier, the tuner's power must be turned off. Automatic and manual search is possible. Automatic search on this receiver model is designated as blind search and is selected by pressing the red button on the remote control. In this search option, the receiver scans all frequencies and saves the programs found. To speed up the search, you can use manual search and scan only the frequencies we need. We go to the manual search menu by pressing the green “Add TP” button on the remote control.
Search mode is available by channel or frequency. Each frequency channel number corresponds to a specific frequency. The search range is set to UHF. The channel number depends on the repeater from which we take the signal. Our antenna is aimed at a TV tower in St. Petersburg and the first multiplex corresponds to frequency channel 35 (Frequency 586000 Khz). With the parameters entered, the receiver displays the signal level and quality as a percentage. Based on these scales, you can more accurately direct the antenna. The receiver will display changes in the signal level with a delay. To scan, press the green button on the “Scan TP” remote control. The receiver will find programs on this frequency and store them.
Setting up cable digital television.
Manually searching for cable TV programs is not much different from terrestrial settings. In addition to the frequency, several more parameters are added to the menu:
- Symbol rate
- Modulation
- Network search
All these parameters can be checked with your cable TV provider.
Channel list editor.
For ease of use of the receiver, you can edit the channel list.
Here we have the opportunity to rename, move, delete or block the channel.
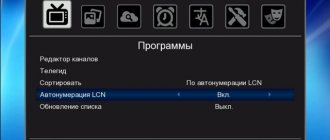
Settings menu
- Language selection
- A/V mode – Select resolution and screen format. Setting up the high-frequency output, setting the frequency number of the channel and the analog standard system.
- Network settings - Wi-Fi network connection settings. Available only when using additional equipment in the form of a USB-Wi-Fi adapter.
- Time settings
- Timer
- Parental control
- Additional settings. Turn on subtitles, select auto. shutdown (options available: off, 30 min., 1 hour, 1 hour 30 min.). Selecting standby mode (two options are available, full and normal), when choosing full mode, the receiver consumes virtually no power but will take a little longer to turn on compared to standard standby mode)
- Update. The latest software versions can be found on the manufacturer's official website.
- Factory settings.
- Start channel. You can select your favorite channel and every time you turn on the receiver it will start from the selected channel. It is worth paying attention to the fact that if we went to this menu and did not select the channel we needed and simply went back to the menu, the receiver will set the radio station as the starting channel. And the next time we turn it on, we will not see the picture; the receiver will be turned on in radio mode. The transition from radio to television is carried out using a separate “TV / radio” button, located in the lower left corner of the remote control.
Media menu
The media item becomes available when a USB drive is connected. It is possible to connect a standard flash drive or hard drive. We connected 16 and 32 gigabyte flash drives and a 2 terabyte hard drive. All drives connected without problems, the receiver worked with files quite quickly.
When connecting external media, we have the opportunity to use the Timeshift recording and delayed viewing functions. It is also possible to view pre-recorded content (photos, movies, music). It is also possible to update the software immediately; the update file must also be downloaded in advance from the manufacturer’s official website and recorded on a USB flash drive.
Applications menu
In this menu you can view video from the Yotube website, view RSS, weather forecast and Web-TV. All these functions are possible when the receiver is connected to a home Wi-Fi network using a USB Wi-Fi adapter. The receiver itself does not come with such an adapter. We tested two models WIFI ADAPTER GI USB and WIFI ADAPTER SWF-3S4T.
Games menu
So that you don’t get bored while your favorite program is interrupted by advertising, you can go to the games section and play your choice of three classic games: Tetris, Snake and Othello.
Also, for convenience, the receiver has an electronic TV guide function. You can view data about the current program, the next one, or view the schedule.
The World Vision Premium receiver currently has no close analogues in terms of functionality/price ratio; good DVB-T2 set-top boxes are sold at this price. The set-top box has problems with the software; the manufacturer regularly releases software updates, but if you remember the cost of this set-top box, these are just little things.
