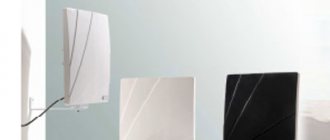
If you have outdated television equipment and want to use it to display digital TV, then the task is quite feasible. You will need additional components - a set-top box and the correct antenna (UHF UHF). Most often, connection difficulties arise due to mismatched sockets (connectors, interfaces) with which the equipment is equipped. To connect a digital set-top box to an old TV, you need to choose the right cable. Sometimes converters need to be used in the connection diagram. And if the TV is very old, released back in the USSR, then it will be able to work with the set-top box only under certain conditions. More details about all the nuances are written below.
How to set up digital channels on an old TV
Digital TV is connected to an old TV using a set-top box (DVB-T2 tuner). The cost of such a device ranges from 600-1500 rubles. The tuner receives the signal and converts it into a supported format. It’s cheaper and easier to buy a set-top box than a new TV, but this also has its own nuances - you can’t always set up a digital set-top box.
Set-top box for watching digital TV
What TVs are digital set-top boxes suitable for?
Almost every modern TV is equipped with a connector for a special cable that transmits the signal. New TVs can receive and process it, as well as use additional functions of such broadcasting. Older models cannot do this, but if there is a tuner, then this task is assigned to it.
It is important to understand that by old we mean models that were released in the late 90s and early 2000s or later. These already have connectors that allow you to connect a tuner to them.
Older models, for example, Soviet tube models, are not suitable for receiving digital broadcasts, even if you use a tuner. Older models simply do not support connecting third-party devices.
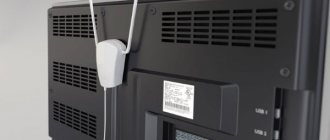
Look at what TV you have. If it has SCART or “Tulip” connectors (Multi-colored cables, usually red-yellow-white), then this means that it is suitable for receiving TV channels.
If your TV has such connectors, you can easily connect a digital set-top box.
If they are missing, you won’t be able to watch TV. There are no additional adapters or connectors to which the tuner could be connected on very old (pre-90s) models.
By the way, we recommend: the top 10 best digital set-top boxes of this year.
Connecting a digital television set-top box on an old TV
To watch digital TV from an old TV, . After this you need to buy a DVB-T2 set-top box. Any one will do for an old TV; they may differ in the number of channels. Before purchasing, you need to understand what connector you have. There are two types:
via SCART connector
Looks like a plug. Combines audio, video and other connectors. In order to connect to it, you need to buy a special adapter (if the tuner is not already equipped with such a cable).
via "Tulip"
3 connectors of different colors, mainly red, yellow and white (other variations may occur). Most tuners are equipped with just such an input.
So, you have decided which connector you have and whether you need additional adapters for connection. Now, let's find out how to connect a digital set-top box to an old TV.
Setup procedure - connection instructions
Turn on the TV to make sure it is working. We take our DVB-T2 tuner and connect an antenna to it. We have a special cable for this. To connect, screw the cord into the tuner, making sure the cable fits snugly into the input. Next, you can start connecting the tuner to the TV.
There are two options - Scart connector or “tulip”. If you have a “tulip”, then simply connect three wires to the TV, and then to the set-top box. It is important to do everything according to the colors, that is, white to white, yellow to yellow and red to red.
If you have a SCART connector, then you will need an adapter to connect “tulips” to it. On one side of the adapter there is a Scart connector, and on the other there are tulip inputs.
After connecting the tuner, check if it works. To do this, turn on the TV and tuner. The tuner comes with a separate remote control, so now you will have to constantly turn on the TV and the tuner separately. If you did everything correctly, then it should work, and you will be able to receive broadcasts and watch channels.
Miniature set-top box with micro-USB OTG
If you are a radio amateur, then on the radio market you can purchase all the components for a homemade digital receiver. Such a homemade product may turn out to be several times cheaper than its certified counterpart. But you'll have to work on it.
Main components
In general, if everything is done correctly, the set-top box will work on mobile gadgets, TV and PC. As an example, you can assemble a DVB-T2 set-top box like a small stick. Main technical characteristics:
- TV tuner form factor – Dongle (stick/whistle);
- tuner - Silicon Labs Si2158A20;
- demodulator - Silicon Labs Si2168-B40;
- USB controller - Cypress CY7C68013A-56LTXC;
- operating frequency range from 48 MHz to 866 MHz;
- input signal - 75 Ohm;
- supported broadcasting standards - DVB-T/T2;
- port - micro-USB OTG (power supply 5V/0.25A);
- removable whip antenna;
- You can watch TV on a device with Android OS 4.1 and higher;
- size – 32x32x7 mm;
- weight – 10g (with antenna).
You can create an exact copy of the Geniatech PT360 whistle. The differences will only be visible on the body. Since the manufacturer will not be indicated there. This small gadget can work with a smartphone, tablet, Android TV-box, and even a Windows-based PC.
By configuration:
- there are 2 connectors: microUSB and antenna socket;
- the antenna socket is threadless and is supported by spring-loaded protrusions, which allows you to rotate it around its axis and set the antenna in any position;
- a kit similar to the one being assembled includes 2 antennas (whip and remote). But in general, you can get by with the first option, if the connection allows.
It is important to understand that soldering all elements of the console requires certain skills, knowledge and equipment. But you can do it easier and purchase a Chinese copy of the original DVB-T2 set-top box on the radio market or AliExpress, modify it to an adequate level and use it everywhere.
Reconfiguration
To create a copy of the Geniatech PT360 set-top box for digital television with your own hands, you need to open it in order to finalize it. It is recommended to modify the whistle if it gets very hot. Otherwise, you don’t have to go into its insides.
To open it, you need to carefully remove one half of the case. It should be taken into account that the body is fastened quite tightly.
Inside the case there is:
- board version 1.21 with an RF transistor (4 legs near the antenna input), which is a signal preamplifier;
- TV tuner;
- demodulator;
- controller.
Datasheets indicate that the receiver supports terrestrial digital DVB-T/T2, cable digital DVB-C/C2 and analog. As for the heat sink, it is constructed as follows: “heat leaves the microcircuit through a through heat sink on the board (indicated by a red arrow) and along the copper substrate into the antenna braid.” In fact, the role of a radiator is played by a banal copper braid. With this approach, after a long period of operation, the heating reaches such a limit that you can simply burn your finger by touching the antenna output.
To prevent this baby from floating along with the microcircuit elements in a closed case in the summer, you can build a small radiator. Any 2.5 mm aluminum sheet is suitable for riveting it. For example, you can cut a primitive radiator from a profile. Then, using copper foil and hot glue, bring the foil layer out. In this way, heat is transferred to part of the board on the opposite side.
You can glue such a heatsink onto a memory chip using superglue and thermal paste:
- apply a thin layer of thermal paste;
- level it and clean the sides of the microcircuits with alcohol;
- at the end, apply a drop of glue to the sides;
- glue can be dropped onto the thermal paste, since the chip is really small;
Do everything as carefully as possible, since you only try once and it will be impossible to clean the glue that has been dropped in the wrong place.
For greater efficiency, glue the plate and copper foil together and bring it out.
Assembly and testing
After installing the homemade heat sink plate, close the housing cover and connect the antenna to the antenna input. You can also check operation with a whip antenna. And the experimental device will be a smartphone with OTG support and Android version no lower than 4.1. The same conditions apply to other gadgets.
Since the connected receiver will receive power from the device, the energy consumption will be equal to 1000 mAh battery for 3-4 hours of operation.
The gadget works with the PadTV HD application, but can also work with other programs for watching a television channel.
If the signal level is high-quality, then the found channel will remain in memory.
Using a microUSB - USB adapter, the TV tuner works perfectly under Windows. The OS can detect the drivers on its own.
What to do if the TV doesn't work
Sometimes it happens that the TV does not work despite the fact that a tuner is connected to it. The causes of problems vary; the most common ones are described below.
Antenna
One of the most common problems is an incorrectly installed antenna. Make sure the antenna receives the signal well. Ideally, it should be installed outdoors, but sometimes it works indoors. Try twisting it in different directions and see if the signal level changes depending on this.
Sometimes the TV does not work because the cable is damaged. Make sure it is not torn anywhere. See if it is screwed into the connector on the console well.
TV settings
Even old TVs had several operating modes - for receiving an analog signal, connecting to DVD, etc. It is possible that the set-top box is not working due to incorrect TV settings. Try switching different modes, your task is to find and select AV mode. It is designed to work with external devices, for example, tuners.
What to do if the TV shows a black and white image
It happens that when you connect a DVB-T2 digital set-top box, the picture becomes black and white and not color. The problem lies in SCART or “tulips”. Most likely, there was a partial wire break. Because of this, the TV shows the picture incorrectly.
Standard set-top box
In the usual form factor, a TV tuner can be found in most cases. New models are also sold in this format. The advantage of a receiver in this form factor is adequate passive cooling and support for various ports for connecting TV, including older models.
The advantage of the case is that it can accommodate a homemade digital receiver. In most cases, homemade boards are after repair and are suitable for reuse. Often, such boards can also be found on the radio market.
Connection diagram
The receiver interfaces with the TV via tulips with the old TV, via HDMI with the new model.
The TV receiver device looks like this.
By and large, the operation schemes of the console are similar to each other. There is no point in manually assembling such a board, since labor costs and the price of components will be more expensive than a new set-top box. If the set-top box needs to be repaired and for these purposes you need a diagram of its operation, in 99% of cases the repair will be more expensive than buying a new TV tuner.
Tuner connections via VCR
For some reason, the TV may not accept the set-top box (the required input is missing or the equipment is not supported). There is a way to solve this problem - connect an old VCR, and, in turn, a tuner to it.
Tune your TV to the VCR channel and you'll be able to watch channels even if your old TV doesn't have an AV input.
Watching digital TV on a regular TV is quite possible, but to do this you need to connect and configure a digital set-top box. Tuners are cheaper than new TVs, but have similar functionality. Set-top boxes can work with TVs that have been produced since the mid-90s, but the main condition is the presence of a SCART connector or “tulips”.
Advantages and disadvantages
Here are the advantages of a homemade console:
- A detailed and practical study of how a digital set-top box works;
- Improvement of heat dissipation, if necessary;
- There is a chance to save money by repairing an old board or setting up a copy of a branded device to work.
Disadvantages of the T2 digital tuner with your own hands according to the diagrams:
- you will waste your time;
- you will not have a manufacturer's warranty;
- It may turn out that the purchase price will be comparable to the price of a homemade product with the same characteristics.
If you can’t assemble a tuner yourself, read our article on how to choose a digital TV set-top box.
Terminals and transistors
Until the 1980s, gold was present only in radio tubes located on a grid near the cathode. But if you look closely at the packaging of a TV made in this era, you can see what precious metals and in what quantities are present in the TV set.
At a time when transistors were extremely popular among the population of the USSR, gold was contained on their substrate, as well as on the contacts of television channel switches. Some gold also included:
- diodes;
- switches;
- connectors;
- terminals.
Today, when you are planning to disassemble an old TV and sell off its remains, it is worth asking professionals in which radio components you can find the maximum amount of precious metals. In this case, the sale of such equipment will be the most profitable and profitable.
If long-outdated devices take up extra space and are not used in any way, you can sell any of their components .
First of all, this will be useful for factories, whose warehouses still contain many long-produced devices and their defective components. The use of gold in the Soviet era made it possible to make televisions more reliable and of higher quality; this factor increased the period of their uninterrupted operation. Gold is not subject to corrosive processes, it does not oxidize and is excellent for use in electronics.
An additional source of precious metals in old TVs are microcircuits. TVs made abroad contained smaller amounts of gold, but they also contained it. Today, special factories can easily process it, extract it and use it to make new parts.
We recommend: Types of trash cans in the cabinet under the sink
