OpenBox receiver
Recently, the phenomenon of cardsharing has become increasingly widespread. This “miracle” is advertised as an opportunity to watch dozens of satellite channels almost free of charge, a subscription to which costs much more from the official provider. Having specified the brand and model of the receiver, a specialist comes and sets up the equipment. Sometimes the device's firmware changes, but most often only some settings are made, especially if an OpenBox satellite receiver is used.
There is access to dozens of new channels. How does this system work and why does the end user get content almost free of charge? The owner of the card, who provides card sharing, configures the appropriate software, and other users can receive keys for decoding channels on their devices.
Some broadcasts, for example, from the Tricolor company, use simple signal encoding. You can find biss keys or a softcam file and use them as keys. If the receiver's firmware allows it, you can enter keys from the softcam keys file or manually enter bis signatures. As a result, the user watches TV programs for free.
Cardsharing can also be used within the same house or apartment. Sharing is organized for several devices and a single card is used, which is used to enter keys.
Openbox HD - welcome to the world of HDTV
We are moving into the second decade of the 21st century, preparations for broadcasting “Surround Television” (3D) are in full swing overseas, so it is already quite difficult to surprise us with the announcement of a regular satellite receiver with HDTV support.
But not everything is so simple; any technology requires a significant investment of time in order to become a truly mass-market product. Discussions about HDTV began in Europe a long time ago, but still only a small number of HD channels in the operator package (usually 5-10 pieces) are in addition to the bulk of available channels in SD quality. The promised broadcast revolution and the abandonment of MPEG2 have not yet happened. Despite this, the equipment buyer looks to the future and chooses a receiver based on the fact that there will soon be more HD channels. But there are already more than enough offers of receivers themselves from different manufacturers! Now, for success, it is not enough to offer the consumer a device with the abbreviation “HDTV” on the front panel. The buyer has a choice and is interested in the functionality, recording capabilities, quality and ergonomics of the product. Our editorial office received three OPENBOX HDTV receivers, which can be called siblings: OPENBOX S5 HD PVR, S7 HD PVR and S8 HD PVR. Starting with this line, the numbering of the manufacturer’s models has changed, since all three models are made on the STi7101 platform, which largely determines the similarity of the parameters. But each of these set-top boxes has its own differences, thanks to which the buyer gets the opportunity to choose exactly the device that suits him best.
Let us immediately note the main differences:
- The receivers have different body sizes (300 mm for the S5 model, 340 mm for the S7 and 430 mm for the S8) and front panel designs.
- Unlike its two older brothers, OPENBOX S5 HD PVR has only one DVB-S2 input unit.
- The eldest of the brothers, OPENBOX S8 HD PVR, has an internal SATA drive installed in its case.
- OPENBOX S7/S8 HD PVR models come with a large universal remote control.
Thus, it becomes clear that the S5 model is a budget model, although it has the entire “gentleman’s set” for viewing and recording programs. Not all users require a second tuner and other frills, but the attractive price in the budget segment will be a strong argument for successful sales. But the manufacturer has not deprived this receiver much of its “functionality”: on the front panel there is an alphanumeric indicator that correctly displays the Cyrillic alphabet, as well as the inscription “OPENBOX” itself, which is made in the original style with a pleasant white backlight.
The arsenal includes one USB port on the rear panel of the receiver, to which you can connect various drives. It could be a simple flash drive, a USB hard drive, a digital camera, or even an MP3 player. We will describe in more detail the procedure for connecting devices and working with them below. To record programs and Time Shift, a USB drive or a computer network drive (via the Ethernet port) can be used. The remote control of the OPENBOX S5 HD PVR receiver is not bad. It has a clear grouping of buttons according to functionality, the buttons themselves are soft to press, and the distance between them is convenient for switching. Unfortunately, many of the buttons are shaped identically, making it difficult to operate in low-light conditions. This is especially true for the lower group of buttons responsible for PVR commands. The remote control fits well in the hand and overall leaves a satisfactory impression.
According to the manufacturer's classification, OPENBOX S7 HD PVR is the golden mean that many are looking for in life. This model is worth paying attention to amateurs who often record programs from satellite broadcasts. After all, the presence of two DVB-S2 tuners provides wider possibilities for PVR functions, namely, simultaneous recording of several channels or combined viewing with recording. In addition, the S7 model has a second USB port hidden behind the front panel cover and an e-SATA connector on the rear. The first point is very convenient for quickly connecting equipment, but the presence of e-SATA is somewhat contradictory.
Theoretically, the speed of 480 Mbps of the USB 2.0 port should be quite enough to record two channels, even in HDTV quality. This is true, but, as practice has shown, displaying the contents of the disk and other operations with the drive are performed much faster with an e-SATA connection. The receiver also allows you to simultaneously record two channels and view already recorded programs from a storage device (hard drive). In such an extreme mode, the drive has to handle two write streams and one read stream, and if these are HD-quality streams, then an e-SATA drive is simply necessary. The disadvantage can be considered the lack of supply voltage at the e-SATA input of the receiver (this is indicated in the user manual), but almost all external e-SATA hard drives have their own power supply.
The oldest among related devices has the largest body width (430 mm), and its stylish front panel will not leave anyone indifferent. There is nothing surprising here - the width of the device corresponds to the popular size of Hi-Fi components. The manufacturer has done a very good job on the exterior, thanks to which the OPENBOX S8 HD PVR will fit perfectly into a rack with the highest class equipment. Perhaps for some, the presence of five brightness modes for the backlight of the POWER button and the circle of cursor buttons may seem overkill, but they look simply great in the dark with a soft white glow. By the way, the POWER button itself has a red glow in Standby mode.
Now let's take a closer look at the Standby mode of all three receivers. There are two modes that can be switched through the menu:
- Complete shutdown of the receiver even without the usual clock on the front panel. The declared electricity consumption in this mode is about 1 W (!). The disadvantage is that the device is turned on for a long time (up to 1 minute).
- The “Fast Standby” mode cannot boast such high energy savings, but it adds one more clock in the house and allows you to turn on the receiver literally immediately by pressing the POWER button.
It’s amazing that even in such a simple and common task as turning off the device, the manufacturer has provided the possibility of customization! Having removed the cover of the receiver of the S8 model, we see an already installed Western Digital WD15EADS 1500 GB hard drive. Information has been received from the receiver manufacturer that all receivers of this model will be supplied to the market with pre-installed hard drives of various sizes. Only Western Digital and “WD Caviar Green” series drives will be used. This solution is due to the significantly lower heat emission of disks in this series and the reduced noise level. The receiver is designed to install drives with a modern SATA interface and, in principle, after the warranty period has expired, the buyer will be able to replace the drive themselves.
SSD solid state drives with a SATA interface are now available for sale, and we were interested in checking how they behave when connected to the OPENBOX S8 HD PVR. We had a Kingston SSD Now drive with a capacity of 64 GB. After turning on, the receiver offered to format the disk, and then it became possible to use it as a regular drive in the form of a hard drive. No problems were noticed during the work. The receiver's compatibility with modern SSD solid-state drives allows you to completely forget about excessive heat and noise during operation. After all, this drive has no mechanical moving parts that make up hard drives, and therefore the reliability is much higher! Of course, the high cost and limited capacity of SSD drives make it difficult for them to be widely used, but this remains only a matter of time. According to other criteria, the S8 model receiver can be considered an analogue of the S7, with the only exception being the absence of an e-SATA connector on the rear panel (the SATA port is used for the internal storage). There are not many differences - but the main one is that you are purchasing a finished product with a built-in storage device. As mentioned above, the S7 and S8 models are equipped with a universal remote control. To say that he is excellent is to say very little. The remote control is impressive in size, but fits comfortably in the hand. It seems that the location of the buttons is chosen just perfectly, in addition, many of the buttons have a unique shape, making it very convenient to use the remote control “by touch”.
Using simple steps described in the user manual, you can program the remote control to work with other devices. There can be three of them in total (the receiver itself, DVD and TV). The current device is selected using the corresponding TV, STB and DVD buttons at the top of the remote control. The buttons themselves have a red backlight, which signals the transmission of the command. It is very convenient to control both the receiver itself and, for example, a plasma panel with one OPENBOX remote control.
So, we have studied in detail the external differences between the three brothers of the OPENBOX HD family, but the most important thing is how they work! Due to the absolute similarity of the internal menu of the devices, the receiver with the maximum configuration - OPENBOX S8 HD PVR - will take part in the test. When you turn it on for the first time or reset it to factory settings, the receiver launches the Wizard, which should make setup easier for an untrained user. The first thing you need to do is to indicate your preferred language of communication with the receiver (and there are 17 of them, besides Russian!). The next step is choosing a time zone, where the menu includes a country that we thought had ended its existence - USSR (the good old USSR). Next, the antenna “equipment” is configured and channels are searched. In the case of a rotary system, go straight to the motor settings section, and then to the channel search menu. Such connections between different menus do not require exiting to the main menu and make it easier to perform actions.
The receiver supports all necessary protocols: DISEqC 1.0, 1.1, 1.2 and USALS. When setting up, NIT (Network Information Table) data is displayed at the top of the screen, which will confirm that the settings are correct for the required satellite. It is also possible to adjust the satellite's orbital position, which is useful when using the USALS system. It was somewhat strange to see another function that had migrated from older OPENBOX models - a large signal level and quality indicator! It is very unlikely that the installer will take an HD receiver with him to the roof to adjust the antenna, but perhaps for some it will be necessary.
There are four channel scanning modes, including “Blind” and “Advanced” (with the ability to set PIDs). “Blind” search works almost flawlessly, the only “but” is that this process takes a lot of time. In the automatic channel search mode, in comparison with many similar devices, the scanning speed is excellent.
Channels with high data flow rates are successfully scanned and operating (Express AM 22 satellite, 53° East, frequency 11044, vertical polarization, flow rate 44950 Ms/s).
The receiver decodes AAC audio, which was tested on the Intelsat 904 satellite, 60° East, frequency 11675, vertical polarization, flow rate 29700 Ms/s (Rikor TV package). An interesting feature was discovered in the sound settings - the ability to increase or decrease the volume level for each television channel by 30%. Not all operators broadcast at the same volume on all channels, so this innovation will be useful. Unfortunately, this menu has not yet been translated into Russian, and its description is not in the user manual, but this fact can only speak of the rapid pace of software development.
The list of channels, as expected, is called up by pressing OK in the main menu. In our opinion, it is too overloaded with information. Not everyone needs to know the parameters of the received transponder and conditional access system. But here I was very pleased with the ability to add channels to favorite groups directly from the list: there is no need to go far into the menu, which greatly simplifies the procedure. At the top of the list there are two small icons “T1” and “T2”. There is no mention of them in the user manual, perhaps this is a new feature that displays channel availability on the first and second tuners. But during the work, it was noticed that both icons are highlighted even when a channel is available on one tuner.
A proprietary feature can be considered a different type of channel list, in which only the names of the channels are displayed, and next to them data about the current program from the TV Guide. We can confidently say that this data display is extremely convenient and will be appreciated by many users.
There are two types of TV Guide modes: “Grid” and directly a list of programs for one channel. There you can also create timers for recording with one click of “OK”.
Another interesting function can be considered “Event Search”, which is available in TV Guide. Now there is no need to look through the entire list of events - just enter a couple of letters of the name of the movie or program of interest, and the receiver will find them itself!
The fly in the ointment is that the receiver distinguishes between large and small letters when searching, although this is absolutely not necessary here! I really want to hope that the developers will correct this small but very important omission in the next versions of the software.
It is possible to set two languages for selecting audio tracks and subtitles (for example, you can set automatic selection of English if Russian is not available). In addition, there is a choice of teletext language and even the ability to connect custom fonts!
Such a standard thing as a factory reset has several modes: you can reset the configuration or channel list, as well as all settings together. Many installers will be grateful for one more addition: the ability to save a “Restore Point.” The essence of this function is that at any time you can save all the receiver settings in the current state to the internal memory, and then restore them if necessary.
A striking example of the use of “Restore Point” is the following situation: the installer completed a complex setup for five satellites and left, and the user began to actively study the receiver. After some unconscious actions, the channel list disappears or the signal from the satellite disappears, and an angry user calls the installer. And he explains in a nutshell how to return to the restore point, and as a result, in a couple of seconds, all the settings are returned.
The receiver also has the ability to save (read) settings to a USB flash drive, so the installer can have a set of standard configurations with scanned channels on the flash drive and configure the tuner for the client in a matter of seconds.
When using a PQI 2 GB flash drive, problems were found with saving settings. But as it turned out later, after saving, you need to press the red “Remove Device” button, and only then can you remove the Flash Drive itself. There were no such problems with the Transcend 2 GB drive.
In the menu it is possible to select separately the drive for recordings and for the Time Shift buffer. The OPENBOX S8 HD PVR receiver is equipped with a built-in 1500 GB disk, but for “younger” models, when using external drives in the form of USB flash drives, partitioning may be required. Here you can set the Time Shift buffer size, but its maximum value is limited to 120 minutes. It is difficult to say what justifies such a limitation, because with a large storage capacity, many will want to increase it. There is an automatic and manual start of the Time Shift mode. In the first case, immediately after switching on any channel, it already begins to be recorded in the buffer, which will allow you to “always rewind”. It is difficult to imagine a situation in which you need to abandon such a convenient function and use the manual Time Shift mode, but this option is available. To start recording while watching a channel, just press the appropriate button. Recording begins immediately, without any confirmation dialogs. In addition, if the channel contains TV Guide data, the recording itself will stop at the end of the event, otherwise its duration will be two hours.
Some receivers have the ability to save Time Shift buffer data as a recording, I would like to think that the OPENBOX manufacturer will also add this feature in the future. The receiver allows you to record two channels simultaneously (including 1080i HD quality channels). If you try to view the third while recording two channels, Time Shift will not be available, since it is analogous to regular recording.
In addition to playing your own recordings, support for MP3, JPEG and DivX/Xvid files is announced (the latter, according to a representative of the OPENBOX trademark, is being finalized). It supports displaying files with Cyrillic in their names if they are located on one of the external drives. But if you copy a file over the network using a Windows computer, the letters turn into “crazy letters”. This is most likely a software flaw, and the manufacturer should fix it.
The MP3 player is quite simple and does not cause any particular complaints, with the exception of support for the Cyrillic alphabet in MP3 file tags. Viewing JPEG photos really pleased me with its capabilities. Unlike standard definition (SD) receivers, these devices display photos with a high resolution of 1920x1080 pixels. If you have an HD Ready or Full HD TV, you can see all the details of the image, just like when viewing it on a computer.
As already mentioned, several drives can be connected to the receiver, including computer network drives. A function for copying files between drives was found in the file list menu. There is no mention of it in the user manual, and some words are not translated from English - apparently, it was implemented by the manufacturer recently. The presence of this function allows you to transfer photos from a digital camera or other files from USB flash drives without the participation of a computer.
Playing several test AVI files with DivX/Xvid content went without any problems. However, it should be noted that one of them was played in violation of the format of the output image. It was accidentally noticed that the receiver can also play MPEG-2 VOB files that make up DVD discs. In light of this “discovery,” we may wish to implement DVD menu display and support for USB DVD drives. After these two software improvements, the receiver will fully combine the functions of a DVD player.
It is not possible to fully describe OPENBOX HD receivers on the pages of our magazine, so we, first of all, set out to introduce the reader to the main features and point out obvious shortcomings. After testing, all three models left positive impressions. These are convenient modern devices with a wide range of interesting functions and practically modified software. The manufacturer's policy of covering all segments of the HD device market with three models is quite bold, but it should receive support among buyers.
- connection of two independent receiving systems;
- simple and intuitive menu;
- the ability to simultaneously record two HD channels and view a third;
- automatic launch of Time-Sfit;
- convenient list of channels with current programs;
- search for events using TV Guide;
- incorrect display of the Cyrillic alphabet in MP3 tags;
- does not play MKV files;
- somewhat overpriced.
We thank the SAT SYSTEMS company for providing samples of receivers for testing.
What is needed for the system to work
The first thing you need is an OpenBox receiver. In its simplest form, it should have firmware that allows key entry, configuration using a softcam keys file, or manual entry of biss codes. A simple receiver will need a computer that will access the server that provides cardsharing. The set-top box and the computer are connected by cable via a serial port, and any method can be used to connect to the Internet.
- The local network. The computer is connected to the provider’s network and receives keys on a server that carries out card sharing anywhere.
- Wi-Fi connection. The access point is not important. You can connect to your own router or obtain keys thanks to free access points of your neighbors, Internet cafes, and so on.
- Sharing can be organized within a local network - within one entrance or in an apartment. To receive the keys, a server is organized and wires are pulled to the recipients of the service.
- Mobile provider network. Here everything depends on how such a connection is established by the computer.
As a receiver, you need a device whose firmware can do sharing. The simple ones are Openbox receivers. They allow you to both set up cardsharing and use the softcam keys file. It is also possible to configure biss signatures to watch Tricolor TV broadcasts, for example.
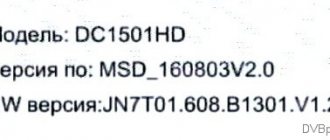
The Openbox receiver is configured as follows. First you need to access the list of servers by pressing a specific key combination. This is regulated by the firmware. For the S2 HD model, the key combination, for example, looks like MENU-1113. In the list that appears, you can add your own sharing sources.
Setting items include:
- Server name for receiving keys.
- Sign of activity.
- Address.
- Port.
- Username and password.
- Server key or DES Keys.
- Channel filter.
The name is symbolic, arbitrary. Usually they write the name of the provider that is being decoded, for example – Tricolor. The sign of activity is a logical value - “off/on”.
Different firmware may allow you to enter an IP address with a numeric indication. Most devices use the latest firmware, where you can specify the IP or URL of the server that does the sharing. Next is the access port number. This is regulated by the “owner” of the server that shares the keys. Reported to a specific user.
Username and password are data for authorization on the server. They are communicated to the user personally. The server key usually does not change. If the user performing the sharing has changed the keys or the firmware has an incorrect value, the user is informed of a new signature.
Channel keys are written in the channel filter, which serve to designate channel identifiers for quickly obtaining decoding keys. Very similar to softcam keys - there is a unique channel number and the identifiers of the necessary packages that sharing transmits.
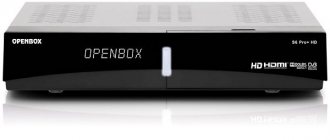
Design
In terms of dimensions, this receiver model is a little heavier than the previous one. However, an external infrared signal receiver allows you to place the TV box wherever it is convenient. The front panel is illuminated with a seven-segment display. The backlight color is green. It doesn't strain the eyes and looks nice. Everything else is hidden from the eyes of the owners using a hinged lid. Namely:
- Start and standby button;
- CH +\- to switch channels;
- Vol +\- volume switch button;
- Display;
- Lock, Rec – blocking and recording;
- Infrared signal receiver from remote control;
- Interface C1, smart card slot;
- USB port.
The slot depth is designed to be as convenient as possible. It allows you to insert the module and close the lid tightly. The module eject button is located to the right of it. The square button will move slightly forward, thus notifying the user that the module is inserted to the limit.
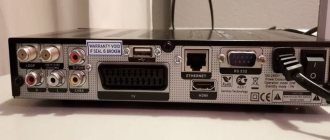
The back panel of the TV tuner allows you to select the connection option. Actually, for this reason the weight and size were increased.
Other features and options
OpenBox receivers can do almost everything. Their firmware allows the use of card sharing and configuration of both broadcast decoding of complex encodings and simple ones, such as Tricolor TV algorithms. You can manually register and use softcam keys data. Explicit input of bis signatures is available for decoding programs of some broadcasts, the same Tricolor TV, for example. But they have a key drawback: to organize cardsharing, you need a computer.
A more effective solution is receivers with the ability to connect to the Internet. These are the DreamBox or Sezam lines. They allow you to enter all the necessary parameters. Even better is a modern TV with network connection and a DVB expansion card. Then you don't need a receiver or a computer.
Technological characteristics
In terms of functionality, everything remains virtually unchanged from the S3 Mini. But there is still a nice addition and it is that YouTube support is implemented, which cannot but please Internet users.
The main feature of the Openbox S3 CI + HD TV set-top box is its support for the C1 module, which is used by many operators. Previously, it was supported only by the SX4 model, the cost of which goes beyond budget devices. Let's consider the main technological characteristics:
| Characteristic | Description |
| Device type | Receiver |
| A country | China |
| Device body material | Plastic |
| Device weight | 1.5 kg. |
| Case color | Black |
| Receiving channels | All thanks to the built-in C1 module |
| HD quality | Yes |
| Number of card readers | 1 |
| C1 slot | Supports module C1 |
| Wireless connection | No |
| Emulator | In stock |
| Operating system type | Standard |
| Availability of DVB-T2/C tuner | No |
| Cardsharing support | Using wired or wireless Internet. |
| Timeshift: | Yes |
| power unit | Built-in |
| Recording to flash drives | Supported |
| Browser for Internet access | Eat |
| Internet support | Supported |
| Digital audio output | Provided |
| USB type | 2.0 |
| Applications | Eat. |
| Availability of Lan port | Yes. |
| Availability of RF Modulator | Yes |
| Composite tulips | Yes. |
Openbox S3 CI HD can quickly switch channels. This speed is higher than many similar devices. Sharing allows 16 different clients.
Description
One of the advantages of a TV set-top box is its design. The device does not need to be hidden from view; its appearance is pleasant. The stylish case will fit perfectly under the TV without annoying the owner.
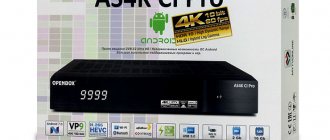
Technical characteristics of the Openbox AS4K CI receiver:
- Case width – 220 mm
- Material of manufacture – metal
- Digital indicator – seven segments with white backlight
- Backlight brightness – adjustable
- Power supply voltage – 12V
- Maximum current – 2A
The parameters of the displayed information can be adjusted through the menu. Enter the appropriate folder using the remote and adjust the details. Now let's look at what is included in the kit.
Equipment
The production package includes the following elements:
- Openbox AS4K CI – satellite receiver
- HDMI cable – connection to TV
- Power supply - for charging
- Remote control – controls
- Instructions - will help in management
- Warranty card – 6 months
If one of the accessories breaks, don't get lost. Today they are taken for sale to every hardware store. However, the manufacturer's wishes must be taken into account.
When using the set-top box, it is recommended to use only the original accessories included in the kit. This will ensure high-quality functioning of the device. Otherwise, buy branded accessories and beware of counterfeits.
Design
The design of the device is standard for satellite receivers. But some features still distinguish it.
The design of Openbox AS4K CI has the following features:
- On the right side there is a two-color LED indicator, responsible for remote control and standby mode.
- The front part of the case includes various connectors, including USB (the third port is hidden by a small cover, as well as the power button - on/off)
- The back wall is the same as that of the AS2 model, so we won’t go into its details
- The top consists of a large number of ventilation holes to prevent the system from overheating during operation
The building is comfortable and well thought out. All parts are arranged by the manufacturer taking into account the specific features of use. There are no questions or inconveniences during operation.
How to manage Openbox AS4K CI Pro
The Openbox receiver model AS4K CI Pro version comes with a remote control. The buttons are conveniently located and easy to press. The device responds quickly to commands. Management is not difficult.
How to control the receiver:
- To exit to the program screen, hold down the MENU command;
- To force exit, hold down the EXIT button;
- Use the remote control instead of a mouse by activating the corresponding mode with the CURSOR button;
- Long pressing the INFO command will help improve the signal quality;
- A left mouse click in the corner of the screen will bring you to work with the console.
To find out all the commands, read the instructions for use. It is included in the kit. Now let’s figure out how to update the software yourself.
Updating the device
To update the software, follow these steps:
- Check your internet connection;
- Enter the menu from the remote control;
- Go to the manager;
- Select the software download function;
- Wait for the process to complete.
Installing plugins
To install plugins correctly, follow these steps:
- Update the software according to the instructions above;
- Click on the menu button and select the manager icon;
- Next, enter plugins and hold the blue button;
- In the window that pops up, click the same button (here the receiver will ask you to install Addon Linker);
- Install the specified application and click the blue button.
After these steps, click the green button in the application and enter default or d.openboxfan.com. The system will highlight available plugins. Select the ones you need and put the red button on download. Next, check autorun.
Main features
The Openbox AS 4K CI satellite receiver differs from competitors' equipment in several ways. Let's take a closer look at them.
Main differences of Openbox AS4K CI:
- Versatility - in addition to the functions of a satellite receiver, the device is used as a 3D game console
- The design is thought out to the smallest detail by the manufacturer; there are slots and connectors for almost all types of additional accessories
- The controls are extremely simple and straightforward; many users note that instructions are unnecessary after pairing the remote control with the TV
- Firmware – the device runs on a full-fledged Android operating system, which indicates an excellent interface and high-quality operation
- Channels – the system supports the usual free channels, IPTV television and paid programs
- Image – of all existing satellite receivers, the model in question has the highest quality image, which is noted by 95% of users
The features of the Openbox AS4K CI satellite receiver can be listed further. The main advantages are listed here. Let's move on to a more detailed description of the device and its capabilities.
Where to download and how to download Wicardd
Vicard includes the following files:
- Conf, which is a configuration file. In fact, a big part of the setup is filling it out correctly.
- The wicardd binary file that powers the emulator. It doesn't have an extension. The exact file name may differ in different versions of Wicard.
- If there are keys for hacked channels, they are located in SoftCam.key.
Please note that the ability to unofficially view programs from some satellite providers may not be available.
To download, you need to take into account the device version:
- https://gomel-sat.bz/files/file/1470-wicardd-openbox-sxzip/ – here you can get Wicard for Skyway Light 2, Openbox SX series, Skyway Classic 4, Skyway Nano 3.
- https://gomel-sat.bz/files/file/1471-wicardd-openbox-sx9zip/ is suitable for those who use Openbox SX9.
- A version is available at https://gomel-sat.bz/files/file/1472-wicardd-openbox-sx9-combozip/ that can be used to install Wicard on Skyway Droid 2, Openbox SX9 Combo.
After downloading to your computer, the archive must be unpacked.