Replacing TV backlight LEDs
You can check that it is the diodes on your TV that have actually failed using one method: direct the light from a flashlight into the monitor. This is a forced illumination that allows you to determine the main cause of the breakdown. In this case, you need to remove the back cover and visually inspect all parts for serviceability. A similar procedure is possible if you have appropriate knowledge in the field of electronics repair. Without the necessary knowledge, the device must be handed over to professionals.
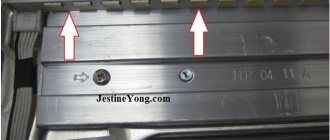
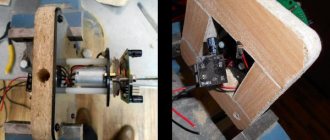
To replace the diodes, you need to remove the back cover. This is done as carefully as possible so as not to break any parts. The first to be disconnected are the legs and fasteners located throughout the body of the product. There is a fixing bolt on the cover that holds the entire structure. It must be carefully unscrewed so as not to damage other functional elements.
After disassembly, you need to check the output voltage. If the value is 100V or slightly less, then this is the problem. To carry out repairs and replace burnt-out LEDs in the TV backlight, you need to remove the matrix. You will have access to the required facility and will be able to carry out repairs yourself.
Introduction
Clearly, the question arises, what is all this for? Of course, there will be supporters and opponents of any action, and everyone has their own arguments, behind which various reasons and arguments are hidden.
With regards to doing work, it always requires a loss of time, and time, as we know, is the most important component of our lives and for some, checking LED strips is completely absurd, as they say, it’s easier to pay.
There is another point of view that some work is quite simple and does not require skilled labor and can be done by the average person. Even a schoolboy can figure out the backlight.
On top of everything else, I would like to add that, oddly enough, all the simplest work is quite expensive and for the majority of people it is financially significant, so for the majority, self-repair is still a necessary measure, especially since the Internet can help.
How to disassemble a TV?
The check of the backlight LEDs is completed, which means you need to go directly to the analysis itself. You need to remove the matrix with your hands as carefully as possible so as not to damage the lenses or power supply. The TV system itself consists of three main parts: power supply, main and T-con. Without parsing experience, you should not take on such work; experts advise performing all procedures in accordance with the following rules:
— Prepare two tables for work, the first for the matrix, the second is intended for scattering films;
— In order not to leave dirty marks on the films or harm the quality of the image later, you need to wash your hands and use special cleaning wipes;
— Decoders should be treated very carefully, because any careless movement can damage the cable
Before replacing the LEDs in the TV backlight, you need to purchase the appropriate diodes. During work, you need to use small soldering equipment aimed at delicate and accurate work.
Troubleshooting
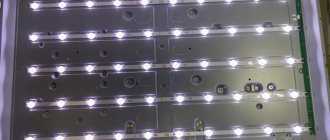
Now we need to get to the LED lines and find the fault locations. Carefully release all the latches that are located along the contour. Remove the frame and remove the scattering films (reflectors) under which the LEDs are located. All LEDs in the line are connected in series, which means if even one LED burns out, the system will fail. After all, a burnt-out LED breaks the power supply circuit for the entire LED backlight.
Each TV model has a different number of diodes in LED strips. For example, the backlight system of the LG 32LB582V TV consists of three rows of 6 LEDs. Some TVs may have 3 lines of 7, or five lines of 9 LEDs. Inspect each line of LEDs visually; if you can find a burnt area, this will make it easier to repair the LED backlight of the TV. If not, you will have to check each of its elements separately.
We know that a voltage of 140 V is supplied to the line of LEDs. We divide it by the number of LEDs (140:18 = 7.8), which means that for each of the 18 pieces, 7.8 V falls. Considering that the voltage on the strips always decreases, we have to install 6 V LEDs.
Repair procedure
The first thing the owner needs to do is completely disassemble the TV. After removing all the bolts, you can remove the T-coin board. It is installed on a cable that is easily detached from the overall structure. Next will be the metal from the decoder, which also needs to be removed. It gives in easily after all the bolts, as it is located on rubber mounts.
Next, the front frame is removed, on which the matrix itself is located. You put it aside, unsnap all the latches and take away the board with the LEDs. The scattering films are also set aside, but with extreme caution so as not to damage or stain them. The LEDs are located on the frame in a specific order. Depending on the model, the order may be very different. Replacing LEDs on LG TVs has a lot of nuances that should be taken into account during repairs.
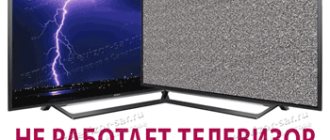
The main disadvantage of LED backlighting is that if one diode burns out, the entire system stops working. No matter how much voltage there is, it will not light up and will not return to its original state. Finding a burnt-out diode is not so easy - you need to check the entire circuit and then replace individual elements. This is performed only if step-by-step replacement is possible for a specific TV model.
TV assembly
We glue the strips to the TV body. We connect the strips through a connector to each other. We check the glow of all LEDs and the accuracy of installation of LED lenses using a mounting reflector.
Installation of planks
We install a white reflective screen on the TV body. The purpose of the screen is to improve reflective properties. The reflector is attached to the LG case using 2-sided 3M tape.
We install scattering filters. We make sure that the resulting white field glows uniformly. If there are no highlights, install the matrix in place in the reverse order. We connect to the matrix all the cables necessary for its operation.
We completely assemble the TV, installing the front frame and sound speakers. We connect the TV control system to work with the remote control.
We perform a test run. After displaying the menu, go to the image adjustment section, set the backlight parameters to 70% on a scale of 100. Reduce the contrast to 85%. Use the brightness control to set the optimal brightness of the image.
Final check