Karaoke is one of the most popular entertainments today. Almost everyone likes to sing their favorite hits to music, regardless of age category. Many people love to spend their leisure time in karaoke clubs, showing their creative abilities in a friendly circle, while others are still embarrassed to sing in public. In this case, a karaoke program on a computer with a microphone is perfect. To do this, it is not at all necessary to buy expensive equipment; the problem can be solved easily and simply. In this article you will learn how to set up your own karaoke corner at home.
Is an extra microphone really necessary?
In the case when the device is required for 1-2 uses, you should not purchase expensive equipment . It is better to use the built-in microphone or wireless headphones.
An additional device will be required for regular karaoke singing, recording let’s plays, and Skype conversations. A high-quality microphone will avoid interference, extraneous sounds, and reduce the amount of noise in recordings. It is better to purchase equipment for 1000-1500 rubles. It is difficult to connect professional devices to a computer. In addition, such equipment is expensive and may break down more often. Most of the additional functions are not required at home.
You will be judged by the most impartial jury in the world: selection of a program judge
There are an incredible variety of different karaoke programs. Choosing the most appropriate software is quite painstaking work not only for a beginner, but also for a professional. However, we will not say anything about the last group of users, because they have plenty of information resources. And we will dedicate this article to beginning music lovers, those who like to sing according to the mood, as well as to all those who are at the crossroads in life “to start a musical career as a singer or leave this idea as a pipe dream...”.
If there is only one connector
Most often, in situations where there is only one connector, it is intended both for headphones and a headset. A number of manufacturers prefer to combine holes for connecting various additional equipment. Try installing the device in place of headphones or speakers.
If the audio recording device does not start working correctly, the connector does not fit, use the built-in microphone or buy an adapter.
Connection via an adapter for non-standard equipment
Non-standard equipment cannot be connected to the computer. You will need an adapter, which you can buy at a specialized store. Then the plug of the audio recording device is inserted into the hole on the device, which is connected to the computer.
Sound quality
The system being developed is not intended for music lovers or audiophiles. I doubt that it will provide sound quality acceptable for these categories. From a layman's point of view, the system does not introduce noticeable distortions into the sound. The only thing we could notice was a slight background hiss that occurs when supply voltage is applied to the board. But it is much weaker than music and voices and can only be heard in complete silence. If you don't pay special attention to it, it's invisible. This noise is introduced by the microphone amplifier, since it disappears when the signal level from the microphones is turned to zero. Unfortunately, I don’t have equipment to measure noise levels, frequency response, and the like, so I can’t give any quantitative values. So just a few examples. We recorded on the phone through a simple adapter with a voltage divider. Voice: drive.google.com/open?id=1Bexac2V2zqbWuDSIACILrTLFIs9iZVMk Silence test - the first 5 seconds were recorded with the microphone turned off (the switch on the microphone itself was used), then the supply voltage was removed from the board: drive.google.com/open?id= 16TSbTLNTQ17zeS-5TLgObyxZ1NqjBeMq
Standard connection method
Insert the standard plug into the socket provided for it. There should be a soft click. If you cannot connect the device, do not use force.
Attempts to push an unsuitable product into the hole will lead to equipment failure.
If the attempt was successful, a connection message will appear on the screen. An icon will appear in the corner of the dashboard at the same time. Most often the symbol is found next to the time and date.
It is recommended to restart your laptop. This action will ensure correct operation of the system. When the device turns on again, proceed to setup.
Hardware
To power the mixer, I used a purchased three-watt, dual-winding 12V transformer with a midpoint. I installed the transformer in the housing from a power supply combined with a power plug. This made it possible to remove the transformer from the circuit and thereby reduce interference.
Board improvements
Now I would do the body differently. In particular, placing the microphone jacks above the volume control was a bad idea, since the inserted plug interferes with the adjustment. It is better to display under the elements or to the side of them. It’s tempting to put connectors on the back panel, but it’s dangerous: if you touch the cord, everything will fly after it. If the connectors are on the front panel, there is a chance that the cord will simply be pulled out. For me, this danger is relevant - my two-year-old son likes to work as a backup dancer when his sisters sing. It is also better to place the inscriptions of the adjustment elements on top so that the handles do not cover them.
Connecting to speakers via laptop
The technique is suitable for gadgets on which Windows 7 software is installed.
First, click on the icon located in the notification area. Find the line “Sounds” and mark it. When the pop-up window appears, click on the “Record” button. Find your equipment in the list that appears. Most often the name of the device or its part is displayed. Double-click on the desired name with the right mouse button. Go to the “Properties” line, and from there go to “Listen”. Then select the “From this device” button.
Don't forget to save your changes. Otherwise, the progress will not be saved and the manipulations will have to be repeated. When finished, check that the system is working correctly.
The best programs for home karaoke
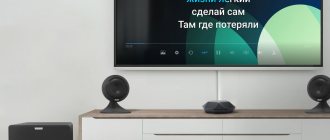
The use of special programs is suitable for those who are interested in vocals and like to sing often. As a rule, such programs read special karaoke files, including accompaniment and text of the piece. you use paid or free software is up to you. There are a lot of sites with corresponding programs; all you need to do is enter karaoke player into the search bar. Next, you will need to download the program, enter the settings options and configure it for your computer. As a rule, such programs are equipped with the most convenient user menu, so a user of any level can handle the settings.
- One of the most popular programs is Karaoke Galaxy Player . It can be classified as a free player, because the authors have provided free legalization for Russian-speaking users. To do this, after installation you will need to right-click on the player and select “Show preferences”, then in the “Player properties” window select the midi tab. Next, click on “register now” and enter the special registration code “karaoke in Russian” in capital letters. Restart your computer and use the legal Russian version. The utility supports almost all basic functions and includes various settings tools, for example, you can change the font, text color, background, and the number of lines displayed.
- Another free option is vanBasco's Karaoke Player . The program is initially aimed at Russian-speaking users; it has an additional “piano” panel, which displays all current notes, which is especially useful for professional vocalists. Another advantage is an additional tab that allows you to change the key, tempo and volume of the accompaniment.
- The last program we will talk about is KaraFun 0.95 . It features a bright, colorful animated interface and includes two ways of displaying text: standard and educational. The first one is for those who know the words well, it involves beautiful animation and text scrolling. The second is aimed more at beginners and is maximally optimized for easy reading. Karaoke lovers will also be pleased by the ability to add various sound effects.
Possible failures and their elimination
Most problems can be fixed on your own at home.
Most often observed:
- No work after connection. In order for audio recording equipment to function correctly, drivers must be installed. If the computer is equipped with Windows 7, the system itself searches for the required programs on the Internet. Owners of other software will have to search and download it themselves. In most cases, you will have to go to the manufacturer’s official website.
- Third-party programs and applications may stop working after connecting the equipment. Reinstall the drivers. During the process of downloading the program, an error may have occurred due to which the gadget cannot function normally. If the procedure does not help, try connecting a different microphone or headset. It is also recommended to check the system for viruses and correct any detected errors.
- Sometimes equipment refuses to work due to mechanical breakdowns or manufacturing defects. To eliminate this possibility, test the device on another laptop.
Vocal Jam
The second contender for the title of “The Fairest Music Critic” is a software tool from a domestic developer, which is distributed free of charge, but is very effective in teaching singing, and is also multifacetedly applicable in other musical fields (you can download Vocal Jam from here ).
The only thing that should be mentioned is some difficulties in the process of deducing an objective assessment of the performer when using musical material (files) with an extension other than “SVE”. Remember this! Otherwise, everything is simple... and nevertheless, if you have any questions, please contact us for help here .
Further microphone settings
Go to the Start menu on your computer. Go to “Control Panel”, then to “Sounds and Audio Devices”. Select the “Audio” tab, and then “Sound Recording”. The “Volume” cell allows you to adjust the sound. It is recommended to set the maximum value and check the box in the “Microphone Gain” column. Save your changes.
For older computers, the description of how to set up the microphone is different.
Go from the Start panel to Control Panel. Then find the “Sound” cell, double-click on it. After this, the user will automatically be taken to the “Speech” section. There, check “Volume”, go to “Properties”. Specify the settings that suit you and save the changes.
Software part
The songs I created are publicly available here. Bonus - a collection of kar files, which are probably 15 years old. I don’t remember where I got it, it was back in the days “before the Internet”. There are a LOT of songs, Russian and English.
The quality of the voice recording in this video is unimportant - I didn’t have time to adjust the levels and started the first voice recorder I came across, which, as it turned out, recorded with a sampling frequency of 16 kHz. So please don’t judge the quality of the microphone and board based on this video. Above are examples of normal recording.
Adapter
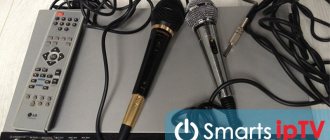
However, before this it is worth noting another small fact. All microphones are divided into two types. The first is 3.5 mm. So to speak, the standard. There shouldn't be any problems with such a device.
The situation is different if you bought yourself a second type of microphone - 6.3 mm. It won't fit into a standard hole. But this does not mean that the headset can be thrown away. All you have to do is go to the nearest hardware store and buy a special adapter. With him, the problem will leave you forever. All that remains is to find the right connection location - and the job is done.
Basics
Using the Wster Ws 858 microphone is very simple. This does not require special instructions. You will intuitively understand the main points on your own. However, there are some things you need to know before purchasing.
The microphone can be synchronized with Android or IOS smartphones. Operation via Bluetooth is possible within a range of 10 m. There is a separate port where a card is inserted to additionally play melodies and sing along to them.
The microphone has round speakers. The characteristics can be controlled through the panel in the middle. The speaker's shape results in clarity and softness, similar to a professional microphone. The device operates within a range of 10 m and is fully charged in 4 hours. The microphone weighs only 400 g, so even children can use it with pleasure. Standby time does not exceed 360 hours.


