Coffee capsule Nescafe Dolce Gusto Cafe O Le Coffee with milk, 3 packs of 16 capsules each
1305 ₽ More details
Coffee capsules Nescafe Dolce Gusto Café Au Lait, 16 pcs.
435 ₽ More details
ACS
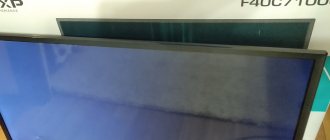
Toshiba TVs, especially the older models, feature high screen resolutions, excellent stereo sound, and built-in modern features. Such devices have been delighting their customers with excellent quality and reliability for a long time. In this article we will look at the most popular Toshiba LCD TV models.
Checking support for terrestrial digital TV
First of all, determine whether your receiver supports the DVB-T2 digital broadcast format. To do this, check the year of manufacture.
- models manufactured before 1998 do not have a built-in digital tuner;
- TVs manufactured between 1998 and 2004 are more likely to have a built-in decoder;
- All devices of the world's leading brands released after 2004 are equipped with a built-in digital decoder with rare exceptions.
There are more accurate ways to determine the presence of a decoder on a TV:
- Read the instructions or packaging. Inspect the cardboard box or product passport, where the format of the digital standard is marked. The inscription “DVB-T2” indicates that the device supports the required signal type. The absence of the number 2 at the end indicates that the device is unsuitable for receiving a digital signal.
- Go online to Yandex.Market. Enter model in the search field. On the page that appears, find the “All characteristics” section, open information about the type of broadcasting in the “Signal reception” item. The inscription “DVB-T/T2 MPEG4” confirms the ability to receive digital broadcasting.
- Enter your TV model in the search bar below. If a match is found, then you can safely proceed to the setup stage.
| Model number | Diagonal | DVB-T2 support |
| 22L1354 | 22 | + |
| 32RL953 | 32 | + |
| 32ML963 | 32 | + |
| 32TL963 | 32 | + |
| 32W2353 | 32 | + |
| 32W3453 | 32 | + |
| 32L2353 | 32 | + |
| 32L2453 | 32 | + |
| 32L4353 | 32 | + |
| 32L6353 | 32 | + |
| 32W2453 | 32 | + |
| 32L2453 | 32 | + |
| 32W2353 | 32 | + |
| 32RL955 | 32 | + |
| 39L2353 | 39 | + |
| 39L4353 | 39 | + |
| 40ML963 | 40 | + |
| 40TL963 | 40 | + |
| 40W3453 | 40 | + |
| 40L6353 | 40 | + |
| 40L7356 | 40 | + |
| 40L7363 | 40 | + |
| 40L2453 | 40 | + |
| 40L3453 | 40 | + |
| 40L7356RK | 40 | + |
| 40RL953 | 40 | + |
| 42VL963 | 42 | + |
| 46ML963 | 46 | + |
| 46TL963 | 46 | + |
| 47VL963 | 47 | + |
| 50L2353 | 50 | + |
| 50L4353 | 50 | + |
| 50L7363 | 50 | + |
| 55VL963 | 55 | + |
| 55ZL1 | 55 | + |
| 55ZL2 | 55 | + |
| 58L7363 | 58 | + |
| 65L9363 | 65 | + |
| 84L9363 | 84 | + |
Determining the model number is very simple:
- look at the instructions or examine the packaging box;
- unfold the TV: the information is on the label on the back cover of the device, in the “Model” line;
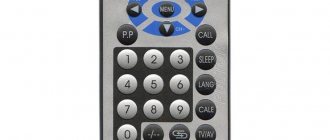
- look in the settings. Using your remote control, open the menu, go to “Options”, then to “Advanced”, then go to “System Settings”.
If your TV does not support digital TV
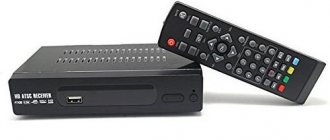
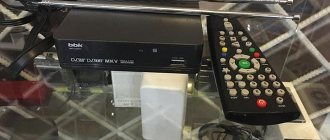
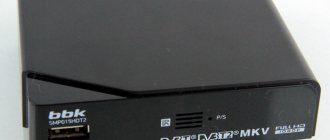
If it turns out that your receiver does not support digital TV, there are two ways to watch free channels:
- purchase a new TV with modern features and a built-in receiver;
- connect and configure the external set-top box.
Characteristics and capabilities of the Toshiba REGZA TV
Today you can find a huge number of different TV models on sale. Each option has its own specific advantages, disadvantages and characteristics. In this article we will talk about a device such as the Toshiba REGZA and its main characteristics.
Toshiba Regza 40sl733r TV review
Toshiba REGZA is a modern smart TV that has a huge number of functions and capabilities for performing a variety of tasks.
The model appeared on the market relatively recently, but has already gained popularity among buyers. The TV has excellent characteristics and is able to satisfy the needs of any consumer.
There are also models in white, you can find out about them in this article.
Features and Features
Toshiba REGZA is a modern smart TV that has a huge number of functions and capabilities for performing a variety of tasks.
In addition to watching digital television, it is possible to go online and watch movies and more online.
Additionally, you can record a specific program and watch it later. This is only part of the device's capabilities.
Screen and format support
Toshiba used a rather interesting development for the Toshiba REGZA - ActiveVision technology.
Using this technology, a huge number of different parameters are formed: color, contrast, movement and details. Thanks to this, it was possible to achieve high-quality color transitions.
Those objects that move too quickly, due to modern technology, turn out to be quite clear and not blurred.
Toshiba REGZA TVs use a completely new type of LED backlight - LED Local Dimming. LEDs are located throughout the screen area, so there is no color distortion during viewing. In addition to the fact that the picture is clear and bright, this way it is also possible to save electricity. During dark frames, the backlight is automatically turned off.
Toshiba REGZA has a function such as Multituner, which indicates the possibility of connecting digital television.
Thanks to this, the TV will be able to easily receive several different types of signals, namely: analogue, satellite (DVB-C), MPEG2 and MPEG4.
Other characteristics of the Toshiba REGZA screen include the following:
- TFT IPS technology
- Diagonal 32 “
- Resolution (max.) 1366 x 768
- Brightness 500 cd/m²
- Dynamic contrast 1600:1:1
- Screen format 16:9
- Viewing angle – 178 degrees.
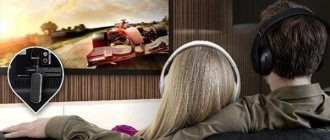
Sound
Many buyers like Toshiba REGZA TVs for their incredibly high-quality sound. For this, manufacturers used special modern functions Dolby Volume and Audissey. With their help, it was possible to achieve an excellent sound environment and there is no need to use additional speaker systems.
Dolby Volume technology also helps control sound volume. The adjustment will depend on what kind of content the viewer is viewing.
For example, during the start of an advertising block, the technology maintains exactly the volume level that was originally selected by the user.
As numerous practice shows, most owners of televisions of this model set the volume to minimum when a program or movie switches to advertising.
Toshiba REGZA has a surround sound feature that makes the sound more rich and realistic. The acoustic system consists of two speakers. The sound power of the device is 20 W (2×10W).
Automatic channel search
The algorithm of actions and the names of sections in your Toshiba model may differ, but the principle remains the same.
On old Toshiba
Having connected the cable from the installed antenna to the TV, start searching for channels:
- Using the remote control, go to “Menu”, then to “Settings”.
- In the “country” item, select Germany (for devices released after 2012 - Russia), in the “Input” line, indicate “Antenna”.
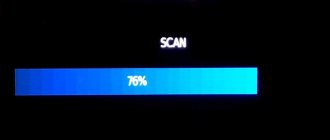
- Go to "Automatic Setup", click "OK".
- In the window that appears, select the “DTV” option.
- In the new submenu, select "Quick Scan".
- Confirm entering the values by clicking “OK” - and the auto search starts.
- When the procedure is complete, click the “Save” button.
On modern models
To set up digital channels automatically on modern TV models, follow these steps:
- Using the “Menu” button on the remote control, go to the “Settings” section.
- In the list of countries, enter “Russia”.
- In the “Automatic scanning” section, select “DVB-T” (in the Russian version - “DTV”), click “OK”.
- Start the scanning process by clicking “Start” in the window that appears.
To receive satellite channels, the algorithm of actions is the same as for terrestrial channels, with the only difference: before starting the search, set the value “Satellite (DVB-S)” in the automatic scanning.
Here are detailed instructions in video format:
About the brand
In November 2021, Toshiba sold its TV division to the largest Chinese electronics and home appliance manufacturer Hisense.
Now production in Russia has been established in St. Petersburg at the largest, and Philips TVs are also produced there.
The level of equipment and production cycle can be seen in the video:
Manual channel search
To manually tune, use the RTRS service: find out the broadcast frequency of multiplexes on the nearest television tower. Then follow these steps:
- Call up the “Menu” by pressing the corresponding button on the remote control.
- Go to the "Manual Search" section and activate it.
- Enter the parameters of the 1st multiplex (TVC and frequency) and start the setup.
- Wait for the process to complete, confirm saving and repeat the algorithm again, entering the values for 2 multiplexes.
Setting up cable channels
After the cable has been installed and the provider’s services have been paid, proceed to the channel search:
- Go to "Menu".
- In Tuner mode, select Cable source.
- Search mode - “Automatic”.
- In the setup mode, set “ATV and DTV (DVB-C)”.
- If you know the parameters of your cable network, select "Full Search" and enter the values received from your provider. Otherwise, use "Fast".
- Start the procedure.
When you finish detecting channels, don't forget to save your settings.
Reviews from experts about the TV
The dimensions of this model are quite large. The TV is 924 mm wide, 604 mm high, and only 248 mm deep. The weight of the model is 13.5 kg including the included delivery. It’s also nice that the kit includes a wall mount measuring 200 x 100 mm. The power consumption of this TV is average. In standby mode, the consumption is 0.5 W. At the same time, during normal operation, electricity consumption is 101 W per hour.
Experts also noted the ability to connect to the Internet. All this became possible thanks to the installation of a built-in browser. It should also be noted that the TV screen has a matte finish. At the same time, the response time is only 8 ms, and the frame rate is 200 AM. Viewing angles both vertically and horizontally are acceptable.
Deleting and sorting channels
For a more comfortable viewing of programs after completing the search, sort:
- Open the main menu.
- Go to "Settings".
- Select Manual - DTV.
- In the window that appears, click “Channels”, then “OK”.
- In the list, use the up and down arrows to select the required program and click OK.
- Move the channel to the desired position with the arrow and click OK.
A bad antenna signal and incorrectly connected devices cause problems with the decoder: the channel list gets confused, a message about no signal appears, the TV does not find all multiplexes, etc. In this case, reset the receiver settings. Next, perform the search again, following the instructions above.
Source
How to set up a Toshiba TV
In order to set up a Toshiba TV, you need to decide what signal source you will use; it could be an outdoor antenna for receiving terrestrial digital television, because now twenty digital channels are available throughout the Russian Federation.
If you are connected to a cable operator, then you just need to configure your Toshiba TV connected to the cable operator's network.
Below are step-by-step instructions for setting up TV channels on your TOSHIBA TV yourself to watch digital TV channels. After all, it often happens that the channels get lost when you switch to another operator or move to another locality and you need to update or rebuild the TV channels in order to continue watching your favorite TV shows.
In order to start tuning all available TV channels on your TOSHIBA TV, you need to find the Menu button on the remote control to access the TV settings menu. If you don’t have a remote control or it stopped working for some reason, then this is not a problem, because you can use the buttons on the side of the TV using the existing buttons.
Before setting up, make sure that the TV is connected to a cable television network or television antenna via a coaxial cable.
Setting up digital and analog channels on your TOSHIBA TV will take a few minutes of your time.
If you did everything correctly, the search for digital channels on your TV will begin.
Once the channels are configured, you can sort the channels as you wish.
Source
What types of settings are there on Toshiba TV and how to configure them
Any equipment initially has special factory settings. Such parameters do not always meet the necessary requirements, so users, as a rule, adjust TVs to suit themselves. The Toshiba TV has a certain list of settings that will need to be completed after purchasing the device.
- Channels.
- Time and date.
- Language.
- Format as well as image quality.
- Internet access.
- Smart TV.
- Automatic channel tuning.
- Cable TV.
In most cases, along with the equipment, the manufacturer provides detailed instructions with which you can easily make all the necessary settings. It is worth noting that the settings can be made either using a special remote control or keys that are located directly on the Toshiba TV itself.
Advantages
A distinctive feature of all TVs of this brand is the quality of resolution. Most models have support for displaying 720p video. Additionally, LED lighting is installed. The overall image refresh rate is on average 100 Hz. Input signal formats are supported from 480i to 1080i. There is also a wide range of resolutions when connecting a TV to a personal computer. In this case, you can set the minimum parameter to 640 x 480 pixels. In this case, the maximum value will be 1360 x 768 pixels.
Stereo sound support is available, and television standards include PAL, SECAM, NTSC formats. At the same time, all models have a child safety lock system installed as standard. USB port available. The TV's viewing angles are another advantage. On average, this parameter is at 170 degrees, which is considered a very good indicator. Additionally, many models are available with progressive scan. In this case, the pixel response time is 9 ms.
Setting up channels
Setting up channels is quite simple. This can be done either automatically or manually. Follow the instructions below and the process will not take much time and effort.
Automatic channel search
In order to automatically search for the desired channels, you will need to press the “” button on the remote control and go to the settings section.
If a TV was purchased that was manufactured after 2011, then Russia is left at the point where the country is selected. Next you need to go to the “Automatic Settings” section and confirm the action by clicking the “OK” button.
In some models, this process may have a different name - “Automatic Channel Scanning”. In the window that opens, click the “Start Search” button. After the search operation is launched, in a few minutes the TV will independently find all available channels and install them.
Manual channel search
To manually tune channels on Toshiba TVs, you need to go to the menu and press a certain button. Select “Manual setting” from the menu. In the window that opens, you will need to additionally set parameters to search for the required channels. then the action is confirmed.
In this case, scanning stops after each detected channel. In order for the search to continue further, it will need to be started again. The advantage of this option is that it is possible to initially configure separate parameters for each channel.
Best models
The Toshiba brand always keeps up with the times, introducing innovations and improving the equipment it produces. The company was one of the first to launch the production of flat-screen TVs of the Bomba series, and today there is a huge number of modern LCD and LED models in different price ranges. Let's look at the most popular models.
- Toshiba 40L2400. A classic option, characterized by quality and simplicity. An ideal option for those who need a TV only to watch TV shows, without any additional functions. The diagonal of 102 cm allows you to place it in any room. This model has excellent image and sound transmission. The number of interface inputs is minimal; you can connect headphones and view files from a USB drive.
- Toshiba 32L2454RB . A budget LED TV model in a white case with a built-in digital tuner. The 32-inch (81 cm) diagonal is quite comfortable for viewing. There is a USB connector. Equipped with two HDMI ports, it is possible to simultaneously connect two additional devices (game console and player).
- Toshiba 24S1655EV . Compact small model with a diagonal of 24 inches (60 cm). It has an average screen resolution (1366 by 768 pixels), but thanks to the presence of LED backlighting, a clear picture appears on the screen. This model is suitable for placement in the kitchen or small room. The package includes a bracket for wall mounting.
- Toshiba 62CM9UR . A projection TV whose operating principle is based on modern micromirror DLP technology. It is distinguished by high quality color rendering (brightness 600 cd/m², contrast 1500: 1) and powerful sound (30 W). A large diagonal of 62 inches (157 cm) means installing a TV in a large room, not only in the house, but also in the lobby of a hotel, sanatorium, and so on.
- Toshiba 42L7453R. The perfect combination of stylish design, high quality and modern features. The 42-inch (106 cm) screen has a resolution of 1920x1080 pixels and fast response when switching. The TV is equipped with a Smart TV function, connects to the Internet via a special connector or Wi-Fi module, and allows you to easily use a variety of applications and social networks.
- Toshiba 49L5660EV. Fits perfectly into the living room. The Full HD screen, 43 inches (109 cm) diagonal and 178° viewing angle provide convenient family viewing. Smart TV allows you to quickly access online games and watch a selected movie from Youtube on the big screen.
- Toshiba 55U5865EV . A “smart” LCD TV with a large diagonal of 55 inches has a built-in Wi-Fi adapter. The high 4K resolution format (3840x2160 pixels) and surround sound will be appreciated by home movie lovers. The Miracast function allows you to synchronize the screen with your smartphone and view the image in large format.
How to setup?
Modern Toshiba TVs can easily be configured for digital TV. Performing simple manipulations will provide access to 20 free channels. Depending on the model, setup can be done in several ways.
Method No. 1 includes the following steps:
- Using the remote control, you need to go to the menu and click on the “Settings” tab;
- choose Russia from the proposed countries;
- go to the “Automatic settings” section; in the window that appears, click on the OK button.
The search lasts approximately 5–15 minutes, after which a list of available channels appears on the screen.
Method number 2 is as follows:
- go to the menu and find the “Settings” section;
- in the window that appears, select the “Automatic channel scanning” option;
- o and click on the OK button.
The search system activates all channels available for free viewing.
Tips for choosing
- The Japanese manufacturer has a rich history and many fans due to the high quality of its products, its stylish appearance, reliability and durability;
- When choosing the best Toshiba TV for yourself, you should start from the room in which it will be installed and what capabilities it should have - this affects the price of the equipment;
- A compact model with limited functionality will cost the least and will allow you to enjoy watching your favorite TV shows in a small room, for example, in the kitchen;
- For connoisseurs of high-quality images and powerful sound, you should pay attention to more expensive widescreen models with 3D and Dolby Digital;
- Many devices come with not only instructions and a remote control, but also a stand and a wall mount. Check the package immediately to avoid overpaying.
Watch a video about repairing a Toshiba TV
Features of connecting the TV to the Internet
Most of the latest models have a built-in Wi-Fi adapter. If it is not there, then you can connect your TV to Wi-Fi via a router .
In the settings, you need to select the wireless network type and automatic mode, which will notify you when you connect to the network. The system will begin checking the software for updates.
In the future, when you need to update the TV’s firmware, it can be done via a wireless network or removable media.
The Wi-Fi module built into the device also allows you to synchronize it with a smartphone. Downloading special applications (Mi Remote, Peel Smart Remote, ZaZa Remote, and so on) allows you to install a universal remote control on your phone and use it to turn on the TV, change channels, and duplicate the smartphone screen in a large format.
( 1 rating, average 5 out of 5 )
How to set up cable channels
Modern equipment has a significant advantage - you can automatically find all the necessary ones, including cable channels. To do this, you will need to complete the following steps.
- The device already contains templates for certain settings in its memory.
- After turning on the Toshiba TV, you need to go to the options section.
- Next, you select a specific template of settings that need to be performed.
- From the proposed list, the most suitable option in each individual case is selected.
Automatic tuning of cable channels is performed using a special button located on the remote control of the device. Due to this, the TV will be switched to a certain mode.
It is worth noting that if such a need arises, the required template with certain settings can be downloaded on the Internet without any problems. After that, they will be installed on your Toshiba TV in a matter of minutes.
Marking, designation of Toshiba TVs 2012-2014
When getting acquainted with Toshiba TVs, the user is interested in finding out what year this or that TV model was produced. How to find out the year of manufacture of a Toshiba TV model?
Manufacturer (Toshiba) year of manufacture in letters. For example, in 2013, TVs received one letter that denotes the series.
In 2014, models almost similar to the 2013 line of TVs were produced. But there is a trend towards a decrease in the number of models. The L and W series differ in that the L series are TVs with Full HD screens, the W series are with HD screens.
- year 2014.
- L2, W2, L3, W3, L5, L7, L9
- In 2013 , Toshiba released the following TV models
- TL, WL, L1, W2, L2, L4, L6, L7, L9
- In 2011-2012 , a series of Toshiba TVs went on sale.
- AV933/934
- DB833
- DL833/834
- EL933/934
- HL833/834
- HL933
- KL933/934
- LV933
- ML933
- RL933
- RL933/953/955
- VL748
- VL863
- VL963
- ZL1
- ZL2 3D
- YL863
- More details about the 2013 Toshiba can be found using the links.
- In marking a TV, a system is used that indicates that the larger the number after the letter that designates the TV series, then the TV has more functions.
- In Russia, televisions received their own individual designation, for example 22L1353 without a letter at the end.
- In Europe, including Ukraine, televisions have a slightly different designation: 22L1334G, 22L1333G, 40L1353N; the last letter indicates the installed digital tuners in televisions.
- G -DVB-T, DVB-C
- N -DVB-T, DVB-T2, DVB-C
An example of decoding the designation of a Toshiba TV.
22L1353
- 22-screen size in inches
- L1- series
- 353-model
Setting up satellite channels
After the satellite dish is connected, as well as the decoder, you will need to find digital channels. To do this, you need to go to the settings and select “Satellite (DVB-S)” in the automatic search. Then the search itself starts. Before the process is completed, you cannot turn off the TV.
Channel sorting and deletion
Toshiba TV settings require, in addition to searching for channels, also their further sorting. It is advisable not to skip this stage, because with its help you can make watching TV more comfortable. To do this, you need to open the main menu and go to “Settings”. Next, select the “Manual DTV setup” section, confirm the action next to the “Channels” item. It is worth noting that sections may have slightly different names, depending on the year in which the Toshiba TV was released.
Settings on TV
In addition to searching for channels, you will need to make some other settings so that the TV can fully function. Next, let's look at the main ones.
Setting the time
In this case, you will need to change not only the current time, but also the date. The data will subsequently be displayed on a specific display. The device starts up, the settings open, and the “Date and Time” section is selected. Using the remote control you will need to select the desired positions.
It is worth noting that on Toshiba TVs you can choose to automatically install these parameters. To do this, you need to connect the device to the network and set the indicators to a certain position in the settings.
Setting the language
To select the interface language, first turn on the TV, then you need to go to settings. After this, the desired language is selected using the remote control. Then all you have to do is save your settings. You need to approach the language settings very carefully, because sometimes situations arise that some hieroglyphs or, for example, the Arabic layout are accidentally installed.
Adjusting the sound
To install and adjust the sound, you will need to follow these simple steps:
- Turn on the Toshiba TV;
- Open settings;
- Select a sound item;
- Changes will need to be made in each section;
- At the very end, all settings made are saved.
You can also adjust the normal volume either using the keys that are present on the TV, or using the remote control.
Specifications
- Diagonal: 32 inches=81 cm
- Screen resolution: 1366 x 768
- Brightness: 180 nits
- LCD backlight: Direct
- Operating system: Android 9
- Headphone Jack(3.5mm): Yes
- Network interfaces: Bluetooth, Wi-fi, Ethernet RJ45
- Processor: MediaTek MSD6683 - 4 cores
- Built-in memory: 8GB
- RAM: 1GB
- Dimensions without stand: (W/D/H): 730X73X443 mm
- Dimensions with stand (W/D/H): 730X186X478 mm
- Weight with stand (kg): 4.3 kg
- Power consumption: 50 W
Image Settings
To change the broadcast format and the quality of the picture displayed on the screen, you need to perform just a few basic steps described below.
- The TV turns on.
- Next you need to go to settings.
- Open the section with changing the picture.
- In each of the sections present, changes required by the user are made.
- You will need to save the settings you have made and wait a few minutes for them to take effect.
This way you can easily change the broadcast scale, add several new templates, so that you can spend a minimum of time on configuration in the future.
Smart TV
In this case, we are talking about a special set-top box with which you can later watch digital television. The Toshiba TV settings in this case are quite simple and will not take much time.
- First of all, all the necessary equipment is connected.
- After that you need to launch it.
- Next, the TV needs to be switched to the appropriate mode in this case.
- After this, you can begin automatically or manually searching for digital channels.
Upon completion, you need to save the detected channels and additional settings made. It is important not to disconnect the equipment from the network during the process so that the settings are not lost. Also, experts do not recommend repeating the adjustment again; everything must be done the first time.
After the advent of Smart TV, interactive television began to enjoy particular popularity among viewers. For what?
Expert opinion about the Toshiba 32P1306 model
In general, the model turned out to be quite economical, and therefore there are not many functions on the TV. There is an audio input as well as an analog jack, but there is no composite jack. Experts also noted a small selection of modes for this Toshiba model (LCD TV). Teletext and also a timer are available, which is good.
Additionally, experts noted the economical energy consumption of this model. In standby mode, an average of up to 0.4 W is consumed. At the same time, in working condition, more than 40 W are consumed per hour of operation. It should also be noted that with a stand, the TV takes up quite a lot of space. Its width is 552 mm, height is 430 mm, and depth is 135 mm. The weight of the model is 5.5 kg. The TV package is quite standard and includes a remote control and a user manual.