Another homemade product for those who are bored at home
I needed a couple of antennas for digital, in places with “not the best reception”... I went shopping (this was before self-isolation - if it’s relatively budget-friendly, then it’s complete G. The more expensive one looks decent, but how it works is questionable.
I decided to make something homemade. It was somehow awkward to “twist” an antenna from a piece of cable (although rumor has it it works) - I wanted something simple, but more decent and advanced
In fact, the one I made is not radically more complicated, but somehow more “solid” or something. And the results of its testing were very encouraging, so I decided to sketch out a short description of what and how, in case someone else finds it useful 
... even if my street cats have a “normal” antenna on their house, what can you do without an antenna?!
The wire is not all finished yet, now we’ll assemble something!
In the places described, I previously used home-made broadband log-periodic antennas, probably since the “beginning of perestroika.” They worked well in analog and not only on UHF, but “for some reason, digital was too tough for them.” I didn’t really delve into the essence of the reasons, I removed them and began to think about what to replace them with. Here is one of them, waiting for a place in the trash
A little history
In the early 60s of the last century, our compatriot Kharchenko K.P. developed a simple flat zigzag antenna with good characteristics.
Copyright certificate No. 138277 for an invention called “Band directional antenna” was issued to Konstantin Pavlovich Kharchenko in 1961 (according to his application dated June 16, 1960). In the same year, materials were published in the magazine “Radio” for repetition by radio amateurs.
The antenna is not critical to materials and dimensions during manufacturing, has a simple good match with the reduction cable, and it successfully combines multiple elements of a common-mode antenna array with a single feed point.
Varieties
"Beer"
To make the product you will need an even number of beer cans. The most common options are made of two pieces. The installation process is quite simple and requires a minimum of tools and consumables.
Instructions:
Antenna with minimal costs
It should be remembered that television travels in space in the form of waves that are well perceived by metal objects. To watch several TV channels, you can use a piece of wire, one end of which is attached to the heating system, and the other into the TV to the central contact.
The principle of operation of such an antenna is based on the area of the system, and it envelops almost the entire house at different heights. The reception quality of the design is not the highest. A more interesting option requires a balcony with metal strings for laundry.
The assembly technology is completely similar to the battery system. There are places with reliable signal reception, where you can use a knitting needle, which will make it possible to view the main channels.
Regular antenna
Assembling the antenna yourself is quite simple; you will need a tube made of aluminum or brass. The latter option is more convenient, since this material practically does not oxidize.
Instructions:
The outlet cable is already connected to the loop.
Powerful antenna
Having dealt with the classic options, you should consider antennas designed to receive the weakest signal. To create one, you will need a minimum of materials, namely a brass tube, a plate of the same material, desire and hands.
Instructions:
UHF antenna
Digital television is covering more and more territories, but for its reliable reception a special module is required. Often, the device is purchased separately, but there are TVs that have a built-in module.
But one receiver is not enough; you need an antenna that receives UHF waves. The simplest option is made on a sheet of plywood.
Instructions:
Theory and calculations
The described antenna, in theory, has a horizontal “figure-of-eight” radiation pattern and a relatively high gain, which can be further increased by using a reflector/reflector.
To obtain maximum gain on all channels, it is necessary to make an antenna approximately in the middle of the range between the multiplexes used.
Finding (for calculations) the frequencies of multiplexes used in your region is easy,
for example, a request like “dvb-t2 channel frequencies” + “Krasnodar”
I found something like this:
The middle, between “my” two multiplexes, is 700 MHz - we will calculate the antenna at this frequency.
As a basis for calculating the dimensions of the antenna, we take the drawing of its author
Calculate the wavelength: λ = 300 / f [m]
300/700 = 0.428m, approximately 43cm length of each side of the rhombus
λ/4
=43/4= 10.75
The total length of the material we need (11cm*8=88cm) is less than a meter. The distance between the reduction contacts, where we will solder the cable, is 10-12mm (the standard value for this antenna for frequencies below 900 MHz).
I will make a simple antenna, without a reflector, however, to further increase the gain of this antenna, it is quite possible to install it behind it
for example, from a metal mesh/grill, foil material or simply a metal plate. Its dimensions should be approximately 20 percent larger than the dimensions of the antenna and it should be located at a distance of ƛmax/7. For my case: wavelength (channel 39) 300/618, it turns out...49/7= that is, about 7cm
For those who are too lazy to do the calculations themselves
— you can use an online calculator, the results will differ only slightly from those I received. Here, for example, this one - here you immediately enter the frequencies of two multiplexes and get the dimensions of the antenna (without a reflector) Or another option, with a reflector - I really want to note that in the second option a slightly different calculation option is used, different from the author’s. An antenna with angles other than 90° is assumed and the reflector distance is calculated as λ/8
To make the antenna sheet, it is recommended to use aluminum or copper (copper is easily soldered) with a diameter of 3 mm and higher - the larger the diameter, the more broadband the antenna is. You can use tubes; the thickness of the walls is not important, since only the surface of the material is used (in fact, you can wrap any dielectric with foil to obtain the required material). However, in my opinion, the easiest way is to buy a meter of large-gauge copper wire at an electrical supply store.
Loop from a pipe
This do-it-yourself antenna for a summer residence is a little more difficult to manufacture: you need a pipe bender, but the reception radius is larger - up to 40 km. The starting materials are almost the same: metal tube, cable and rod.
The bend radius of the pipe is not important. It is necessary that the pipe has the required length, and the distance between the ends is 65-70 mm. Both “wings” should be the same length, and the ends should be symmetrical about the center.
Homemade antenna for a TV: a TV signal receiver with a reception radius of up to 40 km is made from a piece of pipe and cable (to increase the size of the picture, click on it with the left mouse button)
The length of the pipe and cable is indicated in the table. Find out what frequency the repeater closest to you is broadcasting on, select the appropriate line. Saw off a pipe of the required size (diameter is preferably 12-18 mm, the parameters of the matching loop are given for them).
| Channel number | Channel frequency | Vibrator length - from one end to the other, cm | Cable length for matching device, cm |
| 1 | 50 MHz | 276 cm | 190 cm |
| 2 | 59.25 MHz | 234 cm | 160 cm |
| 3 | 77.25 MHz | 178 cm | 125 cm |
| 4 | 85.25 MHz | 163 cm | 113 cm |
| 5 | 93.25 MHz | 151 cm | 104 cm |
| 6 | 175.25 MHz | 81 cm | 56 cm |
| 7 | 183.25 MHz | 77 cm | 53 cm |
| 8 | 191.25 MHz | 74 cm | 51 cm |
| 9 | 199.25 MHz | 71 cm | 49 cm |
| 10 | 207.25 MHz | 69 cm | 47 cm |
| 11 | 215.25 MHz | 66 cm | 45 cm |
| 12 | 223.25 MHz | 66 cm | 44 cm |
Assembly
The tube of the required length is bent, making it absolutely symmetrical relative to the center. One edge is flattened and welded/sealed. Fill with sand and seal the other side. If there is no welding, you can plug the ends, just attach the plugs to good glue or silicone.
The resulting vibrator is mounted on a mast (rod). The central conductors of the matching loop and the cable that goes to the TV are screwed to the ends of the pipe, and then soldered. The next step is to connect a piece of copper wire without insulation to the braided cables. The assembly is completed - you can start “setting up”.
If you don’t want to do it yourself, read how to choose an antenna for your dacha here.
Antenna assembly
Let's remove the insulation from a piece of wire one meter long.
I got a wire with a diameter of 4.5mm
The tools you will need are a vice and a hammer. Measure approximately 11cm each and bend at an angle of 90°
The end result is to get such a “geometric” figure
We cut off the excess and solder the ends. It should look something like this...
Solder the cable as shown in the photo.
We lay the cable along one side of the square and secure it with clamps. This arrangement of the cable is necessary for its coordination (there are different opinions, not everyone agrees with this statement).
When using a reflector, the antenna sheet at the extreme points of the squares can also be secured using metal stands, for example, soldered onto the remains of the same copper wire - there are points with zero potential (highlighted in green). In other places, fastening is allowed only through a dielectric.
Log-periodic circuit
A log-periodic antenna prepared for use is structurally much more complex than equipment sold in stores:
- The axle rod separately supplies power to the antennae. This allows the signal to be received synchronously.
- The signal conductor to the TV is a coaxial wire connected to the beginning of the rod.
- The antennae from top to base must be synchronously removed from each other at each step.
You can make the base yourself or buy it in a store. In the 2nd case, it is worth using “delta” type equipment in the form of a “herringbone”, replacing the plane of the reflector grating. To assemble the base yourself, you can use a soldering iron. Connect the rods, then cut them to the desired length.
The antennae can also be connected with copper wire. In order for them to be firmly attached to the rod, you need to attach the entire structure to the board. The antenna will look less aesthetically pleasing, but will receive good protection from precipitation.
Below you can see the characteristics of a 10 dB log periodic device:
- rod size – 1.6 m;
- number of antennae – 9;
- index of reduction in the size of the next pair of antennae from the base - 160 mm;
- the difference between input and output resistance is 20 Ohms.
As a result, you will get a receiver operating in the frequency range 460-790 MHz. Connect the rods together, and then ground the structure. For this you can use a copper cable.
After making the log-periodic device, set it up. Take 2 load-bearing elements and move them without moving them away from each other. The antennae should be parallel. Make adjustments until a picture appears on the TV.
Tests
And finally, a performance check and a rough
assessment of the quality of the resulting antenna.
In fact, everything is simple with the test - turn it on, it works! And to evaluate whether the game was “worth the candle,” let’s compare the parameters of the received signal from the manufactured antenna with the one I’m already using at the dacha, with a declared gain of 11dBi
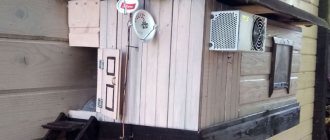
The antenna is installed in the attic of a country house, at a distance of approximately 16 km from the tower.
Signal level: factory stationary antenna on the left / homemade on the right
At first glance, the difference is only 1% (95 versus 94) - but this is not a completely correct comparison, since my external antenna is connected through a splitter, which further weakens the signal.
Bottom line: which option to choose?
Oddly enough, the simplest option is the most effective, so the “loop” is best suited for receiving a “digit” (Fig. 4). But, if you need to receive other channels in the UHF range, then it is better to stop at “Zigzag” (Fig. 6).
Recommendations.
The antenna for the TV should be directed towards the nearest active repeater, in order to select the desired position, you should rotate the structure until the signal strength is satisfactory.
If, despite the presence of an amplifier and reflector, the quality of the “picture” leaves much to be desired, you can try installing the structure on a mast.
Do-it-yourself decimeter antenna mounted on a mast
In this case, it is necessary to install lightning protection, but this is a topic for another article.
Share on social networks
Assessing the performance of the antenna
Let's try to make a more correct comparison by connecting through the splitter input.
Well, in addition, for clarity, let’s add the number of participants List of antennas taking part in the comparison:
1. External antenna Funke BM 4551 external long-range,
declared gain, from some sources (bought at Yulmart), up to 16dB
2. There is an old UHF loop antenna, from TV Electronica 313d, I must say, despite its simplicity, it’s a very good antenna, that’s why it’s been preserved
3. I went to the store and bought for comparison in the review one of the cheapest, such as a symmetrical vibrator (100% the most purchased by pensioners, due to the low price).
I will carry out all “measurements” at one point, located as close as possible to the external antenna - its location was experimentally selected based on the maximum signal, so we can say that the conditions are approximately the same
So, we have already seen the signal level from the external antenna at 95% (at the time of current measurements it showed 94%), we take it as a standard. All comparisons are made by connecting antennas to the input on the splitter, to which an external antenna is usually connected.
Loop antenna, from Electronics 82% on 39 multiplex and 66% on 60
Budget with “horns” - 62%/38% (on the verge of losing the broadcast)
Double square - 92% on both multiplexes, about a couple of percent less than the external one
Out of curiosity, I decided to check the work of the reflector, which is easy to make from any metal mesh, plate or even foil... It REALLY works noticeably! The level rose to 96%!, which is even higher than the stationary one, with a declared gain of 11dB.
The most interesting thing is the object that I used as a reflector!
There was no foil in the house; the only thing available with a metal surface of the required size was... a laptop cover (I have a metal case). But the main thing is the result! It’s clear that I’m not going to “tie” the laptop to the antenna, and its amplification is enough for me without a reflector
Double-triple square
A double square is a pair of frames connected by 2 arrows. The small frame is called a vibrator, and the larger one is called a reflector. The 3rd square is called the director. The manufacturing algorithm for such a device is as follows:
- The metal arrow located on top should unite the centers of all frames.
- The boom located below is made of materials that do not conduct current (wood, textolite).
- Place all the squares so that their centers are on the same line.
- The line must be directed to a ground station.
- The vibrator circuit must be open. Its edges are fixed on a textolite plate.
- The mast is made of wood.
Taking into account the fact that the frame is symmetrical and connected to an asymmetrical antenna wire, it is necessary to use a matching device. The best option is a short-circuited loop. It is made from parts of coaxial wire. The section on the left is the feeder, on the right is the cable. A wire is fixed at the junction of the feeder and the cable, which is then connected to the TV.
The cable is cut on one side by removing the aluminum screen. The braid must be twisted into a bundle. Cut the main conductor down to the insulating layer. The feeder also needs to be cut. Pull out the aluminum screen and twist the braid. There is no need to touch the main conductor.
After that, follow this algorithm:
- Solder the edge of the vibrator located on the left with the braid of the cable and the feeder conductor.
- Solder the edge of the vibrator located on the right with the feeder braid.
- Connect the cable braid to the feeder end located below using a metal jumper. You can also use metal wire.
- The wire parts must be placed in a parallel manner. The distance between them is 5 cm. Special clamps made of non-conducting materials are used. In addition, you can attach a matching device to a PCB plate.
- The wire that is installed in the TV connector must be soldered to the bottom of the feeder. The braids are combined with each other, just like the main conductors.
Conclusion:
I can confidently recommend repeating it!
Simple, “cheap and tasty”... One of the simplest, indoor antenna mounts... with ordinary suction cups - if you’re lucky with the direction to the television center
The next antenna "recommended for repetition" is... log periodic
“Crazy hands” were with you. Good luck and good mood to everyone! ☕
Frame manufacturing
If the antenna will be installed outside the building (on the street), then you need to build a frame. It will maintain its loop shape even when the antenna is exposed to strong winds.
You can make a frame by cutting out a ring in a similar shape to the antenna from plywood or any other material. The cable is then secured to the ring with electrical tape, tape or clamps.
You can also attach a mast - a long stick - to the frame to secure it on the street.
Results
Concluding the topic, you should pay attention to the fact that the highest quality of reception can be achieved by using soldering (bolts and nuts oxidize, significantly deteriorating the signal). An important aspect is the correct choice of cable. The most popular option is a product with a resistance of 75 Ohms, made of silicone.
Such products have a long service life, plus they are not affected by climate. The way you connect the cable to your TV is important. It is recommended to use special plugs; solderless options are allowed.
Before starting to assemble the product, you need to decide on the type of product; to do this, you should find out the frequency at which the signal is broadcast, this depends on the specific area.
Source
Settings
Installation of do-it-yourself products is carried out similarly to factory-made analogues. Most options require a mast to raise them to maximum height.
In most cases, a height of 2-3 meters higher than the height of the roof of the building is sufficient. Additionally, when installing, you should choose a place with the strongest signal, this is especially true for indoor devices.
Configuration is carried out by rearranging or rotating the antenna towards the tower; sometimes it is necessary to install an additional screen on the rear side.
How to make a receiver (receiver)
A TV tuner, according to the author of the simplest invention, can be used by anyone, provided that it is built on the RTL2832U chipset (at least, this model was used in the experiment). Its advantages: it’s cheap, can be found on the Internet for less than 600 rubles, easily connects to a computer via USB like a flash drive, and most importantly, it works.
You can find the model on any Aliexpress and eBay: as an example link: ru.aliexpress.com
The tuner is actually an "SDR" device - a software defined radio, which means it can receive FM frequencies and can be controlled by computer software, which is what we need.
After installing the tuner on Windows, you must "hack" it by replacing the original drivers with the Zadig software. Launch it and click the "Replace Drivers" button.
On Linux the procedure is different and can be found at this link
DIY amplifier
There are often situations when a properly assembled and well-tuned antenna refuses to reliably receive a signal, then you simply cannot do without a signal amplifier.
Most of these devices have a complex design, which is difficult to assemble without certain knowledge. A simpler version can be made with your own hands in 10 minutes.
You will need a magnet onto which several turns of television cable are wound. This device can be assembled either near the TV or on an antenna. The latter option is most popular in factory amplifiers.