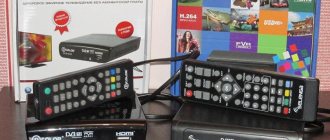
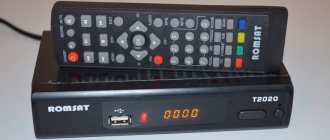
To watch TV channels it is not necessary to have a separate TV or Internet access. A computer with a special tuner is enough. The latter works with analog and digital terrestrial standards. This is enough to listen to the radio and watch TV shows fully.
- Types of TV tuners
- How to choose a TV tuner
- How to connect and configure a digital tuner for a computer
- The best models of digital tuners for a computer
- Which brand of TV tuner to choose
With the help of a tuner you can not only view, but also record the desired television or radio programs.
Why do you need a TV tuner for a computer?
With this device you can watch TV programs on a computer display. The new generation, working at a computer, often prefers to watch programs without the help of a stationary TV.
If you have Internet in your home, it is not economically profitable to pay additionally for television. Using a TV tuner will allow you to directly receive TV programs as if using a TV.
Although the main task of the devices in question is to receive a video signal, it can nevertheless provide additional functions. In particular, the following may be available:
- teletext;
- the ability to record programs and view them later;
- support for high-quality Dolbi Digital surround sound.
The advantages of such devices include mobility and versatility. They can be connected to any computer. TV tuners are usually designed for viewing terrestrial, satellite and digital television.
Types of TV tuners
Various types of devices are available. They are:
- internal;
- external.
The first ones are made in the form of an electronic board. They are inserted inside the computer system unit. External ones can be connected using a special connector.
Tuners can be differentiated based on the type of connection they use. The following connectors can be used for external:
- USB;
- connection via VGA;
- use of Mini and Express Card.
A tuner with a USB interface looks like a flash drive. When using it, an antenna and a remote control are additionally required. Its advantages are:
- High mobility. USB connectors are available on almost any modern computer. To use such a tuner, just insert the device into the connector.
- Ease of installation. Unlike internal tuners, there is no need to perform complicated steps to connect.
- The device does not create additional load on the central processor.
However, when using such tuners, it is necessary to take into account the following disadvantages:
- For correct operation, you must install the appropriate driver on your computer. Without it, the connected tuner will not work.
- When connecting to a tablet or laptop, an additional cable with a micro USB connector may be required.
If VGA connectors are used for connection, then you need to understand that this method of communication is outdated. It was popular back when older display models were used. Digital video inputs are common in modern computers.
However, if you still have a working old monitor at home, using them will help turn it into a TV. Such a set-top box can directly use the liquid crystal display. There is no need for a computer to do this.
These tuners are very cheap due to the fact that they use outdated models of the tuner and display. The disadvantage of this solution is the need to separately connect speakers, since the VGA interface does not provide the ability to transmit sound.
For internal connections, the PCI or PCI Express interface is used. The board can be full-size or designed for installation in a small-size case. It has an RF input for connecting an antenna.
Models using Mini Card and Express Card are used to receive television programs on netbooks or laptops. They usually have corresponding inputs for connection. Their advantages are compactness, ease of connection and low price. This interface is not very common. When using it, the risk of overheating increases.
The advantages of internal tuners are:
- High speed.
- Wide functionality. They are able to change the viewing window, record video and perform some other additional functions.
However, they have a number of disadvantages:
- Internal tuners are used only for desktop personal computers. They are not intended for laptops due to lack of space inside the case.
- To install, you have to open the system unit. To perform installation, you must have special skills or contact a specialist for help.
- As a result of using an internal TV tuner, the PCI slot will be occupied and there will be less space for connecting other electronic cards.
- Operation may be interfered with by other internal components.
Data processing in this case is carried out by the central processor, taking part of its power. When using a weak computer, using an internal board will lead to a significant reduction in power.
You can learn more about the internal models of tuners from this video:
There are set-top boxes that are completely autonomous. In their work, the participation of the computer is completely minimal. Their important advantages are: ease of installation and ensuring high quality of the received signal.
However, they have a serious drawback. It consists in the fact that it uses built-in programs that have limited functionality and insufficient flexibility in operation.
External computer TV tuners
With this article I begin a series of reviews of external computer set-top boxes for receiving television programs and displaying them on a computer monitor. First, let's try to figure out what they are, how they work and why they are actually needed. Therefore, let’s take a short excursion into history and theory.
I think that now you won’t surprise anyone with a classic computer TV tuner. This multimedia gadget has long and firmly won its place in the computer. The most widespread are two variants of tuners built into a computer: in the form of a separate board for the PCI bus and integrated into the video card. The convenience of this solution is obvious: the viewing window is generated programmatically, so its position and size on the desktop can be easily changed, it can be minimized, expanded to full screen, or turned into live wallpaper of the WIndows desktop; in some models, you can even adjust its transparency. As a rule, all such devices have developed software that allows you to save video images and individual frames in files; using the central processor to compress it using MPEG or MJPEG algorithms; record according to schedule. The list of advantages can be continued for quite a long time, but the owner of such a tuner will certainly remember the disadvantages: the location of the radio frequency module of the tuner directly in the computer case negatively affects its sensitivity, selectivity and, ultimately, image quality. When watching a TV image, the PCI bus is heavily loaded. Not all video cards support hardware video overlay, and sometimes it’s a capricious thing. The PCI slot on the motherboard is occupied and at least one hardware interrupt is used, which are always in short supply (although some of the latest statements for tuners integrated on AGP video cards are not relevant). And compressing and digitizing an image into a file catastrophically loads the processor. Not even every modern P4 can handle high-quality MPEG compression in real time. And in many organizations with strict discipline, ordinary users also do not have the right to open the computer case or install additional software.
But there is a way out in such situations - an external set-top box that will receive a high-frequency signal from the antenna, detect it, digitize it and transmit it to the computer in the form of a digital stream. The first copies using this principle were connected to a computer via a parallel port and supplied an uncompressed image with a resolution of 160x120 and 8 or 16 bits per pixel (nowadays such parameters make me smile, but at that time this was huge progress). Later, with the development of the USB bus, external USB tuners became widespread. And now announcements of models with an IEEE-1394 interface and USB 2.0 are coming from overseas countries. Of course, this solution also has its pros and cons. First of all, quality depends on the throughput of the interface used. In the case of USB 1.0, the maximum flow is 12 Mbit/s and it is divided for all devices on this bus (and there are mice, keyboards, scanners, printers, cameras, and other living creatures). In practice, 1.5 Mbit/s is allocated for one device. Believe me, this is very little for transmitting video images. Of course, in a TV receiver the image is compressed. For example, in Aver TV USB (see review), the image is encoded using the MJPEG algorithm and with a stream of 1.5 Mbit/s is supplied to the computer via the USB 1.0 bus. The processor can only decode MJPEG (and for current processors this is a primitive task) and transmit the stream to the video card. But in practice, the quality will not satisfy the capricious modern user. The real resolution, at which frames are not dropped and full color is reproduced (24 bits per pixel), does not exceed 352x288. Much better results should be expected from tuners with the IEEE-1394 interface (aka FireWare, aka i.Link). Here, the maximum throughput is already 400 Mbit/s and the DV compression type is common (in fact, it is MPEG-2 with intra-frame compression only). But unfortunately, I haven’t been able to personally touch any such model yet, so I’m in no hurry to praise this decision.
Is it possible to think of any other way to watch television programs on a computer monitor? It turns out it is possible. Let me remind you that all modern computer CRT monitors (starting with VGA) are multi-frequency, that is, they can automatically adjust to any vertical and horizontal scanning frequency, with any synchronization polarity and any field alternation. For example, they are quite capable of displaying a 15.625 kHz horizontal scan and a 50 Hz frame scan with interlaced alternating fields on a kinescope. But its parameters are very similar to the SECAM television standard adopted in our country (and PAL is no different from it). But there are still difficulties. The video signal received after the RF module is composite. In other words, both synchronizations, a black and white signal, are collected in one physical wire, and two color difference components RY and BY are mixed in there. And the monitor ideally needs as many as five wires (separate frame and line synchronization and three RGB color components). To be fair, I note that some expensive monitor models can receive a full color television signal (PCTS) at the frame synchronization input and decode it themselves. But still, this is a rarity for the average user, and we are looking for a budget solution. This means that before sending the composite signal to the monitor, it is necessary to split it into all the described components, bring them to the amplitude levels required by the TTL standard, and you can safely send them to the monitor! Without going into details for now, I’ll say that with the current level of circuit technology, this can be easily implemented using just one very popular microcircuit. And as a result, our ordinary computer monitor turns into a real TV, which is completely independent of the computer. And if you bring this idea to industrial implementation, equip it with all the bells and whistles a modern TV requires (remote control, on-screen menu, etc.), then you get a completely competitive product. Let's call it a first generation tuner.
But we started with the fact that this is not an independent device, but an attachment to a computer, which means that we somehow need to “pull” the computer here. Please, the solution is simple and elegant! The device “crashes” into the cable from the computer to the monitor and similarly crashes between the computer and the sound speakers. Of course, it “cuts in” conventionally, using the VGA and mini-jack input and output connectors on the case. And the signal sources are switched either using reed relays or integrated circuits. Thus, in the off state, the device transmits a signal from the computer, and in the active state it generates an independent picture and sound. The disadvantages are obvious: you cannot watch the computer and the tuner at the same time; it is impossible to display the tuner image in the window; It is impossible to digitize a video signal via a computer. But still, such a decision has the right to life.
The task became more complicated with the advent of LCD monitors. Keeping up with the times, the manufacturers of these monitors have eliminated interlaced scanning from possible input signals and raised the lower vertical scanning threshold to 56 Hz. This means that the first generation tuner we discussed above will no longer work with such a monitor. This is where modern integrated circuit technology comes to our aid. For example, we decode a radio frequency signal, convert it into a digital stream in accordance with the ITU-R BT656 standard, then using a specialized chip we convert interlaced scanning into progressive, at the same stage we implement an on-screen menu and other user functions (scaling, PIP, color processing, etc.) and a graphics chip (similar to those used in computer video adapters) generates a classic VGA signal from the digital stream (sometimes this is done by a simple digital-to-analog converter). In essence, such a device is a full-fledged multi-chip computer, which contains a processor, RAM, ROM, a graphics adapter, I/O controllers and several chips that perform specific mathematical functions for processing a digital video stream. At almost all stages inside such a device, the video signal has a digital representation. We classify this design as a second-generation external tuner.
What can such a tuner do, why was it worth fussing over this whole garden? It’s difficult to talk about all devices with this operating principle at once, but I’ll still try to summarize their capabilities.
First of all, I would like to note the very high quality of the resulting image. In such an architecture, there is a minimum of analog stages that degrade quality the most, the RF tuner module is removed from the “noisy” computer power supply, and if the input video signal is supplied in component representation, then the image is even more worthy of praise. It should also be noted that the image quality of computer monitors (both CRT and LCD) is obviously better than the traditional kinescope of a household TV (for example, in terms of resolution, brightness range, color depth).
All tuners I know have a remote control, external inputs (and some even analogue TV outputs). Many models have a built-in clock and timer and can be controlled according to a schedule. And the most important thing is that they can all be used independently of the computer. This is the most important value of an external tuner. Why is this necessary? Let's start listing...
Surely many computer owners, after upgrades, still have old VGA monitors that are no longer suitable for their intended purpose, and would be a pity to throw away. We connect a tuner and speakers to this monitor and we get a full-fledged TV! And an additional TV at home, in the country or in the garage never hurts.
Do you want to have a TV in the kitchen, but there is no room? We buy the cheapest LCD panel (here panels with shallow depth, wall mounting and built-in speakers are of particular value), attach a tuner to it and hang it on the wall. So a fashionable modern TV is ready, which is not a shame to hang both at home and in a reputable office (for example, the Samsung 152S panel fits well above the kitchen table in my house). The depth of some panels does not exceed 2-3 cm, with a price of less than $300. And the total cost of such a “designer TV” does not exceed $400. For comparison: the cost of branded wall-mounted LCD TVs from Sony or Panasonic is significantly more than $1000.
Due to the fact that most LCD panels are powered by a constant voltage of +12V, and all tuners require a supply voltage of no more than +6..12V, it is not difficult to build a compact and mobile TV in the car, on a hike, or just on a picnic (again A comparison with branded portable or car TVs is appropriate here).
Here's another use for an external tuner. In offices, showrooms, exhibitions, and training centers, video projectors or plasma panels are often used. Most of them have both low-frequency video inputs and VGA inputs. If you need to display a television signal on the screen, you have to connect a TV or VCR to the projector and use its tuner to receive programs. But this is more expensive, and the quality suffers with such switching. In such situations, an external tuner will be significantly more profitable and convenient. Well, lastly...
Computer video editing at home is becoming increasingly popular. Its obligatory condition is constant monitoring of the installation process on the monitor. Viewing on a computer monitor in an overlay window does not meet even amateur quality requirements, and not all devices support this overlay. A good TV monitor costs $1000 and up. In such cases, an external tuner will again come to the rescue (provided it has external low-frequency inputs).
Now, before moving on to considering specific models, let’s try to develop a methodology for researching and evaluating such tuners.
It is known that people are greeted by their clothes. Unlike many other computer devices (usually located out of sight of users), such tuners are located in a visible place, as they have controls, operational switching and display. Therefore, the appearance of the tuner is important for aesthetes.
Next, let us remember the primary purpose of the tuner - receiving television programs. Since these reviews are aimed at residents of the CIS, it is important to evaluate the degree to which the tuner adapts to our on-air conditions. I'll try to explain why I pay so much attention to this. After the collapse of the USSR, the state's technical control over the quality of television signals distributed over the air and cable networks decreased significantly. In fact, this led to a complete mess in the distribution of frequencies and standards. If during broadcast distribution this could somehow be monitored and regulated, then in cable networks no standards are observed. By now, the division of frequency networks into terrestrial (when the signal is emitted by a television transmitter and transmitted to a television receiver via radio) and cable (when the signal is transmitted only via cable) has been standardized throughout the world. To eliminate mutual influence, the frequencies in these grids must be spaced apart. However, with us everything is different. I will demonstrate it using the example of one typical Moscow house in which I live and research these tuners. The main signal arrives via fiber optic to the district television company. It adds its signal, as well as several UHF channels, and sends it to the regional television company. The district one mixes its signal, signals from the air (with air frequencies) and distributes it throughout the region via coaxial cable. As a result, an “explosive mixture” comes to my apartment, in which the SECAM standard repeatedly contains meter channels, decimeter channels (sometimes at unknown frequencies), some converted satellite channels (NTV+ and not only) and so-called technological ones. Moreover, the signals added by the regional television company come in PAL, and some satellite ones do not have color or sound (or the sound level is too high/low). Some carriers do not fit into any frequency grids at all. And the saddest thing is that all channels often randomly jump to other frequencies, disappear or new ones appear.
And this is a very typical situation, which only gets worse as you move away from the capital, where the popularity of decoded satellite channels increases. There are also a lot of difficulties with sound. By Russian standards, the audio carrier must be spaced 6.5 MHz up from the video frequency, while frequency spacings of 5.0, 5.5, and 6.0 MHz are common throughout the rest of the world.
Unfortunately, not all foreign producers know about the peculiarities of our national television broadcasting. Therefore, only those tuners that are adapted to our reception conditions and allow tuning not only to fixed frequencies, but are able to scan the entire range, have the right to live and operate.
After scanning the entire range, the tuner saves the found channels in certain cells (usually having a direct correspondence with the remote control buttons). In my case, only some sample cells of the range are used (2, 4, 5, 6, 7, 9, 12, 17, 36, 54, 82, 85, 91, etc.), and between them everyone unsuitable for viewing trash. Of course, there is a desire to group all the “useful” ones on the first buttons of the remote control for ease of selection, and delete the rest. Therefore, I give priority to those tuners that allow you to reassign buttons. Unfortunately, not everyone can do this.
Since in an external tuner the only means of displaying information about the state of the tuner and its settings is the monitor screen, the on-screen menu is of particular importance here. It is preferable for on-screen messages to be multilingual and detailed.
Additional inputs and outputs. Formally, they are not at all necessary, but with them the device becomes more functional. Both composite and S-Video inputs are desirable. The second provides higher quality image transmission due to separate brightness and color signals. If the tuner under study has an analog video output (at least composite), then such a tuner, in addition to a computer monitor, can be connected to any other display devices. A pass-through sound channel is highly desirable.
The remote control is the main and sometimes the only means of controlling the tuner. The convenience of the remote control lies in the proper arrangement of keys and the presence of quick access buttons to auxiliary functions.
Teletext has not gained sufficient popularity in our country due to the costs of Russification. However, its presence and performance will be recorded in the assets of the model under study.
Now we have defined a little the theory and scope of external computer tuners. In the following articles we will move on to the study of specific models.
[ To be continued ]
How to choose a TV tuner
To select a suitable device, the following must be considered:
- You need to determine which is better: an external or internal TV tuner.
- It matters what operating system it works with. It must match the one installed on the computer. For example. There are TV tuners that require a Windows operating system to use.
- The channels available using this technique are preliminarily determined. However, you need to find out which ones are available in the area.
When choosing, you need to take into account the advantages and disadvantages of different options. The tuner must have the connectors that are necessary to connect to an existing PC. It makes sense to consider buying branded models. Their cost makes the devices affordable, while at the same time ensuring high quality and reliable operation.
How to connect and configure a digital tuner for a computer
An example of a connection will be considered using an external TV tuner with a USB connector as an example. In this case, you need to do the following:
- Connect the device to the appropriate connector on the computer.
- The antenna that comes with the kit or is already used must be connected to the tuner input.
- Once turned on, the connection of a new device will be detected. It is necessary to install the appropriate driver. You can, for example, download it from the Internet or take it from the disk that came with the equipment. You also need to install an application that will be used to watch TV channels.
- After the driver is installed, you will need to restart your computer.
- Launch the viewing application. You need to start automatic scanning of available channels. After this, the application will determine those that are available for viewing.
You can use the buttons or menu of the viewing application or the remote control to control viewing. If a driver or program for controlling viewing is not available (for example, it was not supplied with the device or was lost), then it can be downloaded from the Internet. The easiest way to find them is on the manufacturer's website. When choosing, you need to make sure that the software matches your existing TV tuner model.
When connecting the internal tuner, you will need to do the following:
- The computer must be turned off before starting work.
- The system unit needs to be opened. You need to find PCI slots on the motherboard. At least one of them must be free.
- You must remove the blank from the selected slot.
- The tuner must be carefully inserted into the connector, avoiding the use of significant force.
- The audio input of the newly installed tuner must be connected to the system board using a special cable.
- The system unit cover must be put in place and secured.
- On the back of the system unit you need to find the input for the antenna cable. You need to connect an antenna to it. In this case, you can use the one that comes with the device or connect another one.
- You will need to install the infrared receiver in an accessible location. This is necessary in order to use the remote control.
When the operating system recognizes the new connected device, you will need to install the driver. Next you will need to restart your computer.
Connecting the internal tuner is described in detail in the video:
After turning on the computer, you need to use the viewing application. When starting for the first time, it is recommended to run an automatic search for available channels. Then you can start watching TV shows.
Digital TV tuner AVerTV Nova T2+C (A757)
with PCI Express interface and support for DVB-T2 and DVB-C “The only real mistake is not correcting your past mistakes” Confucius
While domestic broadcasting is gradually and traditionally slowly moving to the DVB-T2 standard, cable operators have not remained aloof from technological progress, also offering digital television, but of the DVB-C standard, which requires compatible equipment for reception. One of the trends of this very progress is integration, which allows support for different standards within one chipset. The first hybrid computer TV tuners provided reception of analogue broadcasting and DVB-T, the second generation added support for DVB-T2, so the addition of DVB-C to DVB-T2 was only a matter of time.
The Taiwanese company AVerMedia Technologies became one of the first manufacturers to release TV tuners on the domestic market that support current digital broadcasting standards - AVerTV Hybrid Volar T2 (H831) and AVerTV Nova T2 (A757).
In the AVerTV Nova T2 review, we already noted DVB-C support at the hardware level, blocked for marketing reasons, the reason for which became clear after the release of another model, called AVerTV Nova T2+C with the same internal index A757.
The situation is unprecedented for AVerMedia, let’s try to understand the differences between these models.
Contents of delivery
The design of the box in corporate orange and white colors corresponds to the current style of AVerMedia, with the exception of the image of the device itself, which stands out with two antenna connectors, the box completely repeats that of the AVerTV Nova T2, in the same place and the attention-grabbing logo of the HomeFree service, which provides broadcasting to mobile devices.
Package Included:
- tuner;
- remote control;
- remote IR remote control sensor;
- adapter for connecting the IR sensor of the remote control and external analog signal sources (S-Video + RCA video + 2 RCA audio);
- branded portable telescopic antenna for receiving digital broadcasting with two types of fastening, a clothespin and a suction cup;
- strip for installation in low-profile cases;
- user guide.
There is no installation CD; drivers and software can be downloaded from the manufacturer's website.
Design and specifications
Adding DVB-C support adjusts the list of capabilities of the TV tuner and standard software, which now includes:
- support for digital broadcasting in DVB-T, DVB-T2 and DVB-C formats (MPEG2 and H.264);
- HDTV support;
- Electronic Program Guide (EPG) support;
- sorting (reassigning) channels;
- time shift TimeShift;
- scaling;
- scheduler (one-time/regular mode);
- silent recording (mute sound during recording);
- frame capture (one frame/sequence of frames);
- Picture-in-Picture/Picture-Out-Picture (PIP/POP) file playback functions; individual settings for each channel;
- MPEG2/4 recording support;
- support for 4:3 and 16:9 video modes;
- setting up hot keys;
- selecting a font for the on-screen menu;
- preview up to 16 channels simultaneously;
- creating channel groups;
- Windows support Windows XP/Vista/Windows 7/Windows 8 (32- and 64-bit versions).
The tuner has a short, low-profile board, which expands the range of installation options. Like the AVerTV Nova T2, the AVerTV Nova T2+C comes with a bracket for installation in low-profile cases.
The main chips remain the same, the signal is received using the MxL601 RF unit from MaxLinear. The collaboration between MaxLinear and Panasonic Semiconductor in the field of digital television resulted in the use of the Panasonic MN88472 demodulator, capable of working with both DVB-T and DVB-T2, as well as DVB-C.
Support for the PCI Express interface and operation with analog signals at external inputs is provided by the TVMaster TM6202 chip from Trident Microsystems.
Despite the same set of chips, the design of the printed circuit board has changed, the number of elements has decreased, the TVMaster TM6202 chip has moved to the right, the integrated voltage stabilizer instead of the upper right corner is in the lower left, and the wiring for an unsoldered microcircuit has disappeared. One can also note the absence of a shielding casing on the RF unit, which, however, plays a mostly decorative role.
The most noticeable difference was the appearance of a second antenna connector, which ensures independent operation of AVerTV Nova T2+C with digital terrestrial and digital cable broadcasting signals.
Test computer configuration
- Processor Intel Core i7-970
- Gigabyte X58A-UD3R motherboard (rev. 1.0)
- Gigabyte GeForce GTX Titan video card
- RAM 16 GB (4x4096 MB DDR3 Samsung M378B5273DH0-CH9)
- Creative Sound Blaster X-Fi Titanium PCIe sound card
- SSD 64 GB OCZ Vertex 4
- SSD 256 GB Samsung 840 Evo
- SSD 512 GB OCZ Octane
- Hard drive 2 TB Toshiba (DT01ACA200)
- Hard drive 2 TB Seagate Barracuda LP (ST32000542AS)
- Hard drive 1 TB Seagate Barracuda 7200.12 (ST31000542AS)
- Hard drive 1 TB Seagate Barracuda 7200.12 (ST31000542AS)
- Hard drive 1 TB WD Caviar Blue (10EALX)
- DVD ReWriter Asus DRW-24B1ST
- Operating systems Windows XP Professional (SP3) RUS, Windows 7 Ultimate x64 Rus and Windows 8.1 Pro x64 Rus
List of broadcast channels during testing
Digital broadcasting is carried out at a frequency of 522 MHz with M-PLP (Multiple Physical Layer Pipes) technology, which allows different modulation schemes and different levels of error tolerance for different streams in a multiplexed DVB-T2 signal.
To test digital cable broadcasting, the cable signal of the operator Dom.ru, a branch of ER-Telecom Holding CJSC in Samara, was used.
Connection
The TV tuner is equipped with two IEC antenna connectors, any of which can be used to connect both terrestrial and cable television; the choice of connector for configuring the corresponding signal is carried out in the standard software.
The IR sensor of the remote control and external analog signal sources are connected to the MiniDIN 7-pin connector using the supplied adapter.
Settings
During testing, driver 1.54.64.134 and AVerTV 3D program version 6.8.2.4914102401 were used.
After installation, the AVerMedia A757 PCIe Hybrid DVB-T/T2/C device appears in the Sound, video and gaming devices section.
The system tray contains icons of the AVerQuick program, which is responsible for the operation of the scheduler and remote control.
Despite the number update from 6.5 to 6.8, there were no global changes in the interface of the AVerTV 3D program.
In version 6.8, the “Video” section of the context menu, called up with the right mouse button, contains two subsections - “Window” with the addition of a choice between 4:3 and 16:9 aspect ratios and a free setting option for adjusting the window to the size of the video
and “Aspect ratio” of the image itself with a choice between the original frame, automatic adjustment, 4:3, 16:9 and custom with direct input of the ratio up to 1.83.
The settings sections are displayed dynamically depending on the functionality of the active device, so the user will not find the items responsible for supporting the electronic program guide EPG (Electronic Program Guide) for analogue broadcasting and for working with plug-in software modules when using a digital TV tuner.
The parental control feature allows you to block unwanted channels.
The “Panel View” section contains interface settings such as general design (5 options - Azure Fantasy, Dusk Comet, Auric Bullet, Classic Tube Dark Knight, the screenshot above shows Classic Tube), color scheme of the on-screen menu (OSD) and transparency effect when calling the main panel.
The “On-Screen Display Menu” subsection allows you to select the color scheme, duration of display of the menu, its location and parameters for display (channel, color system, sound mode, TV program information and volume), and also enable the display of the AVerMedia logo.
The frame capture settings include the number of pictures in a series, the interval between them (from 1 to 60 seconds), image format, prefixes (date, time, signal, program, custom) and the choice of resolution (original or from 160×120 to the maximum monitor resolution ). The maximum number of screenshots in a series is 100.
The section responsible for saving files provides access to folders for saving video and audio files, settings for limiting recording time and dividing files by size. The prefixes in the file names are the same as those listed above for frame capture.
The multi-channel preview settings section contains settings for the matrix size (from 2x2 to 8x8), the channel switching interval, muting the sound in this mode, choosing between full-screen and windowed display, and starting viewing from the first channel in the list.
The “Miscellaneous” section received an update in the form of a drop-down list of interface languages (the choice is also available in the context menu); previous versions of the program automatically selected the language in accordance with the regional settings of the operating system.
In addition, the section allows you to configure the application to be minimized to the system tray with an optional mute. There is also support for energy-saving modes with actions performed after shutdown (close the application, end the session, standby mode, sleep mode, turn off the computer).
In the video and audio settings section, you can select a video renderer (automatically, Overlay Mixer, Video Mixing Renderer and Enhanced Video Renderer if the latter is available in the system), an MPEG2 decoder (AVerMedia’s own decoder or Microsoft DTV-DVD Video Decoder) and enable hardware acceleration if available .
Teletext settings consist of two options for displaying subtitles (in the main window/in a separate window) and turning on transparency.
The “3D” index in the name AVerTV means support for stereo imaging for Nvidia 3D Vision shutter glasses, polarizing and anaglyph glasses.
The section with the stubbornly unresolved name, despite regular mention in our reviews, “Login Settings” (it would be more logical to replace “login” with “input” or “control”) contains three subsections responsible for keyboard settings,
remote control and buttons/wheel of a standard three-button mouse. Combinations of “mouse button + modifier button” are supported.
Like the AVerTV Nova T2, the included remote control is not in the list of available ones, we will return to this later in the text.
AverTV 3D supports work with several installed AVerMedia TV tuners; the active one is selected in the “Device” section.
The device's main settings section allows you to disable any internal source, including low-frequency inputs, and set standards for S-Video and composite video input. Here you can select the region.
The design features of the AVerTV Nova T2+C led to the appearance of an unusual item for AVerMedia - the choice of an antenna input with a schematic representation of the connectors for clarity.
Despite the transmission of both television channels and digital radio stations in DVB-T and DVB-T2 on the same frequency, the AVerMedia approach provides for separate display of television and radio channels for both digital modes. When you select Russia as a region, autosearch works correctly.
In the list of channels there is an addition to the favorites list; with active parental control, a blocking item is added with a visual display.
In the advanced settings of each channel, you can change the name, frequency, bandwidth and time zone settings to use the EPG (Electronic Program Guide). There you can also search for channels on a specific frequency.
Broadcasting in MPEG2 formats and H.264, selected as the federal standard, is supported.
Searching for DVB-C channels for some reason requires selecting a position in the main settings, however, this can be attributed to the status of the test version and can be circumvented by forcing the selection of a frequency or range in the additional settings.
Lack of Common Interface (CI) support allows the device to work only with open channels; encrypted channels are displayed in red in the list.
TimeShift delayed viewing mode, called time shift in AVerMedia localization, supports saving a buffer file within a specified volume (only for MPEG2, H.264 is not supported).
Supports recording in the original format, recording audio and transcoding in WMV and H.264 with pre-installed profiles for Apple products, when selected, synchronization with iTunes becomes available.
Separate settings for preview, time shift and recording format are intended for analog video inputs.
In additional channel settings, available using a button on the panel or via the context menu, complete information is displayed.
There you can also select an audio track, as well as individually configure for each channel - scaling (“non-working area” according to AVerMedia terminology), deinterlacing type (Bob, Weave, edge anti-aliasing, progressive scan) and enable subtitle display.
Changing brightness, contrast, hue, saturation and sharpness in digital mode is not supported, however, “Video Color Enhancement” in the original is available, which allows you to further increase saturation (in addition to automatic operation, manual adjustment is possible, which, however, may still interfere one long-standing error in localization, which caused the incomprehensible “Collapse” instead of “Minimum”). The program implements demo modes with processing half of the image and splitting the window. By default, the option is activated; users who are not fans of excessive saturation will do well to take this into account.
There is a 10-band equalizer with preset modes and manual control, balance adjustment and separate volume control for the left and right channels.
Work with the electronic program guide has been implemented, provided that it is available in the digital channel.
Additional features
Additional features include a miniature gallery of captured files and a mode for playing video files inside/outside the main video window “Picture in Picture”/“Picture Out of Picture” (PIP/POP).
The scheduler supports background recording with muted sound and delayed viewing mode as a task, including according to the EPG. It is possible to turn off the computer/switch to power saving mode after completing a scheduled task. The advanced settings section allows you to configure parameters such as recording storage location, file format, and file splitting for each task.
One of the useful little things is the spectrum analyzer, which can be called up via the context menu on the display.
To use the device with alternative programs, there is a separate utility for setting up antenna inputs.
HomeFree service
Both digital and analog AVerMedia TV tuners currently support the proprietary HomeFree service, which turns any computer with an installed AVerMedia TV tuner into a center for broadcasting television broadcasts to mobile devices running Android and iOS.
It is possible to connect up to 5 devices, supporting work with several AVerMedia devices. When the AVerTV 3D program is running, only the active channel is broadcast in digital mode; in analogue mode, broadcasting is not available, and a corresponding warning is displayed.
For the service to work, it is enough to install the HomeFree application that ensures the background operation of the service (version 1.0.22.2014071701 was used during testing) in addition to drivers and standard software, and on a mobile device - a client from Google Play (version 1.0.29 was used during testing) or iTunes .
The application provides sound settings in the form of selecting channels and audio tracks,
video quality settings (best, standard, minimum delay),
source selection (analog broadcast is also supported)
and interface language (English, Chinese and Russian).
EPG support is implemented for digital channels.
Testing was carried out on an Asus Nexus 7 2013 tablet (Android version 5.0.2) and a THL 5000 phone (Android version 4.4.2).
Updating Android from 4.4.4 to 5.0.2 on the tablet led to image jerking while working with the service, AVerMedia and Google should work on compatibility with the new version of the mobile OS.
Note the not entirely intuitive aspect ratio switching via a miniature icon in the upper right corner (applies to all channels) and the gray background in 4:3 mode.
Quality
The tuner provides good reception quality of digital channels, switching between channels takes about 2 seconds, between channels in different PLPs up to 3 seconds.
The image quality when working with DVB-T, DVB-T2 and DVB-C is determined by the operator in the range from low resolutions with low bitrates to HDTV. DVB-T2 channels are currently only available in standard definition.
DVB-C broadcast operators offer support for high definition television (HDTV), an example of a recorded fragment can be downloaded here.
During testing of HD channels, playback artifacts were discovered, which were eliminated by disabling hardware acceleration.
Remote control
The lack of remote control settings in AVerTV 3D can be explained simply; like AVerTV Nova T2, AVerTV Nova T2+C is equipped with an MCE-compatible remote control that has no additional buttons.
It can be assumed that the reason for this configuration was unsold stocks of remote controls; if so, then the configuration with other varieties is not excluded, however, for users who prefer Windows Media Center or third-party programs that support such remote controls, the described remote control may be more preferable.
For those who plan to use the ProgDVB program instead of standard software, it makes sense to use the recommendations given by one of the participants in our conference.
The remote control is powered by two CR2032 size elements; there may be copies on sale with low-quality batteries, so we recommend checking the functionality before purchasing or simply keeping this possibility in mind.
conclusions
pros
- support DVB-T, DVB-T2 and DVB-C;
- two independent antenna connectors;
- PCI Express interface;
- good reception quality;
- automatic determination of the color standard;
- support for MPEG2 and H.264 HDTV in digital mode;
- TV program support;
- subtitle support;
- background recording;
- the ability to turn off the computer/switch to energy-saving mode after completing a task;
- delayed viewing mode TimeShift;
- multi-channel preview;
- multi-window file playback modes “Picture in Picture”/“Picture outside Picture” (PIP/POP);
- Windows support Windows XP/Vista/Windows 7/Windows 8 (32- and 64-bit versions);
- HomeFree service support.
Minuses
- artifacts on HD channels with hardware acceleration enabled;
- insufficient optimization of the HomeFree service for Android 5.0.x.
If the small price difference between modifications without support for digital cable television and with support for DVB-C did not allow us to definitely recommend the AVerTV Nova T2 for purchase, then the situation with the AVerTV Nova T2+C is much simpler - support for both common types of digital signal, traditionally high quality hardware parts, two independent antenna connectors and the ability to broadcast to mobile devices distinguish this model from modern computer digital TV tuners with a PCI Express interface.
| Average price according to price.ru |
| $81() |
We express our gratitude to AVerMedia Technologies
for the tuner provided for testing
The best models of digital tuners for a computer
When purchasing, you can focus on models that are popular with buyers. The following describes in detail the features of the most famous of them.
Model Oriel 421D
Supports all common digital standards. HDMI and composite inputs are used. Viewing using this device produces good images.
It is not necessary to use a router to connect to the network. For this purpose, it is enough to purchase and install an internal wireless adapter. This digital tuner can work with IPTV. With its help, you can play video and audio from external media. Here you can use the delayed viewing mode and, if necessary, record the video you like.
| Characteristic | Parameter |
| Type of module used | Oriel 421D is made as a standalone device |
| What video modes are available | 1080i,p quality available |
| Possible display formats | Normal 4:3 and widescreen 16:9 |
| Video standards that can be used | DVB-T, DVB-T2, as well as DVB-C are used |
| Can be connected to interfaces | audio, standard HDMI; There are USB 2.0 connectors (2 pcs.); there is a composite; |
| What additional functionality can the tuner provide? | Teletext available, child lock, timer for video recording; delayed viewing of programs; |
| Supplied complete | Remote control with batteries |
Model HARPER HDT2-151З
This is a budget model with relatively simple controls. Here the user can additionally use the media player function. The tuner provides high quality signal conversion.
Supports viewing using Full HD. All major video and audio file formats can be played. It is possible to set a password for child locking purposes. The connection is made via a USB connector.
| Characteristic | Parameter |
| Type of module used | Model HARPER HDT2-151З is a stand-alone module |
| What video modes are available here? | You can watch videos in 720, 1080i, 1080p quality |
| Possible display formats | Normal 4:3 and widescreen 16:9 |
| Video standards that can be used | The tuner works with DVB-T and DVB-T2 |
| Can be connected to interfaces | audio, standard HDMI version 1.3; there is USB 2.0; there is a composite interface; |
| What additional functionality can the tuner provide? | timer for recording TV programs; deferred viewing; |
| Supplied complete | Includes 3 RCA cable with remote control and batteries |
World Vision Premium model
The high cost corresponds to the capabilities provided by the device. It is possible to use most available digital standards, including cable television.
High quality IPTV television viewing is provided. There is no input for a network cable, so a Wi-Fi adapter with a USB connection can be used to connect to the Internet.
| Characteristic | Parameter |
| Type of module used | The World Vision Premium device is standalone |
| What video modes are available | Supports 1080i,p video modes |
| Possible display formats | Regular screen format 4:3 and widescreen 16:9 |
| Video standards that can be used | DVB-C, DVB-T and DVB-T2 standard available |
| Can be connected to interfaces | audio, standard HDMI version 1.3; USB 2.0; there is a composite interface; |
| What additional functionality can the tuner provide? | Teletext can be received; there is a possibility of delayed viewing; timer; built-in internet access |
| Supplied complete | Remote control with 3 RCA cable, |
Model D-COLOR DC-1802HD
This tuner is designed compactly and has a modern look. Allows you to view various types of digital content, including cable television. Connection to the TV is made using HDMI or “tulips”.
There is no coaxial audio input for home theater use. However, there is support for the AC3 audio format. Users note the high quality of video and sound. Here you can play online radio using the built-in receiver.
| Characteristic | Parameter |
| Type of module used | D-COLOR DC-1802HD made autonomous |
| What video modes are available here? | The tuner provides viewing in 1080i or 1080p quality |
| Possible display formats | Normal 4:3 and widescreen 16:9 |
| Video standards that can be used here | DVB-T2, DVB-C, as well as DVB-T are used here, |
| Can be connected to interfaces | standard HDMI 1.Z; there are 2 USB 2.0 connectors; composite; sound; |
| What additional functionality can the tuner provide? | there is Dolby Digital sound; deferred viewing done; there is a timer for viewing; child lock; |
| Completeness | connecting cable, remote control |
Model Selenga HD-950D
This model has a relatively low cost. At the same time, it provides high-quality image and sound. It is a good choice considering the price/quality ratio.
Can play video and audio recorded on external devices. It has thoughtful, convenient and simple controls.
| Characteristic | Parameter |
| Type of module used | Selenga HD-950D is a standalone node |
| What video modes are available | Selenga HD-950D provides 720p, 1080i,p quality |
| Possible display formats | Standard 4:3 and 16:9 widescreen |
| Video standards that can be used | The tuner works with DVB-T2, DVB-C and DVB-T, |
| Can be connected to interfaces | audio interface, HDMI version 1.3; USB; composite interface; |
| What additional functionality can the tuner provide? | Dolby Digital quality available; possibility of delayed viewing; There are parental controls, teletext, the use of external HDDs is available; |
| Completeness | remote control and power supply |
| Name | Description | Rating |
| Oriel 421D | Provides high-quality viewing of TV programs and Internet channels. | 5 |
| HARPER HDT2-151З | A simple and reliable budget model that provides basic functions for work. | 4 |
| World Vision Premium | An expensive set-top box that works with most standards. | 3 |
| D-COLOR DC-1802HD | Compact device that provides basic functionality. | 2 |
| Selenga HD-950D | An inexpensive brand that performs its functions. | 1 |
USB DVB-T2 tuner for computer
This is the simplest USB DVB-T2/T/C tuner that connects to a computer USB for watching digital television. It has a USB output for communication with a computer, a familiar antenna input (IEC connector)... The gadget was purchased to while away the evenings during a business trip. Sometimes there is no TV. Sometimes there is only one TV, but there are more people wanting to watch than there are received channels. Now you can watch what you want, when you want, without infringing on anyone’s interests. Attention traffic. First, we look at how they pack (sometimes interesting). A simple box with a window for the tuner.
On the sides there are brief characteristics in the form of pictures and equipment.
At the back are brief characteristics and capabilities.
There is another box hidden under the outer packaging. The tuner itself lies in a special niche. Everything else is inside the box.
The package includes: - USB DVB-T2/T/C tuner, - remote control, - CD with drivers and user manual (in English), - antenna.
Let's look at what is written on the store page.
Made an automatic translation. Not everyone understands English:
Product Description USB2.0 DVB - T2 FM DAB HDTV Stick TV Tuner Receiver (DVB-T/T2/DVB-C + FM + DAB + SDR) for Laptop PC Computer Enjoy advanced DVB-T2/T/C technology in your computer. With this USB2.0 DVB-T2 FM DAB Tuner TV Receiver, you can enjoy original digital quality control and recording on your PC. You can watch TV in full screen or in a window. Shift pause and play live when in use. Support VHF/UHF band and two-channel stereo sound performance. Enjoy advanced DVB-T2/T/C technology on your computer Watch and record in original digital quality on your computer Watch TV in full screen or zoom window Use time to pause and rewind live TV Record your favorite TV shows or schedule future recordings Can decode H.264 MPEG - 4 Small and compact size, easy to carry Note: Please make sure your region can receive DVB-T2 signal. Specification: The tuner supports television standards: DVB-T2, DVB-T, DVB-C, VHF / UHF range Stereo / two-channel audio Antenna input: IEC connector PC interface: USB 2.0 (Hi-Speed) TV recording formats: MPEG Transport Stream -2, MPEG-4, H.264 (AVC) System Requirements: Microsoft, Windows 7 or Windows Vista with latest service pack, 1 GB RAM Windows XP (32 bit) with latest service pack, 512 MB RAM Intel Pentium 4 2 .0 GHz, Pentium M 1.3 GHz or equivalent AMD Athlon XP For HDTV: 2 GHz processor Hard disk with min. 300MB free capacity (1GB free power recommended) USB port 2.0 CD/DVD drive for software installation Recommended: Internet connection for software updates and activations Package included: 1 x USB2.0 DVB – T2 FM DAB HDTV Stick TV tuner receiver 1 x remote control (including battery) 1 x DVB-T and T2 antennas 1 x CD with application drivers, and user manual Accessory equipment only, tablet PC not included
I provided both options in order to exclude the indignation of one of the “halves” of the readers, who also understand not very English :) The remote control is the simplest.
These usually come with a battery included. To prevent self-discharge (in case of accidental pressing during transportation) there is a plastic insert.
The included antenna is significantly different from the one shown on the store page (not for the better).
Active part of fixed length. The store page is slightly different - with a “variable thrust vector” :-)
Antenna plug of standard size. No comments here.
Complete antenna with magnetic stand.
There is a small but powerful magnet inside.
And here is the tuner.
Not much larger than a flash drive.
There are no control buttons, etc., nothing like that.
On one side is USB.
On the other side there is a standard antenna socket. In case of emergency, you can use any other external antenna (for example, from a TV).
I'll see what's inside the tuner. The case is held on by latches.
Everything is very compact (general view).
Maybe closer.
On one side there are Realtek RTL2832P, Panasonic MN88473 (demodulator), Rafael Micro R828D (tuner) chips. On the reverse side there is a memory module and an IR receiver. The names of the chips are clearly visible (except for one). I took a photo of the tuner chip from different angles (for those who want to look at the letter).
It's time to see what he (the tuner) can do. But to do this, you first need to install the driver and software from the disk. Installed the driver (FSC DVBT2_Setup_160614.exe) and the program (FSC DVBT2_Setup_160614.exe). Nothing complicated. The driver is multilingual. I select Russian and click next.
When installing on an old work computer (at first I decided to test it on Windows XP), a small problem arose.
The instructions say in black and white: Windows 2000/XP/Vista/Win7/Win8. Clicked “Continue Anyway.” Everything turned out fine. There were no difficulties in installing the program itself (the multifunctional multimedia application AstroMetaTVRplayer).
The program is also Russified.
All procedures are standard; I see no point in describing them in detail. Let me remind you. The stray was purchased to while away the evenings during a business trip. Sometimes there is no TV. Sometimes there is only one TV, but there are more people wanting to watch than there are received channels. Now you can watch what you want, when you want, without infringing on anyone’s interests. I will conduct the main experiments on my travel netbook. The Samsung NC110-A07 netbook is quite old and perfect for business trips: it’s small and weighs just over a kilogram. I will conduct basic tests on it.
After installation there was a problem with sound. I decided to install sound drivers from a free package (Advanced_Codecs). The CD included a user manual (Manual.docx). Detailed description and characteristics - everything is there. When you first launch this is the picture.
The toolbar (at the bottom of the screen) is equipped with standard controls: audio/video playback (Play / Pause, Stop, Record), as well as volume controls and channel switching buttons. If necessary, you can call up special controls. The tuner has already been configured. Setting up channels is almost at the very end of the described buttons. I'll get to it a little later. First, I’ll explain the purpose of the buttons in order (from left to right). 1. The “Guide” button on the panel opens a list of recorded channels. This section allows you to view/listen and select a specific channel.
Double right arrows on the selected channel call up the TV guide (left arrows return to the previous menu),
Clicking on a specific program opens a brief description of the TV program and a button to call the scheduler.
When you click on the plus sign, a window for selecting the time and date of recording opens (one-time, daily and recording by day of the week are supported).
2. By clicking this button 2 (open folder), you can open saved images and recorded video files. 3. Click on this button (camera icon) to take a screenshot. The captured image will be recorded in the format “02 RUSSIA-1_2017_0615_1329_32.jpg”. No decoding of letters and numbers is required, everything is clear. The file is only about 80-82kB.
Initially, the picture shows the signal level, channel number, date/time and control buttons...
If the mouse is inactive, it goes into a mode convenient for viewing (picture above). You can view it both in a “window” and in full screen mode. These two photos are the original recordings. The rest of the photos in the review are screenshots from a netbook. 4. This button (red circle) must be pressed to start/stop recording a TV program. During recording, the channel switching buttons are locked. What we record is what we watch. An example of recording a video signal from a USB DVB-T2 tuner to a computer:
Characteristics of the recorded file:
Video: MPEG4 Video (H264) 720×576 (20:11) 25fps [Video] Audio: MPEG Audio 48000Hz stereo 192kbps [Audio]
Records in the format “02 RUSSIA-1_2017_0615_1253_26.mpg”. Recording 26 seconds took 10.1MB of space. 5.6. Channel switching buttons. 7. Button to return a previously viewed channel. 8. MUTE button – mute/unmute sound. 9.10. Volume up/down buttons. 10. MAIN MENU.
Teletext works.
The number of the page being viewed can be selected using the keys on the computer. You can select the aspect ratio of the picture: Auto→4:3→16:9. This is the main thing. The remaining points are not for everyone. 11. Setup (configuration).
There are two multiplexes broadcasting in Tambov. Found all channels (20+3).
Scheduler.
You can change the input source.
Turned on the FM radio. Scanned. I found more than thirty channels. I deleted the empty ones. I left 16. I didn’t know we had so many of them.
The names can be edited. Initially, a name is assigned according to the broadcast frequency. I edited one for example (right mouse button to help). The next item is the capture parameters. The location where the files are saved is specified.
The last point is display settings.
You can adjust the brightness, contrast, and saturation of the picture. 12. LIVE. Quit all open tabs. To record programs and operate the Timeshift delayed viewing mode, just press the button of the same name on the remote control.
The remote control works from a maximum of three meters. A kind of scroll bar with a red mark appears on the screen (top). This is the location where the story is currently being viewed. You can select (with the mouse) any viewing location. By clicking “LIVE”, we switch to standard viewing mode.
Regarding the buttons on the remote control and keyboard shortcuts. There is an interesting sign in the instructions.
Thanks to this picture, I found an alternative settings menu, called up by pressing the “E” button. Here you can select the range, frequency, scanning step... You can delete or add found channels or radio stations to favorites... In general, there is a whole field for creativity.
At the end there is some information for extras. The tuner does not heat up much during operation. At idle it consumes just over 0.1A.
When watching TV, the current increases to 0.2A. Power is only 1W. The ventilation holes, the size of the device itself and the connected antenna do not allow the device to heat up above 40 degrees.
In this regard, everything is wonderful. It's time to move on to the final part. I'll highlight what I liked and didn't like. The point of view is subjective. Pros:
•support for DVB-T, DVB-T2 and DVB-C2, DAB and FM;
•small sizes; •availability of Timeshift delayed viewing mode; •availability of on and off timers; •recording TV programs; •Russified menu; •Teletext support. Cons:
•two different programs for DVB-T/DVBT2 and DVB-C; •delays when turning on and switching channels; •absence of any hints about the manufacturer. And one more thing at the end. I told you about the device I was holding in my hands. He pointed out all the pros and cons. Everything I noticed, I wrote about everything. The device is functionally rich. Perhaps I haven’t figured it all out yet. If something is unclear, ask questions. I hope it helped at least someone. Perhaps someone will want to help me too. That's it. Good luck!
The product was provided for writing a review by the store. The review was published in accordance with clause 18 of the Site Rules.
Which brand of TV tuner to choose
Manufacturers in this area are little known due to the lack of widespread use of TV tuners. AverMedia and Beholder have the highest reputation. When choosing, it is recommended to first take into account the operational features of the models.
Buying a tuner for your computer will allow you to watch TV programs without having to purchase a modern television device. There are a large number of models offered - you need to choose the one among them. Which will suit the user best. Among the variety of available models, almost everyone can find the one they need.
4.6/5 — (30 votes)